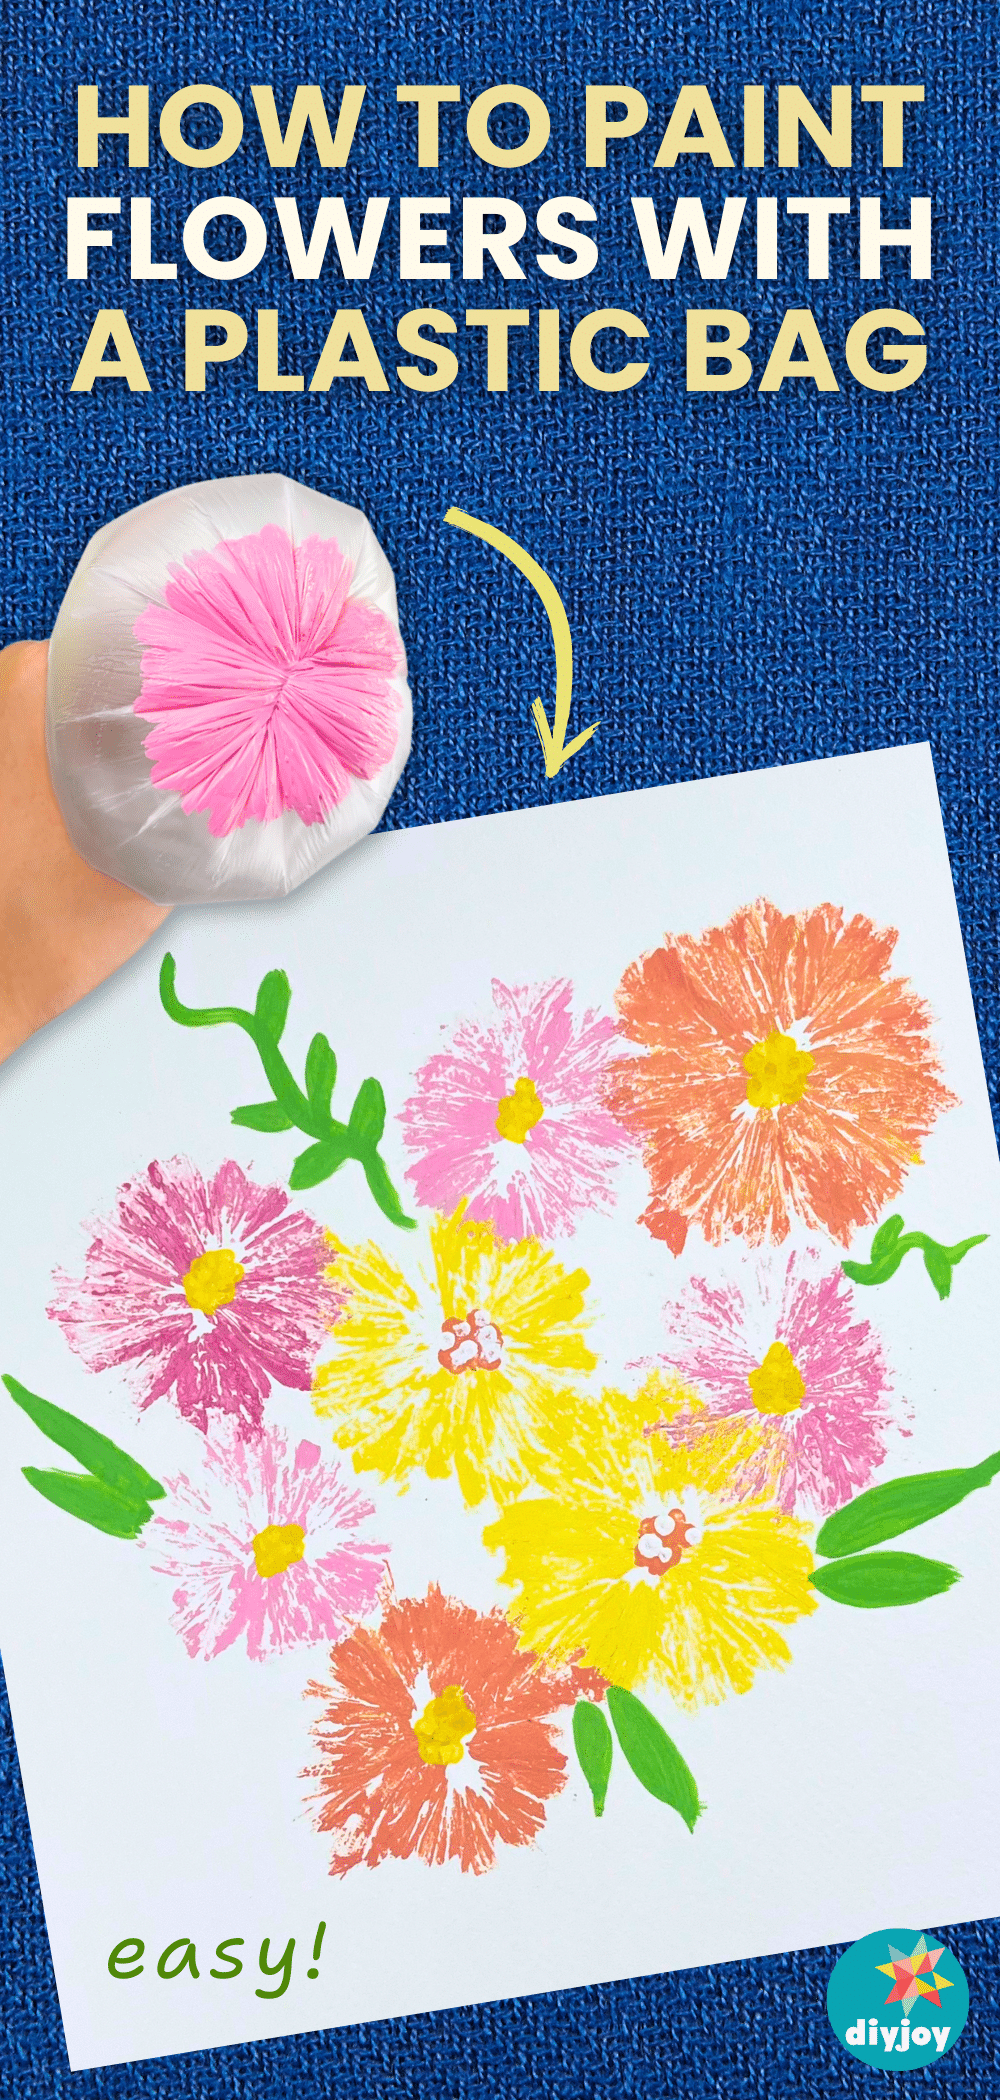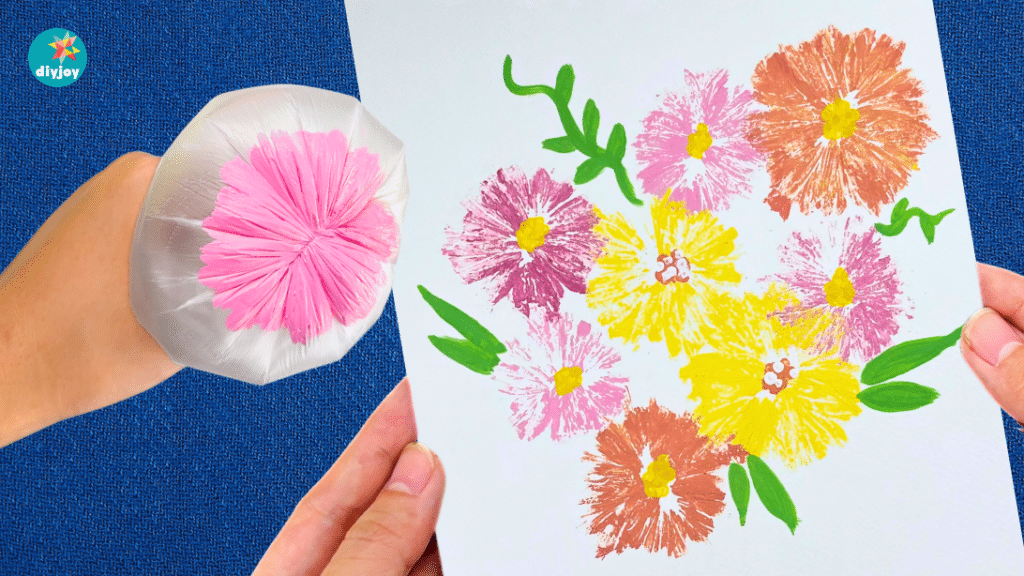
Spring is the perfect time for art activities. If you’ve been wanting to learn how to paint but don’t know where to start, don’t worry. I’ve got you covered! Just grab a piece of plastic and I’ll guide you on how to paint flowers. Any used plastic will work. It’s super easy and beginner-friendly. Basic painting skills, although helpful, are not required for this art project. You’d be surprised how fun painting is when you try this technique.
RELATED: Easy Flower Painting Idea – Bubble Wrap Art
This method removes the barrier that often deters people from trying painting, which they associate with perfect strokes. Painting flowers doesn’t have to be stressful and intimidating! It’s actually therapeutic. It keeps your hands and mind busy, letting you focus and stay in the moment, just concentrating on what you’re doing.
Why Plastic Bags?
Single use plastics are every where. Many products from stores and online packages are wrapped in plastic. Even though it’s best to not use plastic at all, there are times when it’s unavoidable. When that happens, it’s good to find ways to reuse it.
Plastic bag flower painting is a creative way to repurpose plastics that would normally be discarded. It allows you to create textured flower designs that are hard to do with a regular brush. It makes painting easier, especially for beginners.
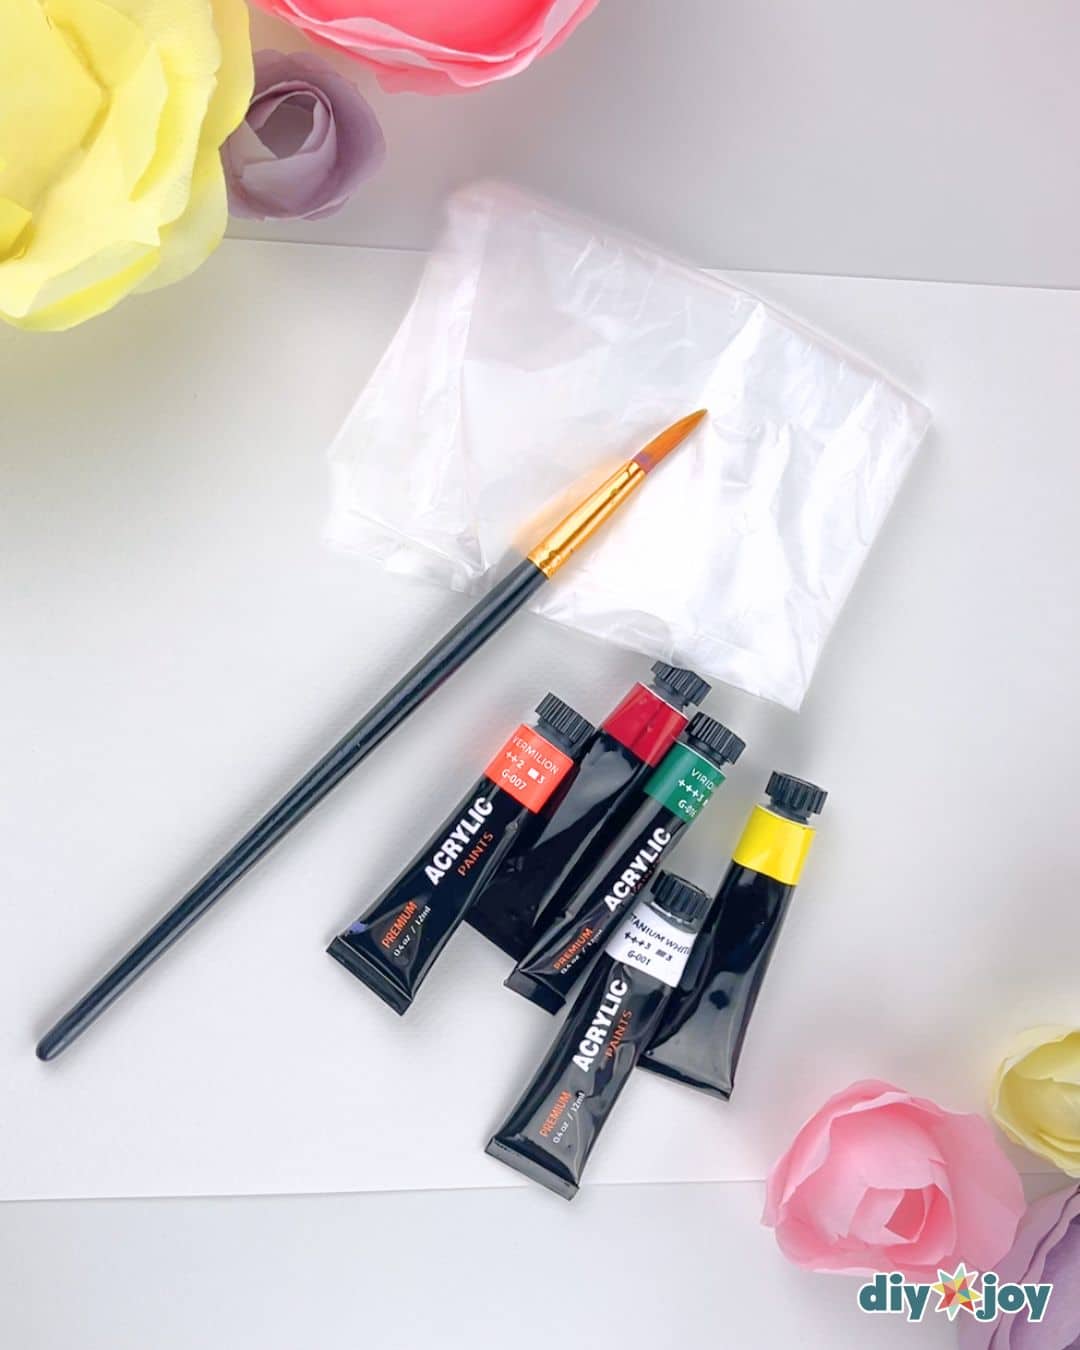
Materials Needed
List of essential supplies
- acrylic paints
- canvas/paper
- plastic bags
- paintbrushes
- cotton swab
Optional Tools
- paper plates or painting palette
- water
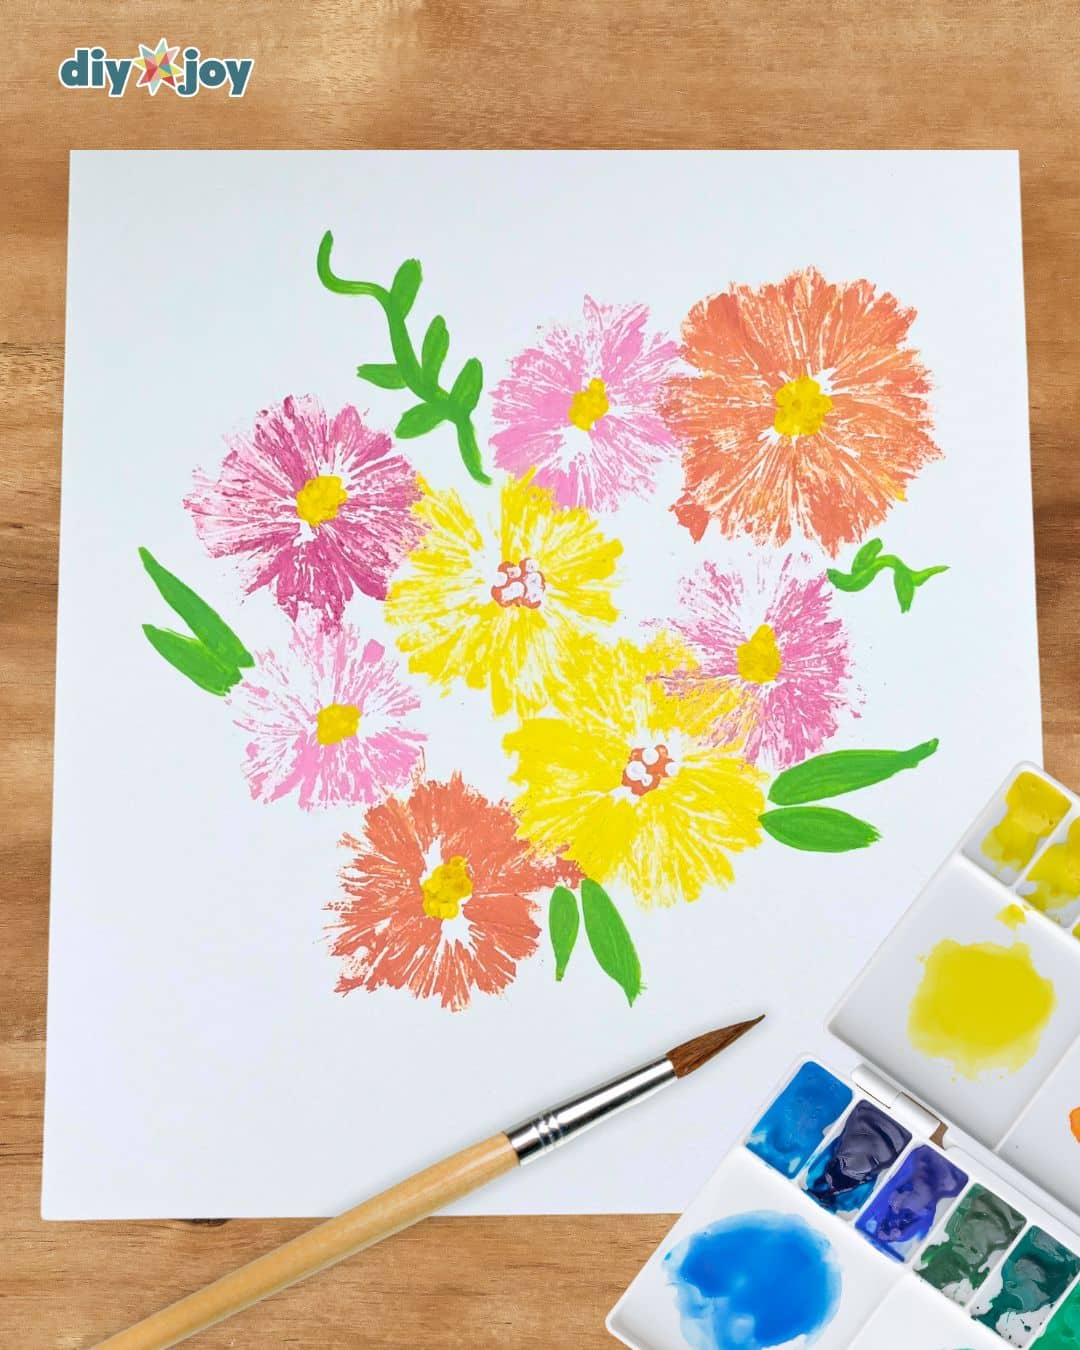
Step-by-Step Instructions
Step 1: Making a layout
This step is optional, but it will help you make a beautiful flower painting. Decide on your layout and colors. You can draw your own arrangements or find inspiration online to use as a guide.
Step 2: Plastic bag magic
Tie a knot at the closed end of the plastic bag.
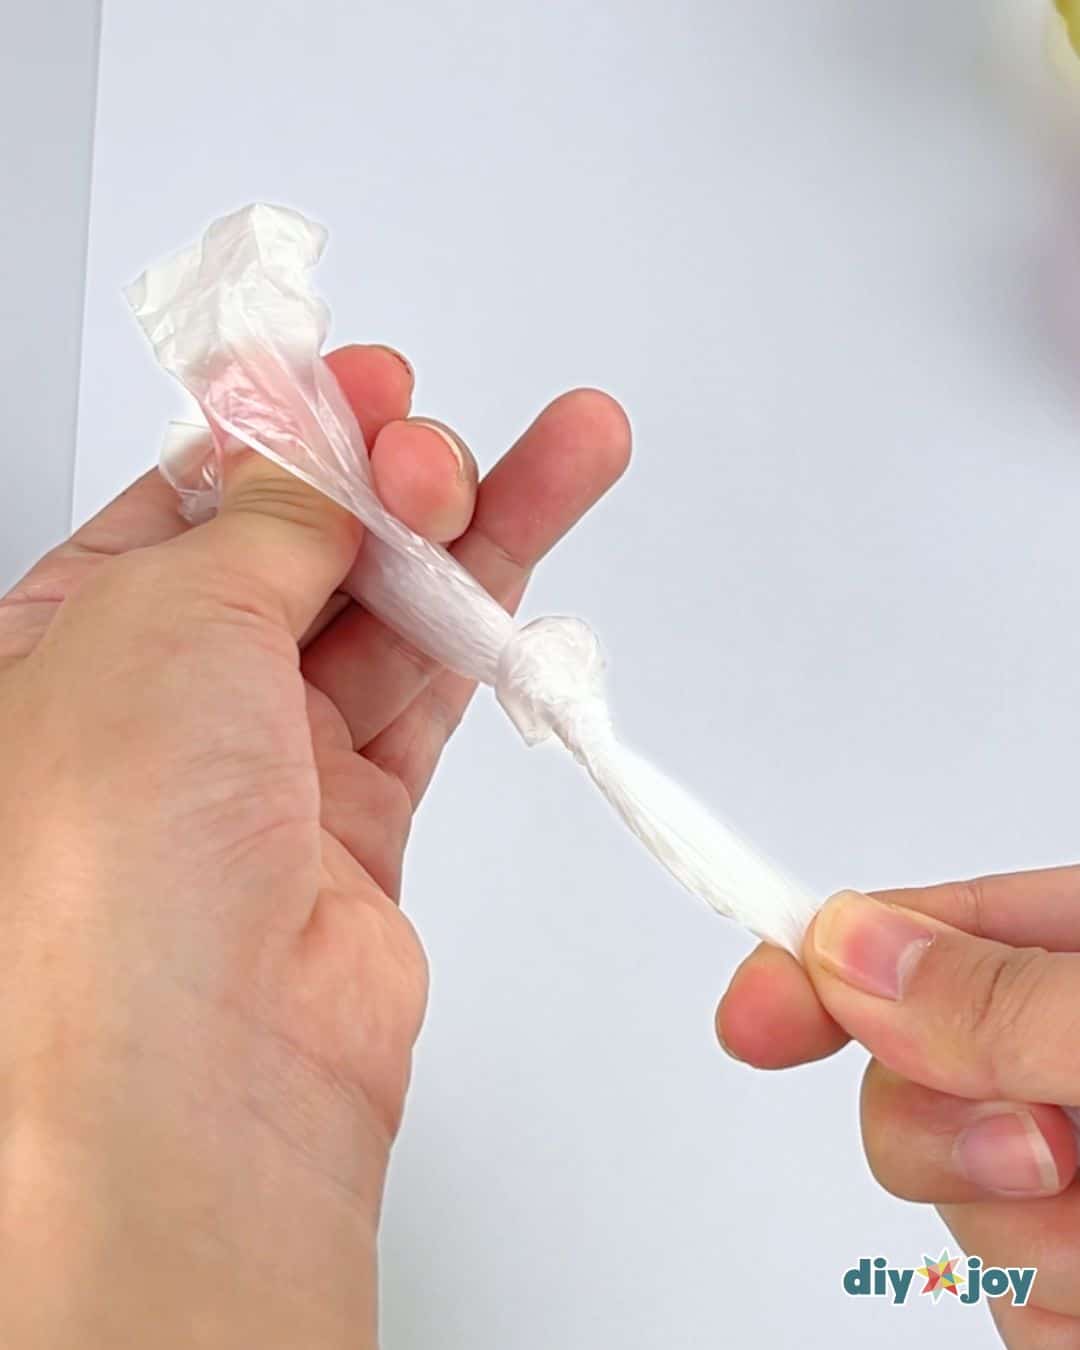
Turn the bag inside out, so the knot is now inside. Inflate the bag with air, then tie another knot to secure it.
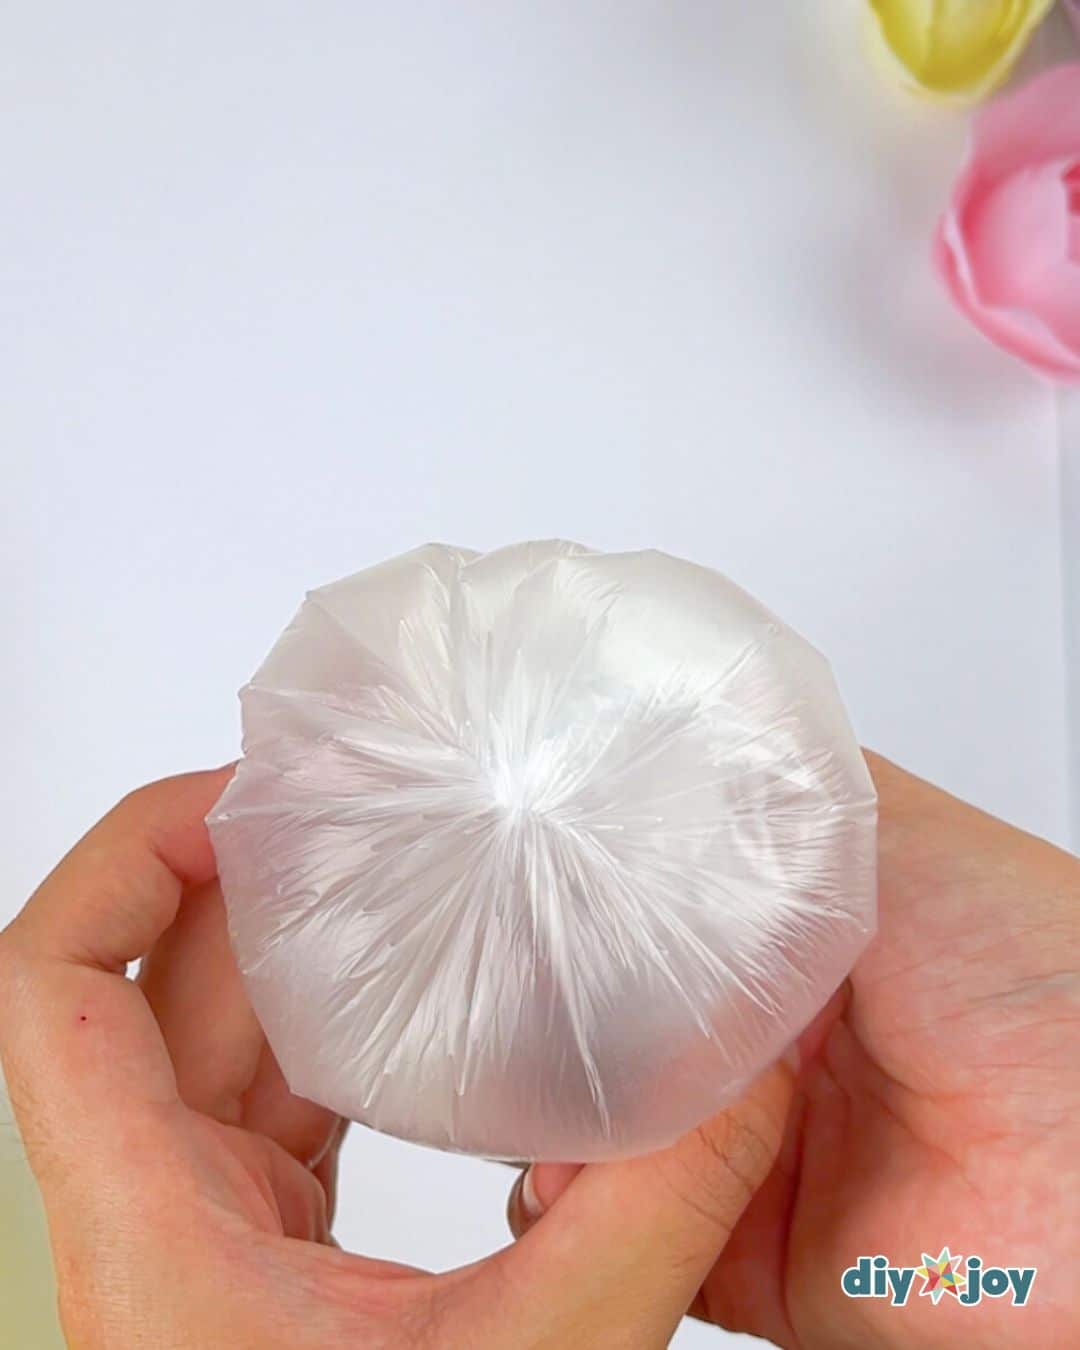
Step 3: Creating flower shapes
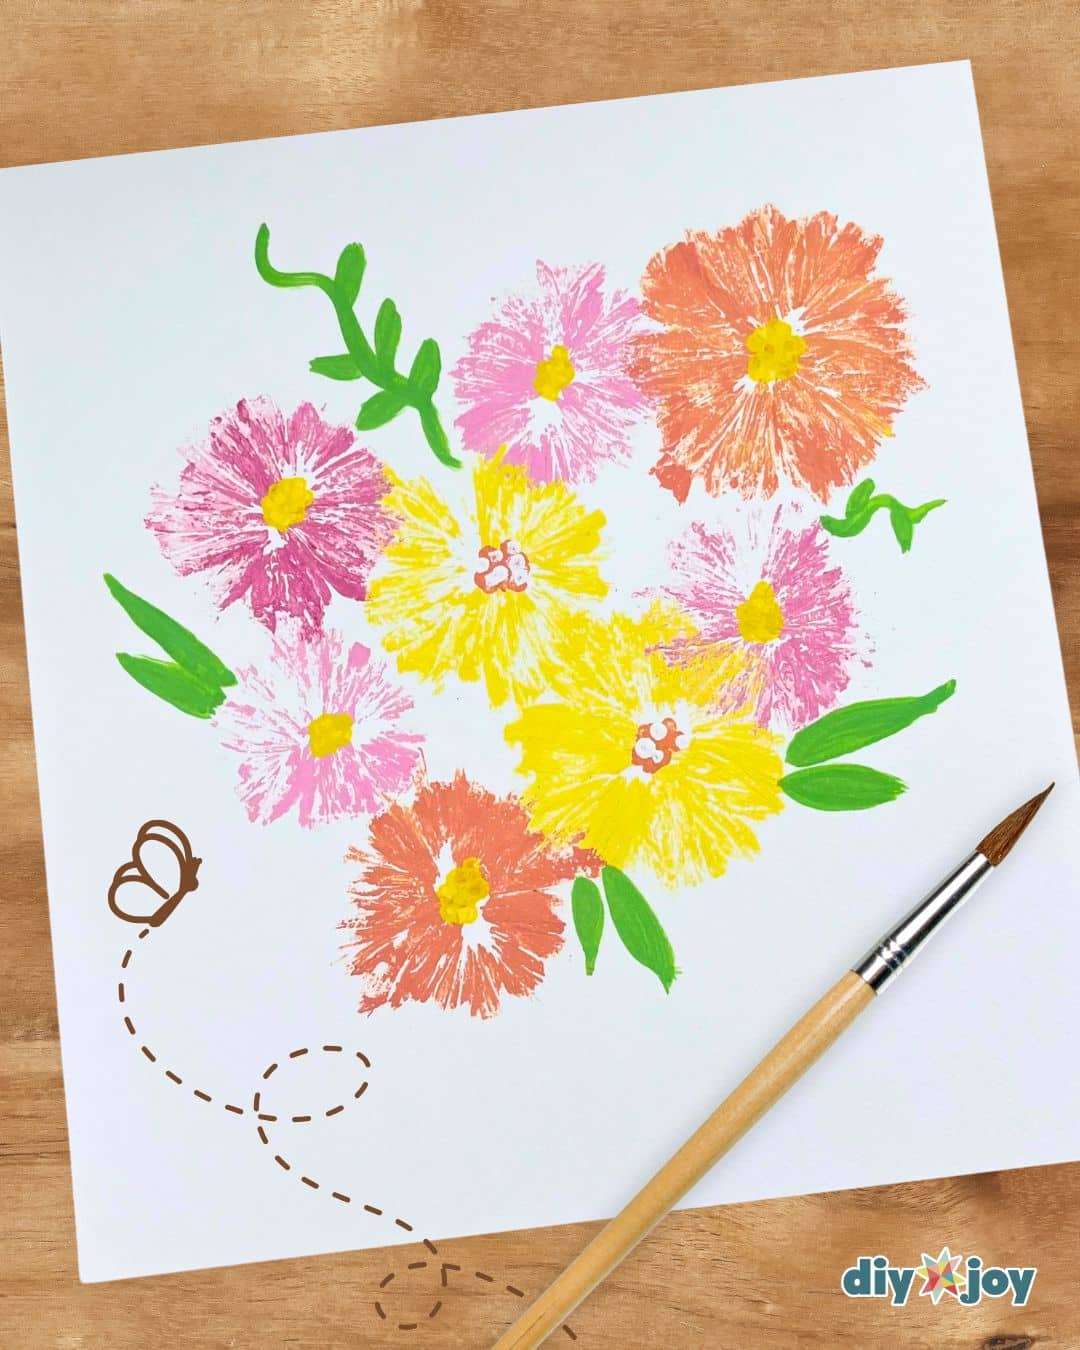
Hold the plastic bag flat side up, and paint from the center outward. The painted area should match the intended size of your flower.

Once done, immediately press on the paper.
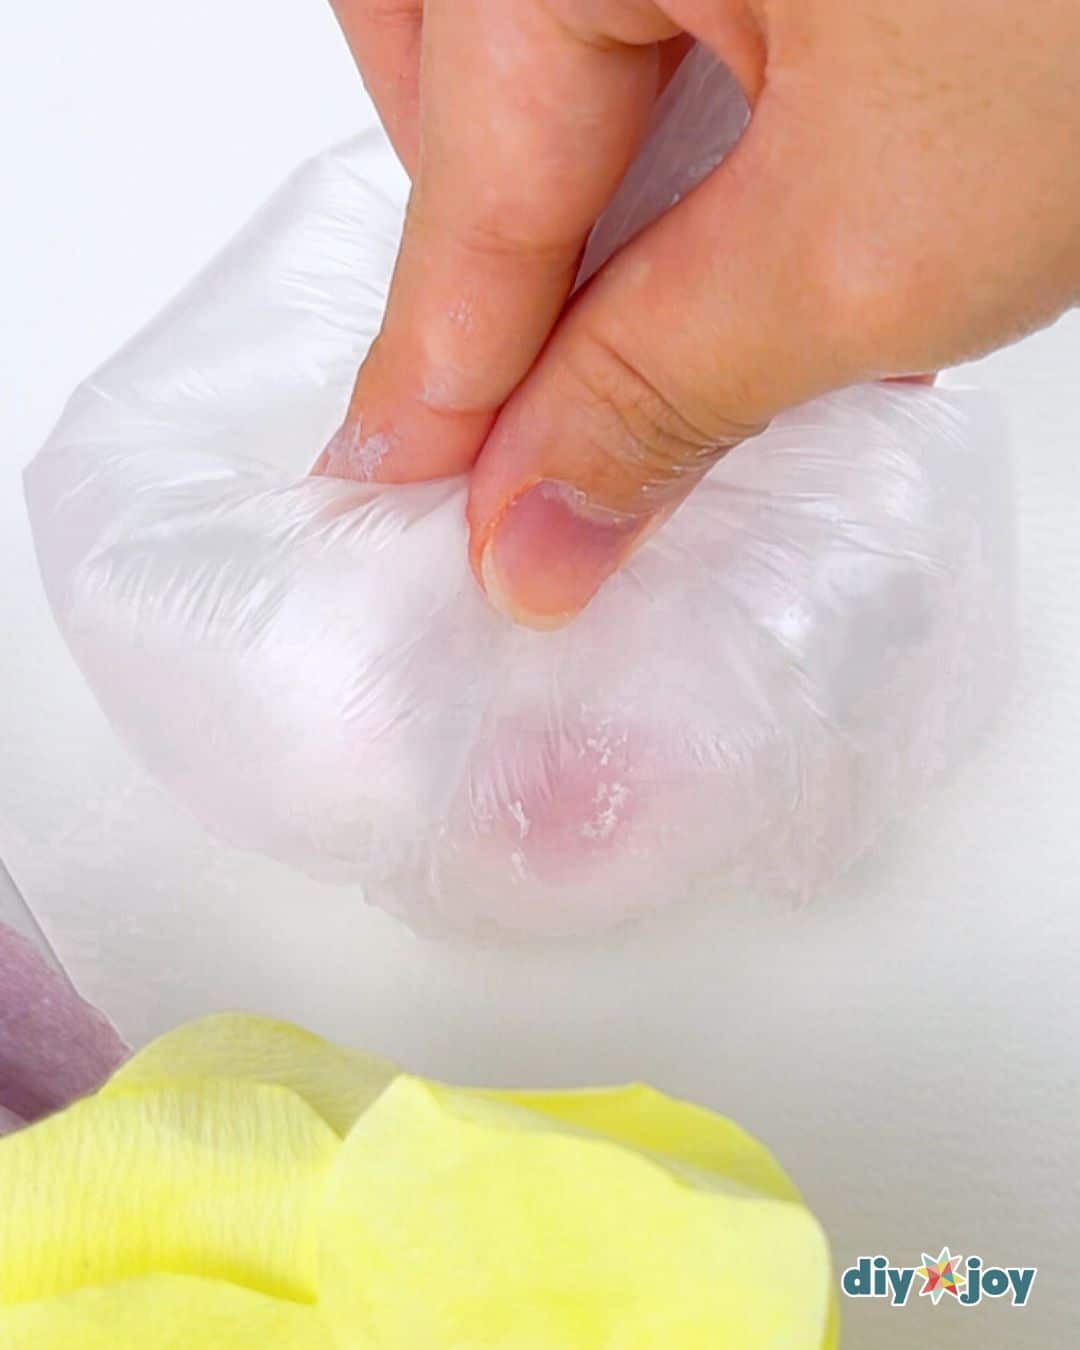
Repeat for other flowers.
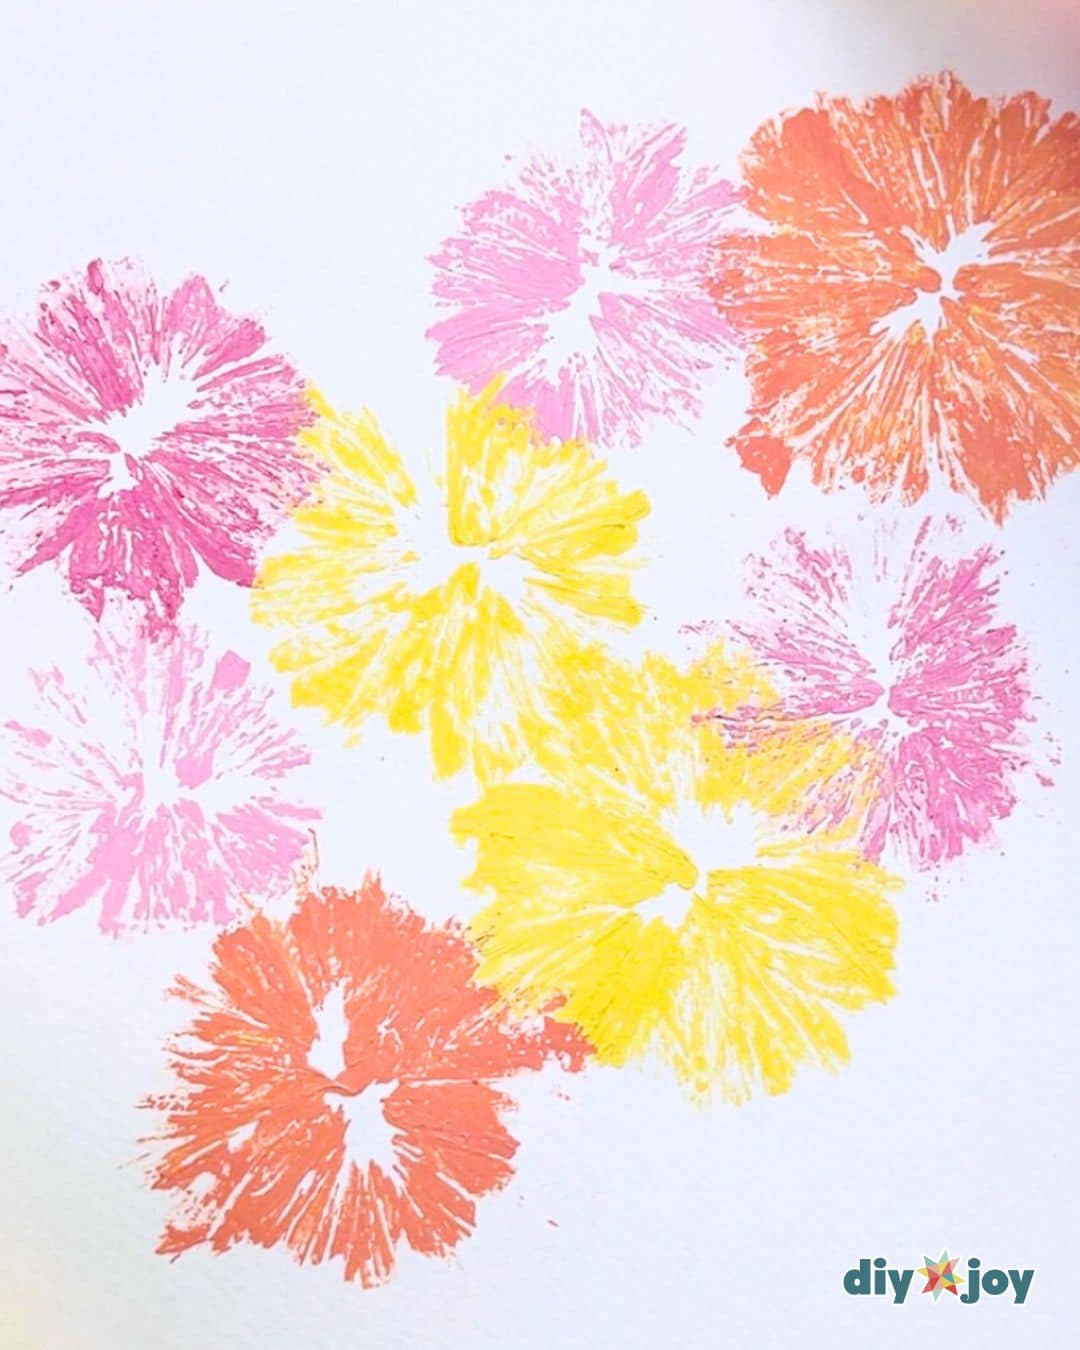
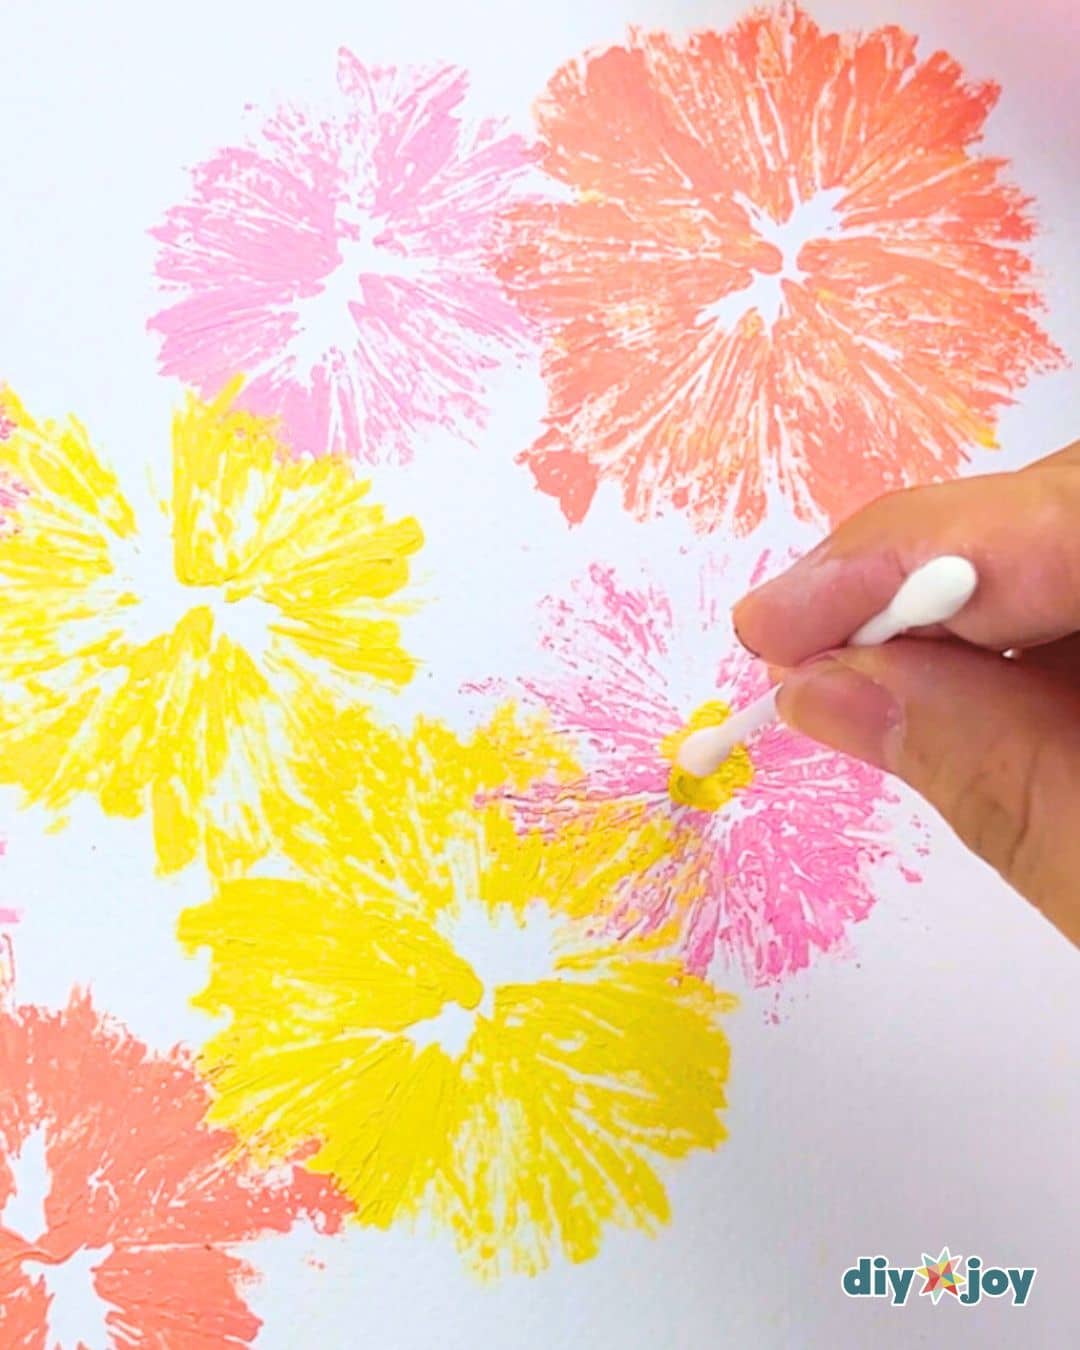
Step 4: Creating details
Dip a cotton swab in a contrasting paint color, and dot the flower’s center. Allow the paint to dry thoroughly.

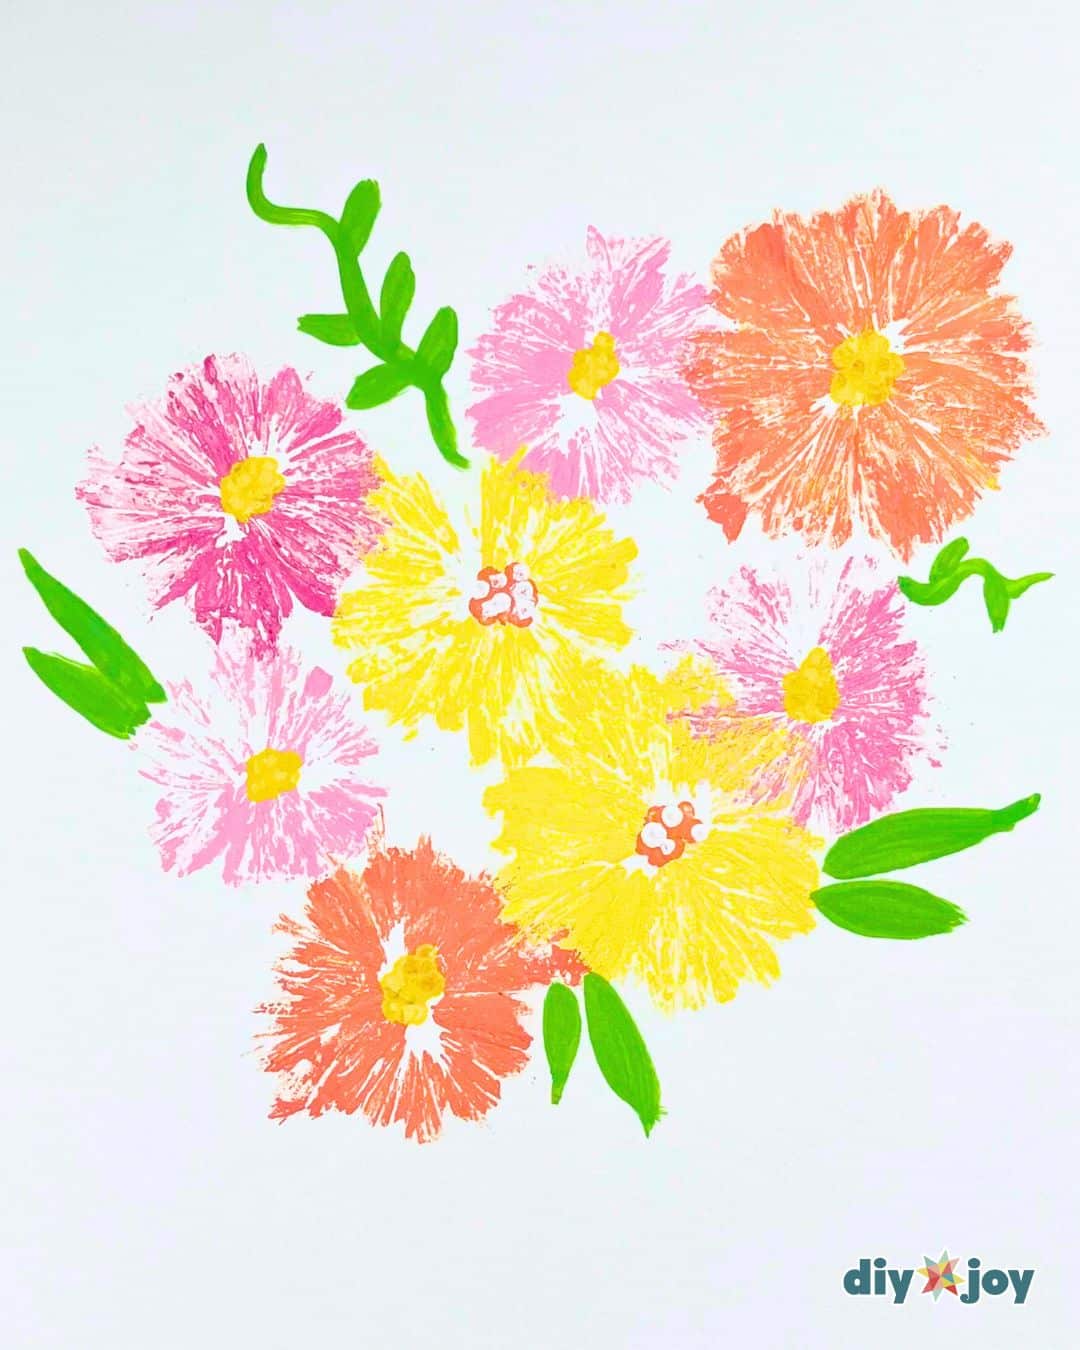
Step 5: Adding stems and leaves (if desired)
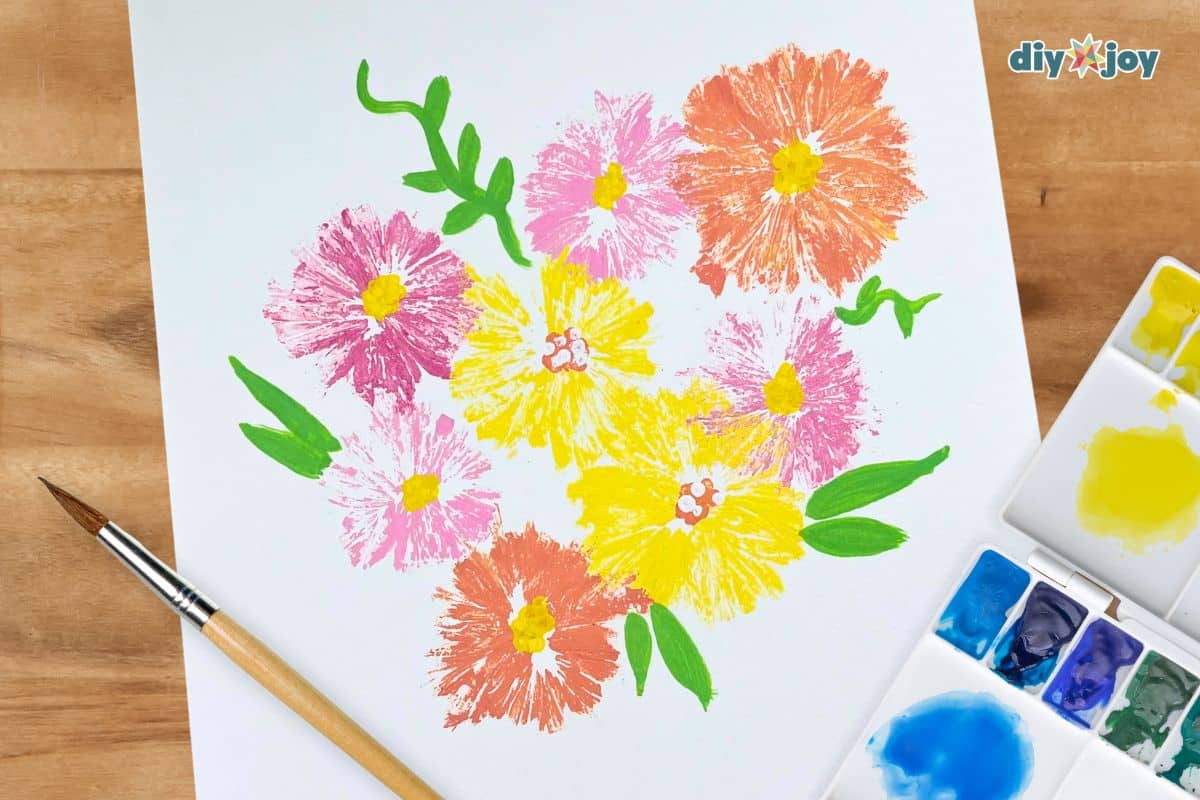
Create the stems and leaves with a paintbrush or plastic bag edges. I painted curved lines for stems, adding alternating leaves along them. I also painted big leaves in pairs.

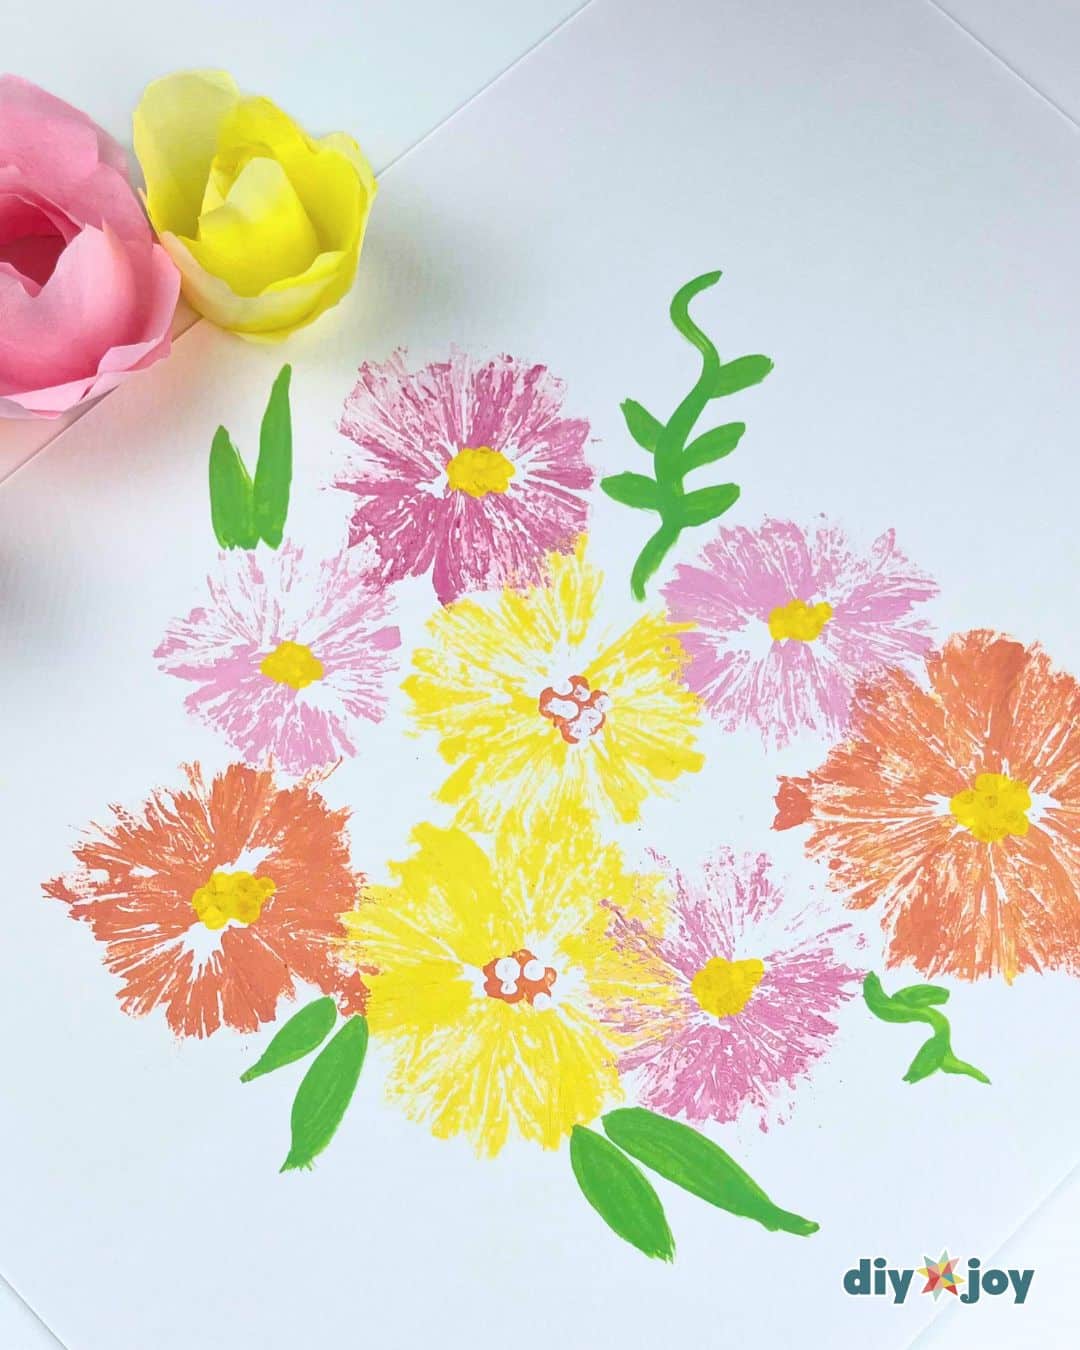
Creative Ideas and Variations
- Create variation and depth by making flowers in different sizes and shades.
- Use real leaves to paint the leaves. Simply paint the back of a leaf and press on the paper.
How to Paint Flowers With a Plastic Bag | Video Tutorial