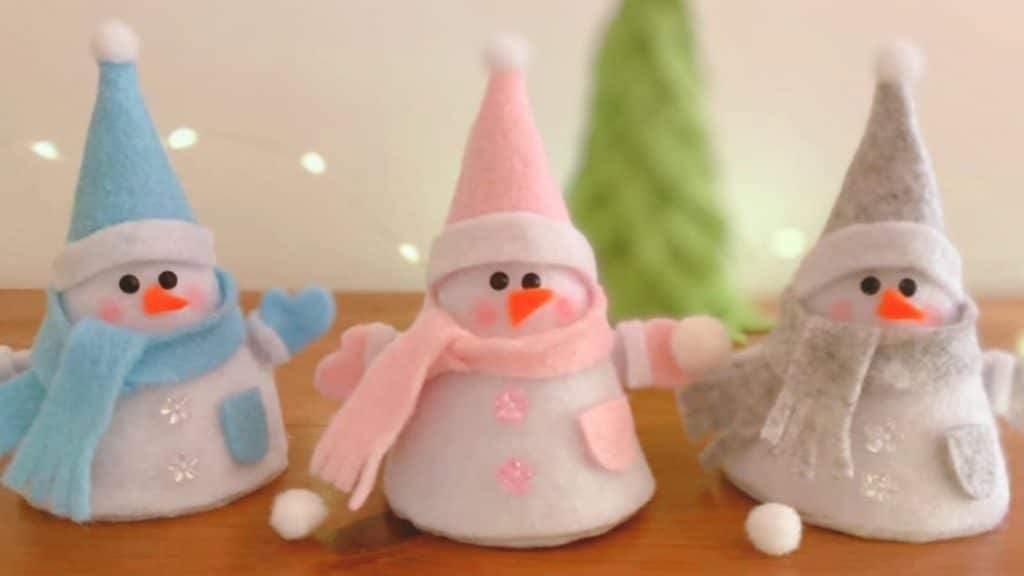
These snowmen decor pieces by Flower note – Felt & Craft are so adorable! They are so tiny and are perfect decorations for your Christmas tree. I love easy and quick projects like this and I’ll sure create tons of this in different colors. Learn how to make a felt snowman Christmas ornament by watching the video below.
Materials:
Light-colored felt:
- 5.9″ by 3.9″ rectangle (A)
- 0.4″ by 5.1″ rectangle (B)
- 2 pieces of 0.2″ by 1.6″ rectangle (C)
- 2 pieces of 0.6″ by 1.2″ rectangle (D)
- 2.8″ square (E)
Dark-colored felt:
- 0.4″ by 9″ rectangle (F)
- 0.6″ square (G)
- 4 pieces of 0.8″ square (H)
- 2″ by 3.9″ rectangle (I)
Orange felt:
- 0.2″ by 0.4″ rectangle (J)
Others:
- felt ball
- embroidery thread
- beads
- rhinestone
- glue gun
- scissors
- tape
- cardboard
- 5.9 inches plate
[social_warfare buttons=”Facebook,Pinterest,Twitter,Whatsapp”]
Instructions:
Step 1:
Draw a circle about 5.9″ long on a piece of cardboard using the plate, then cut it. Draw a line in the middle horizontally and vertically. Cut one of the quarter circles and make a cone. Make it a 2.2-inch diameter and secure it with tape.
Step 2:
Get felt A and wrap it around the cone. Cut the excess felt. Glue the base of the cone to felt E and cut the excess.
Step 3:
Get fabric I and mark a 0.4-inch in the center of the felt. Cut a small curve from corner to corner passing through the mark. Wrap it around the top of the cone for the hat of the snowman, then cut the excess. Make sure the ends of the hat are straight. Get fabric B and attach it to the end of the hat.

Step 4:
Get fabric F. Cut in the tip of the felt to make a fringe. Wrap it around the cone like a scarf. Curve it so the face will look round. Paint 2 rhinestones black and glue them for the eyes. Next, cut fabric J to make a triangular shape, then glue it for the nose.
Step 5:
Get felt G and make a pocket. Once done, glue it to the snowman.
Step 6:
Take felt D and glue it in half – this will be the arm. Next, cut a glove shape from felt H. Glue the pocket and the arm together. Glue the other felt F on the back of the glove, and cut. Glue the fabric C between the glove and the arm on the front and back. Make another piece. Once done, glue the arms to the snowman.

Step 7:
Glue a small loop of thread on the top of the hat of the snowman, then attach the felt ball. Lastly, add blush to the snowman.


