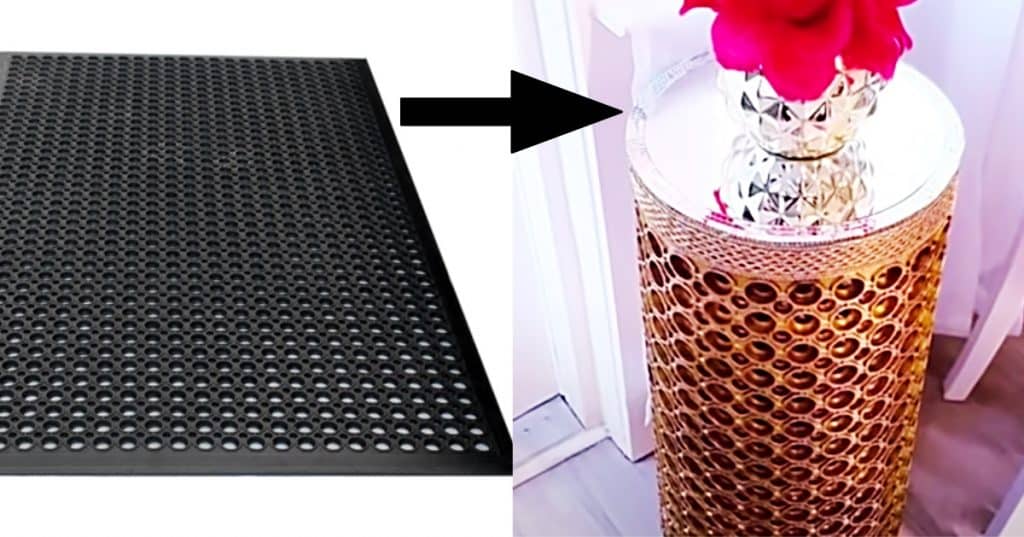
When I found this amazing rubber mats DIY side tables video tutorial by Yoduvh Essentials, on YouTube, I knew I needed these tables in my life. The fact that a couple of car mats could make attractive side tables was such an amazing idea, I couldn’t wait to make them. These tables are perfect for a glam bedroom accessory or they could make any living room look very posh.
Materials For Rubber Mat Side Tables:
- 2 Rubber Mats
- 2 round pieces of wood (from Dollar Tree)
- Gold spray paint
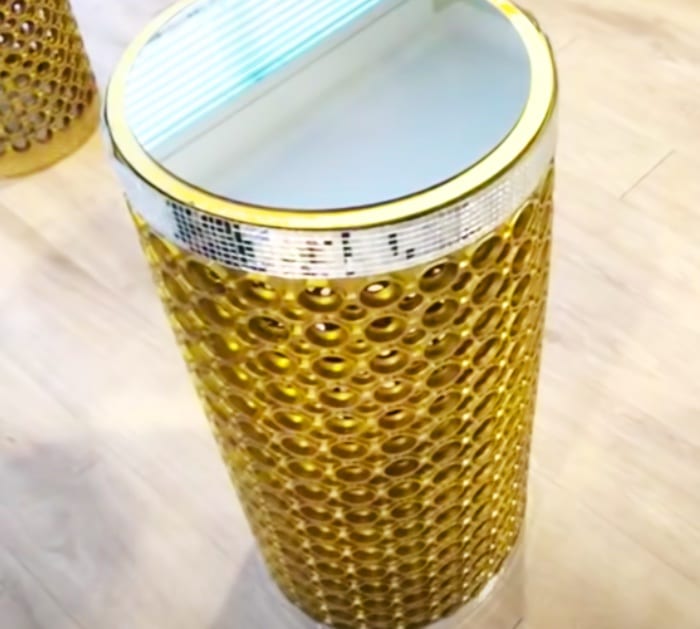
- 2 small round mirrors
- A drill
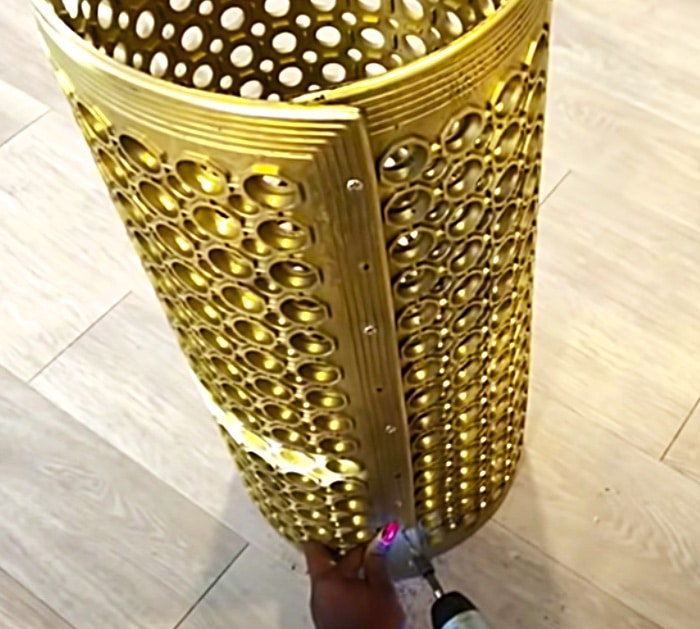
- Long screws
- Short screws
Directions:
In this amazing rubber mats DIY side tables video tutorial by Yoduvh Essentials, on YouTube, you will learn how to make these amazing side tables in a couple of easy steps. You start by painting the rubber mats gold, or the color of your choice, then drill holes and screw them together.
Then, you will add the wooden top and screw it down securely, then decorate your gorgeous table with flashy trims and place a mirror on top to add dimension.
These tables are so easy and cute! I highly recommend this project, it is perfect for almost any age or skill level.
How To Make DIY Side Tables From Rubber Mats


