
Here’s another sewing tutorial for all you DIY lovers out there. Today’s featured article by Notches Sewing via YouTube lets you use old fabrics and customize your door stopper. It’s very easy to follow even if you’re a beginner in sewing, so don’t worry about making a mistake. Also, it is budget-friendly because you can use and substitute the materials with those you already have. If that isn’t convincing enough for you, then read along with the procedures and see for yourself just how adorable and fun this project will be.
Materials:
- 1/3 yard or meter of fabric
- 6 x 1 inches (150x25mm) of cotton tape
- 7 x ½ inches (180 x 12mm) wide Velcro
- Fabric scissors
- Chalk or marking pen
- Cutting blade
- Ruler
- 2 sheets letter-size or a4 paper
- Pen or marker
- Tape
- Batting (optional)
- 4-5 lbs. (2 kg) of filling pebbles
- Pins
Directions:
Step 1
To make your pattern, tape 2 sheets of paper, then fold it in half along the taped seam and press. Mark 5 inches (127mm) from the fold on top and bottom, then place a ruler along with those marks and cut. On the bottom, mark 3.5 inches (89mm) from the fold, then 1.5 inches (38mm) up from the first mark, on the outer edge mark 1¾ (44mm) up, join all those marks together with a line. At the top, mark 3 inches (76mm) in from the fold, join that mark to the one on the side, then cut out your pattern. Turn the pattern around then mark 1 inch (25mm) from the outer edge and cut a little notch, then mark a notch on the centerfold as well. Open the sheet, then draw a line down the center and label the bottom and top of the pattern.
[social_warfare]
Step 2
Fold the right sides of the fabric together, then place the pattern on top of the fabric, trace around the pattern with chalk or marking pen, and mark the 3 notches at the top. Pin the fabric at the corners then cut out the 2 fabric pieces. Snip your fabric on the notches at the top at about 1/8 inches (3mm), remove the pins and separate the pieces, 1 side of the fabric is showing the right side out and the other shows the wrong side out. Fold the bottom edges at about ¼ inch (6mm) and press. Fold the cotton tape in half matching the short edges together and place it on the right side of the fabric centering it on the middle notch, stitch to hold it in place.
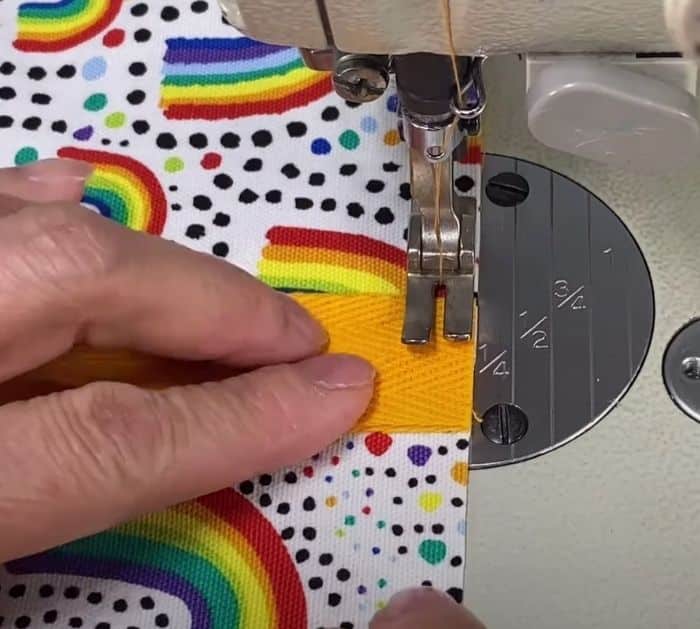
Step 3
Turn it around with the folded side facing you, then stitch the Velcro to the bottom along the fold with about 1/8 inch seam allowance. Stitch the other piece of Velcro on the second fabric piece, flip the piece over so the right side is facing up, then connect the Velcro. Place the right sides of the fabric together matching all the edges along the three sides. Starting at the bottom, stitch along the fabric with a ½ inch seam allowance. Open the bottom corners and pull on the fabrics, turn it around and open the side with the seams matching the sides of the Velcro pieces, then stitch the seam close with a ½ inch seam allowance, repeat it to the other corner. At the top part where the notches are, fold the sides towards the center matching the top edge, stitch right at the existing line, fold the other side, and stitch right to the end. Turn it apart and push the fabric thru then poke at the corners, fill the top part with batting and the rest with little pebbles. Close the Velcro and use.

*All image credit belongs to Notches Sewing via YouTube. Follow and subscribe to her channel for more!
How to Sew a Fabric Door Stopper


