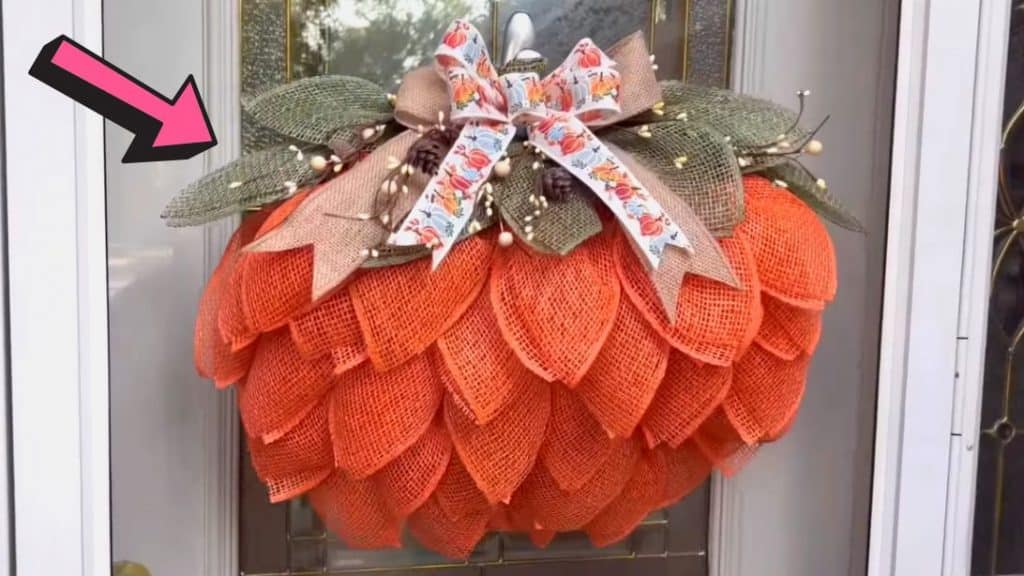
Looking for easy and beautiful decor projects to do this week? Learn how to make a dollar tree pumpkin wreath with this tutorial by Julies Wreath Boutique on Youtube. It’s the perfect decoration on your front door for this Fall season. Watch the video below for the full instructions.
Materials:
- Dollar Tree pumpkin frame
- 10″ orange poly burlap
- 10″ olive green poly burlap
- zip ties
- ribbon of your choice
- fall wire vines
- pipe cleaner
- pliers
[social_warfare buttons=”Facebook,Pinterest,twitter,WhatsApp”]
Instructions:
Step 1:
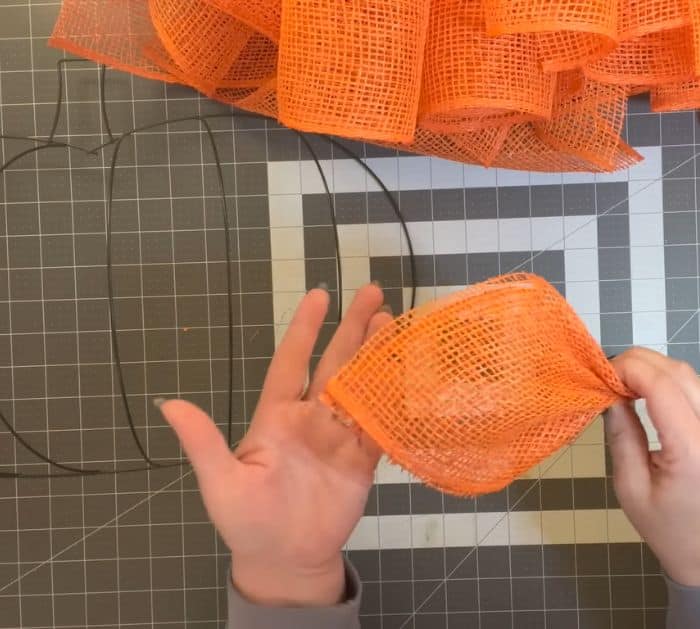
Cut the orange burlap into 30 equal square cuts. Get one piece and fold it in half diagonally. Next, bend the ends under the ribbon and gather the bottom to make a daisy petal. Do the same for the other cuts. You can use a clip to secure the folds.

Step 2:
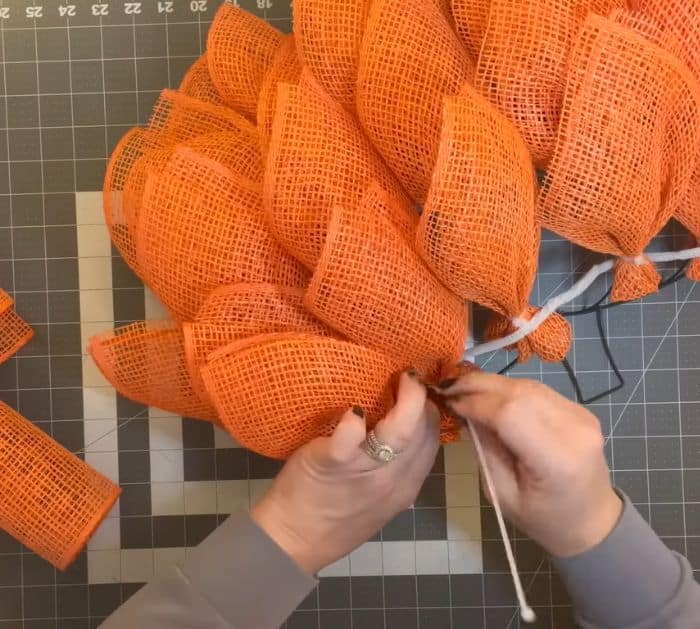
Start on the 3D rims. Take the daisy petal and use a zip tie to attach it to one of the rims. Move it to the bottom part and cut the excess zip tie. Get another one and tie it on top of the first one. Tie 4 petals for each rim. Do the same for the other rims.
Step 3:
Tie one end of a pipe cleaner to the second rim and loop up and down on all the rims until the second to the last one. Put it where the zip ties are.
Step 4:
Tie the extra petals on the pipe cleaner using the zip ties.

Step 5:
Make the stem of the pumpkins. Take the olive green burlap and cut it into square cuts. Fold one over with a 3 inches height and glue the edges together. Insert on the stem of the rim, and flatten it down. Take a zip tie and go through the front of the burlap to the back to anchor it. Trim off the excess zip tie.
Step 6:
Make more petals using the olive green burlap and attach them to the top part of the rim.
Step 7:
Decorate the top with fall wire vines. Make a bow with the ribbon and attach it to the pumpkin.


