Almost everything that makes a house look dated is a surface, and surfaces are cheap. That is the entire argument for budget home improvement, and this list is the proof: a ceiling fan brought forward twenty years for six dollars of spray paint, a bathroom countertop refinished for thirty five, a builder grade mirror framed out for twenty, a plain concrete porch stained to read as tile. None of it is repair work and none of it is decorating, which is a different list. This is the middle ground where a weekend and a hundred dollars change how a room reads, and where the skill needed is usually patience with prep rather than anything you have to learn. Paint the trim, stain the concrete, frame the mirror, cover the fixture. Every project links back to the person who did it first.
1. $6 Dollar Ceiling Fan Update
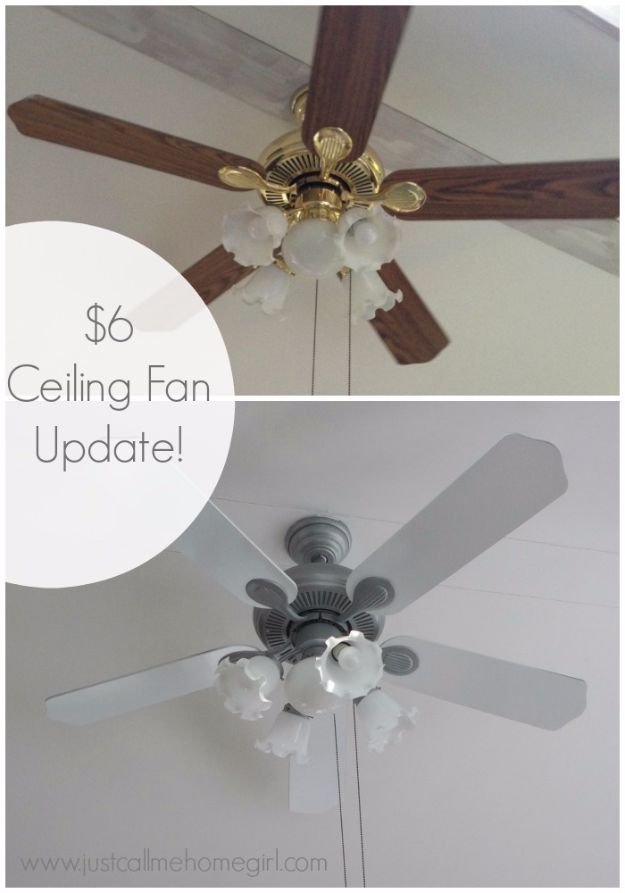
A brass and dark oak ceiling fan turned soft gray and white with two cans of spray paint, total cost six dollars, and the fan was still running perfectly six years later. Take the globes and the blades off, tape over the electrical parts and cover the ceiling with newspaper, then spray the housing in the hammered silver and the blades in white. Keep the can moving in short passes so paint never pools or drifts into the motor vents, and no sanding is needed. Do it on a warm day for drying.
Get the full tutorial at Just Call Me Homegirl.
2. Bathroom Arrow Stencil Refresh
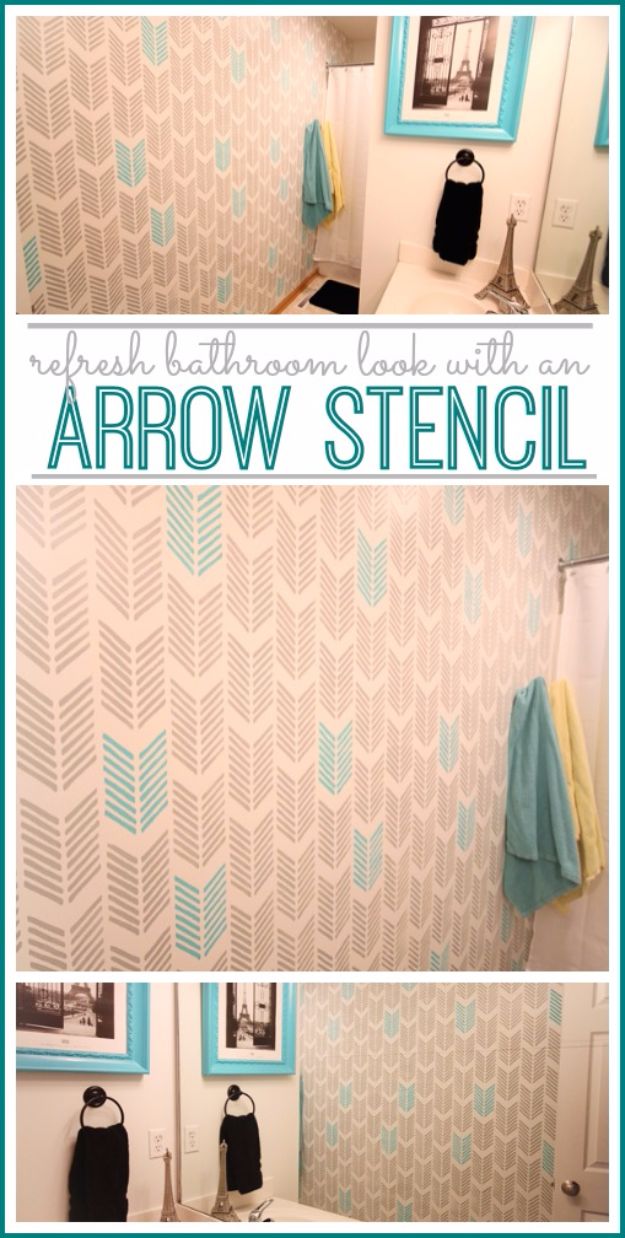
A full wall of gray arrows with occasional turquoise ones scattered through, stencilled from ceiling to skirting in a small bathroom. The kit used here is the Drifting Arrows stencil, and the two things that make it work are in the box: a companion ceiling border piece so the pattern reaches right up to the top of the wall, and a mini level so every repeat stays straight. Spray a light coat of adhesive on the back of the stencil rather than taping it, start at the ceiling and work down, and mix a second color in for interest.
Get the full tutorial at Sugar Bee Crafts.
3. Cedar Street Number Planter
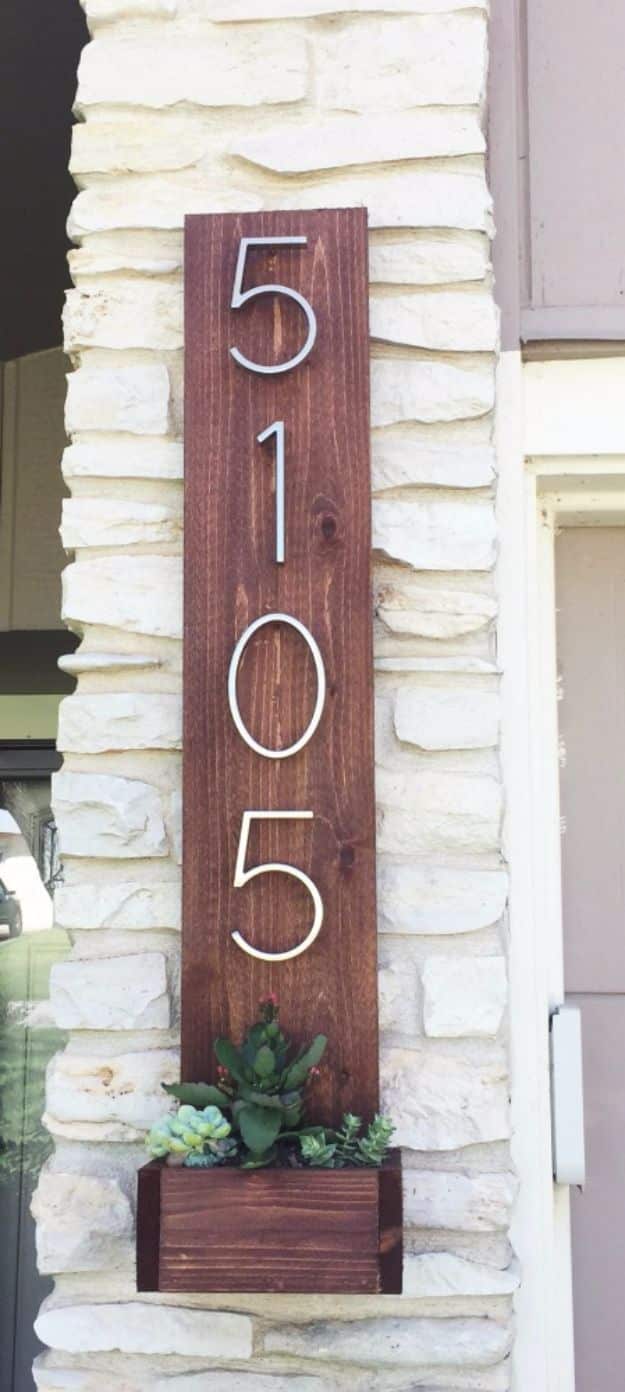
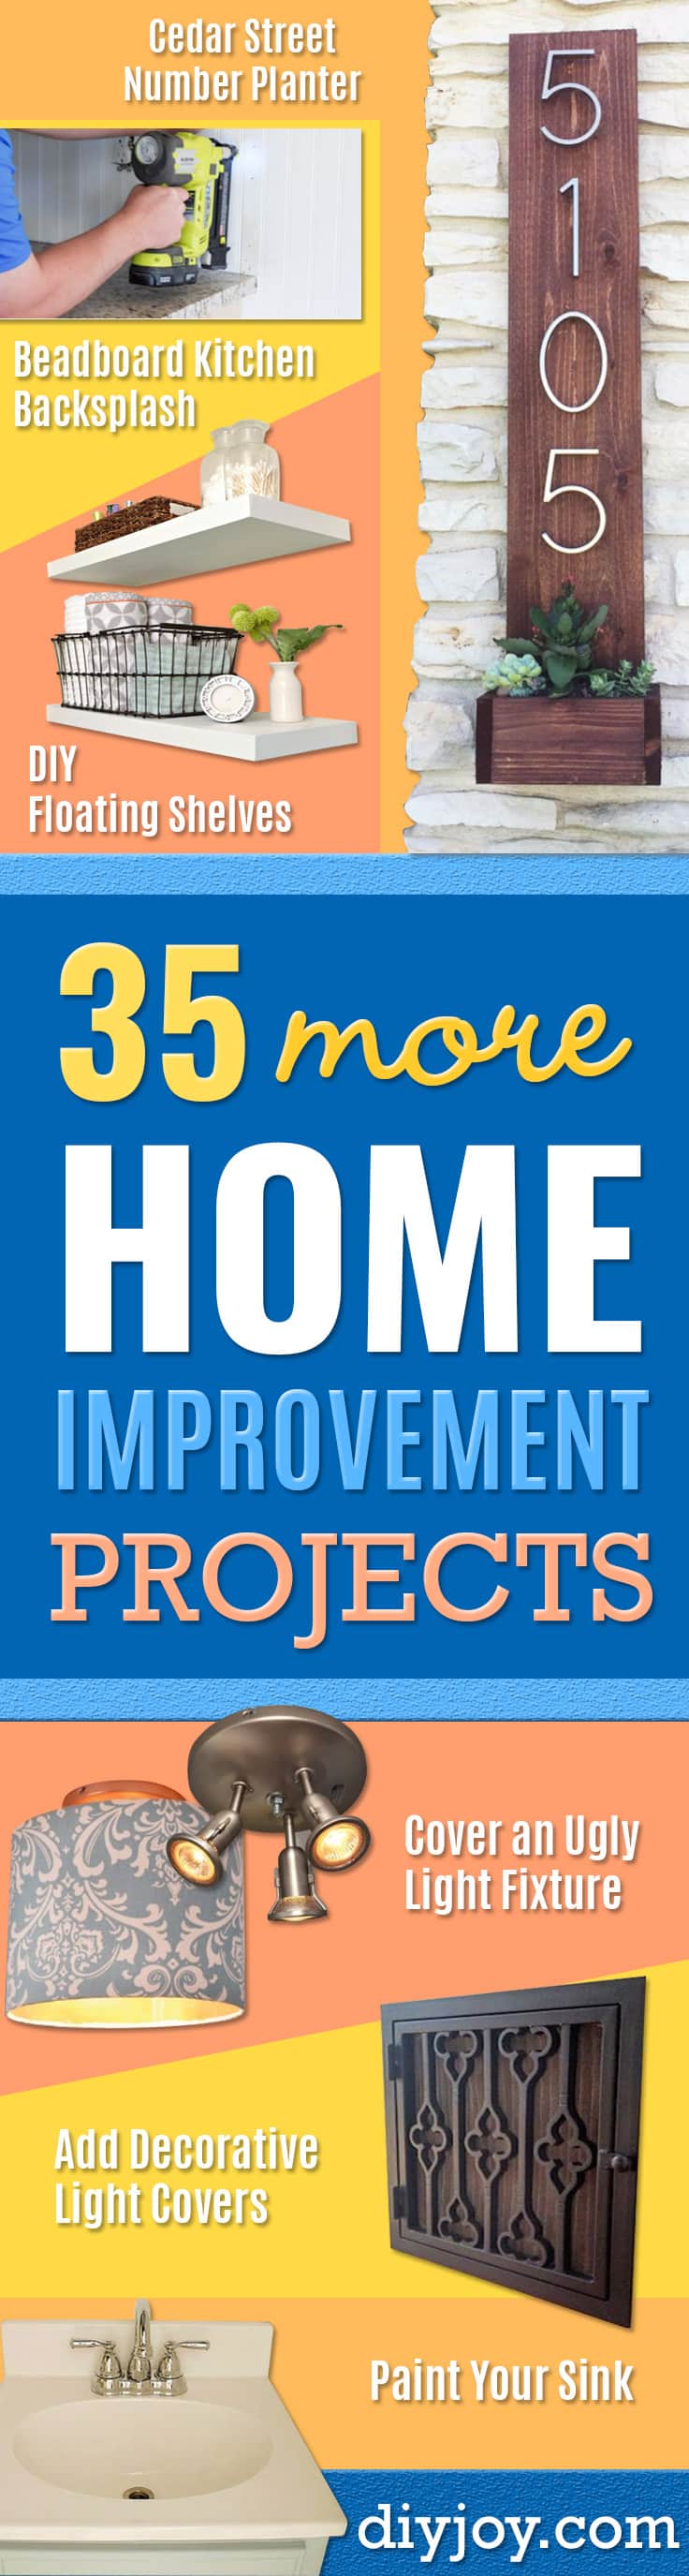
A vertical cedar board with big satin nickel house numbers running down it and a small planter box of succulents at the foot, mounted beside the front door. It is built from a free plan written around cedar fence pickets, which is why the timber costs almost nothing and the numbers end up the largest line on the receipt. Cedar is the right wood outdoors because it handles weather without any treatment. Stain the board rather than painting it so the grain still reads, and fill the little box with succulents so nobody has to water it.
Get the full tutorial at Ana White.
4. Painted Stairs
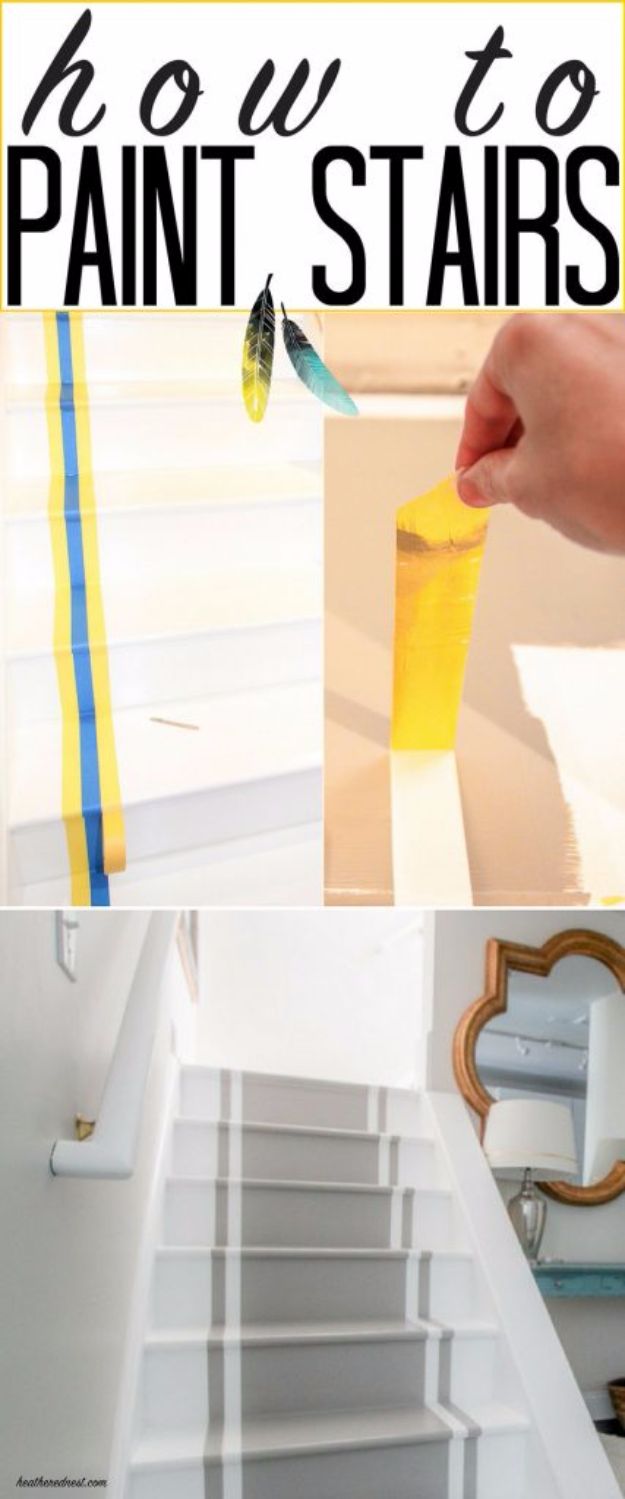
White painted treads with a gray runner stripe painted straight down the middle, and it has held up for more than eight years of daily traffic. Porch and patio paint is the reason: it is formulated for foot traffic, so no polyurethane topcoat is needed over it, which removes the slowest and smelliest step. Sand off any gloss first and fill gouges with wood putty. Tape the stripe with delicate surface tape, then brush a light coat of the base white over the tape edge before the gray, so nothing bleeds under it.
Get the full tutorial at Heathered Nest.
5. DIY Roman Shade
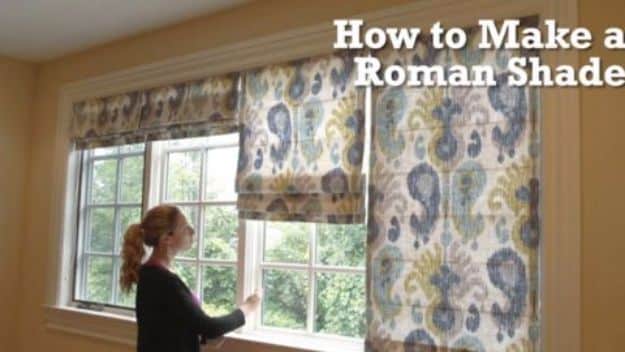
Fabric roman shades made to measure for a bedroom, which is where the saving is: ready made blinds in a decent print run to three figures per window and a couple of yards does not. Buying the fabric online rather than at a chain store cut the cost again here. Roman shades soften a bedroom in a way that wooden blinds never manage, and because they pull up into neat horizontal folds they suit a window you actually want to open. The full step by step is a sewing tutorial from a marine canvas maker.
Get the full tutorial at DIY Joy.
6. Camouflage An Eyesore
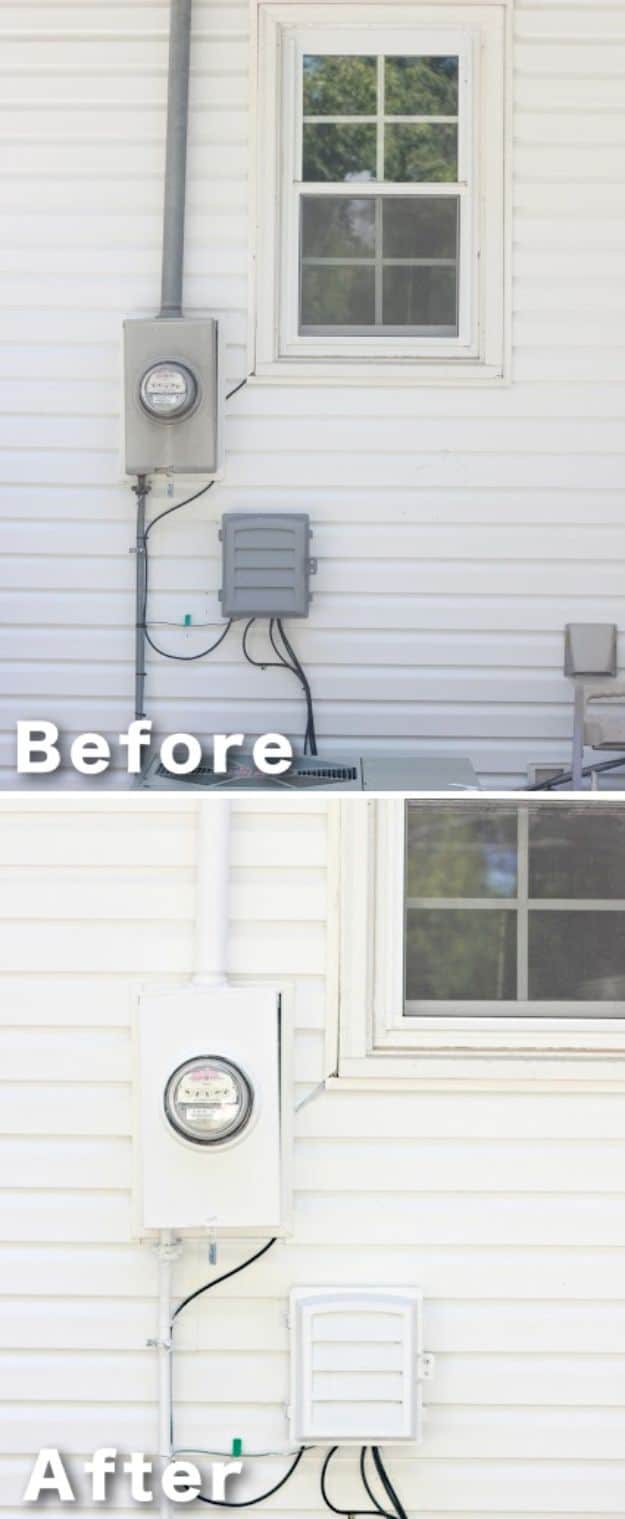
An electricity meter and a cable box painted to match the siding they are bolted to, which does not make them vanish but does stop the eye landing on them from across the garden. Primer first, then white exterior paint, brushed on rather than sprayed so nothing drifts onto the wall. It took a couple of hours, and most of that was waiting between coats. Leave the meter face and any labels uncovered, work around the cables rather than over them, and do the smaller utility boxes at the same time.
Get the full tutorial at Love of Family and Home.
7. Paint Cultured Marble Countertops
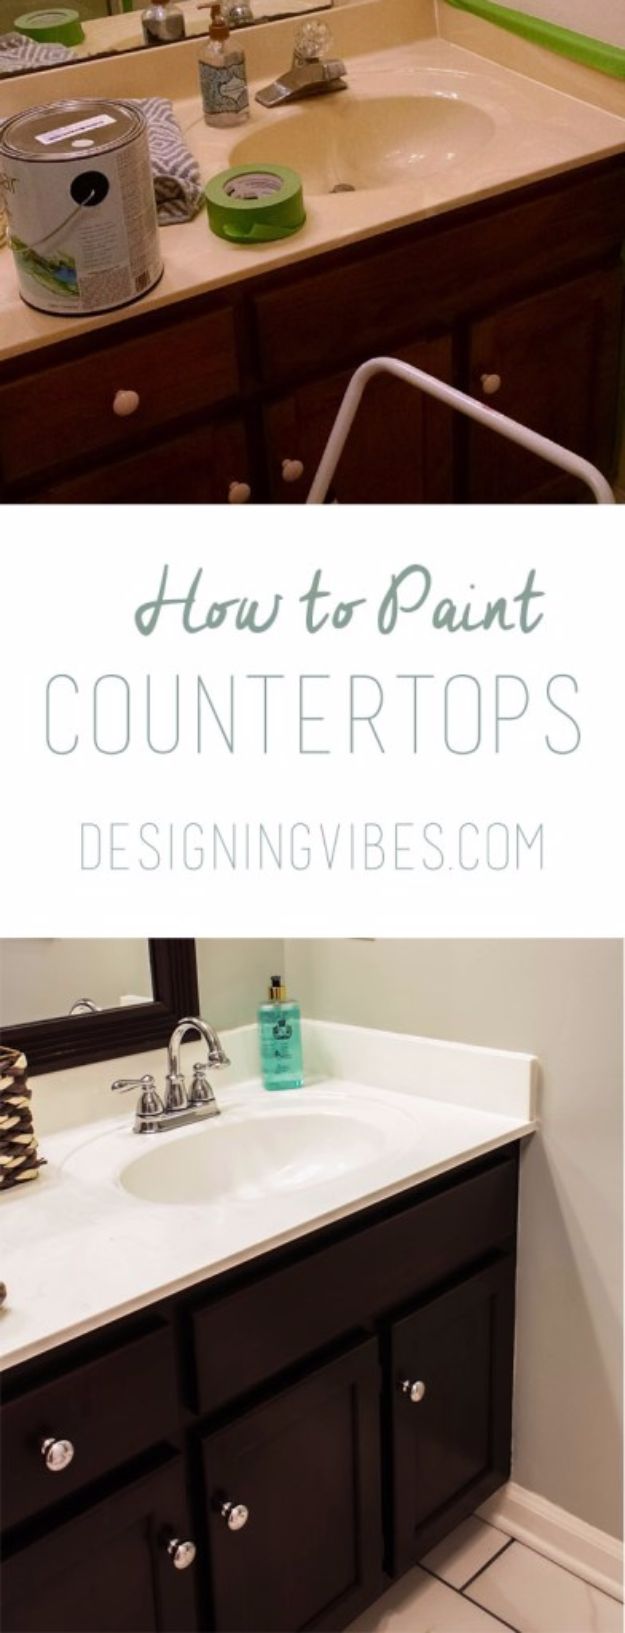
A dated cream cultured marble vanity top painted white with a tub and tile epoxy kit, about thirty five dollars against a replacement running into the hundreds. Everything depends on the cleaning: the kit’s own solution, three separate times, because epoxy will not grip a surface with any residue on it. Roll it on with a high density foam roller rather than brushing, in thin coats, about four of them, with roughly an hour between. Open the windows and wear a respirator, and give it a full week to cure before anything is set down on it.
Get the full tutorial at Designing Vibes.
8. Cover An Ugly Light Fixture
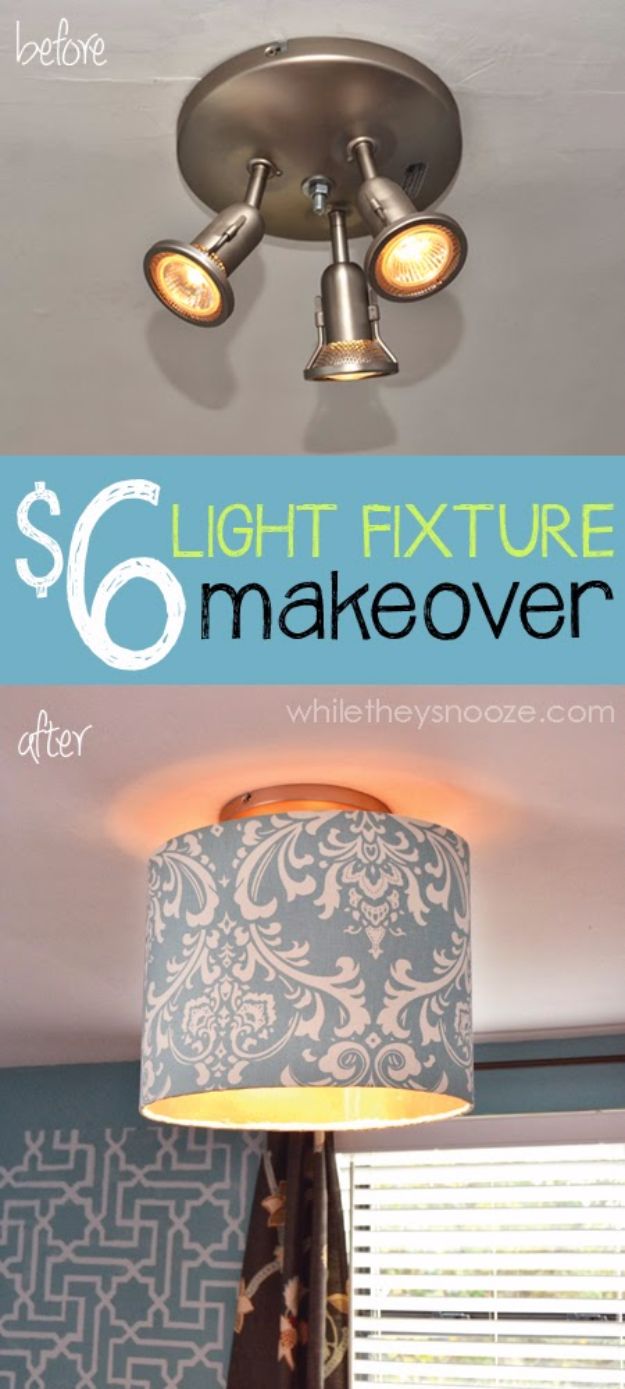
A dated three spotlight ceiling fitting hidden inside a fabric covered drum shade for about six dollars, and the whole job takes roughly forty five minutes. Buy the drum shade secondhand, cut fabric two inches taller than the shade and long enough to wrap with an overlap, then hot glue it around the top and bottom edges only, leaving the middle loose so it sits smooth. Fold the raw end under at the seam. To hang it, drill a small hole through the fixture’s metal dome and bolt the shade bracket through it.
Get the full tutorial at While They Snooze.
9. Concrete Floor Stain
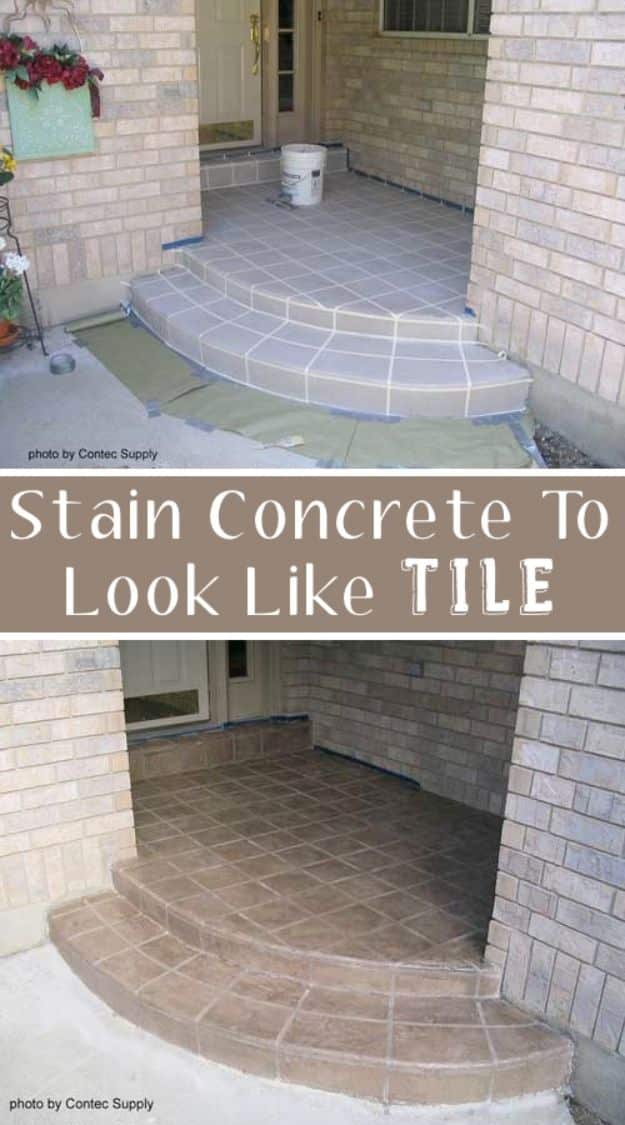
A plain concrete porch and steps stained to read as tile, with the grout lines taped off and the stain rolled on between them. The product here is a water based solid colour polymer stain that soaks into the concrete rather than sitting on top, which is why it does not peel like a floor paint will. Clean the slab back to bare concrete, repair any cracks and test the colour in a corner first, since concrete takes stain differently depending on how it was finished. Brush, roller or sprayer all work.
Get the full tutorial at Front Porch Ideas and More.
10. Paint Kitchen Cabinets
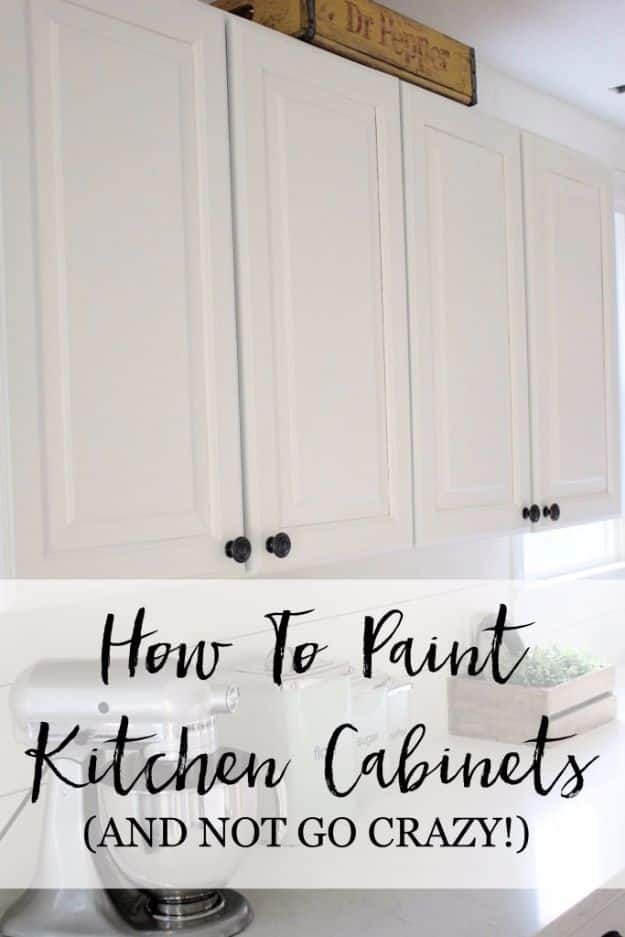
Dated cabinet doors painted a clean white over three or four days, which is the single biggest change a kitchen can get without a skip on the drive. Take the doors off and fill the old hardware holes. Sand with an electric sander, wipe with deglosser, prime, then use a self levelling cabinet paint so there are no brush marks in the finish. Brush the frames in place and spray the doors if you can, three coats in total, allowing a full eight hours between them. Satin, not gloss.
Get the full tutorial at Lauren McBride.
11. Give Your Faucet A Face-Lift
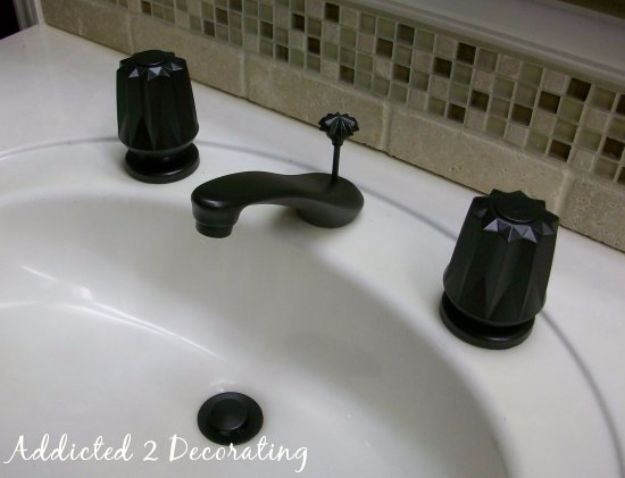
A chrome bathroom tap painted oil rubbed bronze, and the maker is blunt that the painting was the quick part while the prep and masking took forever. That is the honest shape of this job. Take off whatever unscrews, sand with two twenty grit, follow with fine steel wool, then wipe every trace of dust away. Tape the curves carefully and paper everything nearby, prime with an automotive primer and follow the can’s recoat window exactly. Score the paint line with a razor before pulling the tape, and let it cure several days before use.
Get the full tutorial at Addicted 2 Decorating.
12. Paint A Sink
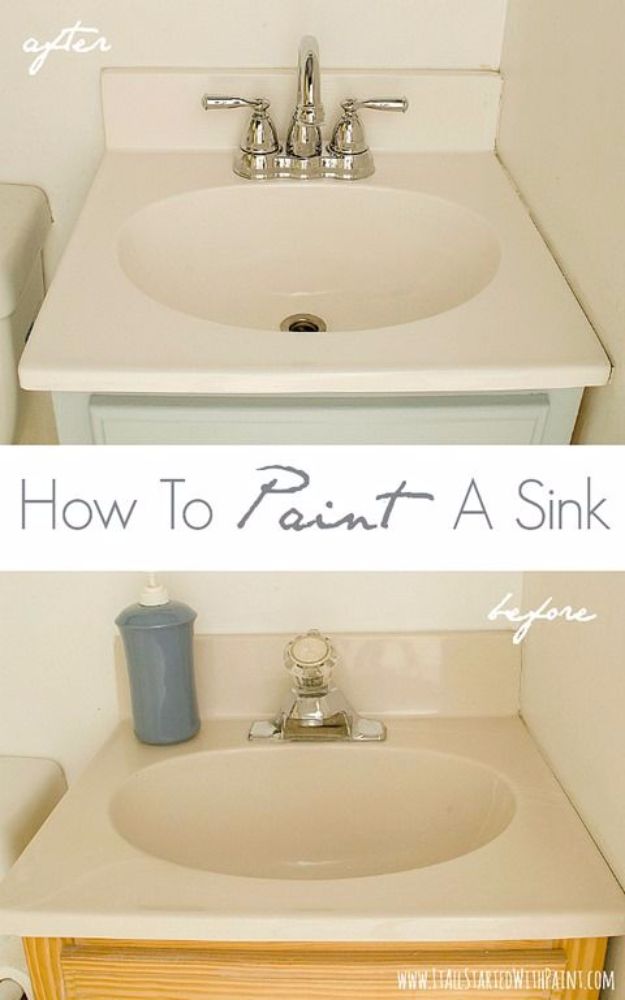
A faux marble bathroom sink painted white with a brush on epoxy, which is the same trick as a refinished bathtub and just as convincing when the prep is done properly. Clean it, scour it with fine steel wool in circles, rinse, dry, and then do that whole sequence three times over before opening the epoxy. Tape off the drain and the surrounding surfaces. Two coats, thin, with two to four hours between, then leave it seventy two hours before the tape comes off or the tap runs.
Get the full tutorial at It All Started With Paint.
13. Frame A Builder Basic Mirror
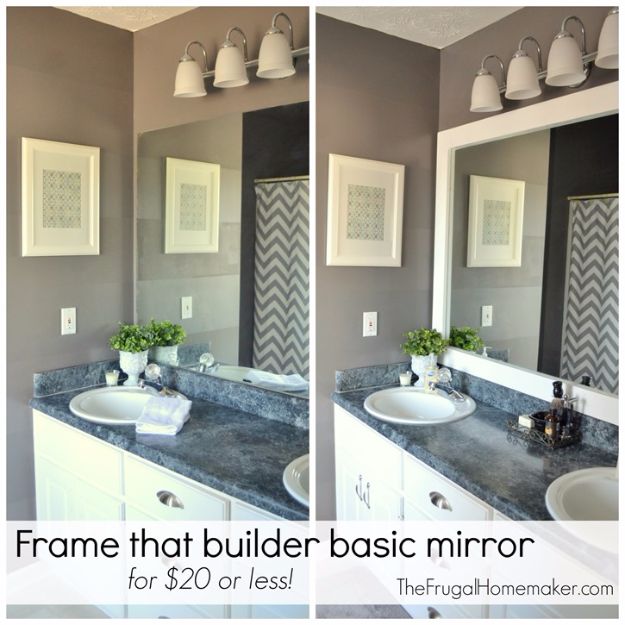
The flat builder grade mirror over a bathroom vanity, framed out with primed one by four trim boards for just over twenty dollars. Primed boards are worth the extra over bare pine because there are no knots, no grain and no filling to do, so you go straight to caulk and topcoat. Glue the frame on with a mirror safe adhesive and tape it while it sets. Leave the top inch or so of each board unglued to avoid reflection, and caulk the corners, which hides any miter that came out less than perfect.
Get the full tutorial at The Frugal Homemaker.
14. DIY Handrail Makeover
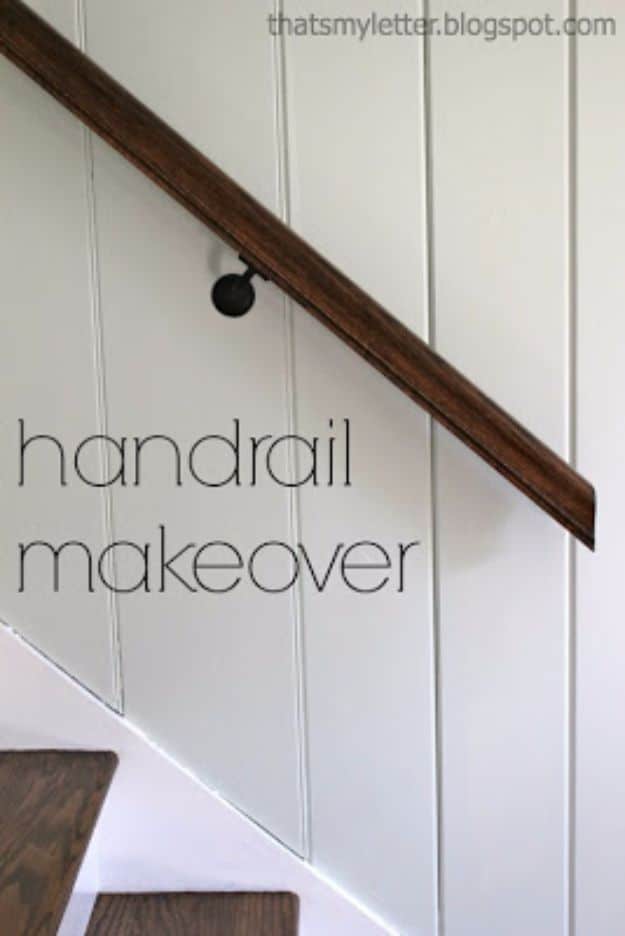
A painted handrail stripped back to bare wood and refinished dark, against a freshly white stairwell, which is the pairing that makes an ordinary staircase look deliberate. Chemical stripper takes the old paint off, then sand smooth, rinse and let it dry before any stain touches it. Two coats of clear semi gloss polyurethane over the stain, sanding lightly between them, because a handrail is touched constantly. New oil rubbed bronze brackets from a home improvement store finish it and cost very little.
Get the full tutorial at Jaime Costiglio.
15. Air Stone Fireplace Makeover
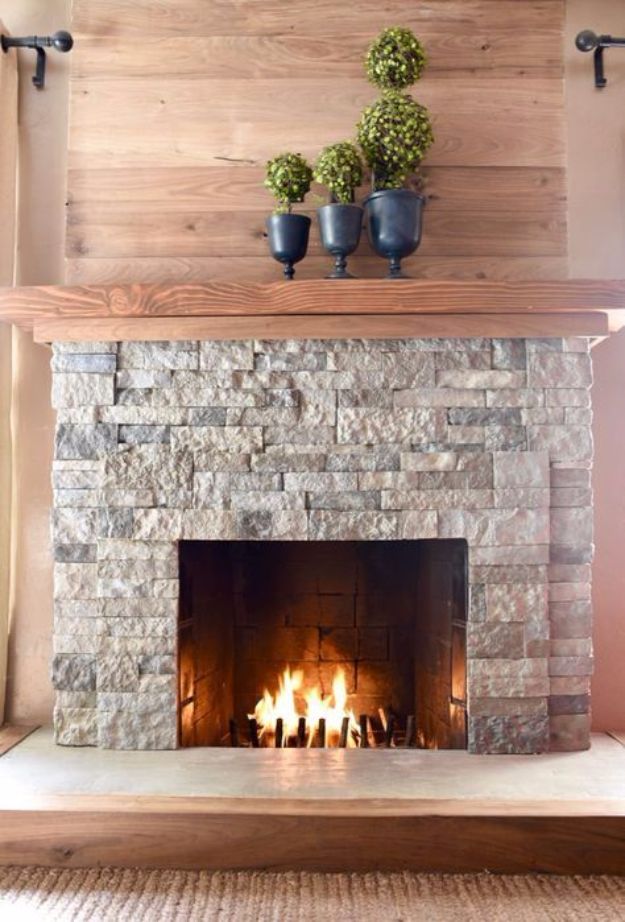
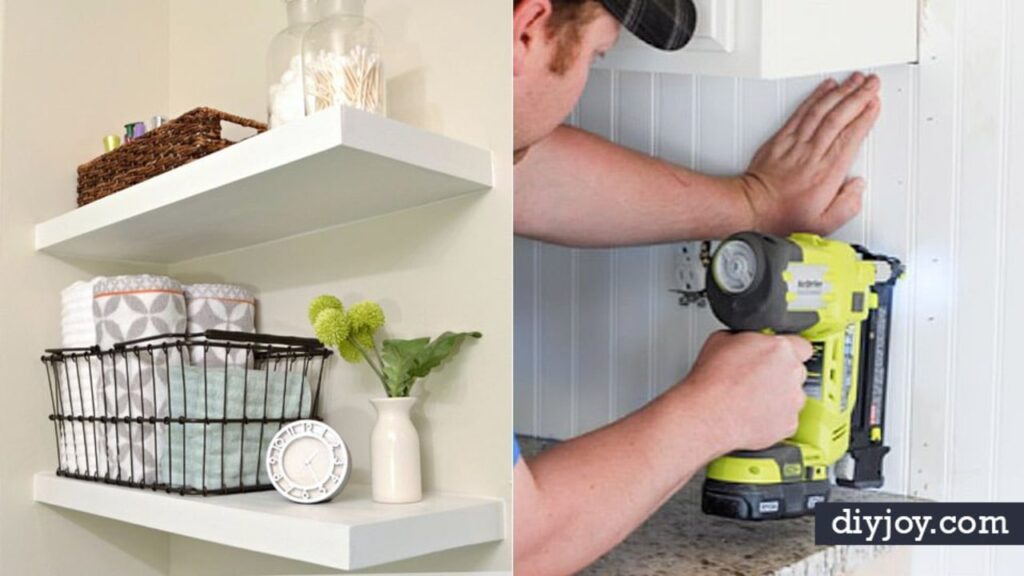
A fireplace refaced in lightweight stone veneer, which goes on with adhesive and a putty knife instead of mortar and a trowel, so it is genuinely a two person weekend rather than a trade job. Sort all the pieces by colour and size before starting, because the finished wall lives or dies on how well the tones are mixed. Shims keep the courses level as you build up. Cut with a masonry blade, and borrow or hire a rotary saw rather than buying one; it makes the cutting dramatically faster than a hacksaw.
Get the full tutorial at Make Life Lovely.
16. Add Crown Molding
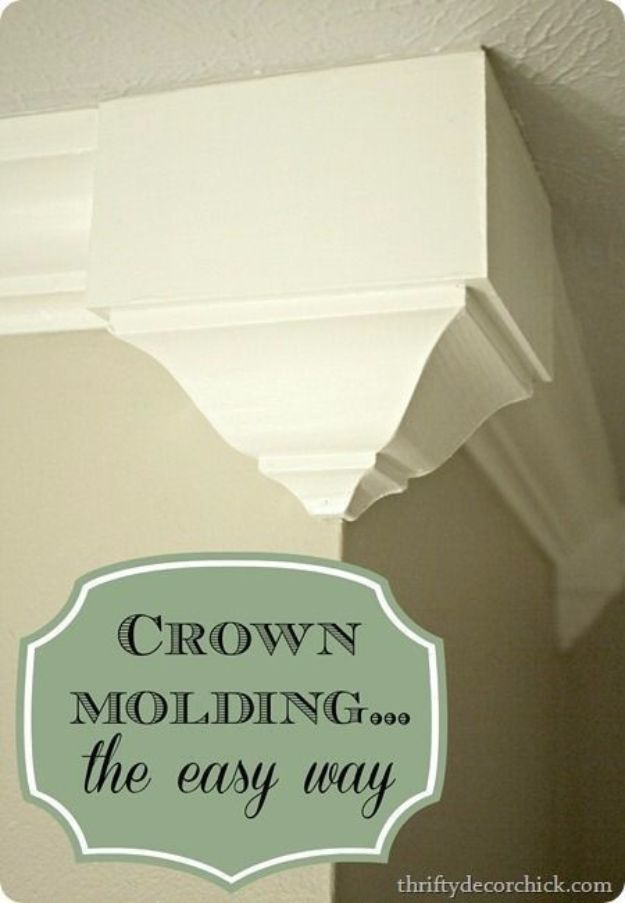
Crown molding fitted without a single mitered corner, using pre made corner blocks that take the angle for you. Nail a block into each corner and every length of crown between them needs only a straight cut butted up against it, which removes the one thing that stops most people attempting this. The blocks cost more than plain molding, so it is a trade of money against skill. Paint everything before it goes up, tape the bottom edge and caulk the top and bottom lines to kill the shadow gaps.
Get the full tutorial at Thrifty Decor Chick.
17. Paint A Trim
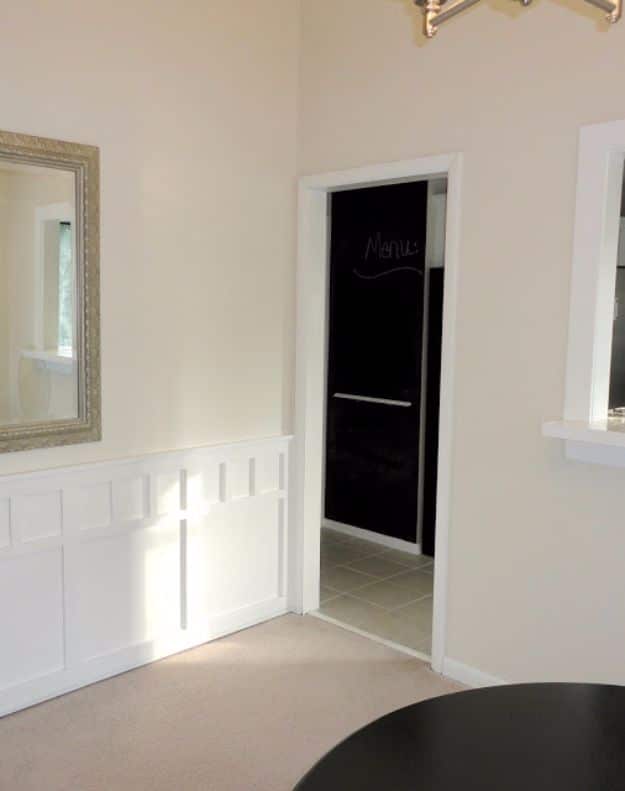
Orange toned wooden trim painted white, room by room, which is the cheapest whole house transformation there is and the one people are most afraid of. Dark varnished trim from the seventies dates a house faster than any wall colour, and white trim reads as new joinery from the doorway. The surprise is that sanding is optional: primer alone carried almost every room here, and only the living and dining room trim was taken off and sanded first because it takes the hardest wear. Zinsser primer, a semi gloss white, a good brush and a small foam roller are the whole kit.
Get the full tutorial at LiveLoveDIY.
18. Paint A Door Without Taking It Off The Hinges
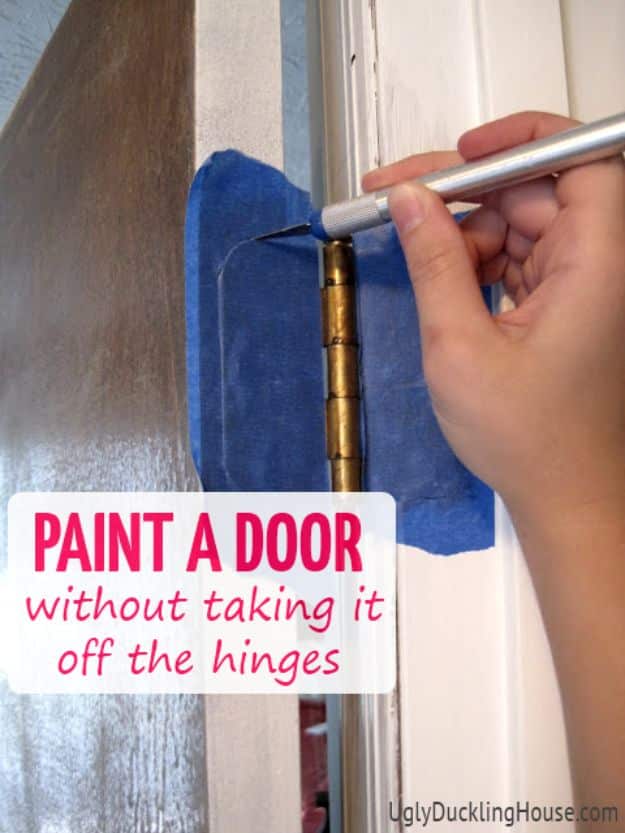
A door painted in place with the hinges masked so precisely that nobody can tell it was not taken down, and the technique is worth more than the project. Tape right over each hinge, then run a finger around its edge to find the recess where the metal meets the wood, and cut the tape along that line with a craft knife. Peel the outer waste away and you are left with a perfect mask on the metal only. Paint, then pull the tape while the paint is still wet.
Get the full tutorial at Ugly Duckling House.