
Looking for a fun and eye-catching pattern? Here’s a funky chicken quilt by Sew Yeah on Youtube! I enjoyed making this so much as it’s very different from the designs I usually do. Read on or watch the video below for full instructions.
Materials
Fabric A
- 12 pieces of 10″ x 10″ squares
- 12 pieces of 3″ x 3″ squares
Fabric B
- 24 pieces of 15.5″ x 3″ strips
- 24 pieces of 10.5″ x 3″ strips
Fabric C
- 24 pieces of 5″ x 3″ rectangles for comb
Fabric D
- 24 pieces of 3″ x 3″ for beak
[social_warfare buttons=”facebook,pinterest,twitter,whatsapp”]
Instructions
Step 1:
Take the 3 x 3 squares from fabrics A and B and draw a diagonal line from corner to corner on the wrong sides.
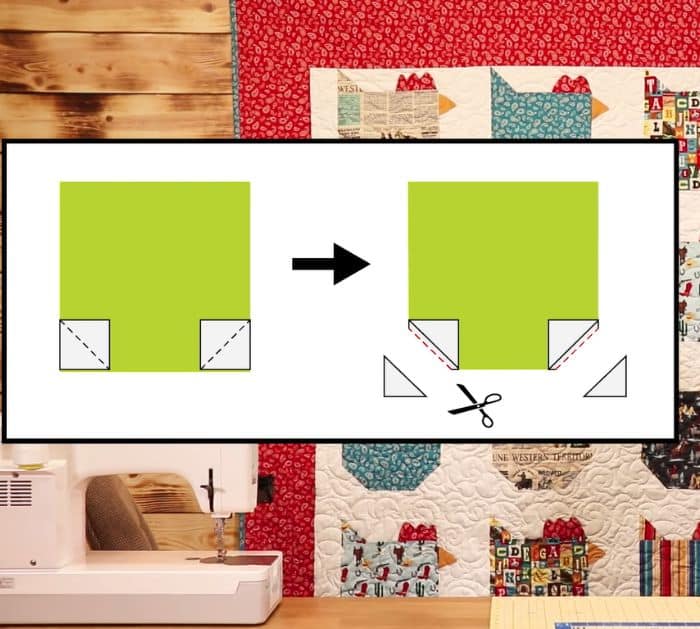
Step 2:
Take one of the 10 x 10 squares and place it right-side up. Place two of the fabric B 3″ x 3″ squares face down in the two bottom corners. The drawn line should be pointing downwards. Sew across the drawn line, then trim 1/4″ away from the sewn line.
Step 3:
Make the tail. Get one of the 10.5″ x 3″ strips and place it right side up. Place one of the marked 3″ x 3″ fabric A in the left corner and sew across the drawn line. Trim 1/4″ away from the sewn line, then press it flat.
Step 4:
Make the beak. Get two of the 3″ x 3″ fabric D and place them right sides together. Trace a beak shape onto the wrong side and sew over it. Trim as close to the edge of the stitch line and flip it right side out. Make the crown the same process as the beak using two 5″ x 3″ rectangles of fabric C.
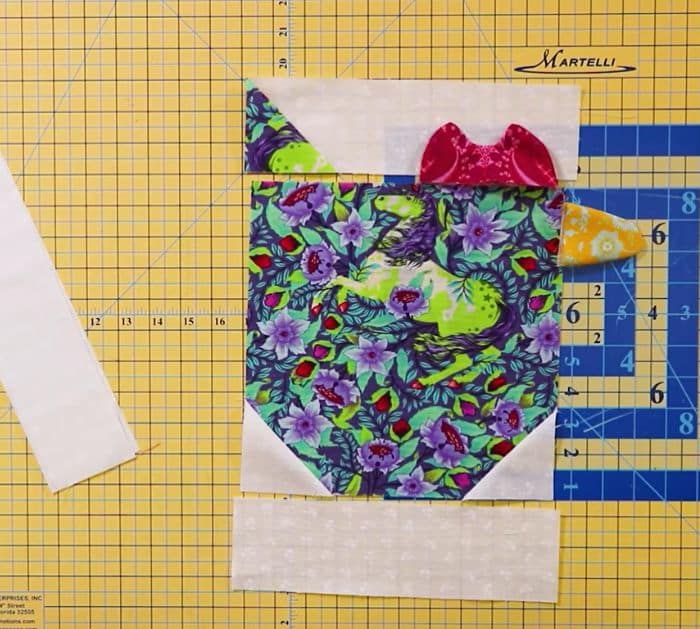
Step 5:
Assemble the chicken. Place the body right side up and put the crown about half an inch from the right edge, lining up the raw edges. Next, place the 10.5″ x 3″ tail strip on top, right side down. The crown should be in between the body and the tail strip. Sew 1/4″ from the top edge and press it flat.
Step 6:
Take one of the unsewn 10.5″ x 3″ fabric b strips and place it right side down on the bottom of the chicken. Sew 1/4″ from the edge, press, and trim if needed.
Step 7:
Put the beak about 1/2″ down from the top right side of the chicken. Make sure to line up the raw edges. Next, place the 15.5 x 3 sashing of fabric B right side down, lining up the edge with the right side of your chicken. The beach should be in between the right side of the body and the sashing. Sew 1/4″ from the edge, turn, and press it flat.
Step 8:
Place a 15.5″ x 3″ strip of sashing along the left side of the chicken with the right sides together. Sew at 1/4″ and press.
Funky Chicken Quilt Pattern


