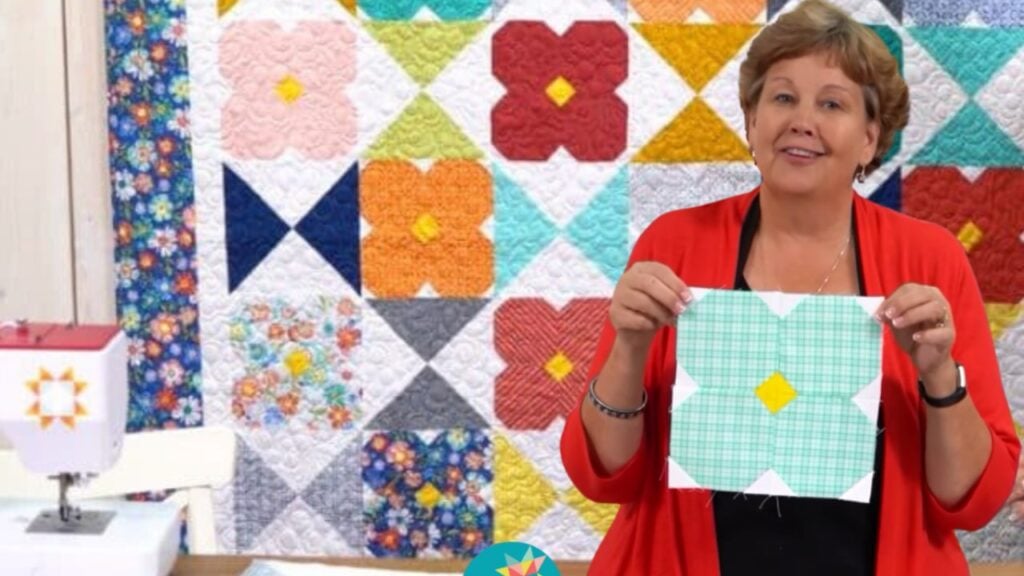
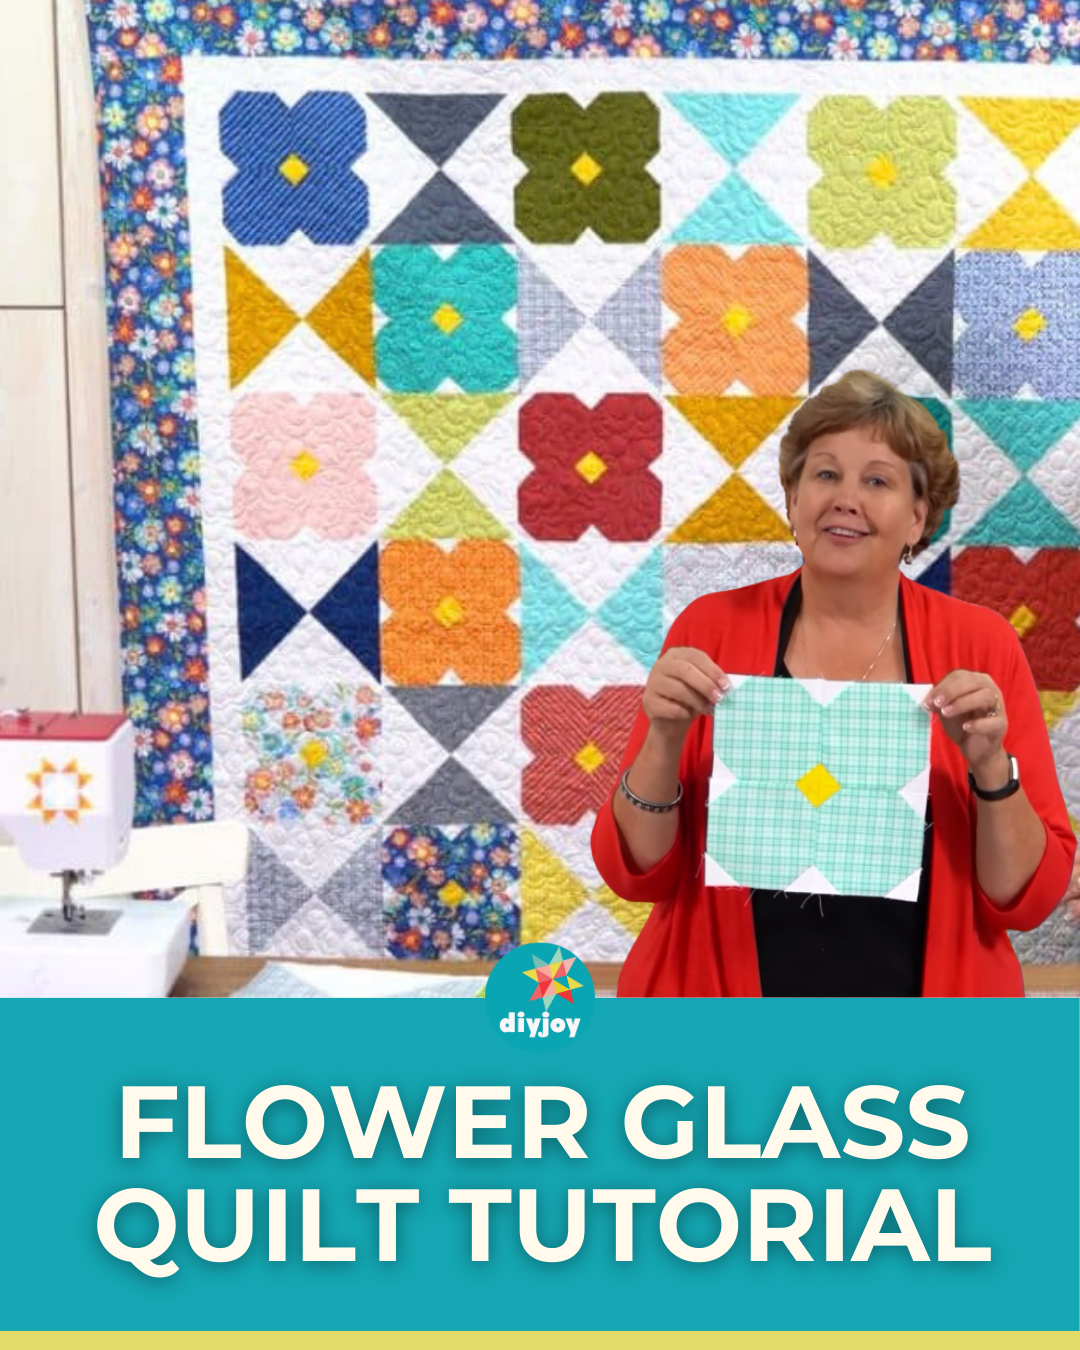
If you want a fun and lively design for your next sewing project – make this quilt by the Missouri Star Quilt Company. The flower and hourglass blocks definitely look beautiful together. Both blocks are easy to make just follow this simple flower glass quilt tutorial by Jenny Doan. Watch the video below for the full instructions.
Materials:
- 1 package of 10″ print squares
- 2 yards of background fabric (includes inner border)
- 1/4 yard of complementary fabric
- 1 1/2 yards of the outer border
- 3/4 yard binding 7 1/4 yards of backing
[social_warfare buttons=”Facebook,Pinterest,Twitter,WhatsApp”]
Instructions:
Step 1:
Take one piece of 10″ square. Cut it into 4 using a ruler and rotary cutter. Do the same for the 24 pieces of 10″ squares. Make sure to keep the colors together.
Step 2:
Take your background fabric and cut strips of 1 1/2″ squares. Fold them in half diagonally to make a crease. Do the same for the complementary fabric.
Step 3:
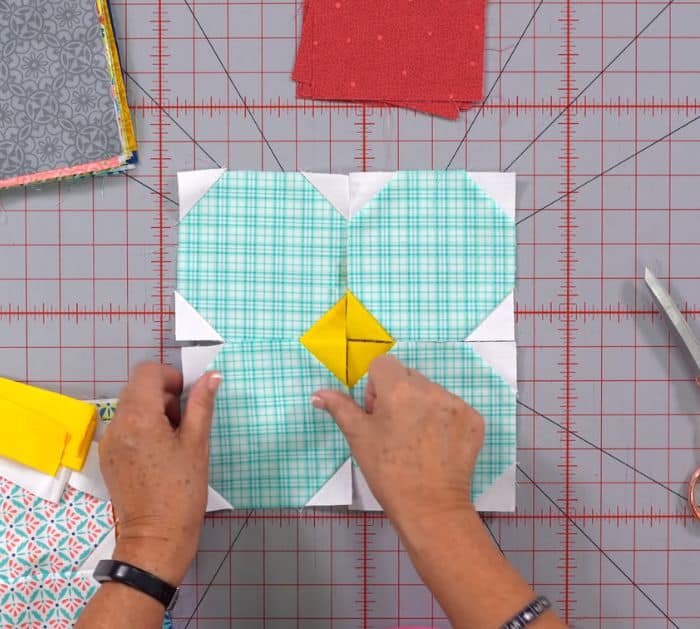
Take one piece of 5″ square then place 3 white 1 1/2″ squares on the three corners. Then take one from the complementary fabric and place it on the last corner. Sew right on all the lines for all the square corners. Once done, trim off the excess corner tips. Press using an iron. Do the same for the remaining 3 pieces of 5″ squares.
Step 4:
Arrange the four blocks together with the yellow triangle in the middle forming the center of the flower. Place them right sides together then sew. Create more of this block with the colored squares.
Step 5:
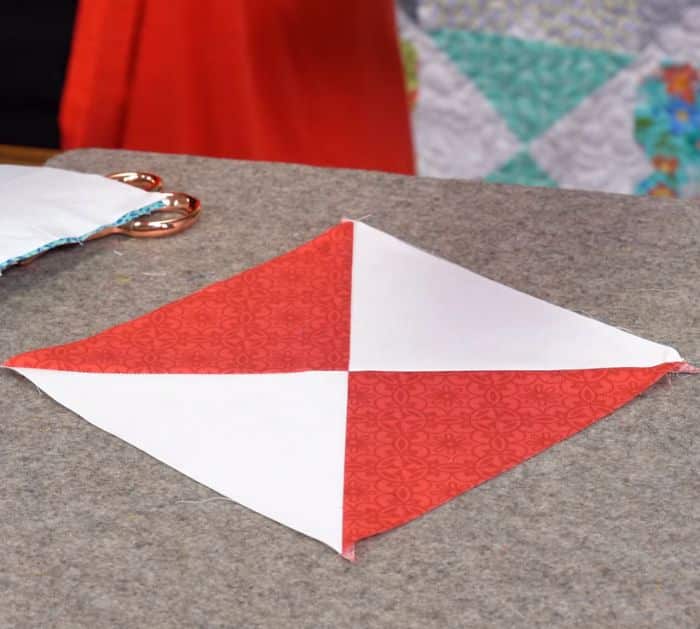
Pull out 12 of the colored and 12 of the white 10″ squares. Get one white and one colored. Place them right sides together then draw a line diagonally. Then sew a quarter of an inch away from that line on both sides. Cut right into the line and press them open to the dark. Take one and draw a diagonal line again from corner to corner. Take the other one and place it on the bottom, right sides together. Sew a quarter of an inch on either side of the line. Cut on the line and you have the hourglass. Do the same for the remaining pieces.
Step 6:
When assembling, alternate the hourglass and flower. On the first row, arrange the hourglass vertically then horizontally on the second row. Use four flowers on the first row then use just 3 on the second. Repeat for the other rows.
Flower Glass Quilt Tutorial


