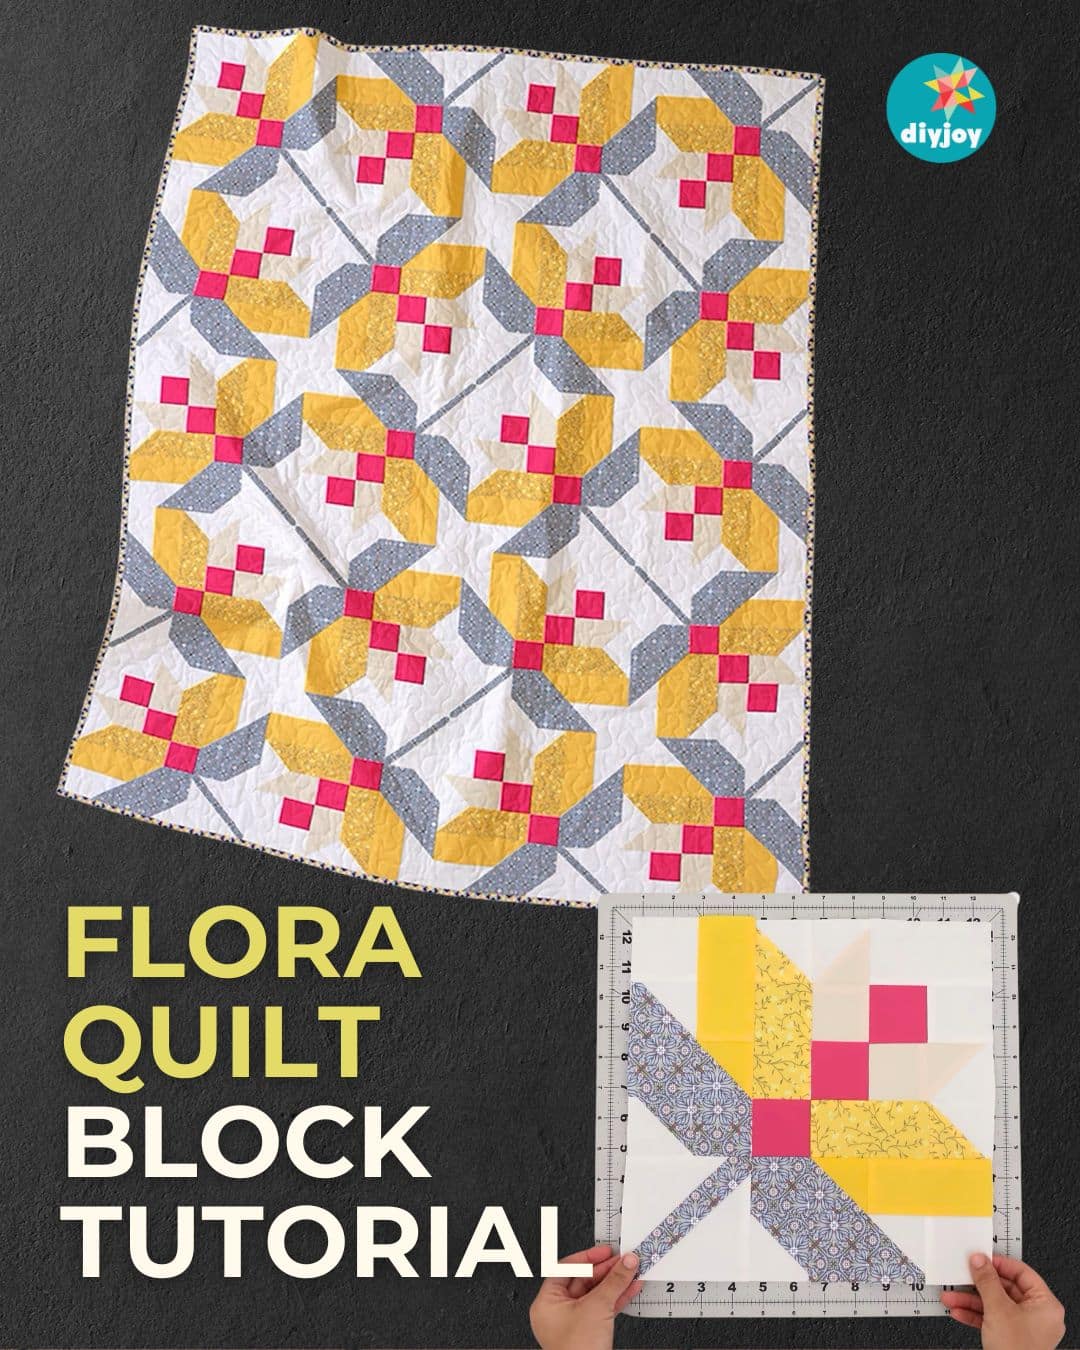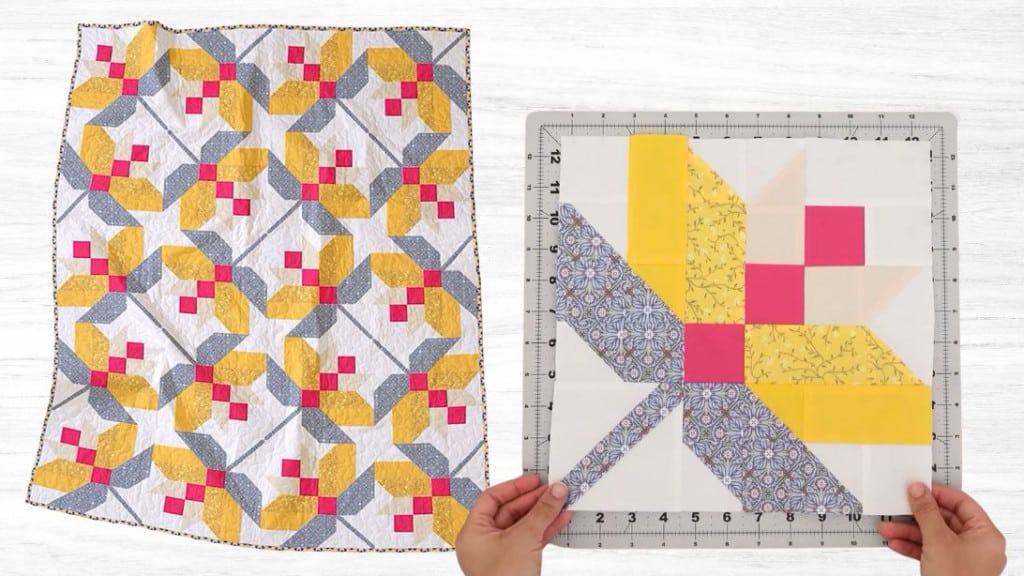
Looking for a quilt pattern that is sure to impress everyone? Look no further than this flora quilt block from Art Gallery Fabrics! This is probably one of the most beautiful blocks I have ever seen. You’ll surely receive a ton of compliments when you make this block. Although it is not that easy compared to the other patterns I have shared, I think it’s definitely worth making.
RELATED: Easy Flower Quilt Block
You will be sewing several half-square triangles for this project. If you’ve already mastered making them, you’ll finish a block easily and quickly. Five different colored fabrics are used for this flora quilt block. I suggest following them if you want to achieve the same look. Watch the video below for the full instructions.
Easy Flora Quilt Block Materials
For fabric A
- 2 pieces 3 7/8” squares
- 4 pieces of 2 7/8” squares
- 1 piece of 2 ½” x 4 ½” rectangle
- 3 pieces of 2 ½” squares
For fabric B
- 3 pieces of 2 ½” squares
- For fabric C
- 1 piece of 2 7/8” square
- 2 pieces of 2 ½” squares
For fabric D
- 1 piece of 2 7/8” squares
- 2 pieces of 2 ½” x 4 ½” rectangle
- For fabric E
- 1 piece of 2 7/8” squares
- 2 pieces of 2 ½” x 4 ½” rectangle
For fabric F
- 3 pieces of 2 7/8” squares
- 4 pieces of 2 ½” squares
- 1 piece of 4 ½” square
How to Make Flora Quilt Block
Step 1:
Take the 2 7/8” squares. Place the 3 pieces of fabric F, 1 piece of fabric D, and 1 piece of fabric C on your working surface. Place 2 fabric A squares on top of two fabric F squares, then place fabric E square on top of the last fabric F square. Place the remaining fabric A squares on top of fabric D and C.
Draw diagonal lines from corner to corner on all sets. Sew ¼” away from both sides of the line. Cut directly on the lines. Press and trim to 2 ½” squares. You should have 10 HST in 4 color combinations.
Step 2:
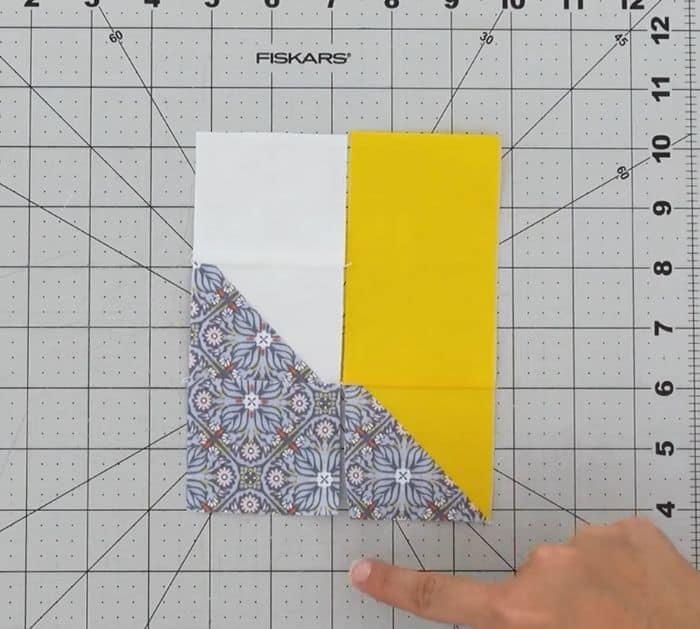
Take a 4 ½” square of fabric F, then place a 3 7/8” square of fabric A on the left corner. Draw a diagonal line from the top right to the bottom left on the smaller square. Sew on the diagonal line. Cut ¼” away from the seam and press. Repeat with a 3 7/8” square of fabric A on the opposite corner.
Step 3:
Get a 2 ½” square of fabric A, a FA HST, and join a 2 ½” square of fabric F. Sew them together.
Step 4:
Take a 2 ½” x 4 ½” rectangle of fabric E and join a FE HST. Join the previous strip to the left side.
Step 5:
Take a DA HST and join a 2 ½” x 4 ½” rectangle of fabric D.
Step 6:
Sew together CA HST, a 2 ½” square of fabric C, and a 2 ½” square of fabric B.
Step 7:
Take a 2 ½” square of fabric B and a 2 ½” square of fabric A. Place a 2 ½” square of fabric C and a CA HST on the bottom of the two pieces. Sew like a four patch. Join a 2 ½” x 4 ½” rectangle of fabric A at the top.
Step 8:
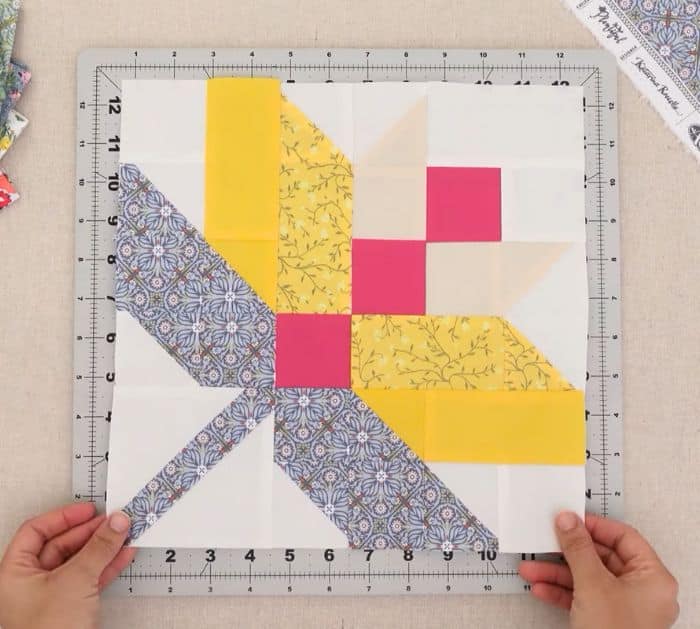
Arrange the pieces just like in the photo below.
Flora Quilt Block Video Tutorial