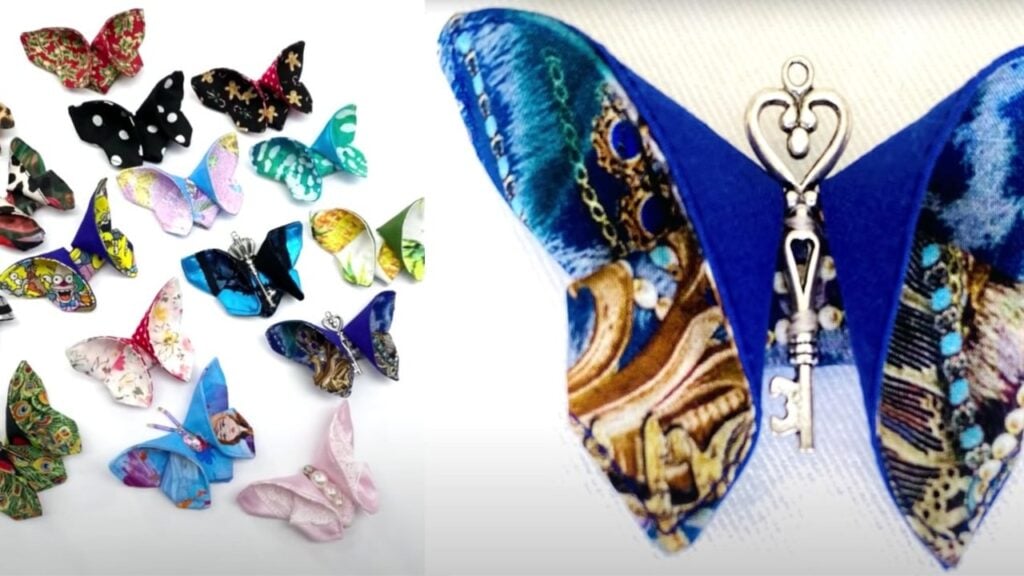
For crafters, we all have a stack of unused scrap fabric. Notches Sewing on YouTube shares this one-of-a-kind sewing project that transforms them into beautiful flowers that can be used to decorate anything; on clothes, curtains, or as accessories.
Materials/tools:
- Scrap Fabric
- Large cutting mat
- Rotating cutting mat
- 5″ x 5″ template
- Silicone template grips
- Rotary Cutter
- Scissors
- Pins
- Magnetic bowl
- Thread snippers
- Steampunk
- Ironing board
- Cloth iron
Directions:
Prepare all the needed materials and tools.
Lay your scrap fabric on the cutting mat and cut it into 5″ x 3.5″ or 13 cm x 9 cm. Make as much fabric as you want. If you want your butterflies to be enormous, make them in any size, but just make sure that the width measurement is about 70% of the length.
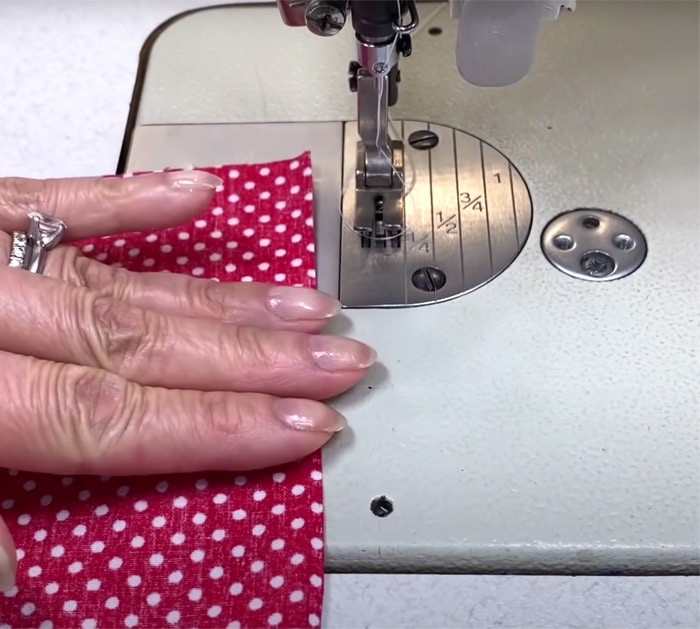
On the sewing machine, lay two cut strip fabrics right sides together with the shorter ends facing you. Mark a 2-inch opening on both ends. Starting from the seam allowance, start by backtacking at the first bottom mark. Stitch until you’re 1/4 inches from the first edge, then lift your foot and pivot with the needle down. Continue stitching all around the edges. Trim the excess threads.
Using scissors, trim all the corners diagonally. Make sure not to cut too close to the stitching. Then, turn the fabric right side out by pushing all the fabric through the 20-inch opening. Use a needle to slide the points of the fabric seam together.
On the ironing board, make sure the edges of the opening and the sides are straight before pressing with the iron.
Back to the sewing machine, start by backtacking to secure and edge stitching around, starting from the center of the opening. Trim out all the excess threads.
Pull up 1.2 meters of thread and fold it in half. Push the fold through the eye of a needle and pull the strands until they are even. Cut the thread and tie a knot. You should end up with about a 12-inch strand to work with.
Lay your fabric back on the cutting mat and flip your fabric over the wrong side. Fold the fabric to match the short edges and finger press the bottom fold. Fold the right edges to match the left and press the centerfold. Hold on to the top left corner flap and lift the top layer until you have a triangle at the bottom. Carefully flip the fabric and open the fabric again while holding onto the corner on the bottom. Adjust your fabric symmetrically for the wings.
Hold everything in place with your left hand, and then, with your right index finger, use it to push the center fabric down a bit and fold it over the front.
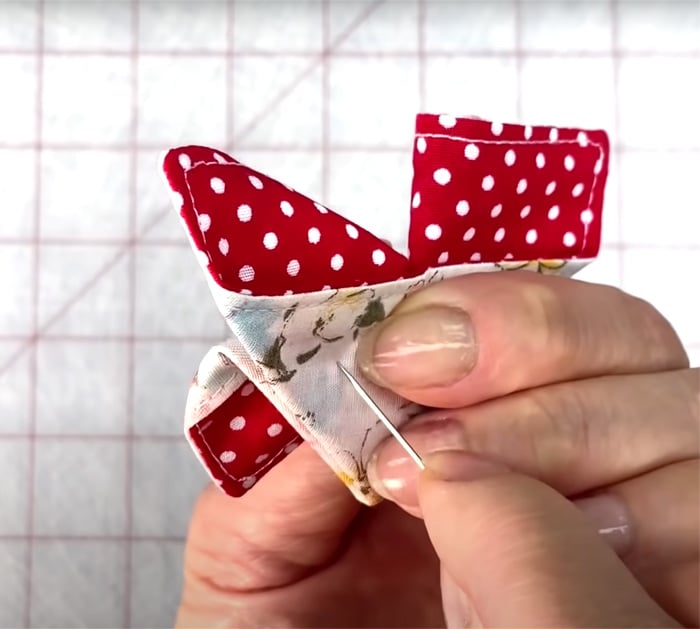
Securely turn it around and grab a needle and thread to sew in from the center corner through four of the layers. Push your needle back beside the thread that you pulled out. Repeat the process twice and secure it to close. Cut the excess thread.
Repeat the wing process with the other side, while leaving a space in the center. Leave it as is or fold back the center point and stitch it in place.
How to Make Fabric Butterflies