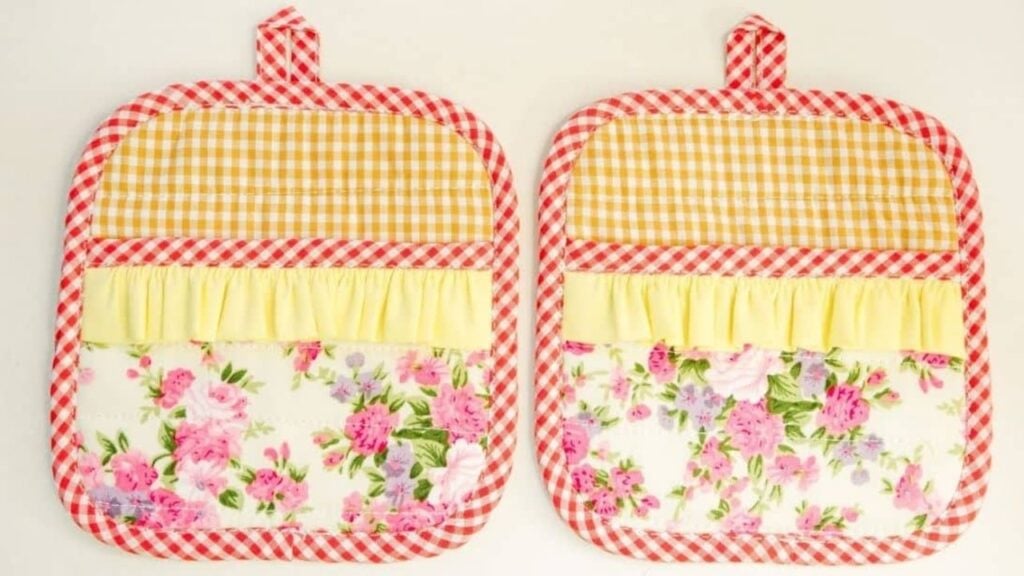
These cute pot-holders by Thuy craft on YouTube are so easy to make and use only a few fabrics. It’s very rare to see such detailed sewing projects with straightforward and simple instructions. That’s what I love about Thuy Craft, all of her sewing projects look so adorable and yet so easy to follow, even beginners in sewing can perfect the project on the first try.
Materials:
- 5 x 5.5 inches(13cm wide x 14cm tall) Paper for template
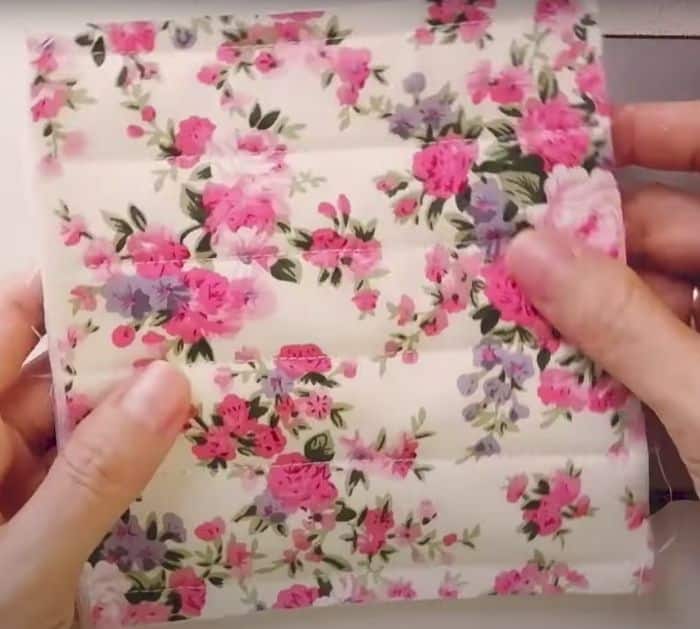
- Main fabric, will appear at the lower front
- Lining fabric, will appear at the upper and inner part
- Yellow fabric strip, fo ruffles in the middle
- 1 x 1.5 inches (3.5-4cm) Bias tape
- Cotton pads
Directions:
Step 1
Using the paper template, cut the main fabric, lining fabric, and cotton pad according to the paper’s size, then set them aside. Now fold the upper part of the paper by about 2 inches (5cm), use this size to cut another set of main fabric, lining fabric, and cotton pad of the same size, then set them aside. Cut the yellow fabric in 2.3 x 10.2 inches (6 x 26 cm), and set it aside.
[social_warfare]
Assemble the 5 x 5.5 inches (13cm x 14cm) set of fabrics with the lining at the bottom, cotton pads in the middle, and the main fabric at the top. Sew both of the shorter sides by a ¼ inch seam allowance, followed by a 1-inch seam allowance from each stitch keep doing this until you’ve reached the center. Do the same process for the smaller set of fabrics, then set them all aside.
Step 2
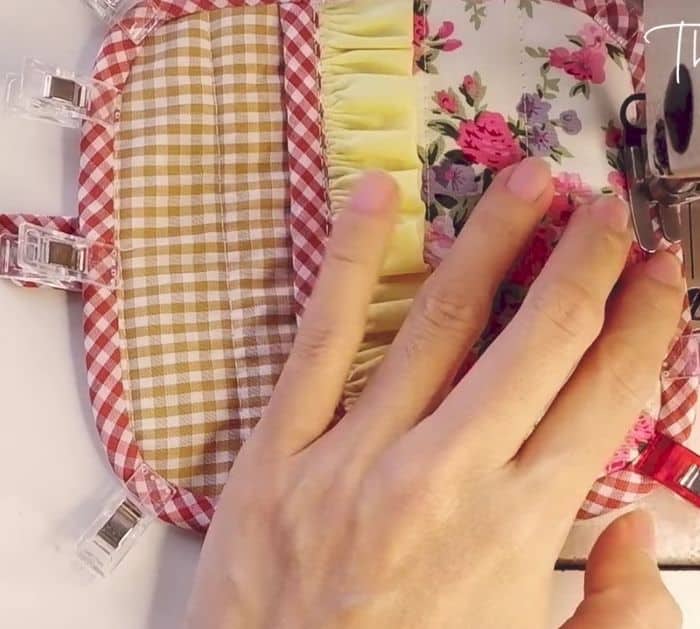
Get the yellow fabric strip, then sew the sides with a 1/8 seam allowance, followed by a ¼ seam allowance, pull the threads stretch from both sides to scrunch the fabric and create ruffles, adjust and sew it on the ¼ seam and upper part of the smaller fabric set, sew along with the same stitch, then pull the old threads completely out of the fabric. Place a bias tape on top of the ruffled fabric and make sure that the ends match, then sew with a ¼ seam allowance. Fold the flap of the bias tape over backward, fold and tuck so it’s the same size as the front, then sew, and trim the excess.
Step 3
Take the large fabric set, flip backward so that the lining fabric is facing up, lay the smaller piece on top of it, and make sure that the ends on the lower sides are matching. Sew along both sides and the bottom with a ¼ seam allowance, leaving the top unsewn for a pocket. Trace even curves on all corners and cut them out, then fold it in half to find the midpoint, at that mark, sew a looped bias tape about ¼ thick, this is for the potholder to hang. Place the bias tape around the potholder with their edges matching, then sew around the potholder with a ¼ seam allowance. Flip the bias tape over backward, tuck in so that it’s the same size as the front, pin in place, then sew around.
*All these images are credited to Thuy craft via YouTube. Give her channel a visit and subscribe for more!
Easy DIY Pot-Holder Sewing Tutorial


