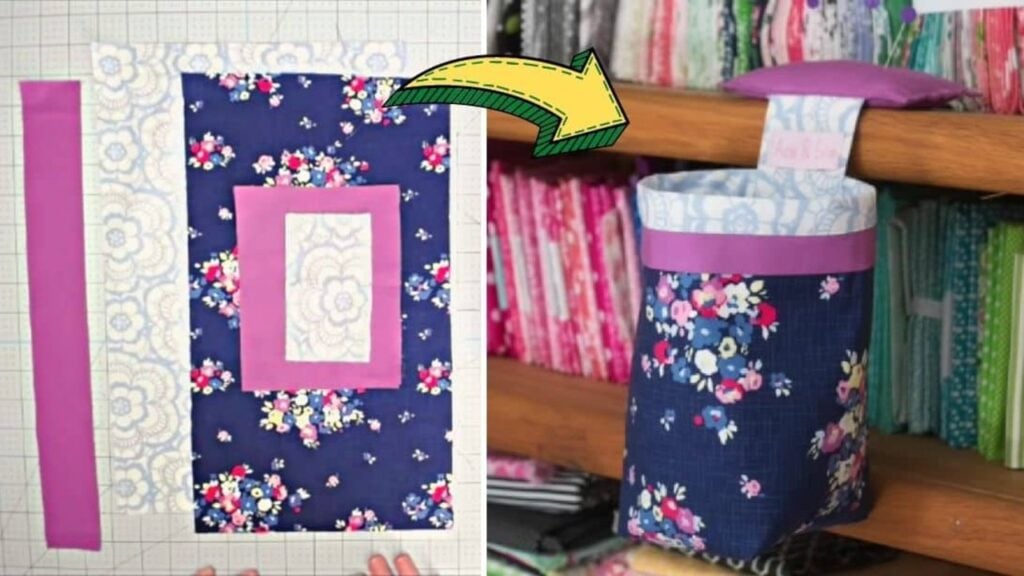
This multipurpose sewing project by Lorrie Nunemaker on YouTube will teach you how to make a pincushion and thread catcher using some scrap fabrics. You can use this as a small bin for your cut-out papers, threads, and fabrics, this way you will lessen the time you have to spend on cleaning all of those materials on the floor.
Materials:
- 9*16″ outer fabric
- 11*16″ lining fabric
- 5.5*7″ lining fabric
- 5*3″ accent and cushion
- 2*16″ accent and cushion
- Iron
- 1/2 inch nylon boning
Directions:
Step 1
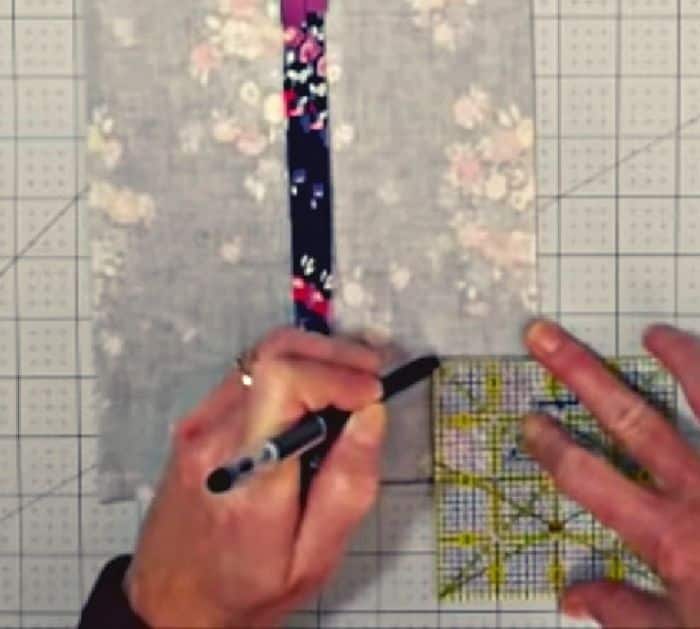
First off, make sure that all pieces are ironed, then take the hinge piece and fold it in half. Sew up one side and down the other, leaving the other short side open, cut off the corner and turn it over, press it again, you can add a label to your hinge at this point if you want. Place the hinge right at the center of the shorter side of your cushion fabric, pin it into place, then fold the bottom up and clip it in place. Sew up and across leaving one side open, snip off the corner and turn it over, press it nicely. Tuck the ends of the cushion fabric under and press, then topstitch but leave a little hole at the top corner for the nylon boning, set aside. Fold the trim piece by half lengthwise and press. Take the shorter piece of 2 rectangles and line the trim piece on one of the long edges with their raw edges matching. Clip them into place, then sew them with a ¼ seam allowance.
[social_warfare]
Step 2
Lay it on the other rectangle fabric with their right sides facing together and the top edges matching, sew right on top of the same stitch, then spread it open and flip it over. Fold the trim piece over the outer fabric and press nicely. Fold them in half across and find the center point making sure that the seams are matching, clip them in place. Sew from the bottom to the edge of the outer fabric, skip an inch, then continue sewing until all the way to the edge, open it up so the seams line up to the center, press the seam open. Sew the side of the outer fabric, then on the lining side leave 2-3 inches, measure 1¾ across and 2 inches tall from the corner of the outer fabric and draw a box at the bottom, cut it out.
Step 3
Use the cut-out piece as a template to do the other 3 corners. Spread one boxed corner open and fold it flat, then sew ¼ across the bottom, repeat on all other sides. Turn it right side out through the opening, stitch the opening close, then tuck all the lining inside the outer with bottoms lined up. Press the upper seam well, then sew right along the edge of the lining fabric. Insert the nylon boning through the little opening of the lining fabric seam, cut off the excess and tuck the little overlap inside. Center the hinge on top of the basket seam and sew it. Using a funnel, fill the pincushion slowly with some crushed walnuts or similar, sew the gap close.

*All these images are credited to Lorrie Nunemaker via YouTube. Give her channel a visit and subscribe for more!
Easy Pincushion Thread Catcher Sewing Tutorial


