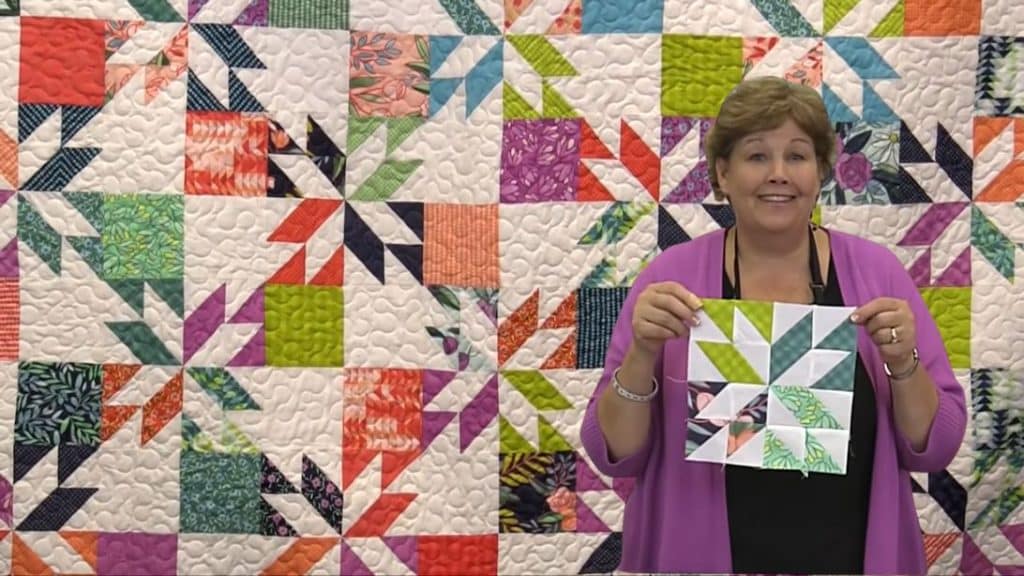
Isn’t this design impressive? It sure is an eye-catching piece. When you look at this pattern, you might think it’s challenging to make, but it’s actually not. With the help of this tutorial by Missouri Star, you will learn how to sew this easy hunter’s star quilt. Believe it or not, these are made of half-square triangles. You just need to arrange them carefully to create the blocks and make them look like this. Read on or watch the video below for full instructions.
Materials:
- 1 pack of 10″ print squares (42 pieces)
- 1 pack of 10″ solid squares (42 pieces)
- 3/4 yards of the inner border
- 1 and 3/4 yards of the outer border
- 3/4 yards of binding
Size: 80″ x 10″ quilt
[social_warfare buttons=”facebook,pinterest,twitter,whatsapp”]
Instructions:
Step 1:
Get one print square and cut it in half horizontally and vertically to make 4 small squares. Repeat with all the remaining squares.
Step 2:
Take 2 solid 5″ squares and 2 printed squares. Arrange them in a block with the print and solid alternating. Sew them with a quarter of an inch seam allowance to make a 4-patch. Flip and press the seams. You need 28 pieces of this block.
Step 3:
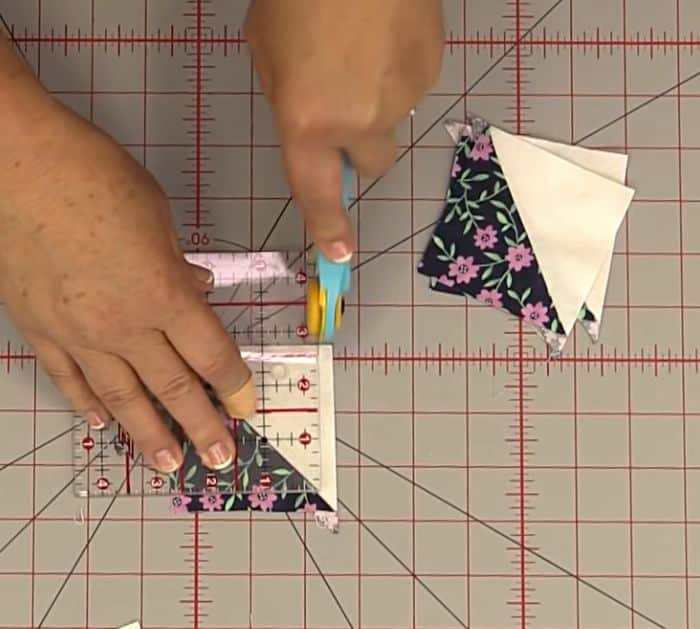
Get one print and one solid square. Place them on top of each other, right sides together. Sew all the way around with a quarter of an inch, then cut diagonally in both directions. Trim the half-square triangles into 2 3/4″ squares.

Step 4:
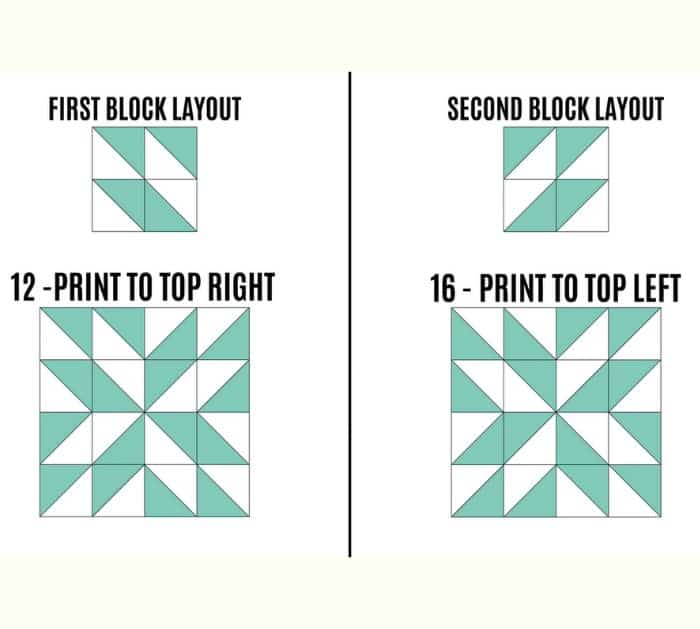
Arrange the blocks as shown below and sew them together. There will be 2 stars. For the first star, you need 12 and for the second, you need 16.

Step 5:
Arrange the stars and four patches. The four patches will always be on your left for the first row. Alternate it on the second row. Repeat the first two rows until you have seven across by eight down, for a total of 56 blocks.
Step 6:
Sew border, bind, quilt, and enjoy!


