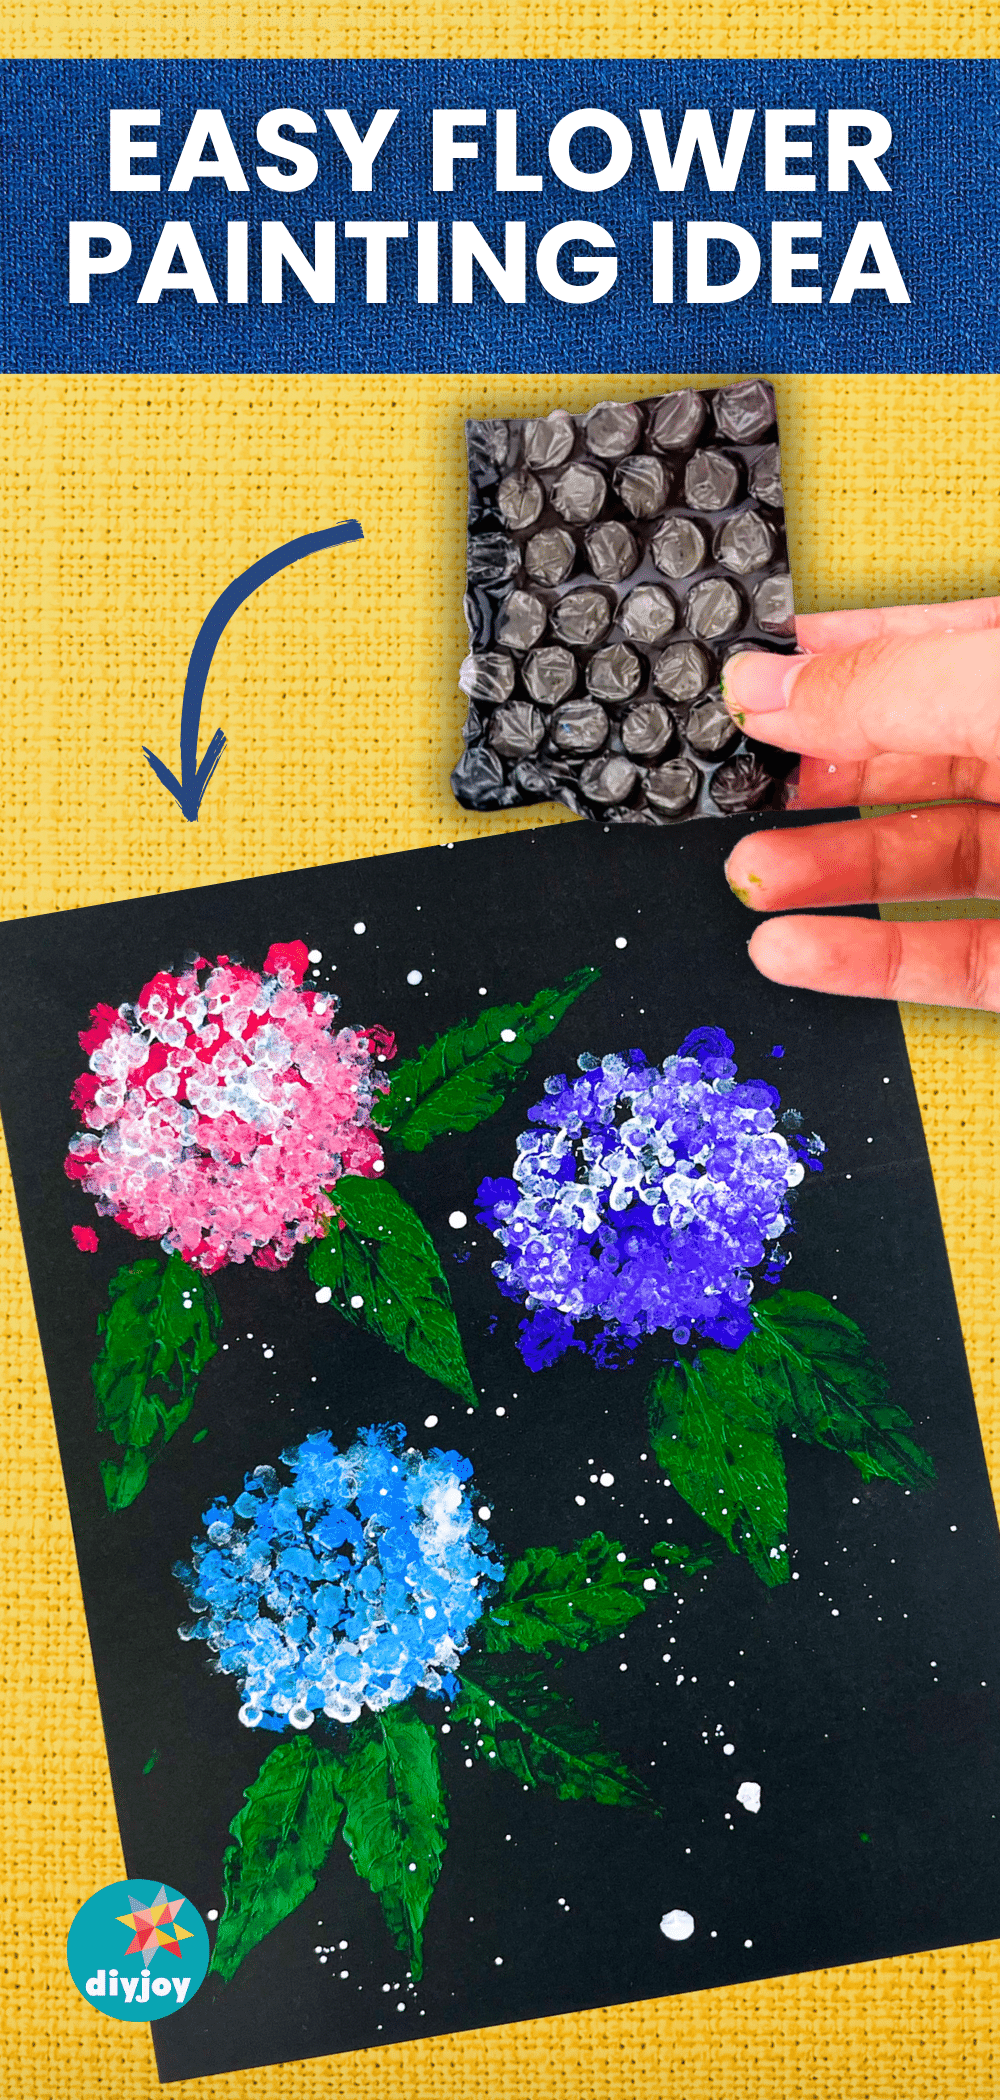
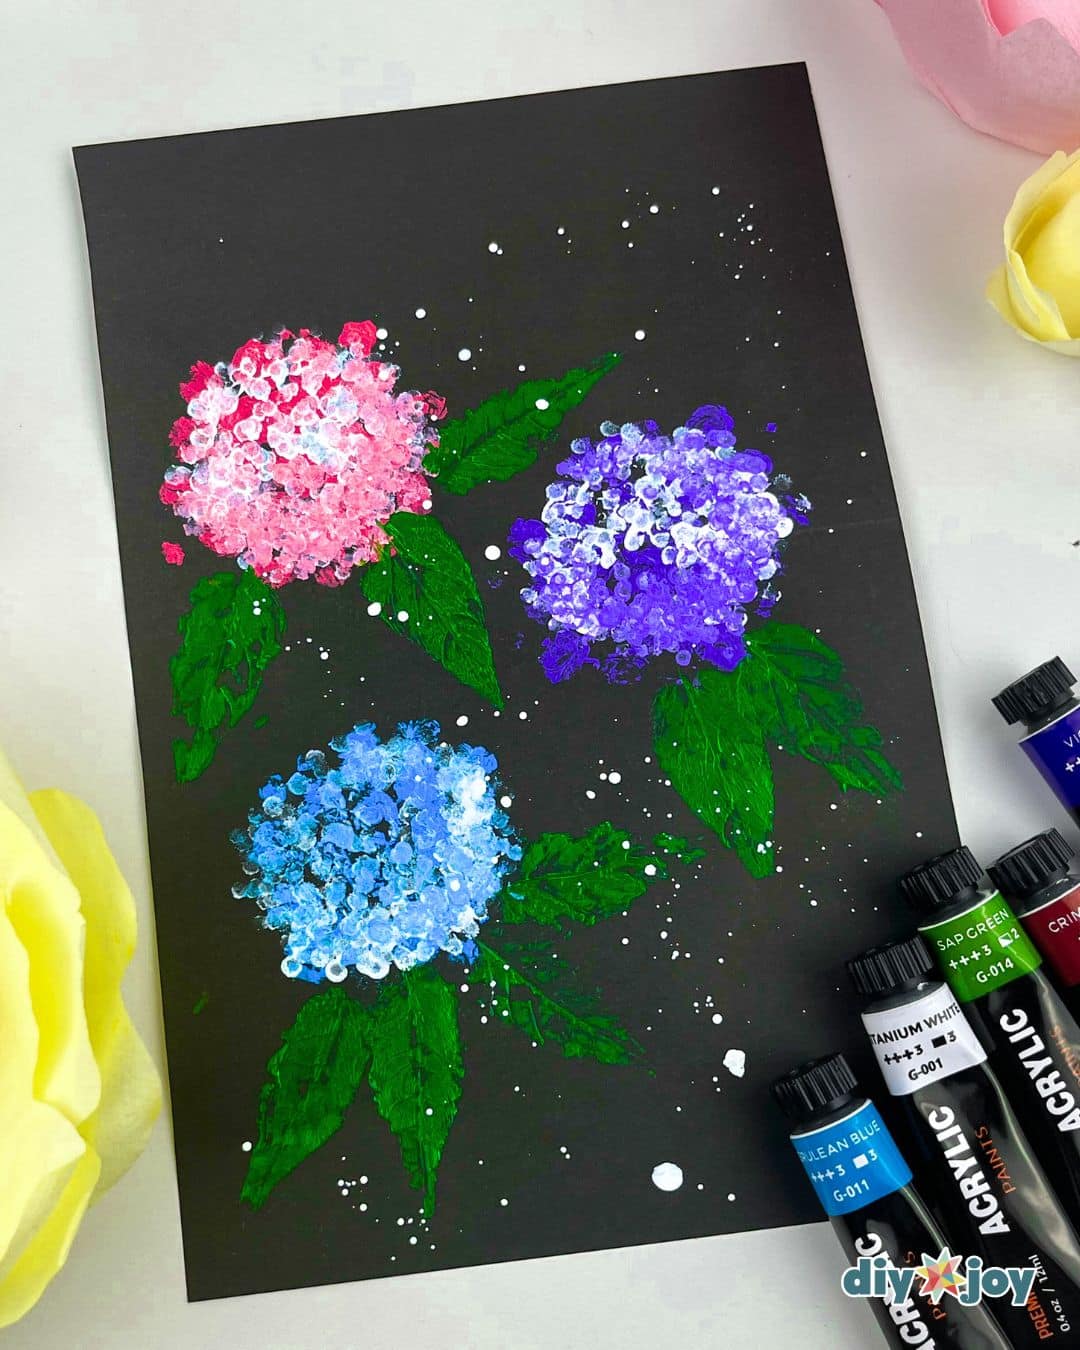
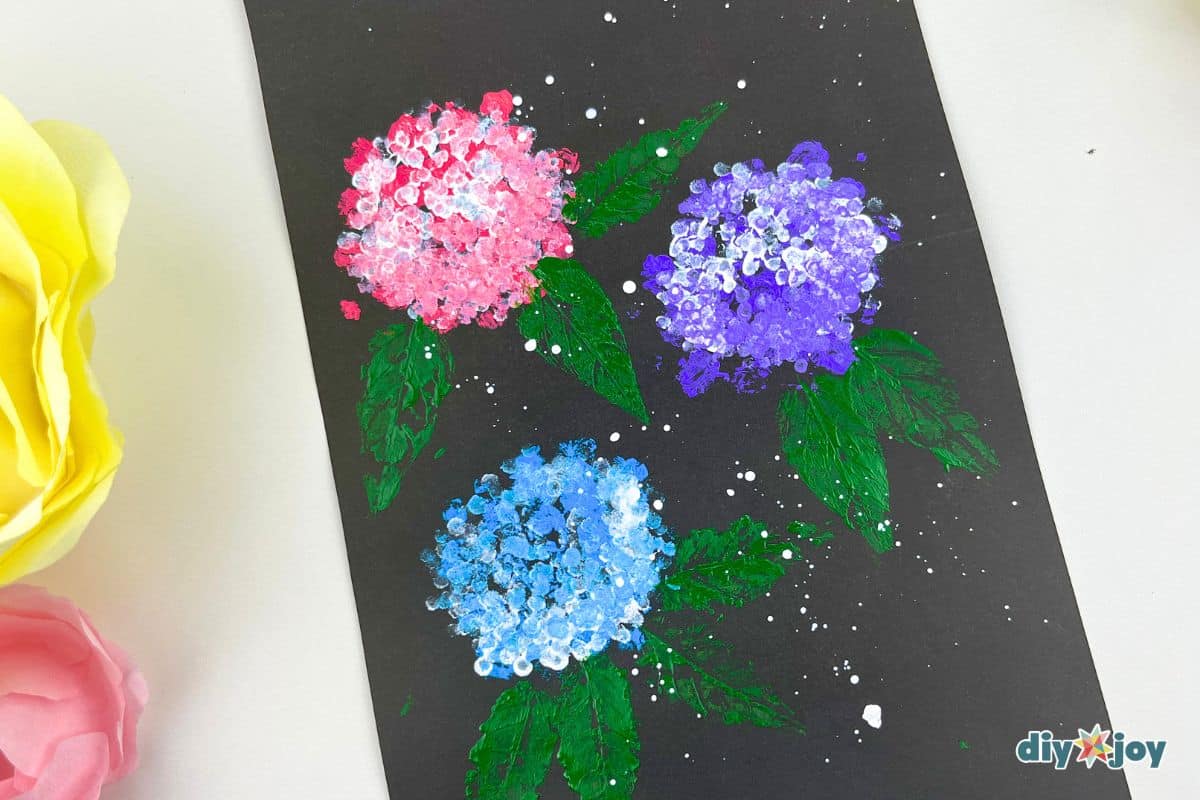
Put those bubble wrap that arrive with nearly every package into use! Although popping them is undeniably fun, there’s a far more creative way to put them to use. Imagine vibrant, textured hydrangea flowers on canvas. Yes, you heard that right! We are talking about bubble wrap flower painting, a painting method that’s not only easy but also makes gorgeous, professional-looking results. This easy flower painting idea will surely surprise you – the perfect spring craft idea for all ages.
RELATED: Round Crepe Paper Flowers
This isn’t your typical painting tutorial. Forget about needing years of art experience as you don’t need them to make this easy flower painting. Bubble wrap painting is so forgiving and accessible that even if you’ve never touched a paintbrush before, you’ll be amazed at the beautiful artwork you can create.
It is the perfect art project for beginners, kids, or anyone looking for a fun and stress-free way to express their creativity. Ready to start? Let me show you how to paint flowers using bubble wrap and cotton swabs in the step-by-step instructions below.
Why Bubble Wrap?
If you are tired of the same old painting techniques, you have to try bubble wrap painting. Bubble wrap isn’t just for popping! It’s a great tool for creating unique, textured hydrangea petals.
Think about it: the bumpy texture of bubble wrap creates interesting patterns when painted and pressed onto paper. And the same applies to cotton swabs. This means you don’t have to worry about intricate brushstrokes. Both techniques adds depth and dimension to your artwork, making the flowers truly stand out.
I will guide you through each step, and by the end of this flower painting tutorial, you’ll not only have a beautiful piece of art to display proudly in your home but also a newfound appreciation for the creative potential hidden in everyday materials.
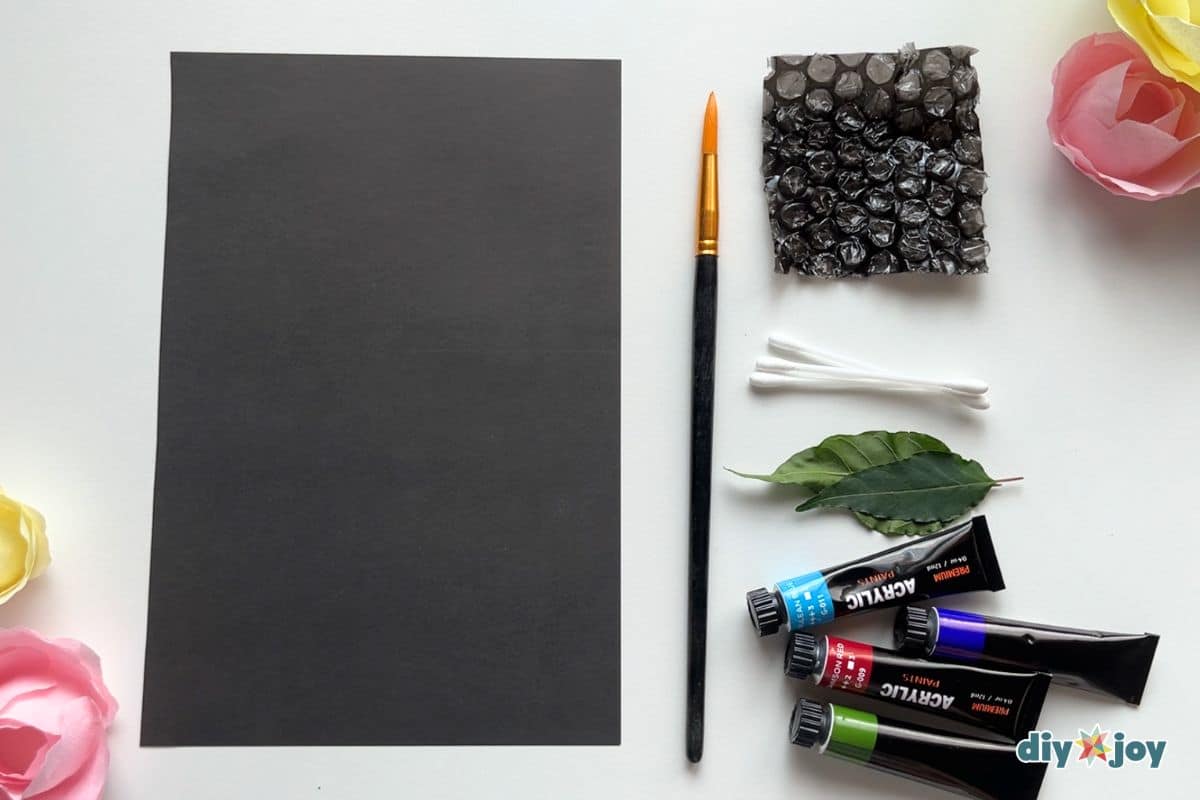
Materials You’ll Need to Get Started
- black canvas or black colored paper
- acrylic paints (blue, green, violet, pink, and white)
- bubble wrap
- flat, round object
- paintbrushes
- cotton swabs
- paper plates or palette
- leaves
- water
Step-by-Step Guide to Bubble Wrap Flower Painting
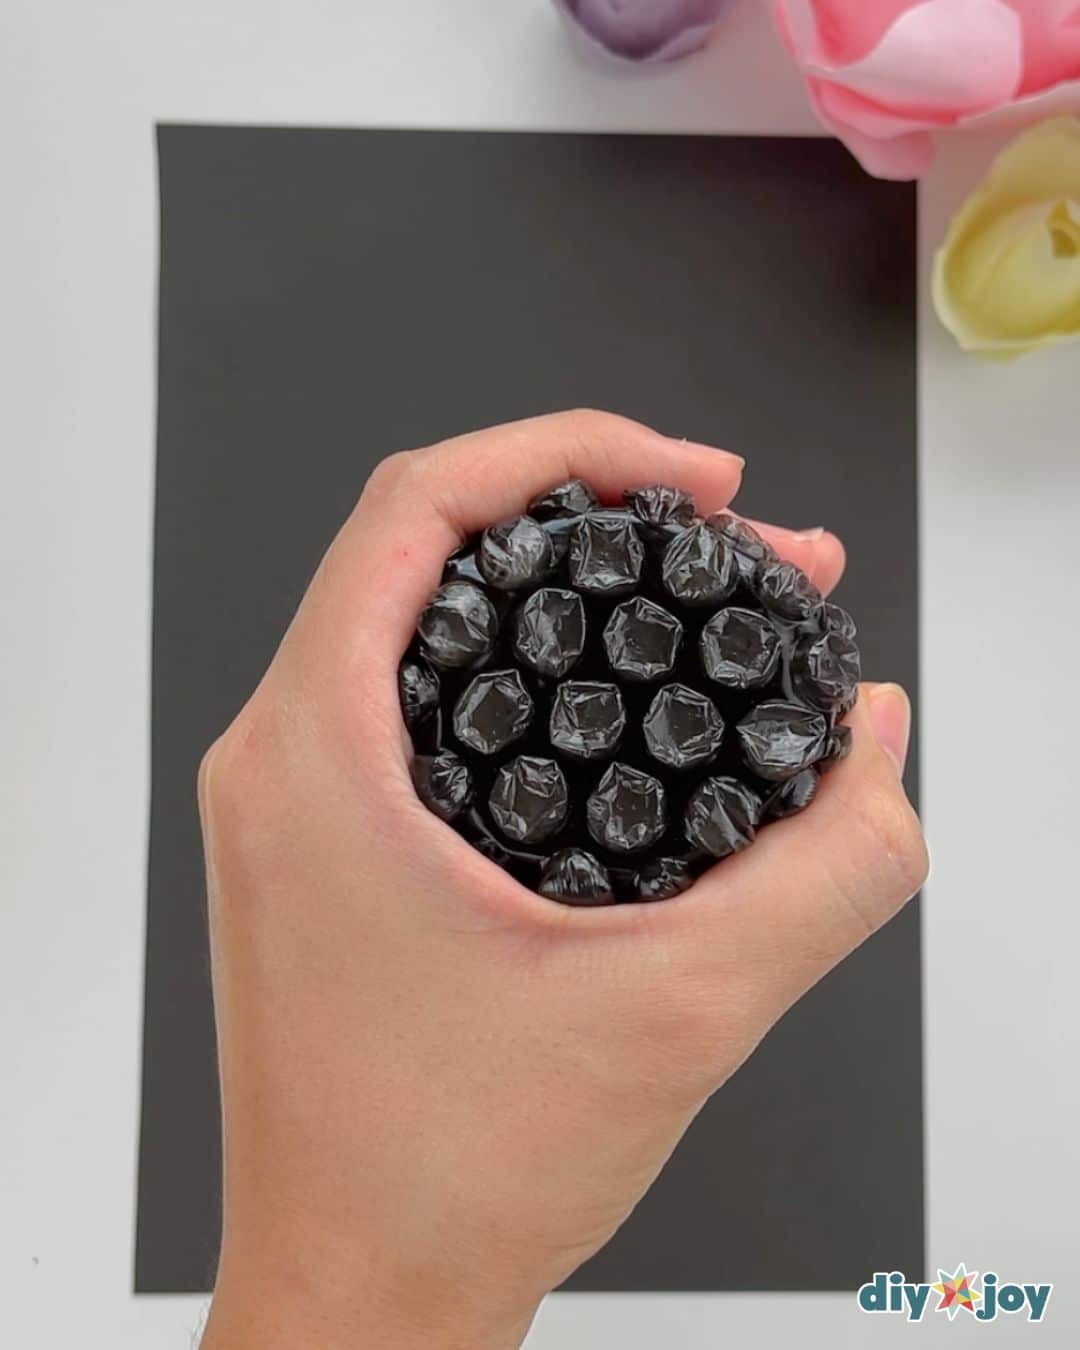
Step 1: Prepare the bubble wrap
Find a flat, circular object that matches the size you envision for your flowers. Next, cut a piece of bubble wrap that is big enough to wrap the object.
Step 2: Prepare paint
Add paint to paper plates or palette. If you want pastel colors, start with a small amount of color, then add white paint in small increments, mixing between each addition, until you get the desired pastel shade.
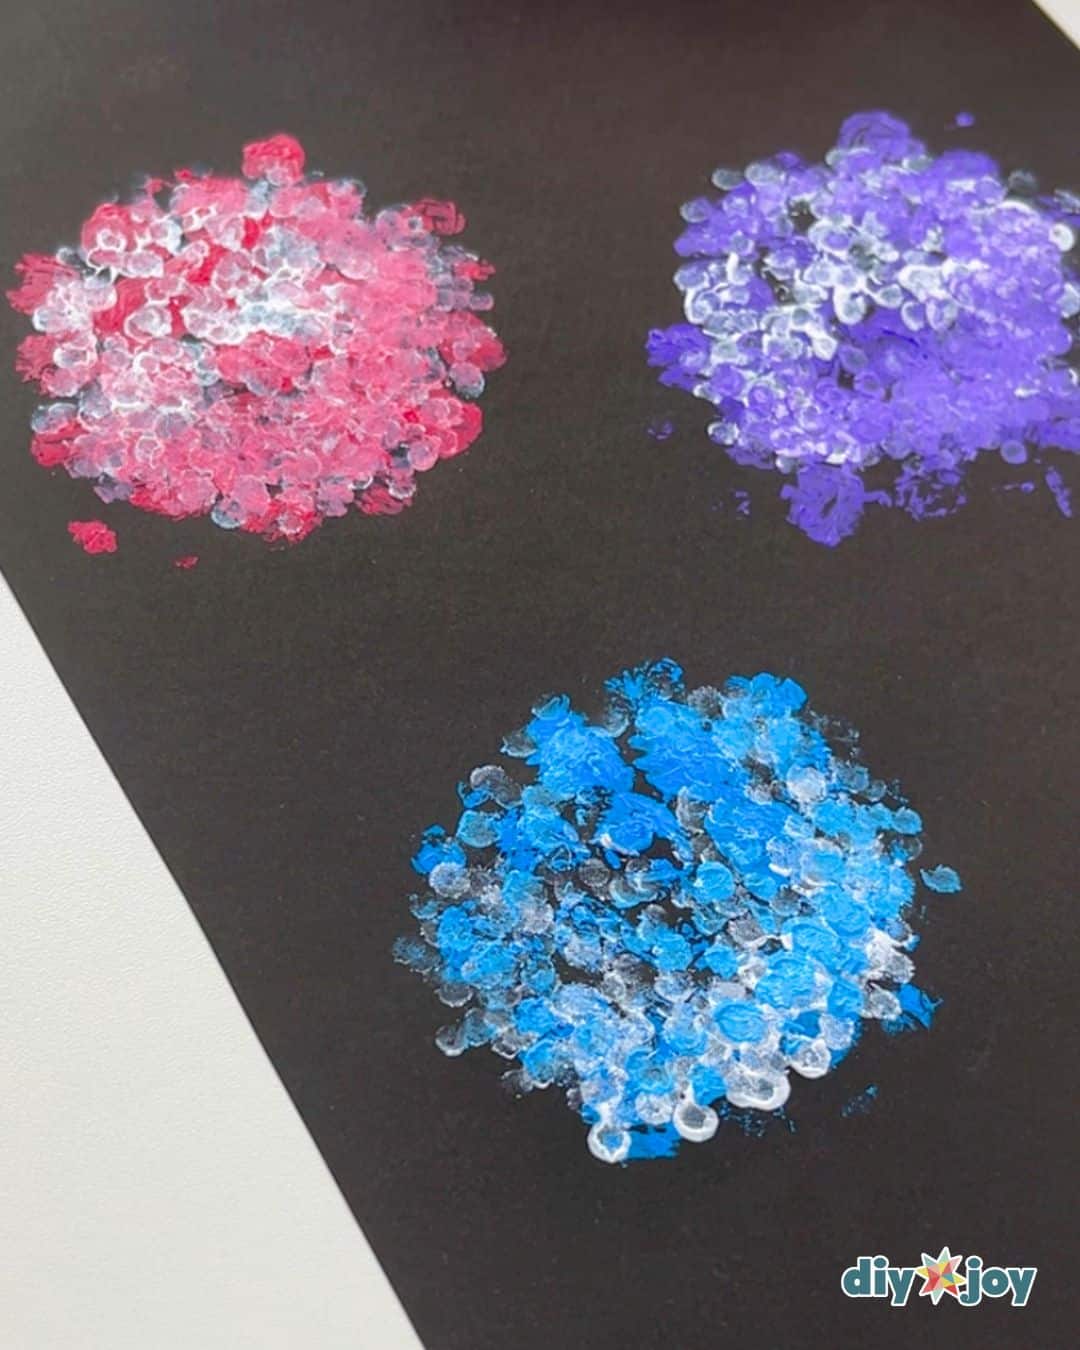
Step 3: Bubble wrap magic
Paint the air pockets with your desired color using your paintbrush. If the consistency is too thick, use a little bit of water to thin it out.
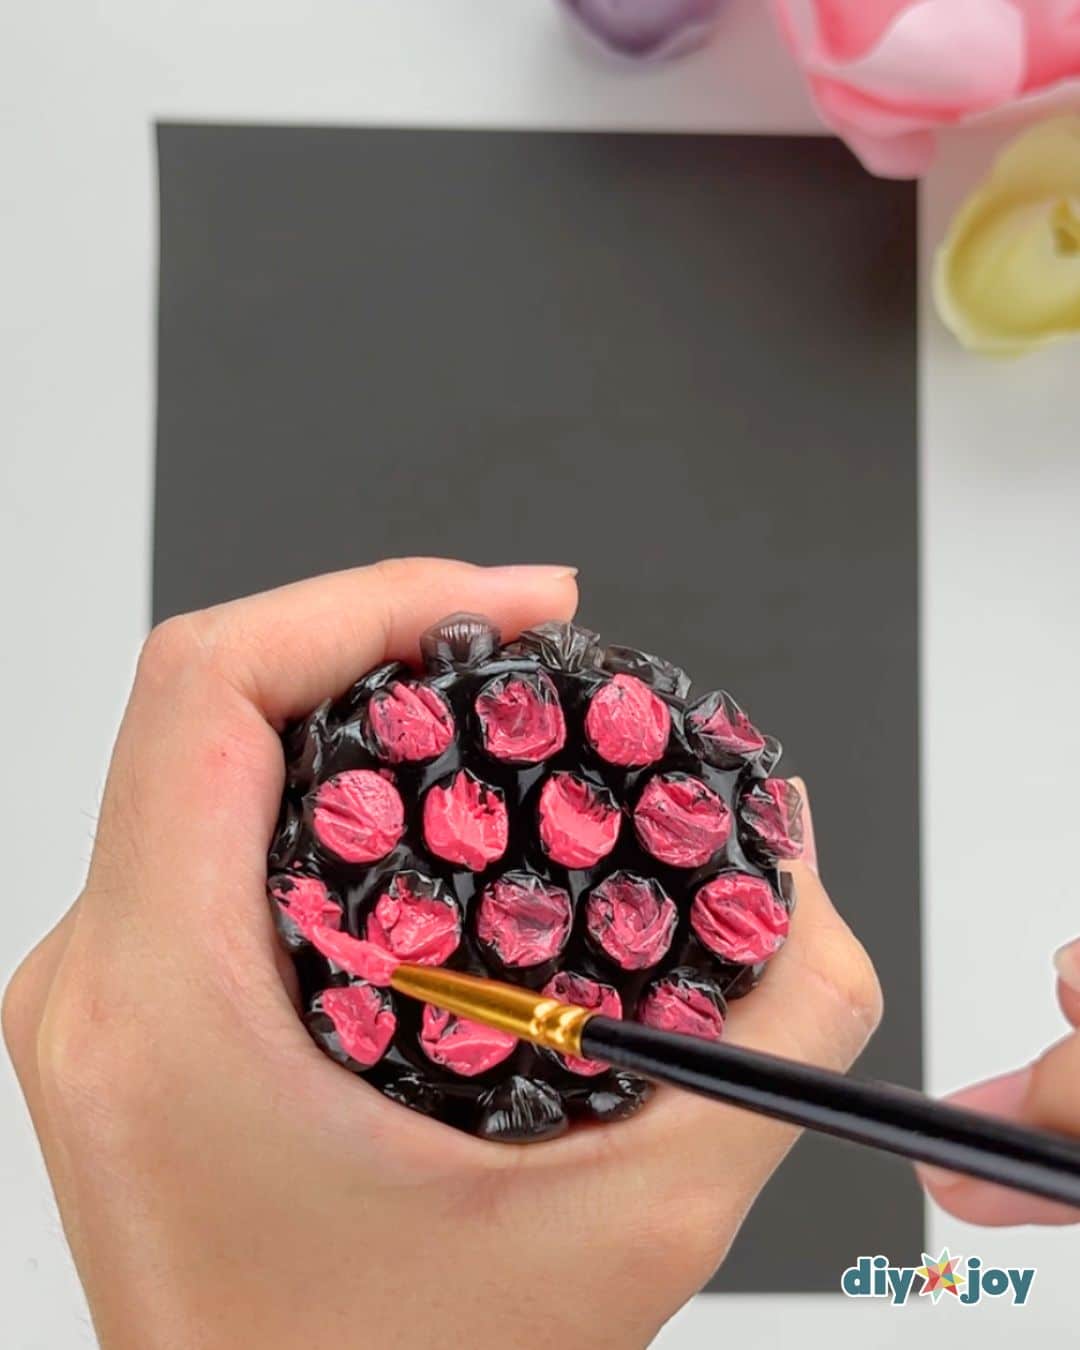
Once done, immediately press on the black colored paper.
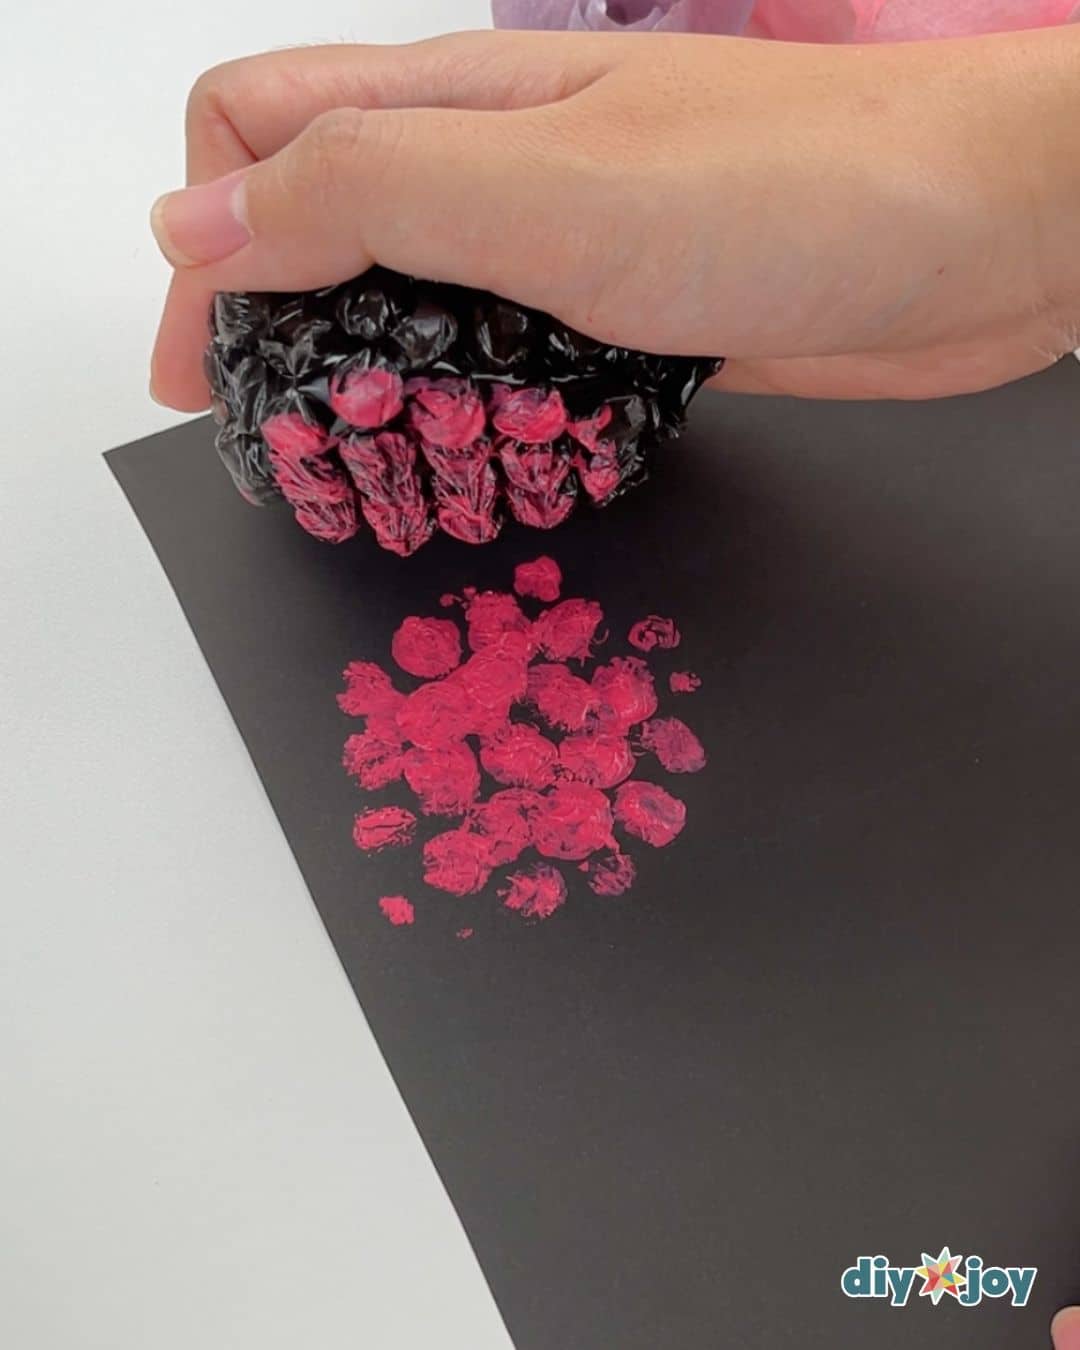
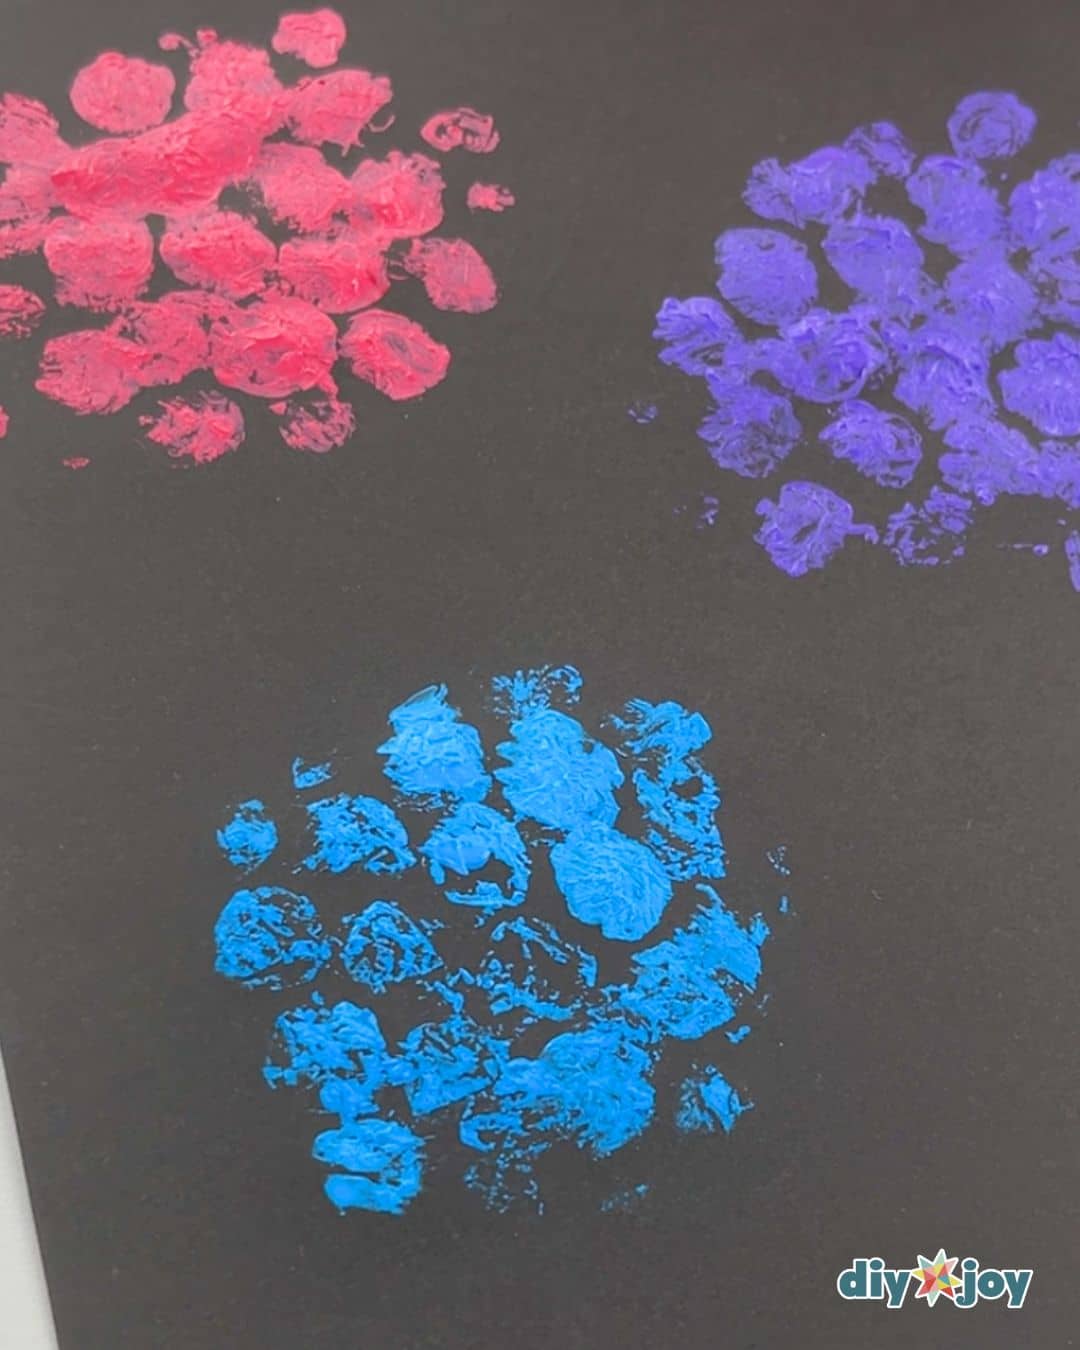
Repeat the same process for the other colors. Make sure to space them out and leave some space for the leaves.
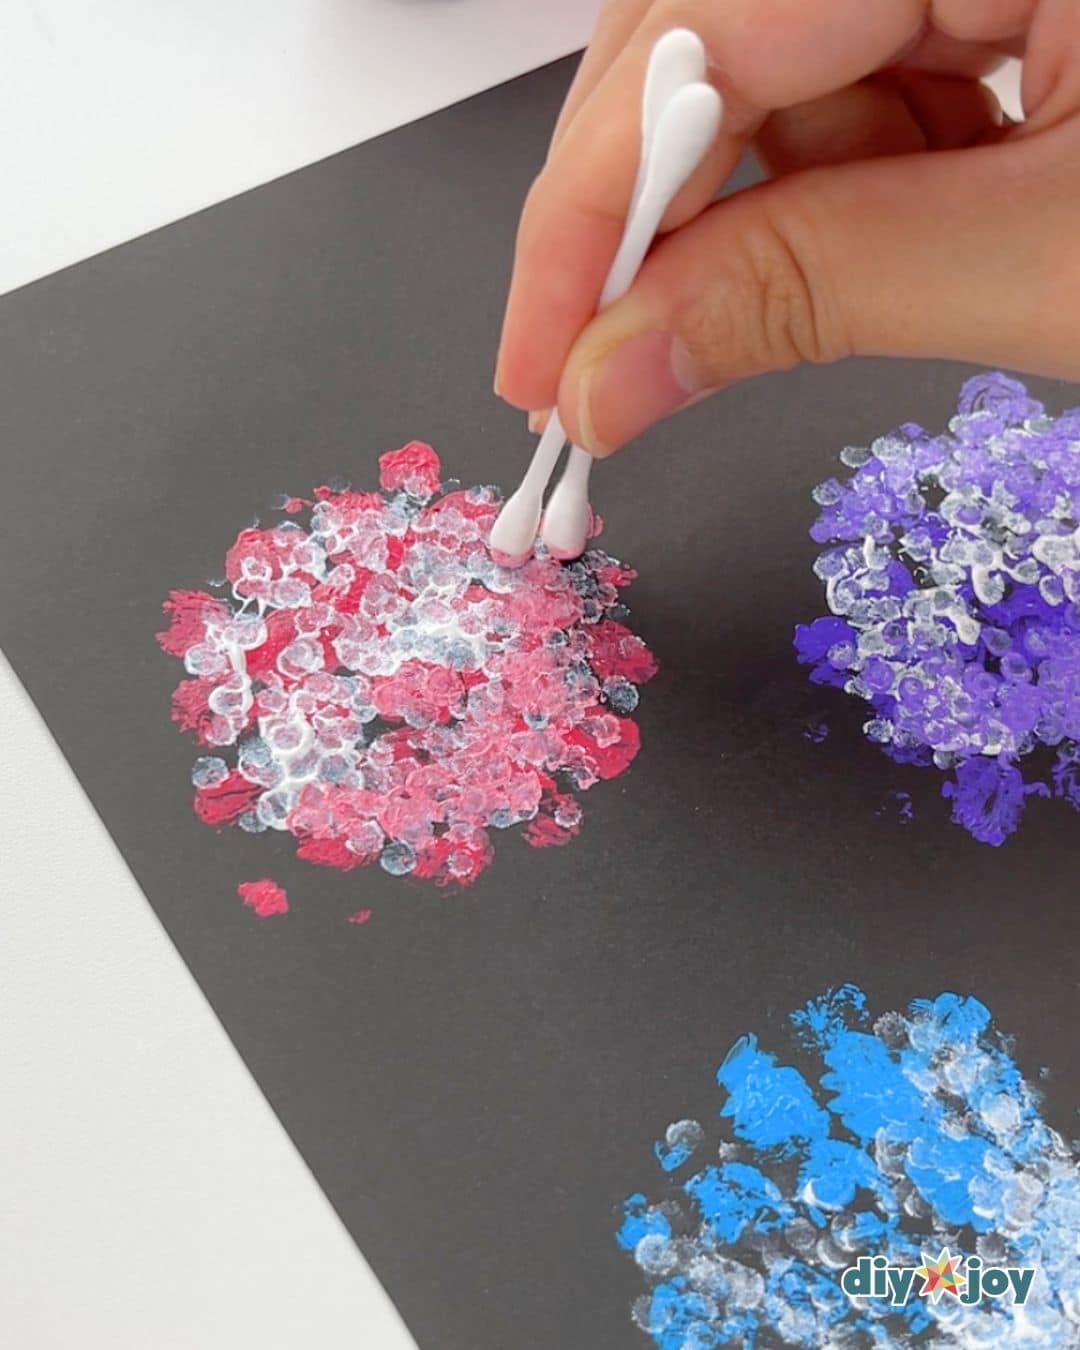
Step 4: Add details using cotton swabs
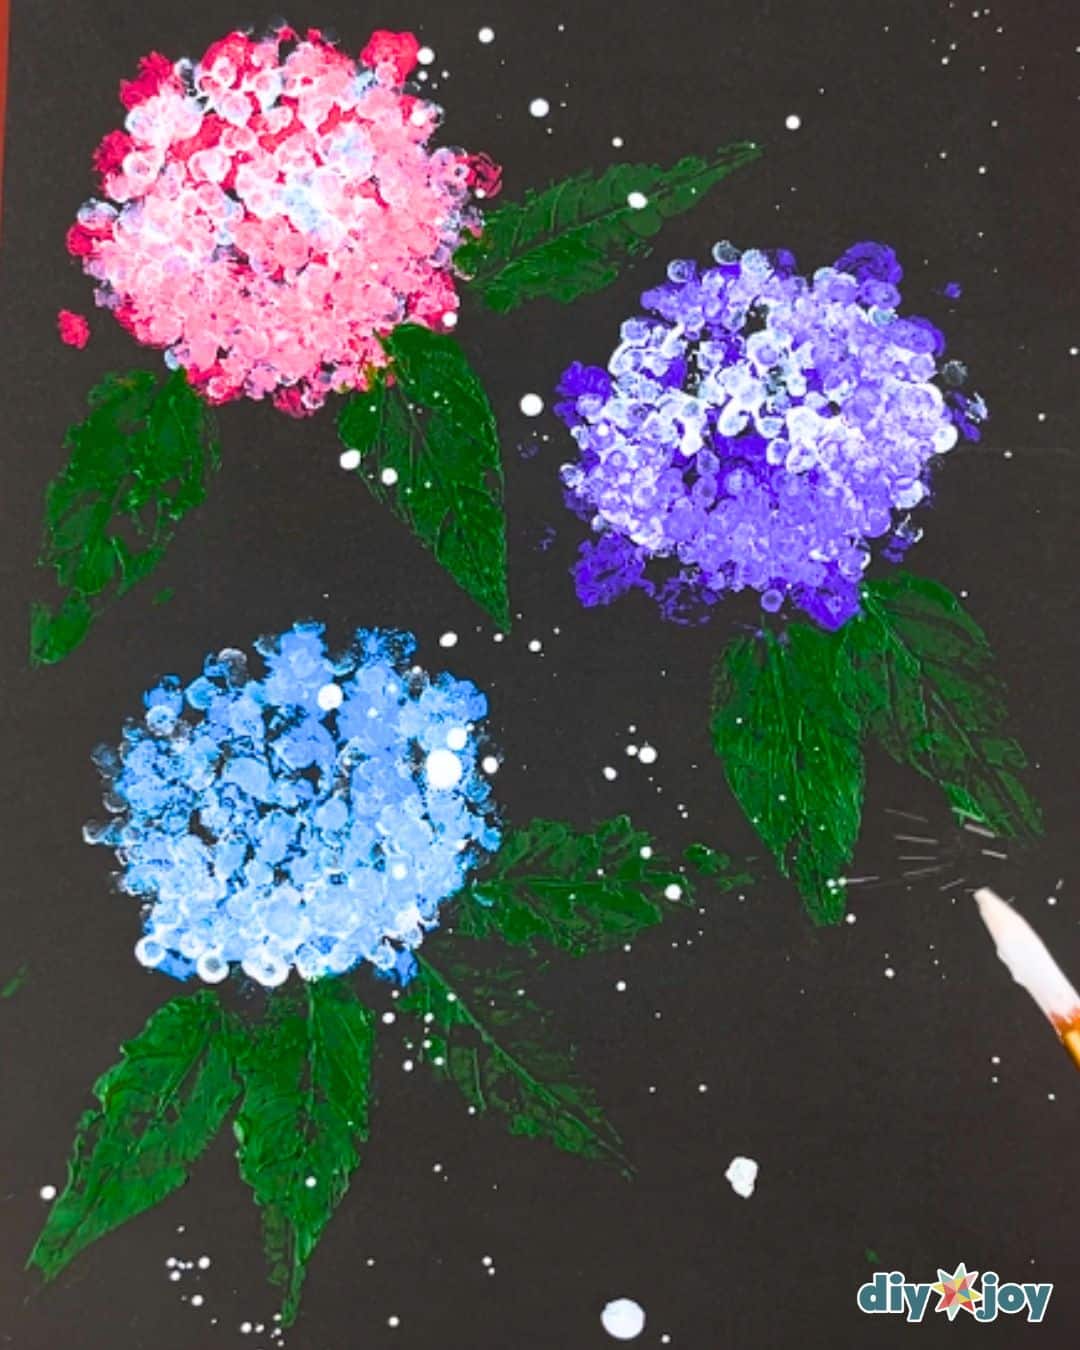
Dip the tips of three cotton swabs into white acrylic paint, then dab them to make dots. See the photo below for reference.
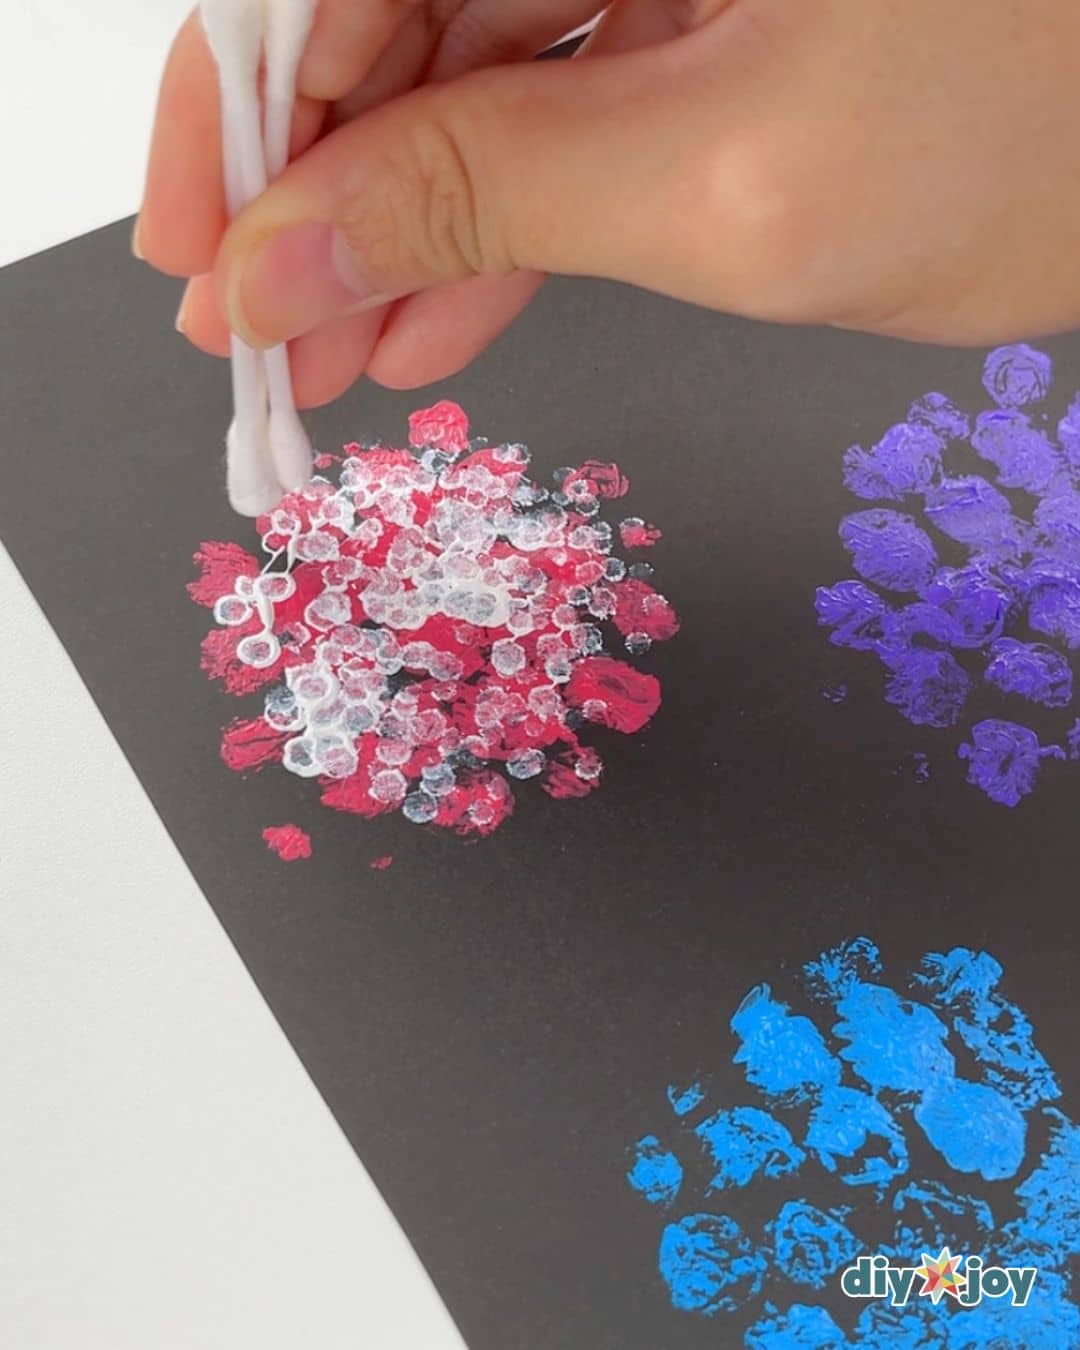
To add depth, create a lighter shade of the flower color by mixing it with white paint. Then, dip the swab tips, and make dots on some of the petals.
Step 5: Paint the leaves
Paint the back of the leaf with green paint, then carefully position it, right side up, at the bottom of the flower, making sure that the tips are pointing away from the flower. Gently press, then remove.
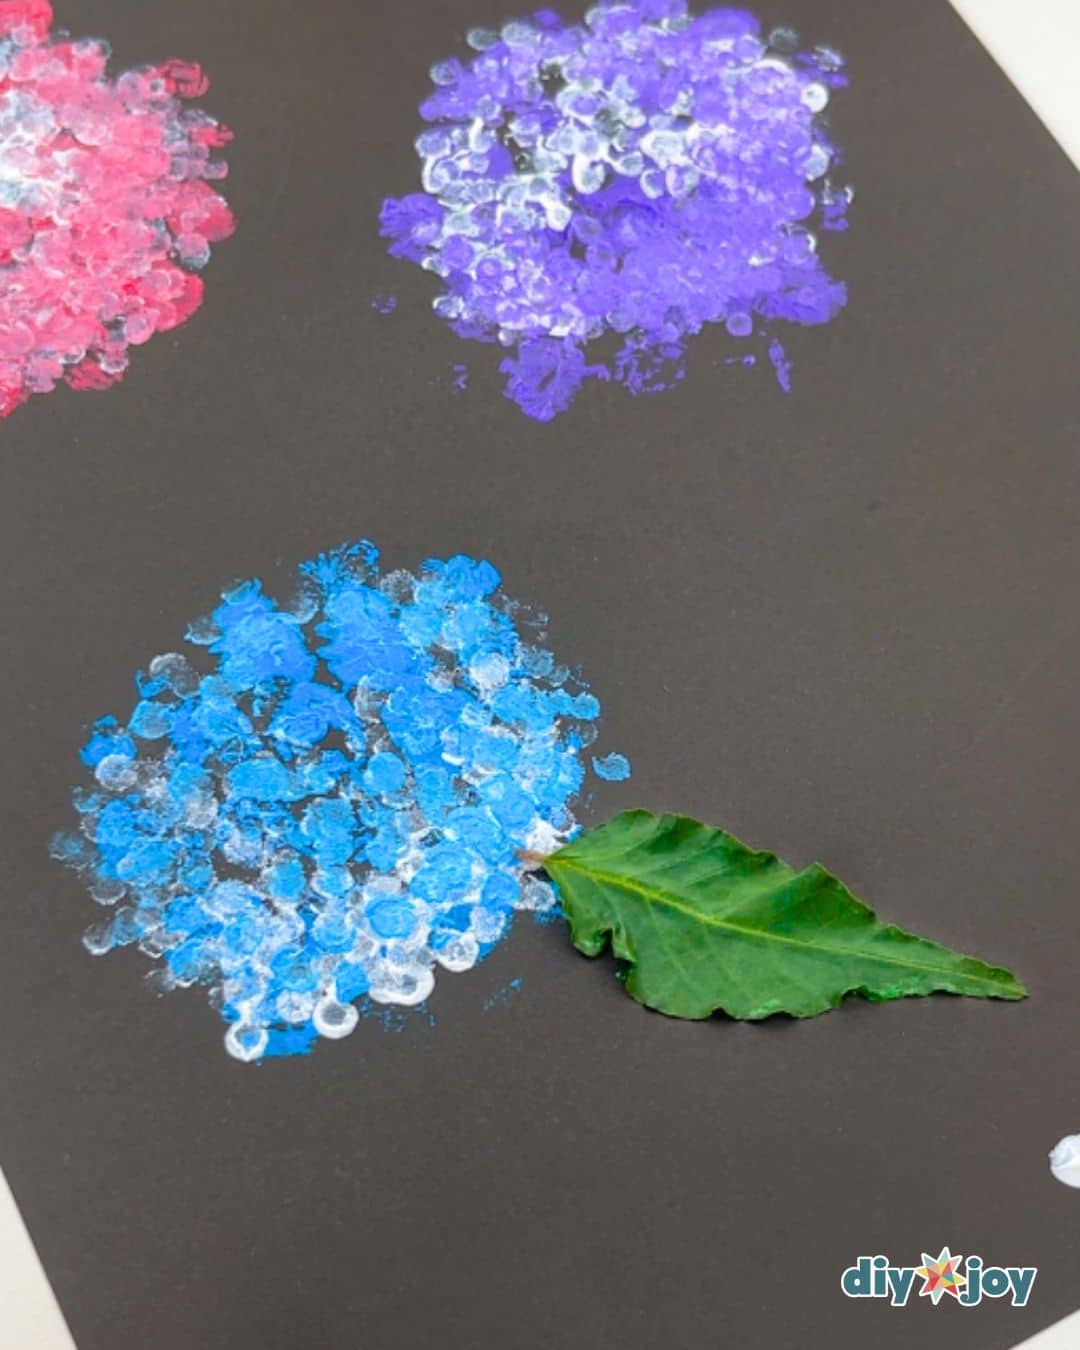
Repeat several times. See the photo below for reference.
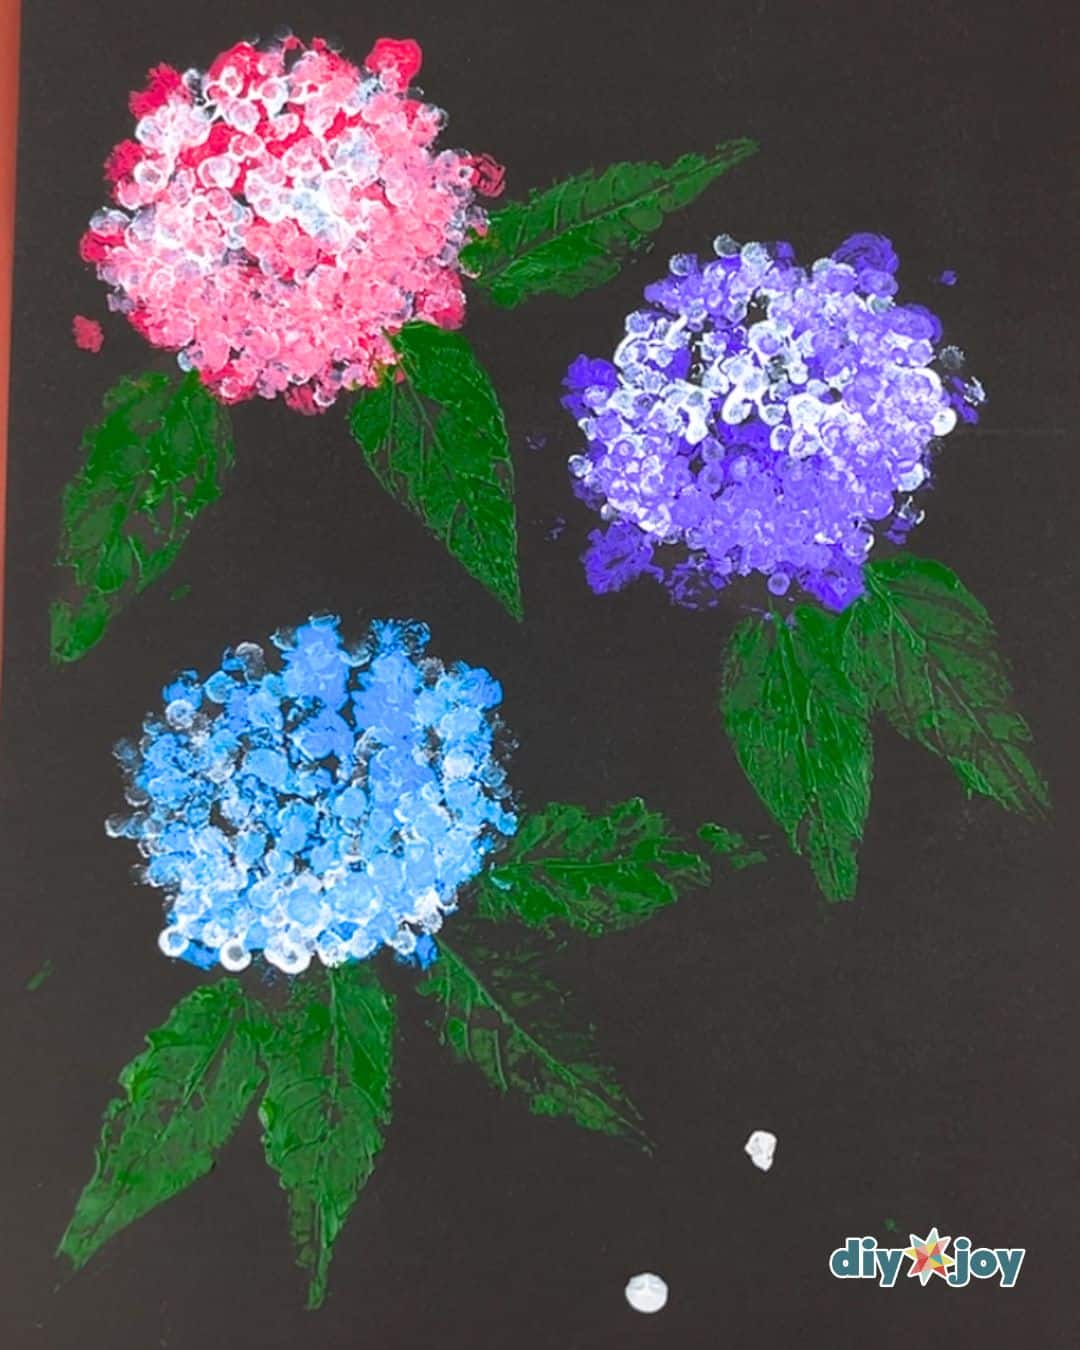
Step 6: Create the splatters
Lightly load your paintbrush with white paint. Make sure it’s not dripping. Position it horizontally above your painting using your non-dominant hand, then flick it with your dominant hand to create white splatters. Let your painting dry completely.
Creative Variations and Ideas
- Use varying shades of acrylic paint to add depth.
- Make the flowers and leaves in different sizes to create focal points.
- Create a gradient effect on the bubble wrap before pressing it to the canvas for a unique look.
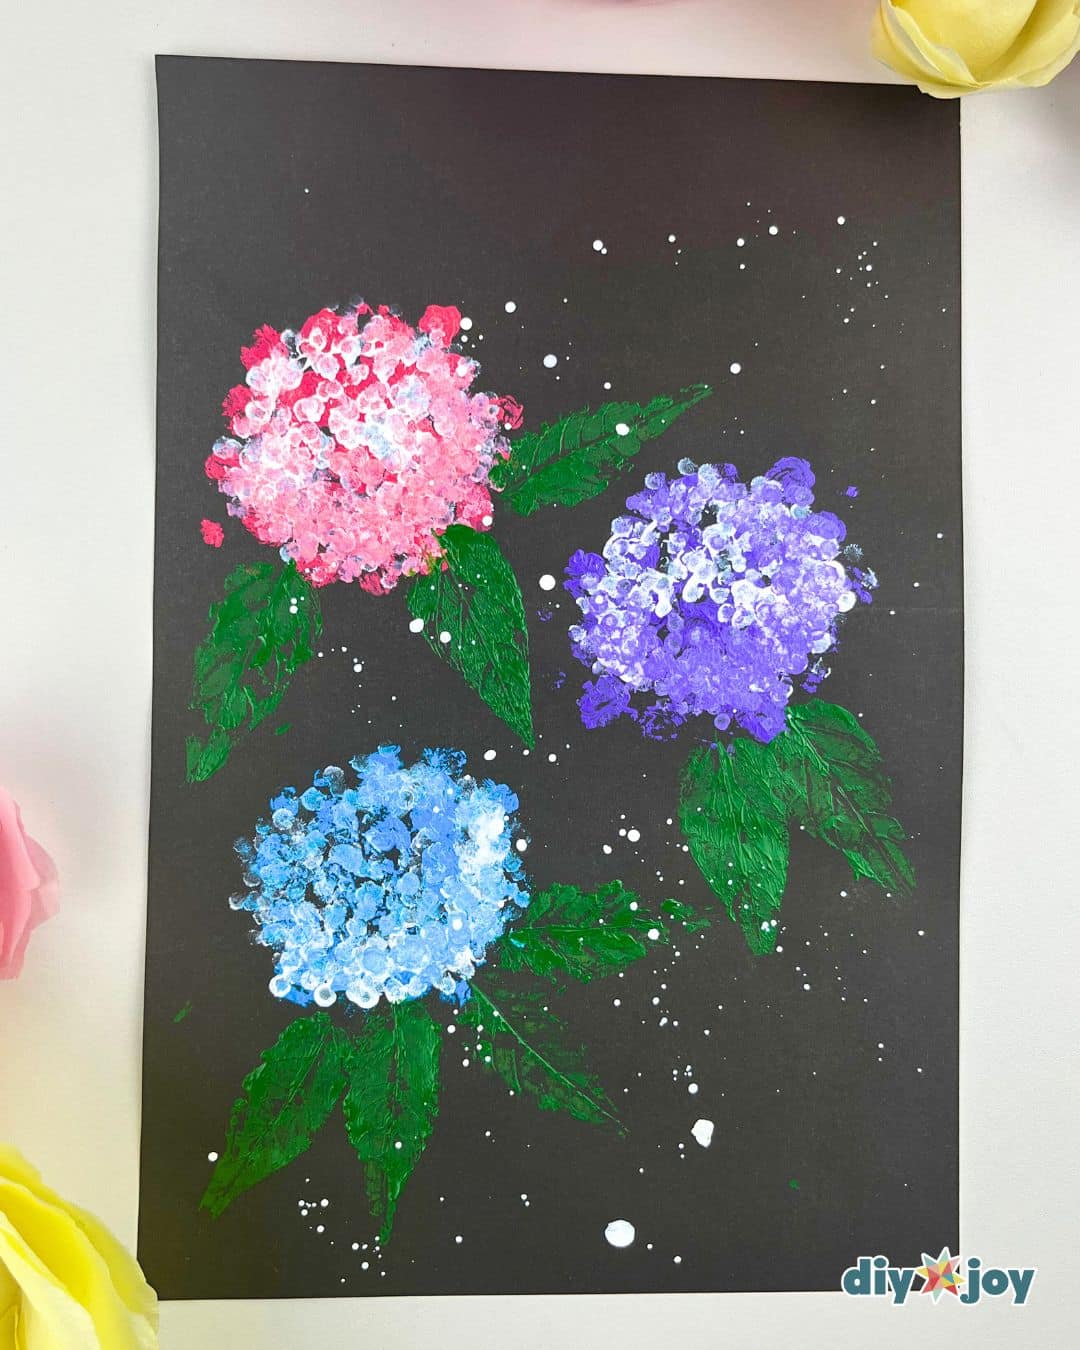
Easy Flower Painting Idea – Bubble Wrap Art