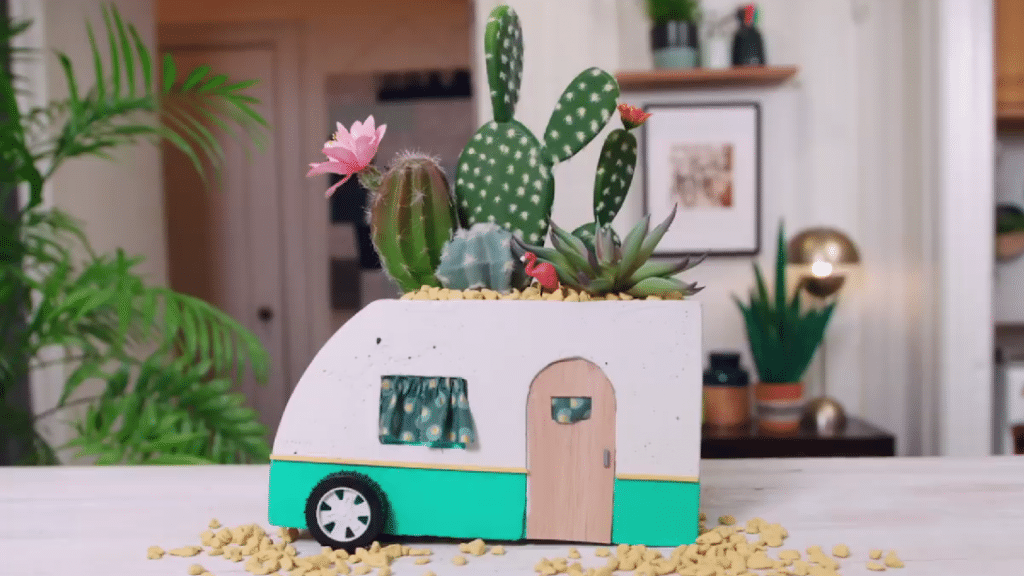
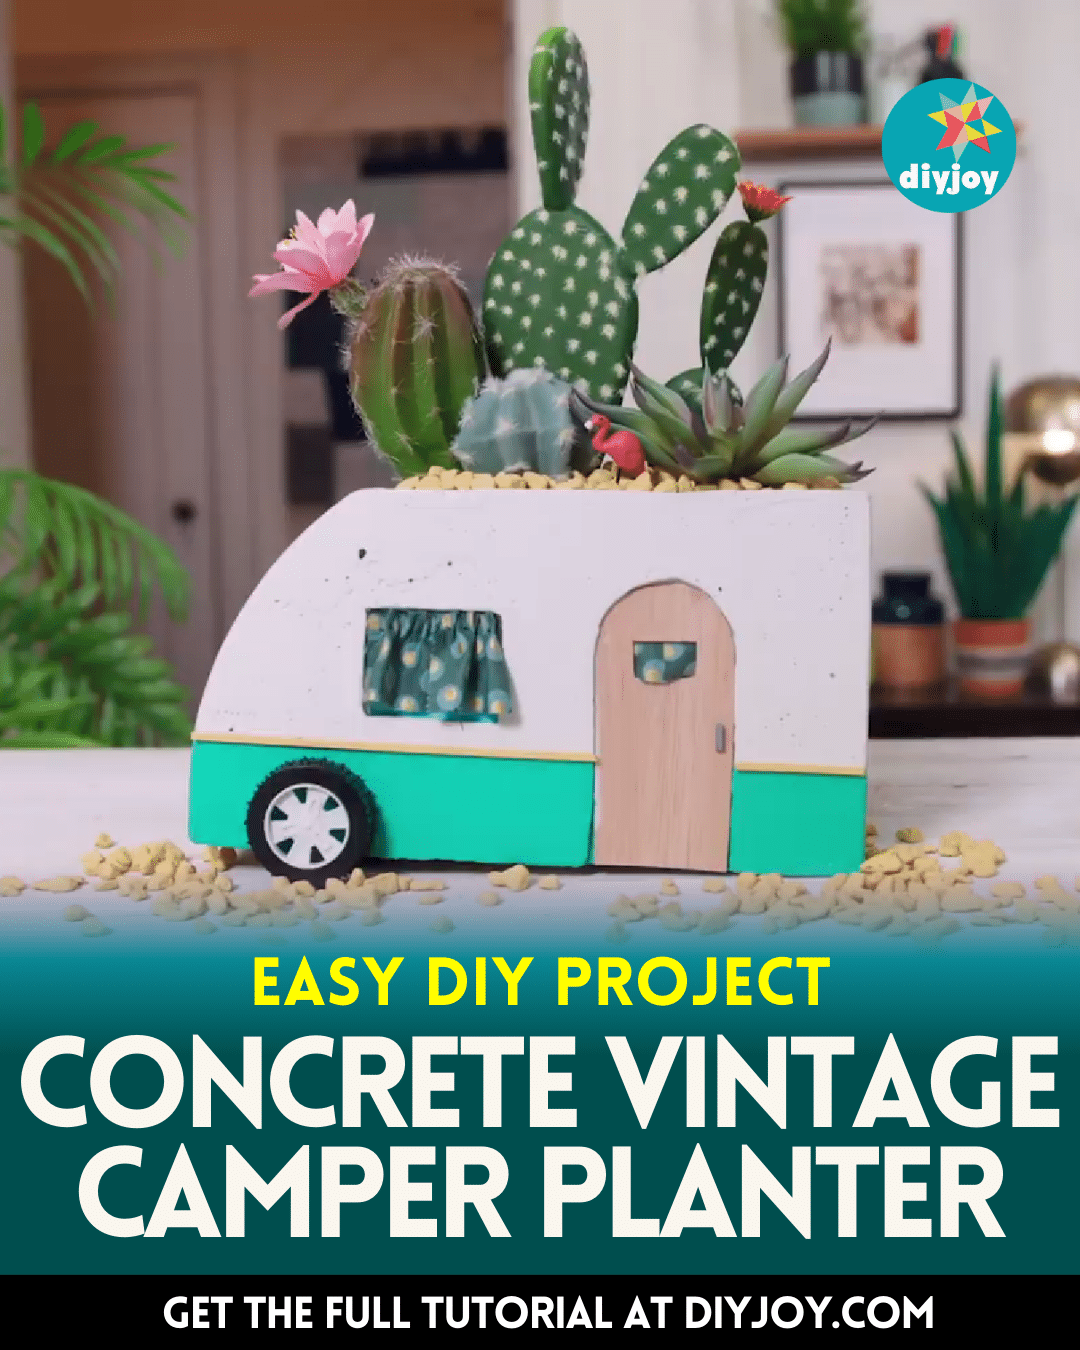
Creating different handmade crafts is one of the best ways to pass the time, plus you can use the finished product as decor and most of them are functional. A great example is this DIY vintage camper that can also be used as a planter, you can put artificial or real plants in it, and they would make the perfect accent for your house.
RELATED: How to Build a DIY Truck Planter
This type of project is also customizable depending on your preference and you’re free to let your creativity loose and make it look as simple or as festive as you want. Watch this video tutorial now by HGTV Handmade on YouTube to learn how to make this DIY concrete planter with steps that are easy to follow.
Materials for DIY Concrete Vintage Camper Planter:
- Insulation board
- Foam board adhesive
- Heavy-duty blade knife
- Cardboard
- Packaging tape
- Super glue
- Cutting mat and ruler
- Rapid set concrete
- Bucket
- Stir stick
- Distilled water
- Tupperware
- Mineral oil
- 60-grit and 220-grit sandpaper
- Rag
- Painter’s tape
- Acrylic paint
- Plants
- Rocks
- Wheels
- Fabric
- Balsa wood
How to Make a Concrete Vintage Camper Planter:
Step 1
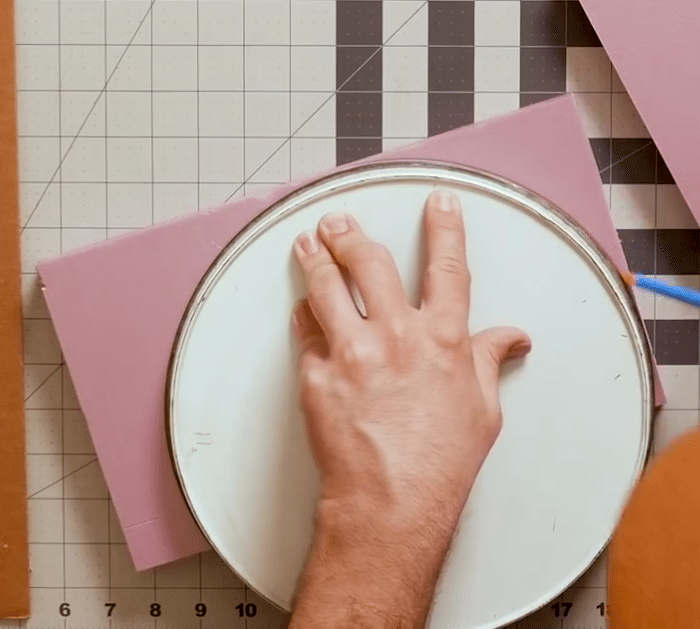
Measure and draw the base, back, and sides of the camper on the insulation board, then use a round object to create the curved back of the camper. Cut a piece of cardboard to size and score it to create flexibility, then cut out a small door and window, and wrap them with tape. Build the mold as demonstrated in the video, then prepare the concrete according to the package instructions, and set it aside.
Step 2
Spray the inside of the mold with mineral oil making sure to cover the sides and bottom well, then pour in the concrete mix filling the mold halfway, and then place a plastic container in the center to create a space for the plants. Hold them in place using tape, then continue pouring concrete to the sides, and lightly tap the mold on the surface to level it up and remove air bubbles.
Step 3
Allow it to dry completely, then remove the plastic container, and carefully unmold the camper. Remove the door and window on the camper, then sand it entirely until smooth, and wipe it with clean with a rag. Paint the camper however you want, then add embellishments such as a door, curtains, a license plate, and wheels. Add the plants to the camper, then decorate it with rocks and other embellishments you want.
*All image credit belongs to HGTV Handmade via YouTube. Follow and subscribe to their channel for more!
How to Make a Concrete Vintage Camper Planter


