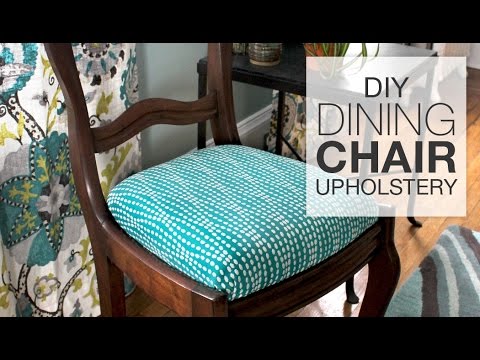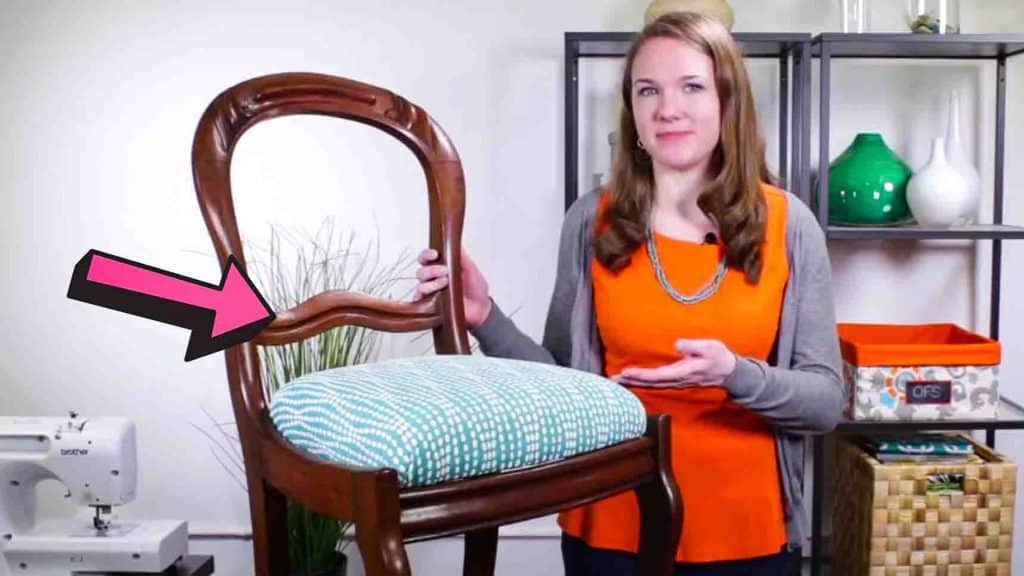
Want to upgrade your dining chairs without breaking the bank? This DIY reupholstered dining chair tutorial from OnlineFabricStore on Youtube is the perfect project for you. Who says you have to buy new ones? All you need is your old dining chairs and this video tutorial! It’s a straightforward tutorial, so even if you’re a beginner, you’ll be able to do this. Watch the video below now.
Materials:
- upholstery fabric
- cambric dust cover fabric (optional)
- staple gun
- C.S Osborne combination tool
- scissors or rotary cutter
- serrated or electric knife
- dacron upholstery deck padding
- 2″ upholstery foam
Directions:
Step 1
First, take off the cushion of your dining chair and remove its fabric and dust cover. (Use the combination tool to remove all the staples or tacks that are attaching to the dust cover and upholstery fabric.) Strip the seat down to the wooden frame if you’re adding a new foam. Next, attach a piece of cambric by stapling it down below the foam so it doesn’t sag. (Optional.) After this, trace the frame on the foam and trace it around it. Cut the foam out with a serrated knife. Place the foam and frame face down on the dacron padding. Cut the padding so it wraps onto the bottom about 2 inches all around. Staple the padding in the middle of all 4 sides to hold it in place. Work your way out from the center staple, leaving a little space at the corners. Repeat on the other sides, pulling the padding-top as you go.

[social_warfare]
Step 2
Now, for the corners, pull the padding towards the center of the frame and staple, then staple down the loose padding on either side of the corner. Repeat this for the rest of the corners. Trim off all the excess padding. Next, lay the upholstery fabric out, right side down. Place the cushion, face down, on top of it. Cut the fabric so there’s an extra 3 – 4″ to wrap around the back. Staple it down in the middle of all 4 sides. On each side, work your way out from the center towards the corners, and run your hand over the front as you go tighten the fabric. Leave a few inches at the corners. For the corners, pull the center of the corner towards the middle and staple. Fold over one edge and staple to form a pleat, then fold over the other side to form a second pleat. Repeat the corners to all corners. Trim off all the excess fabric. Finally, attach the cambric dust cover. Cut the cambric to the same size as the frame, fold under the edges, and staple. The cushion is now finished and all you have to do is re-attach it to the chair.

Easy DIY Reupholstered Dining Chair Tutorial