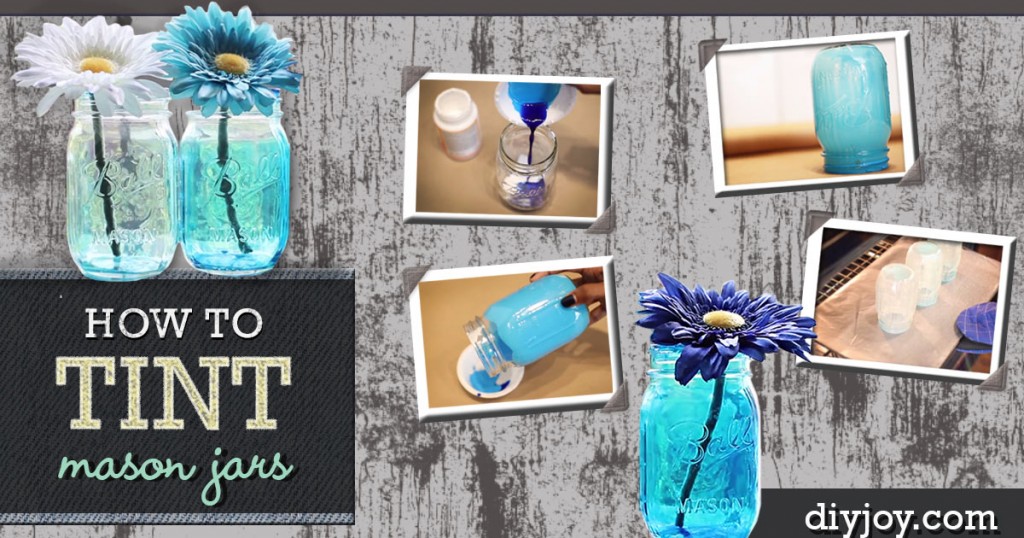
We know there are a lot of mason jar projects out there but these Ombre-tinted mason jars very well may be the best one yet! I love this project for the reasons I adore some of my other favorite DIYs- it is easy, fast, cheap, and virtually impossible to end up with a Pinterest fail! (Send yours to me if you end up with one, though!) The shades of aqua and turquoise are pretty with almost any decor, bringing back memories of the vintage era. However, feel free to tint your mason jars in any color of your choice. Red would be very pretty, of course, reminiscent of cranberry glass. Green jars, too.
With a few simple steps, you can create a cleverly creative work of art. HGTV Handmade shows us how make these lovely DIY tinted mason jars in just 6 easy steps. When I say easy, I mean it, too. In this tutorial, they have the brilliant idea of using the oven! (Every tutorial I have seen on Pinterest so far shows you how to dry your jars on racks, patiently waiting many, many hours to see if your creative craft idea even turned out at all.) I will take the shortcut every time, thank you…
Here’s How To Make Tinted Mason Jars
Supplies You Need:
- Mason jars
- Food coloring
- Glue
- Small mixing bowl
-Step by Step Tutorial and Instructions Below after the Video-
How To Tint Mason Jars – Instructions
Make sure your Mason Jars are clean and dry before you start this DIY.
Step 1.
In small mixing bowls add 1 table spoon of water each and different drops of food coloring. NOTE: Anything less than 10 drops won’t work, 20 or more will do depending on the shade you want.

Step 2.
Add 1 table spoon of glue to Mason jar and then put in the food coloring. Mixed it all up and coat the inside of the mason jar. (Make sure your work surface is covered)

Step 3.
Twist the Mason jar around and just let the color runs over the entire inner surface. Let the excess run back in to the bowl so that it can be reused later.

Step 4.
Once your Mason jar is coated, let this sit upside down for about 10 mins while you preheat your oven to 200 degrees Fahrenheit.

Step 5.
Place the Mason jars upside down on wax paper then put them in the oven.

Step 6.
After 15 minutes flip them over and warm for another 15 mins. Our Ombre Mason Jars are done and ready to use.