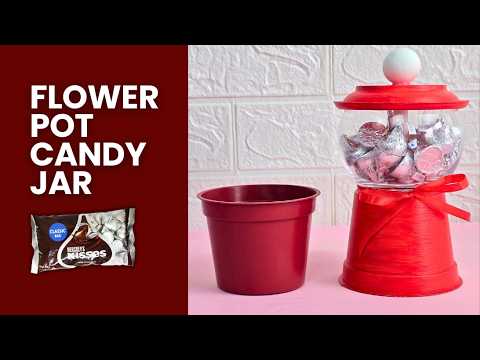
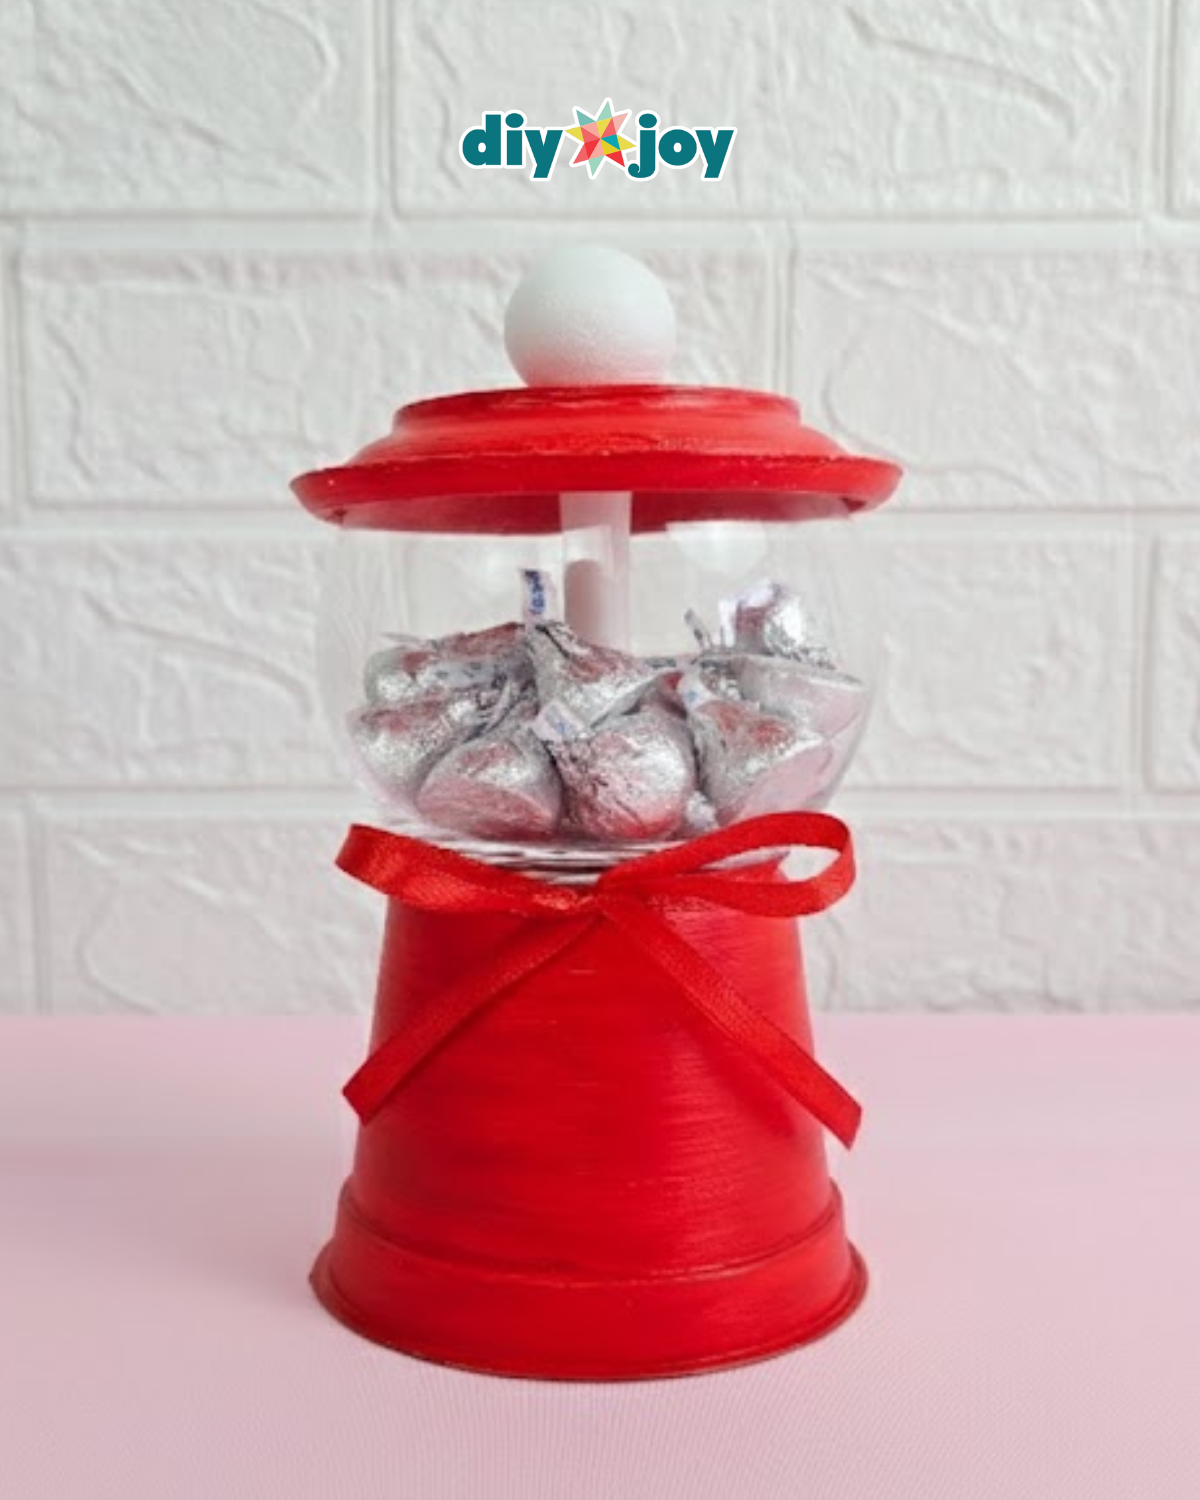
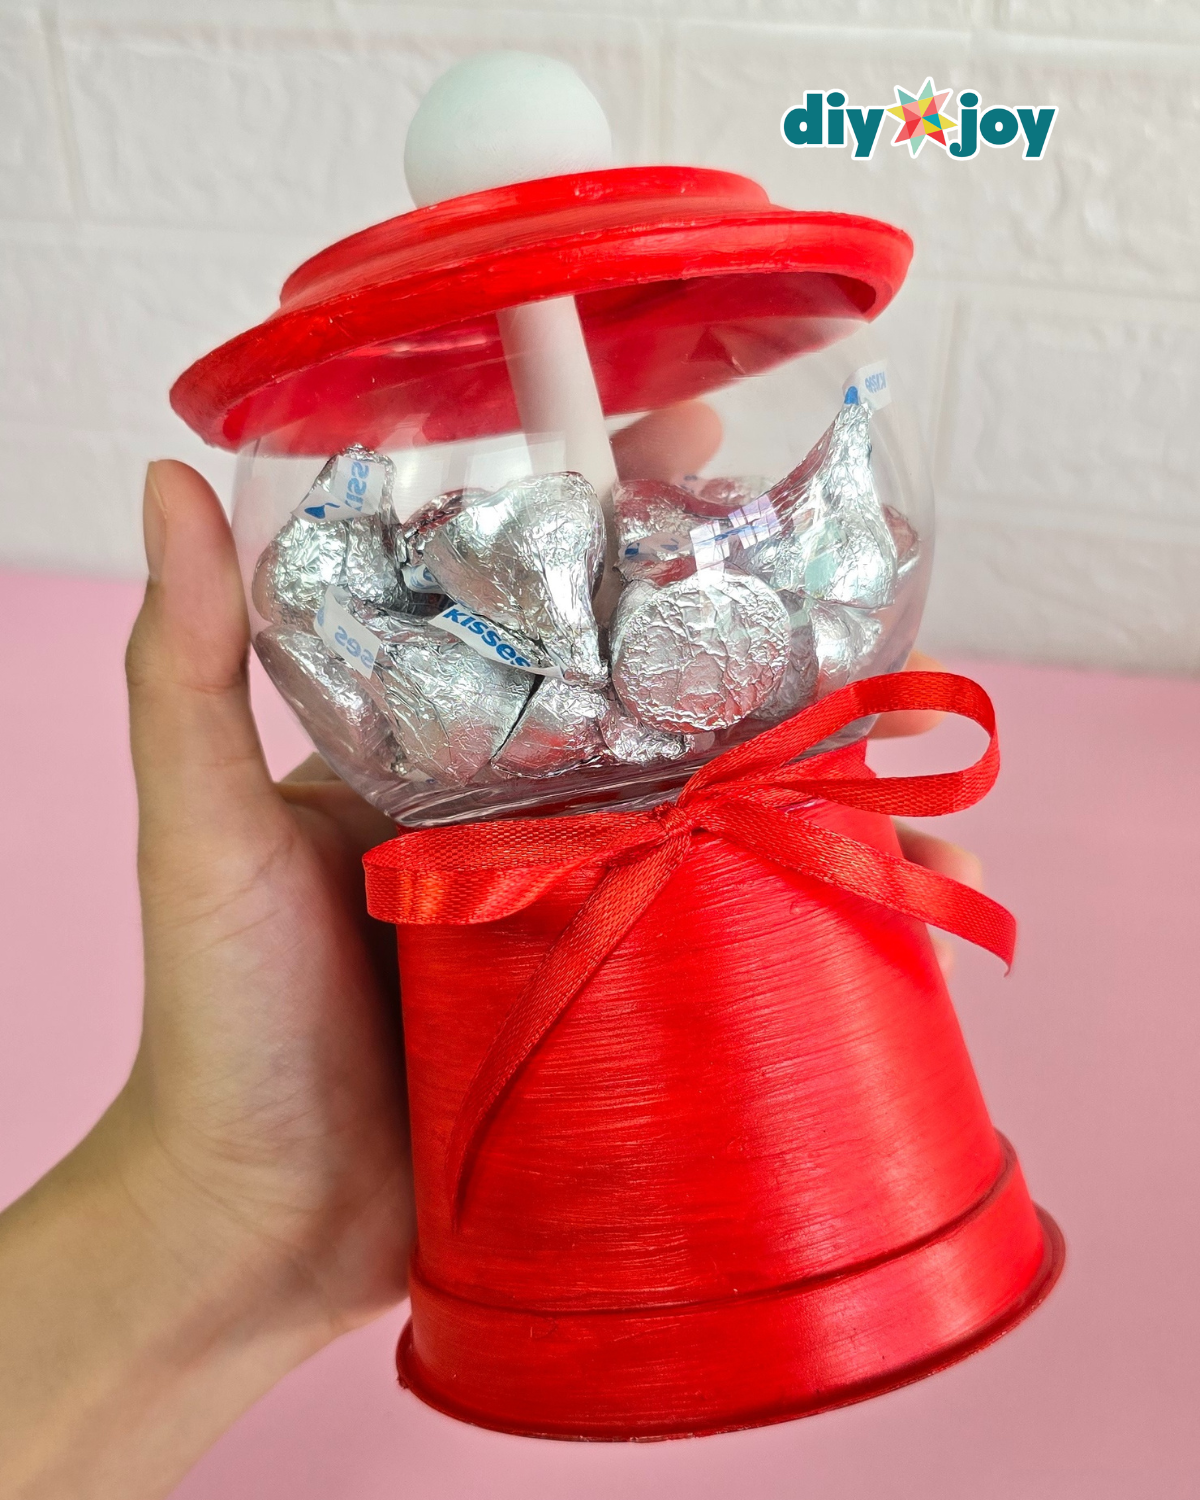
I remember visiting gumball machines all the time when I was a kid, always asking my mom for extra coins so I could get more candy. That classic gumball machine look is so nostalgic and instantly recognizable, and chances are you have seen one or two yourself over the years. Some of them still exist today, which makes them even more iconic. In this project, we are bringing that childhood favorite back to life by turning it into a DIY treat container that looks just like a gumball machine, using supplies that are easy to find or already available at home.

This project makes a wonderful Valentine’s Day craft idea or a thoughtful handmade gift for any occasion. Instead of simply giving chocolates or candies, presenting them in this cute gumball machine-inspired jar makes the gift feel more personal and meaningful. It can also be used to store small keepsakes or favorite items, making it both fun and versatile.
RELATED: Upcycled Ferrero Rocher Jewelry Box
While this DIY craft may look complicated at first, you will be surprised by how easy and quick it is to put together. It is a fun project you can make with friends, family, or kids, and you have complete freedom to customize the design with your own details and embellishments. Follow the step-by-step written instructions below, along with photos to guide you through the process. You can also watch the video tutorial for extra tips and visuals. Happy crafting!
How to Make Flower Pot Candy Jar
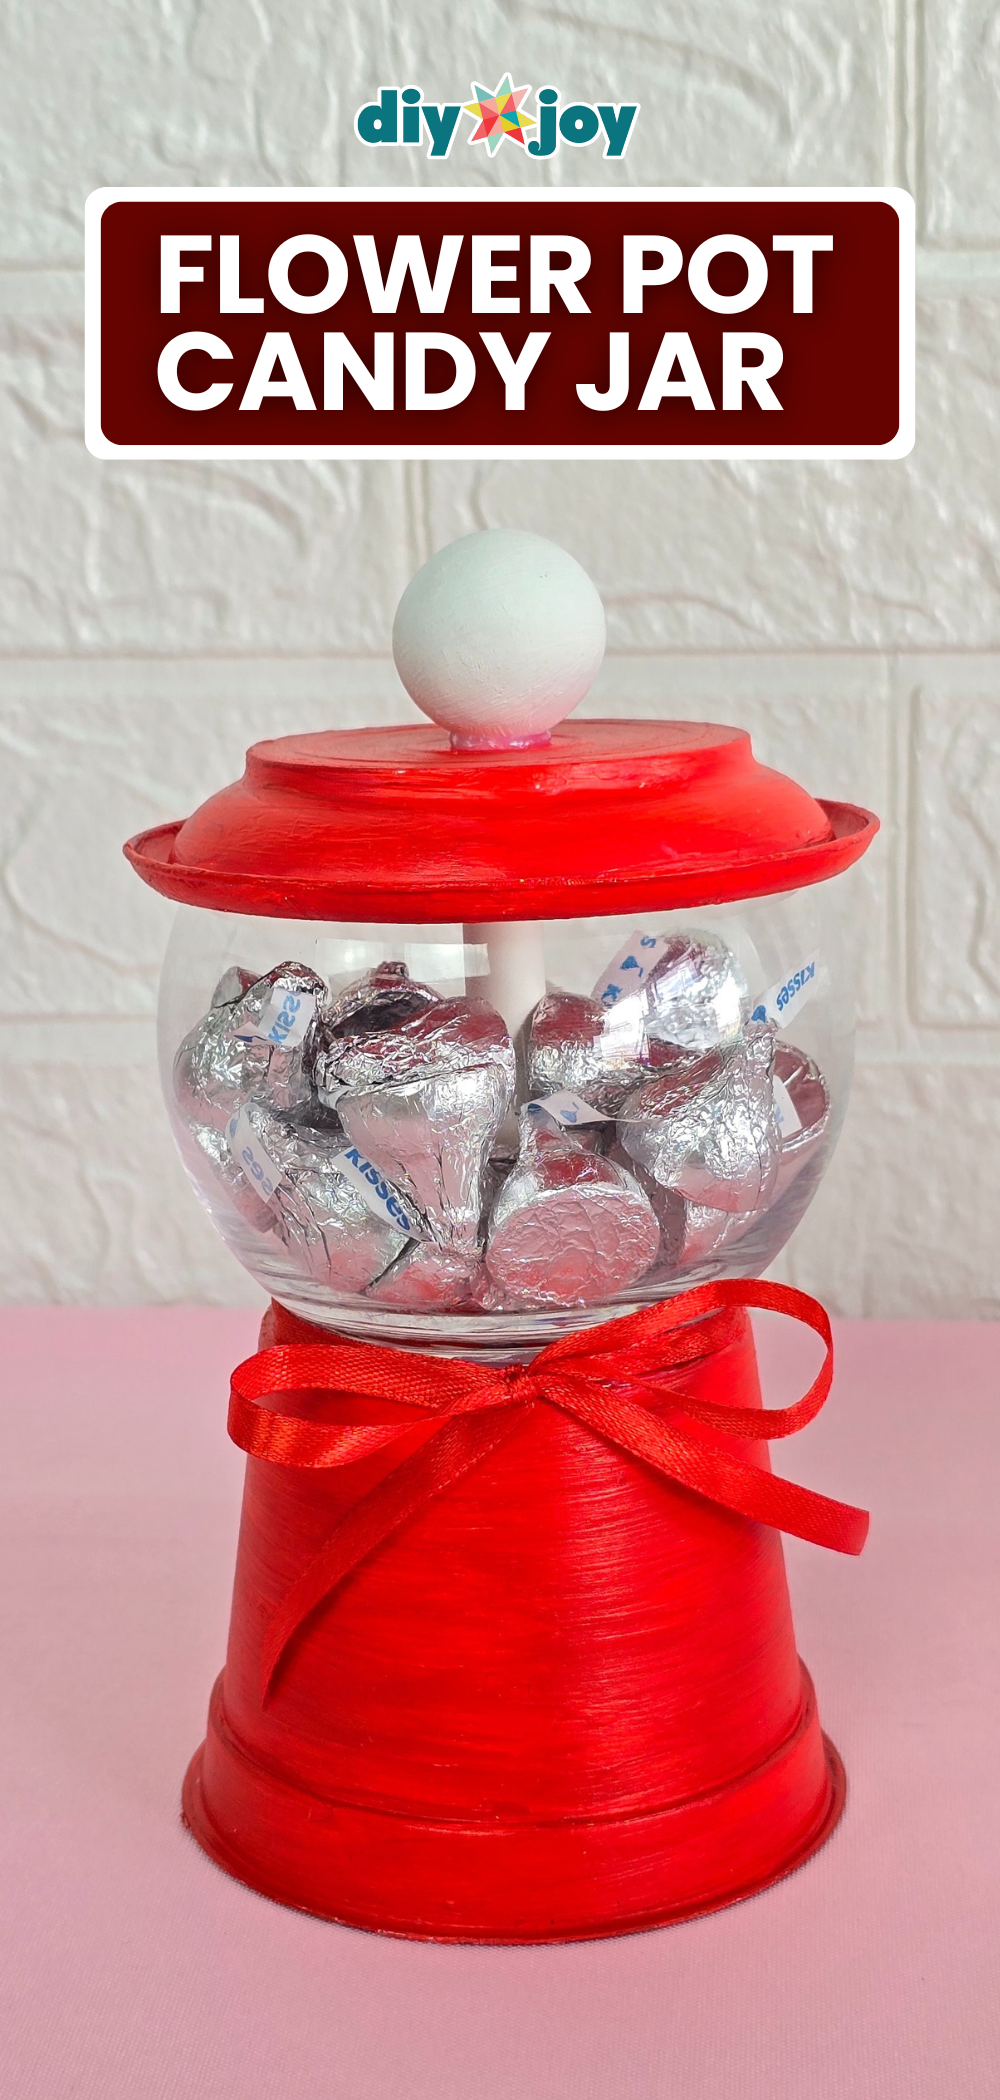
Step 1: Prime and Paint the Base

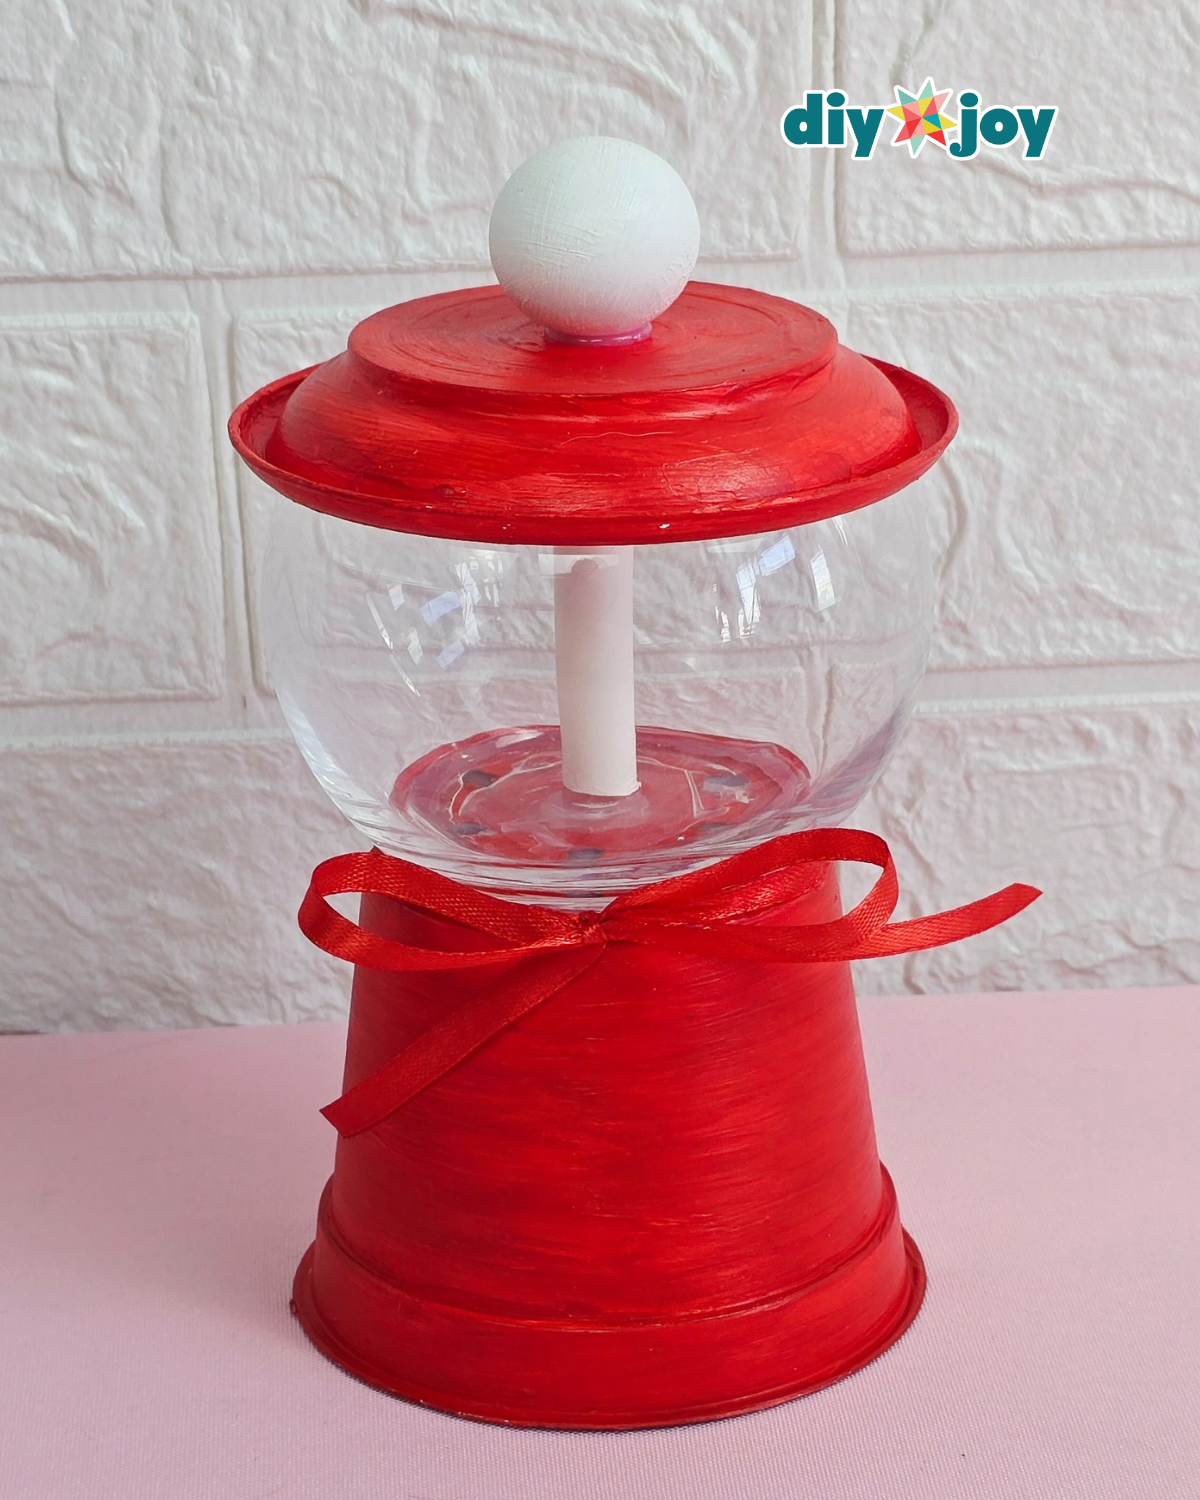
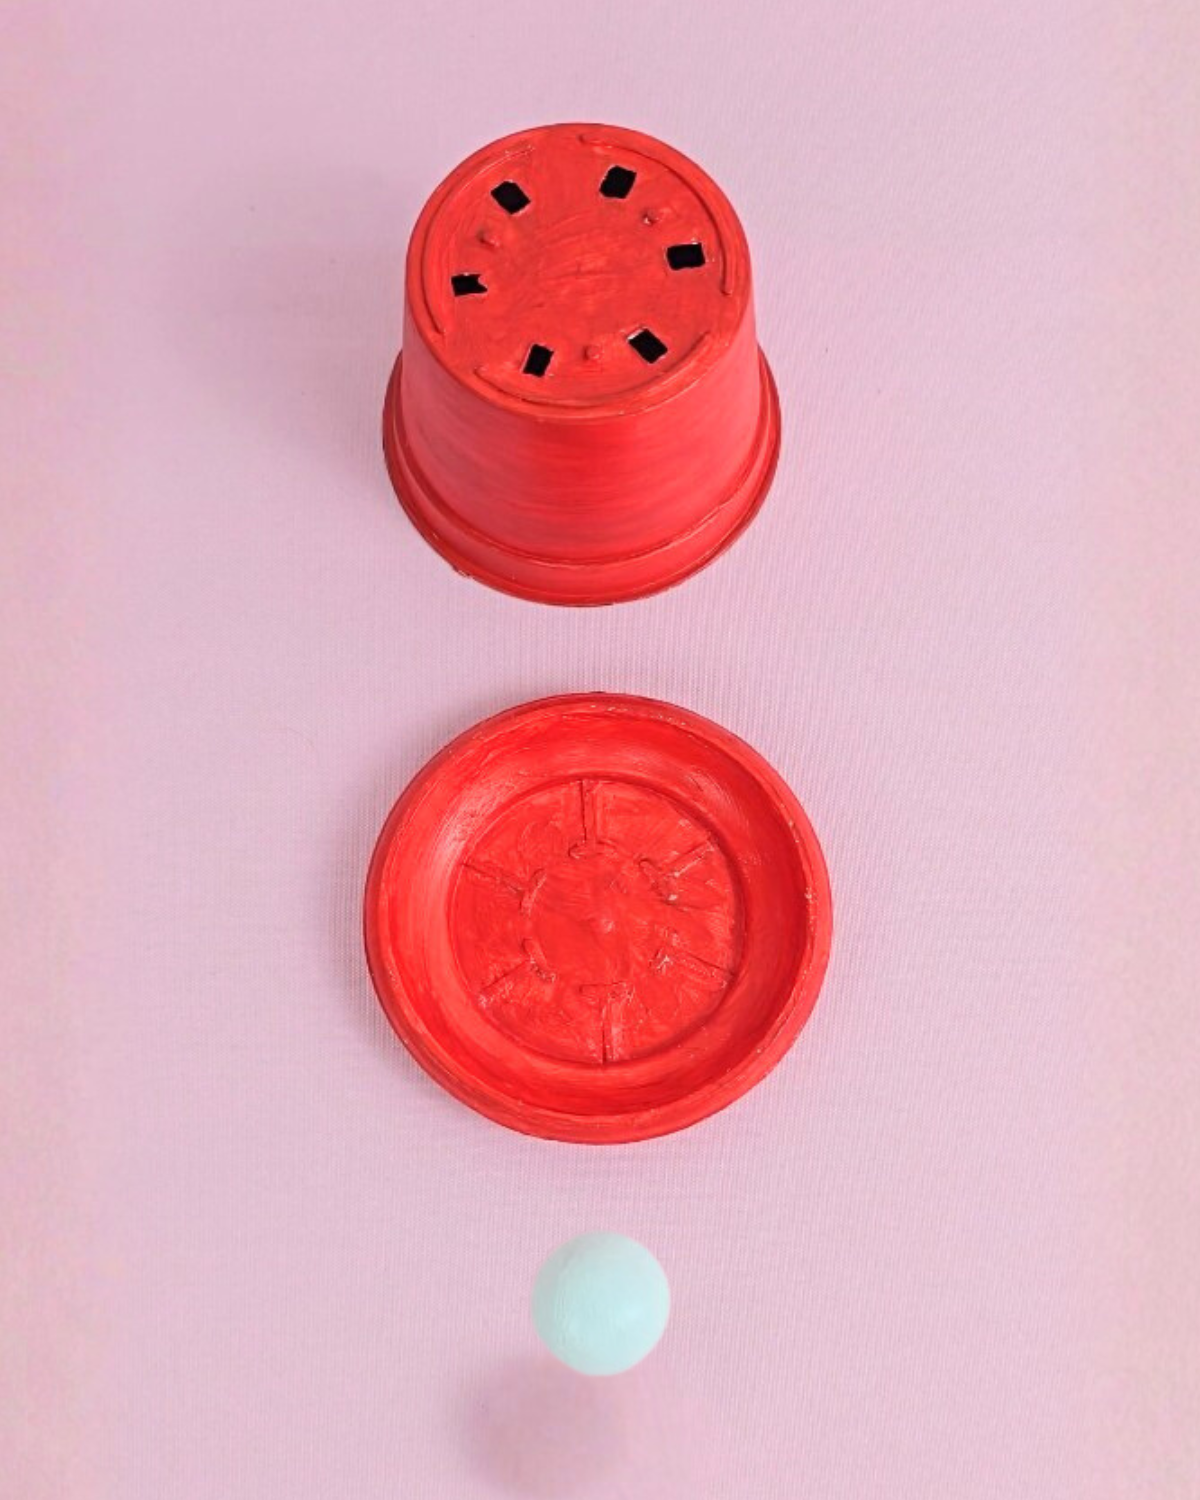
Apply primer to the flower pot, tray, and wooden ball. Once primed, paint the flower pot, wooden ball, and tray in your desired color and let them dry completely. Add another coating of paint as needed.Step 2: Assemble the Base Structure
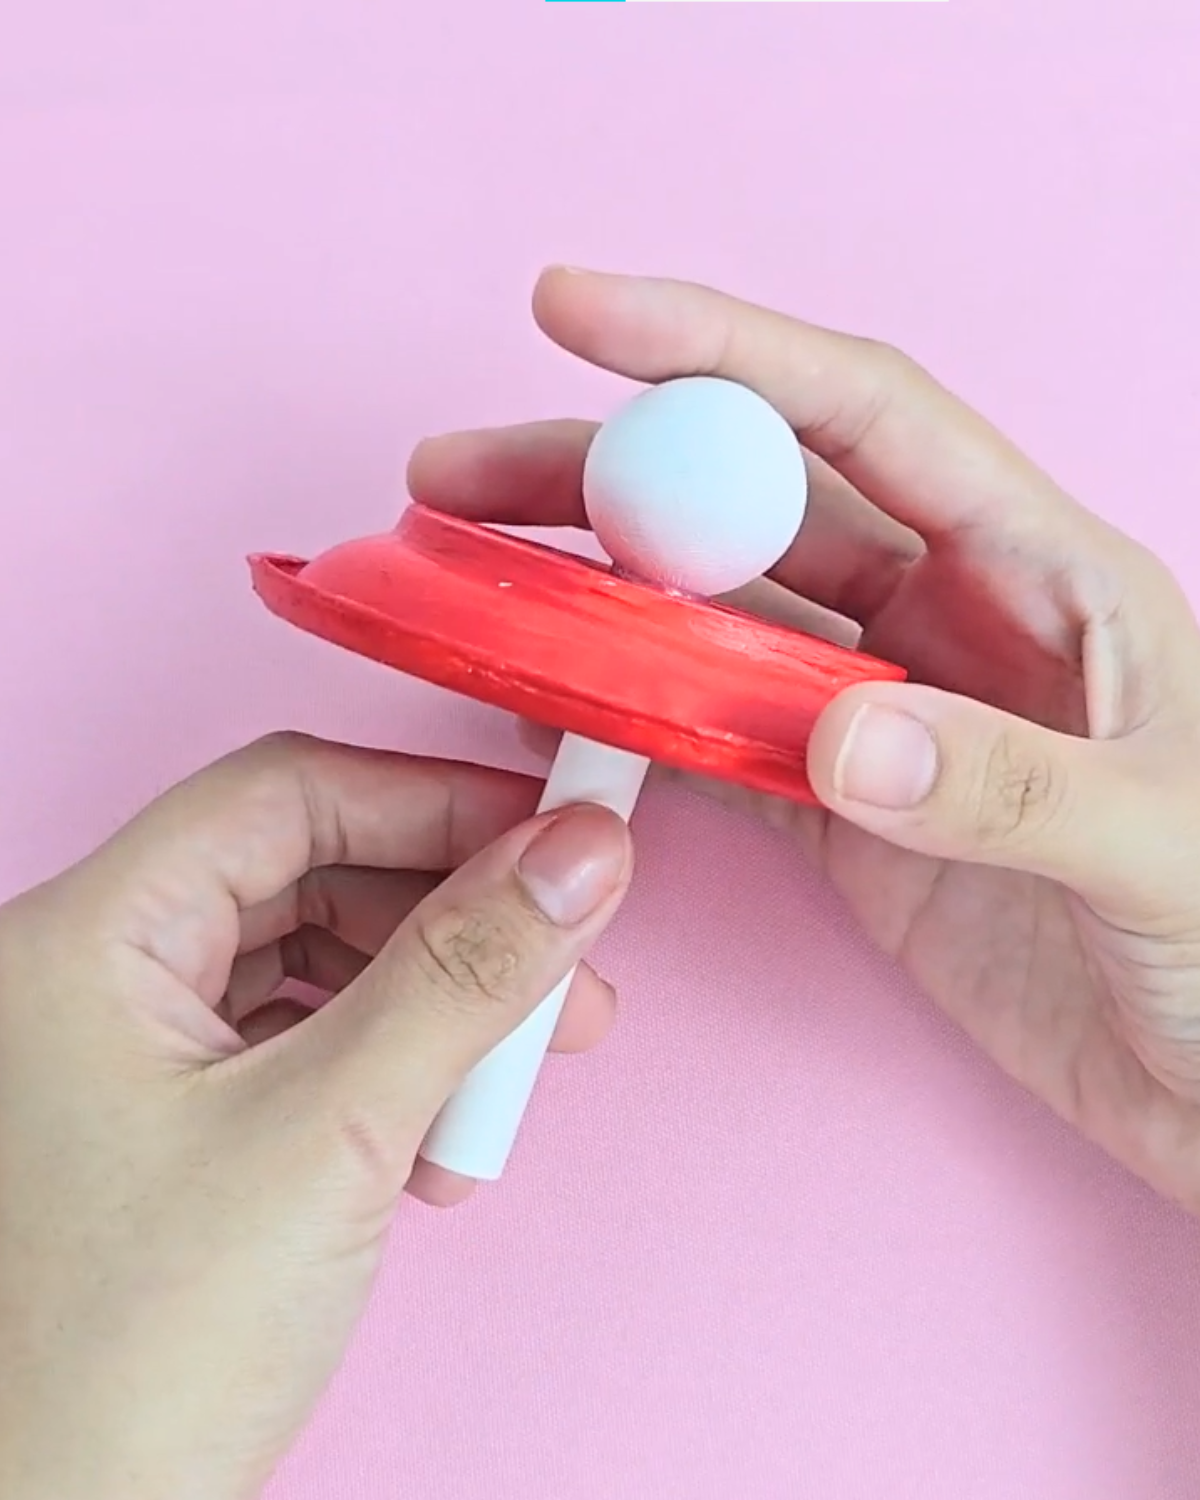
Flip the tray upside down, then hot glue the wooden ball to the center of what is now the top of the tray. Cut the straw to the same height as the fish bowl and hot glue it to the center of the tray’s bottom, making sure the wooden ball and straw are perfectly aligned.Step 3: Attach the Flower Pot and Fish Bowl Base
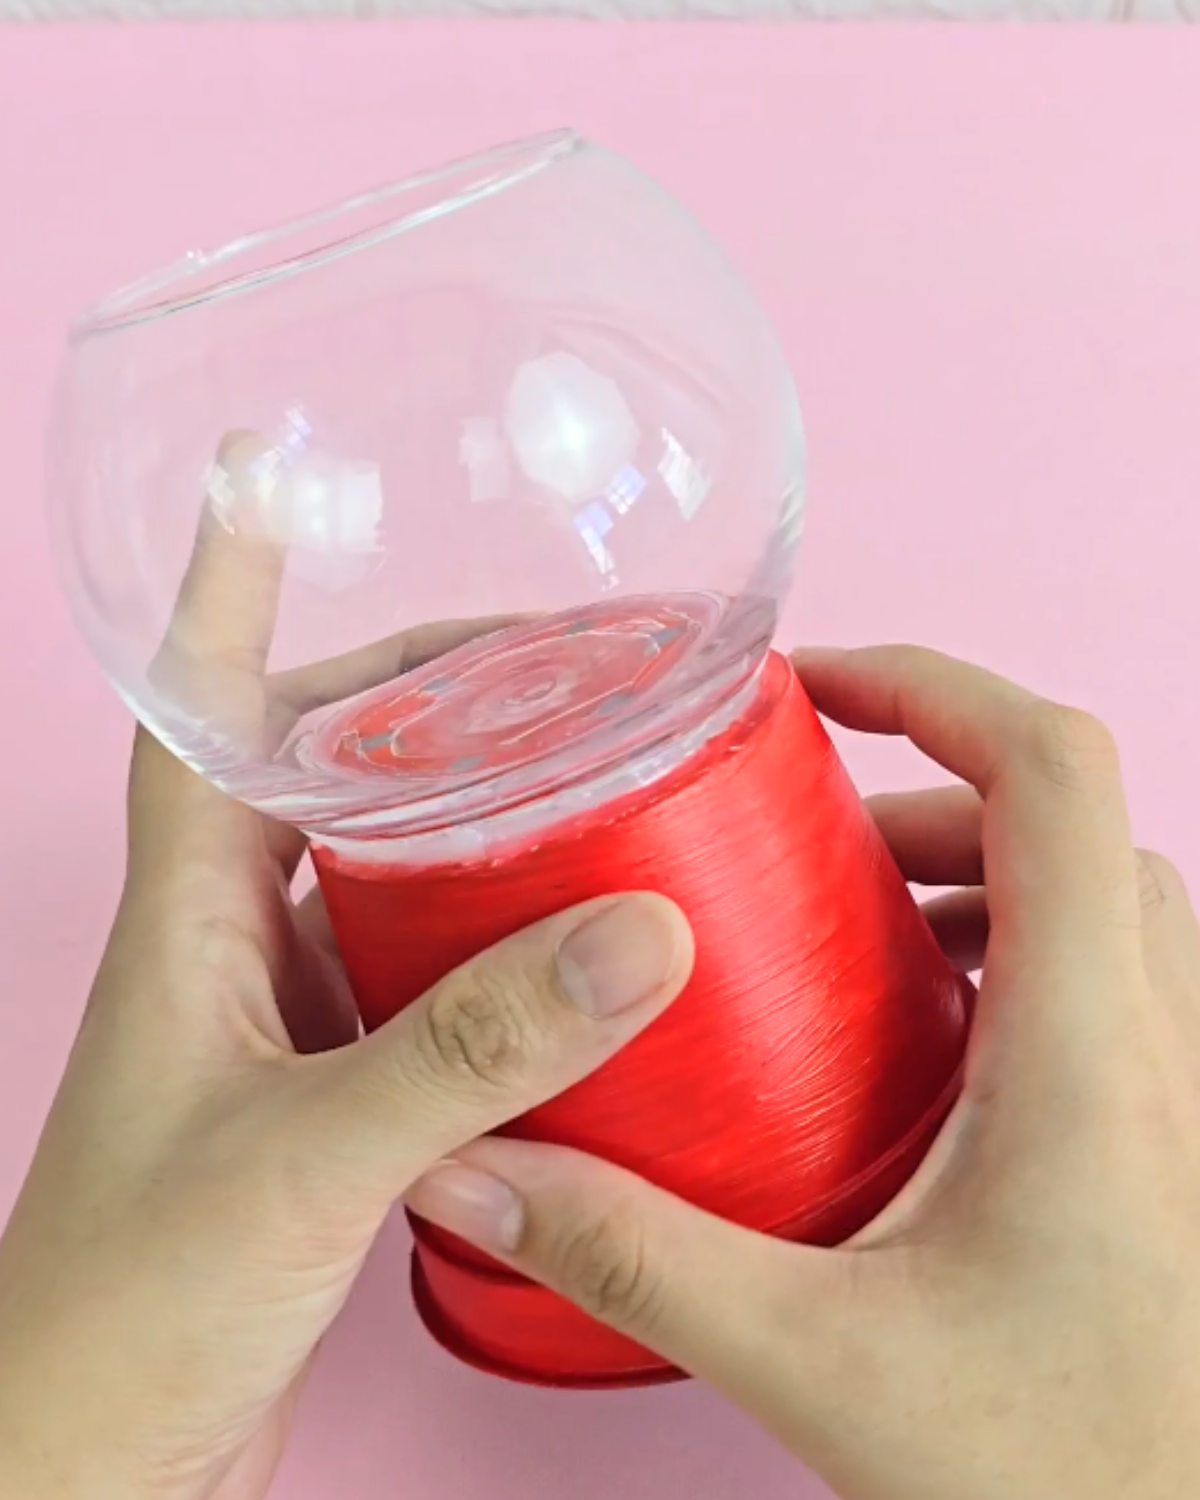
Apply E6000 glue to the bottom of the bowl and the top of the flower pot, then let it sit for a few minutes. Add hot glue to the areas without E6000 and carefully press the two pieces together, holding them firmly in place. Allow the glue to set completely before moving on to the next step.Step 4: Decorate and Fill the Candy Jar
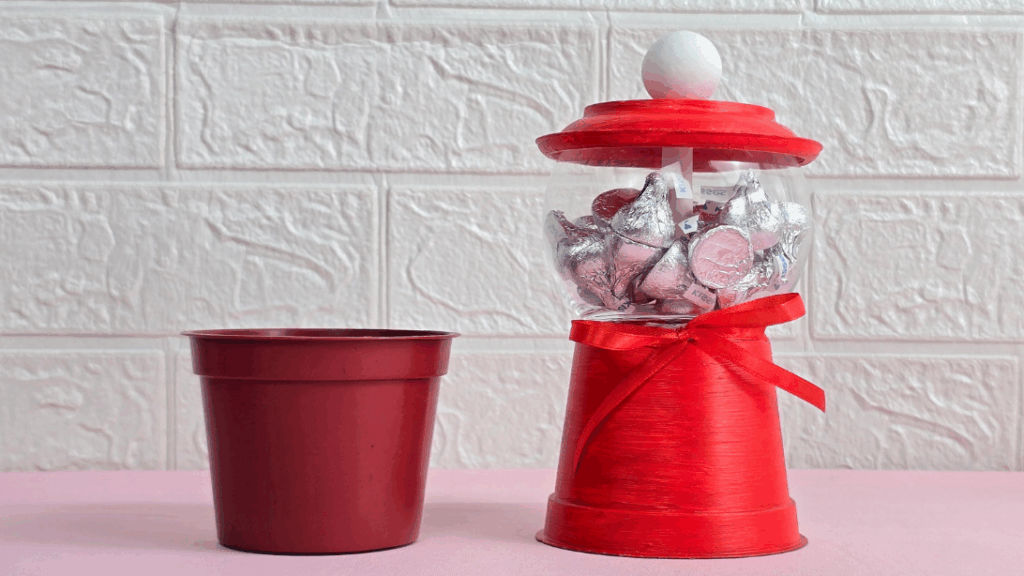
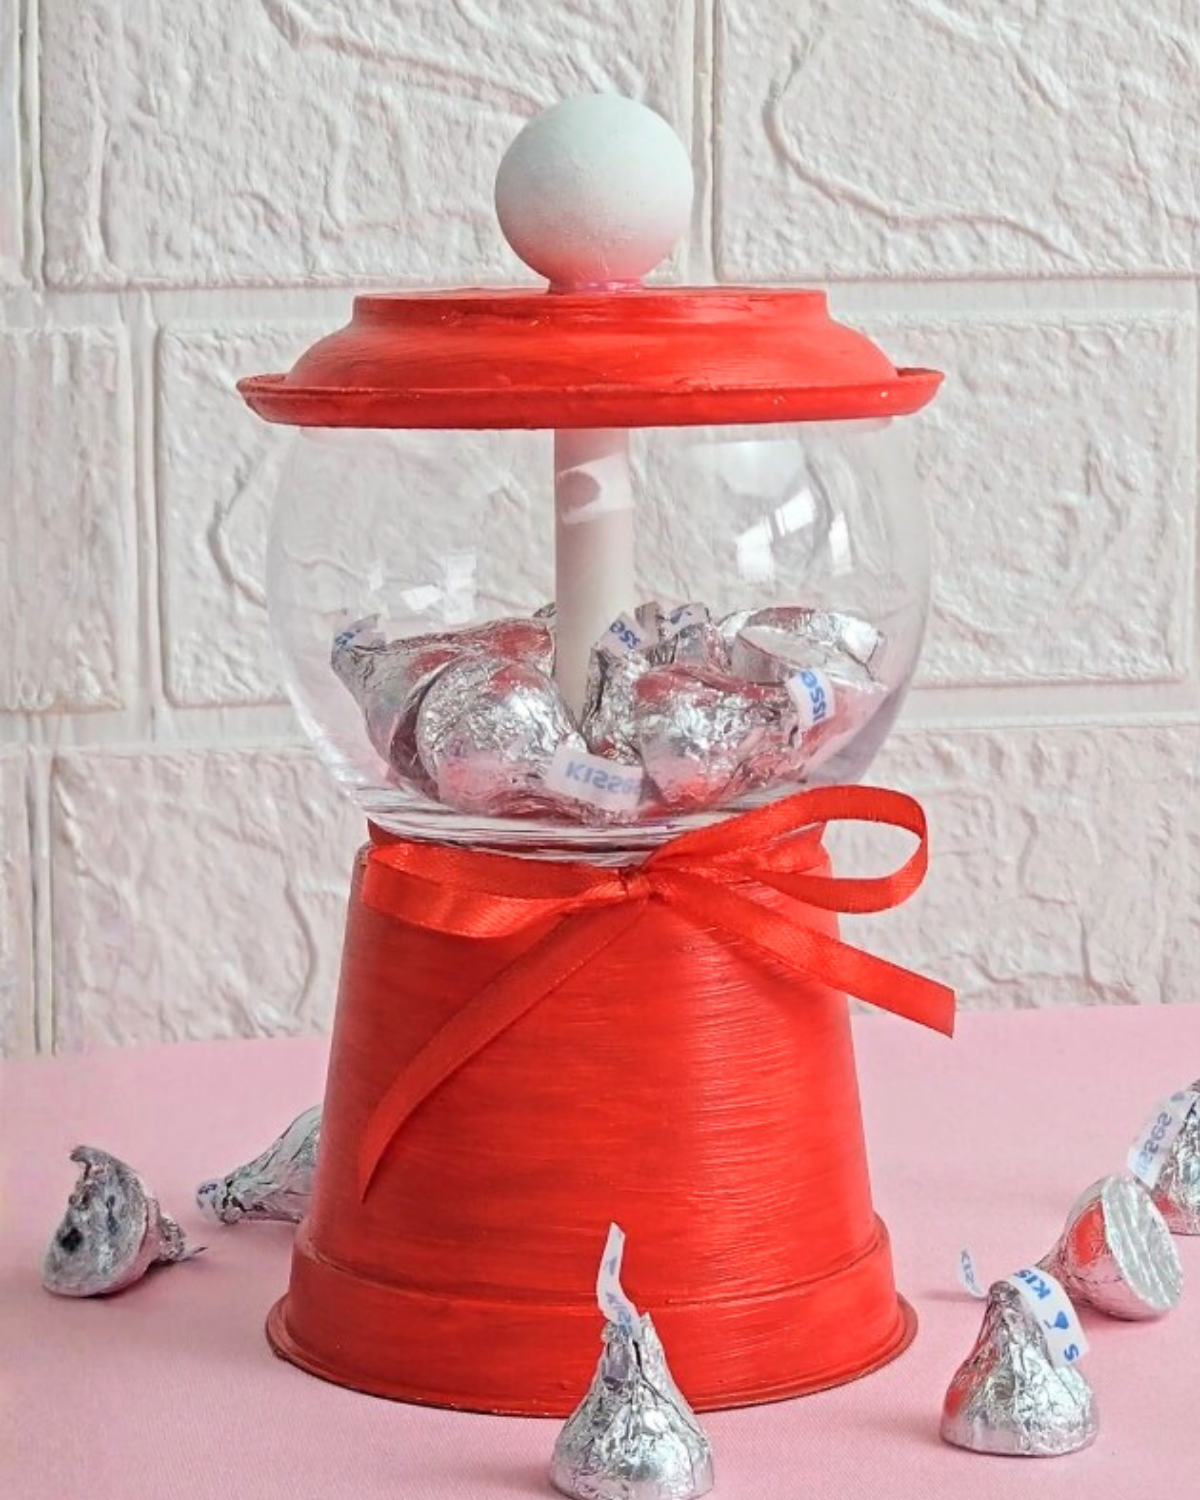
Tie a ribbon around the neck of the candy jar to hide the glued area. If desired, add more painted details or designs to the body of the jar. Fill it with chocolates, then close it with the jar’s lid.
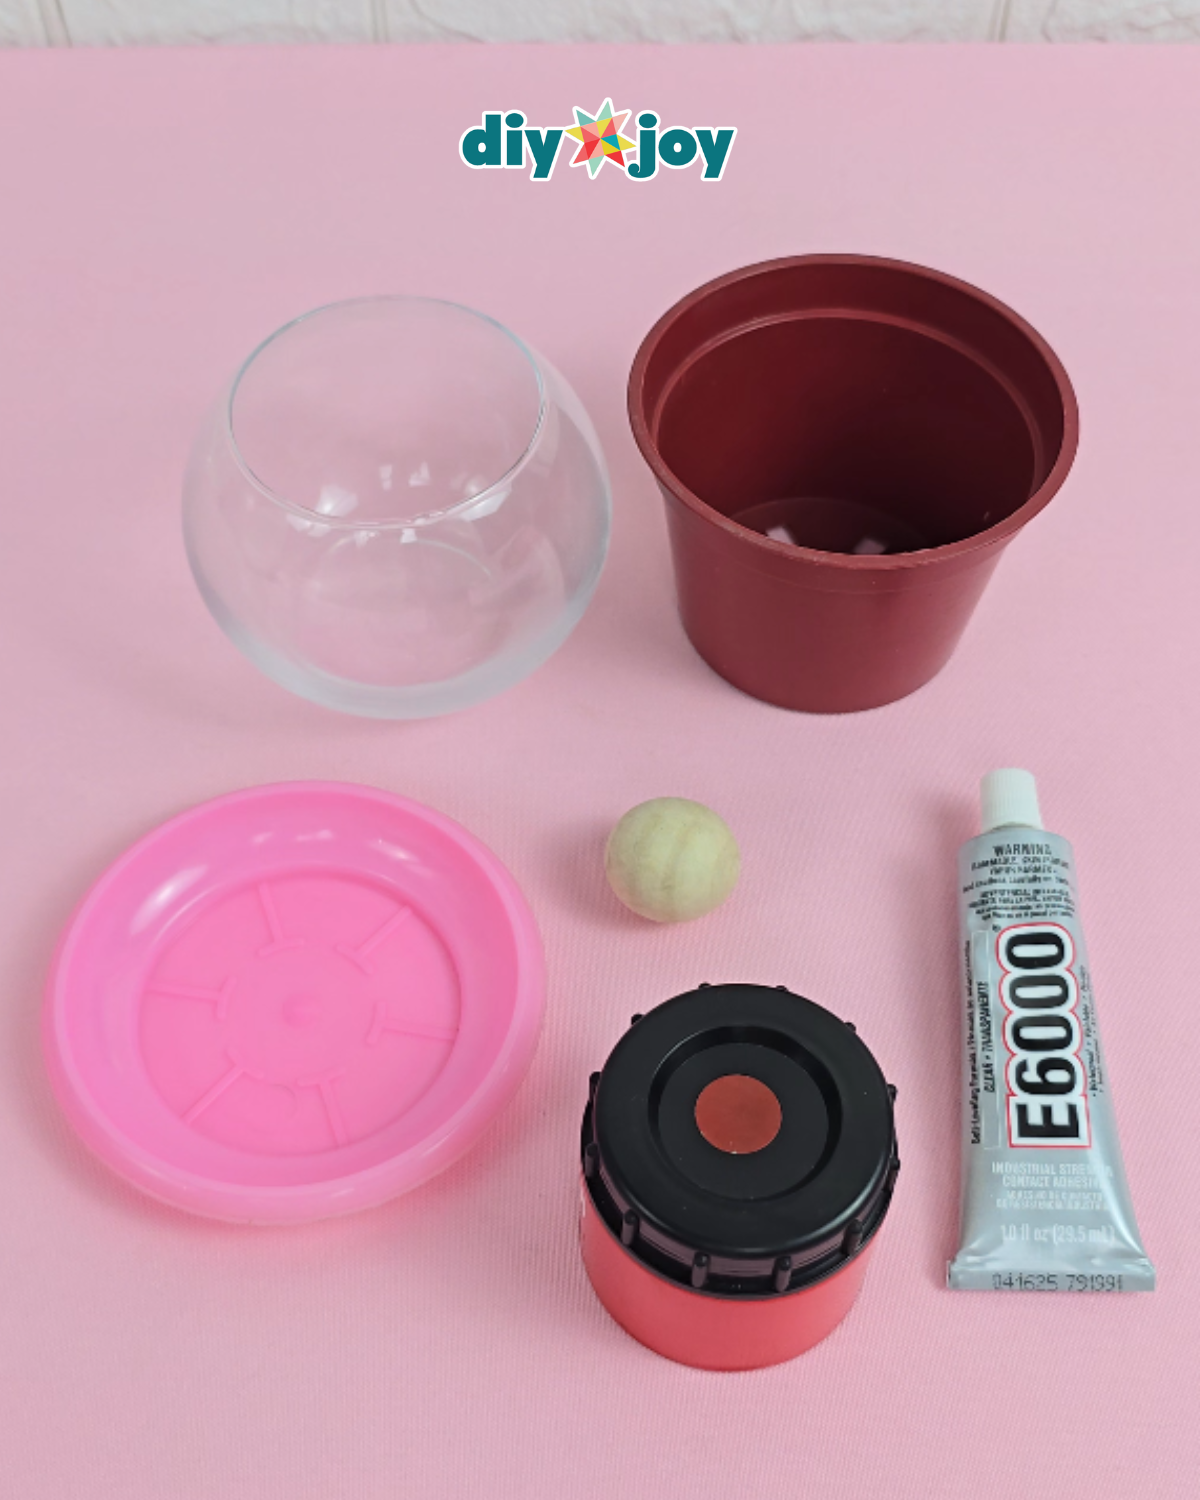
Materials
- Flower Pot with Matching Drip Tray
- Fishbowl
- Primer Paint
- Paint and Paintbrush
- Ribbon
- E6000 Glue
- Hot Glue Gun and Glue Sticks
- Wooden Ball
- Paper Straw
![]()
Pro Tips
- Test the fit before gluing
Dry fit all the pieces first to make sure everything aligns properly. This prevents uneven placement and makes the final jar look more balanced. - Customize by occasion
Change the colors or labels to match holidays like Valentine’s Day, birthdays, or party themes. This makes the project easy to personalize and gift. - Scale it down for keychains or party favors
Use smaller containers to create mini versions using the same technique. These are great for gifting, selling, or using as party favors. - Secure edible items safely
If you are using candy or chocolates, line the inside or use wrapped treats to keep everything clean and food safe. - Let the glue cure overnight
Even if it feels dry, giving the project extra time to set will make it sturdier and longer-lasting.
What’s Viral on DIYJoy Today

Crafts
Paper Flowers

Crafts

Paper Flowers
*If you love this craft, then visit our official website, follow our Facebook page, and subscribe to our YouTube channel for more!
DIY Flower Pot Candy Jar Tutorial