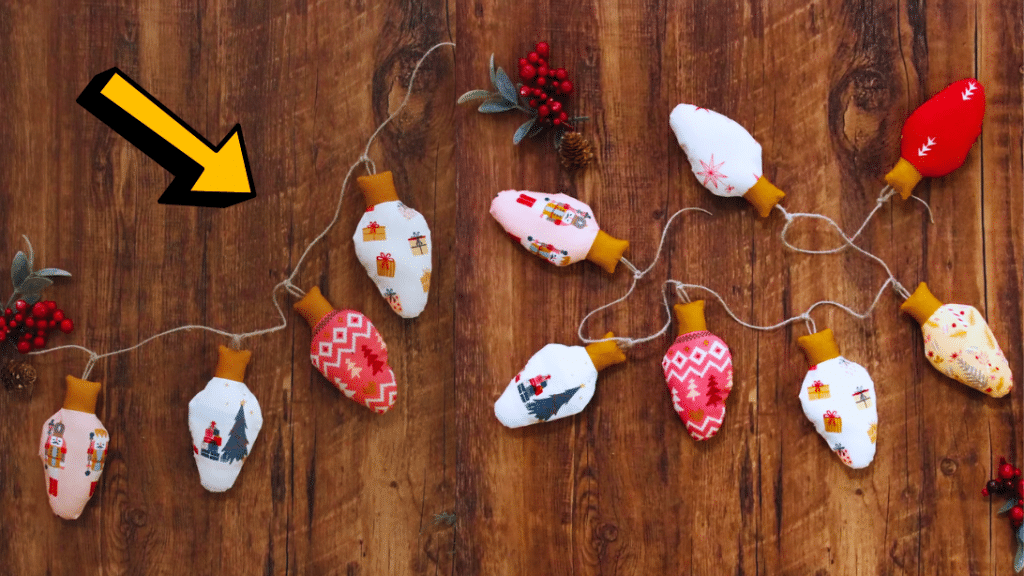
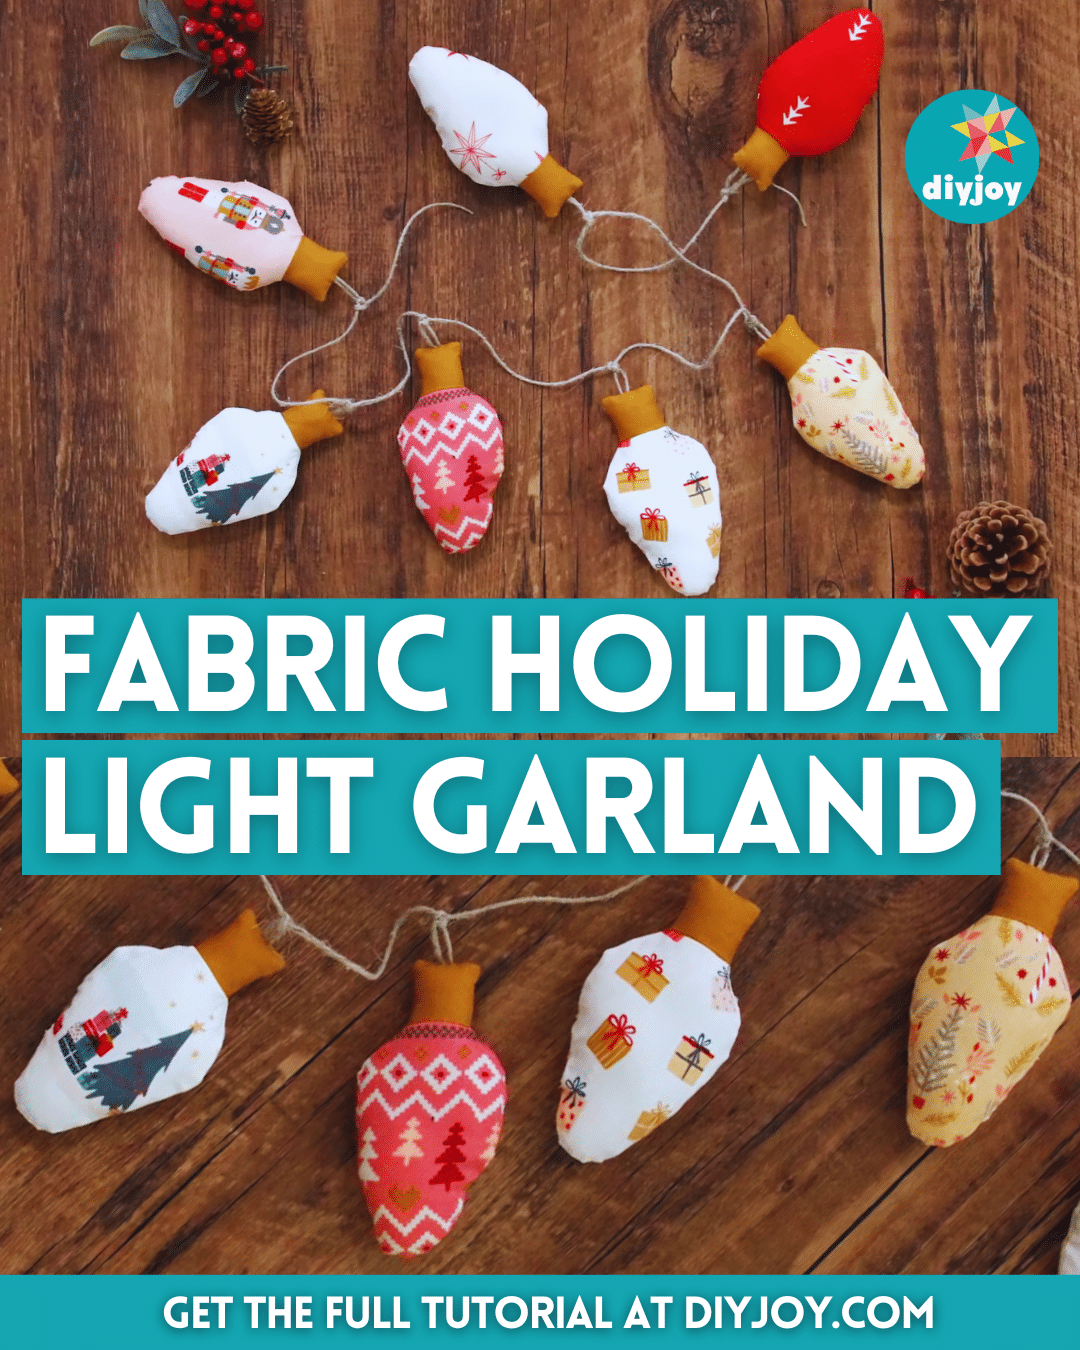
This DIY fabric light garland by Art Gallery Fabrics on YouTube is the perfect decor for Christmas. It would also make a great handmade gift to a loved one, or you can use it as a gift bag filler if you want. This is very easy to make and even if you’re new to sewing, I’m sure that you can finish this project perfectly on your first try.
RELATED: 3D No Sew Fabric Snowflakes
What’s even better about this DIY project is that you can make this using some fabric scraps and you wouldn’t have to spend a lot of money on the materials because you can easily find them in the nearest Dollar Store. You can also add more embellishments to the garland to make it more festive such as poinsettia, some artificial leaves, etc.
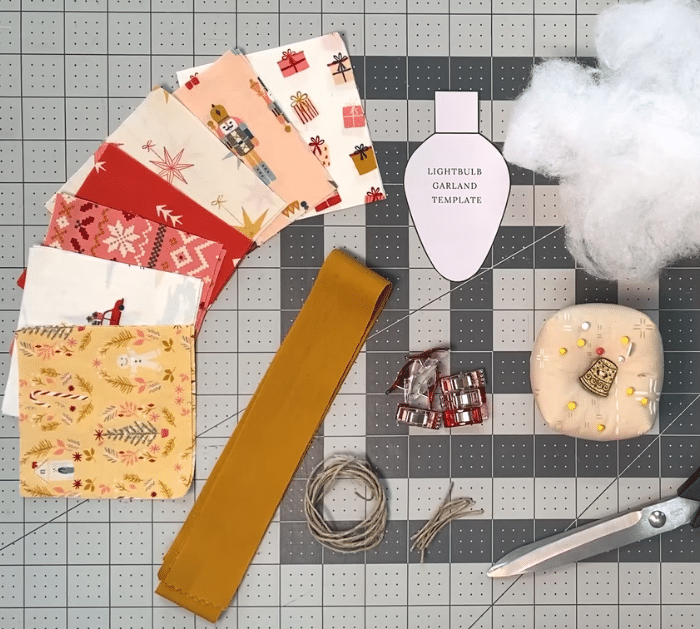
Materials for Fabric Holiday Light Garland:
- 14 pieces of assorted print squares @ 4″ each
- 2 pieces of solid fabric strips @ 2″x WOF
- Poly-fil fiberfill
- Twine
- Marking pen, pencil, or chalk
- Scissors or rotary cutter and a cutting mat
- Fabric pins or clips
- Needle and thread
- Iron, for pressing
- Sewing machine
- Template (Click here to download the template)
How to Make Fabric Holiday Light Garland:
Step 1
Pick 7 assorted print fabrics and cut them into 7 pairs of 4-inch squares for a total of 14 pieces, then cut the solid fabric strips.
Step 2
Lay the fabric squares on top of the solid strips with their right sides facing, then chain sew them, and trim each section apart.
Step 3
Pair the matching pieces and press the seams to the side alternating the direction for each piece, then stack them together with their right sides facing, and make sure to nest the seams.
Step 4
Pin them in place, then trace the template on top, and insert a small piece of folded twine in between the top of each pair.
Step 5
Stitch around the shape and leave an opening backstitching at the start and finish, then cut out the shape with ¼ inch seam allowance, trim the corners at an angle, and notch the edges around the curve.
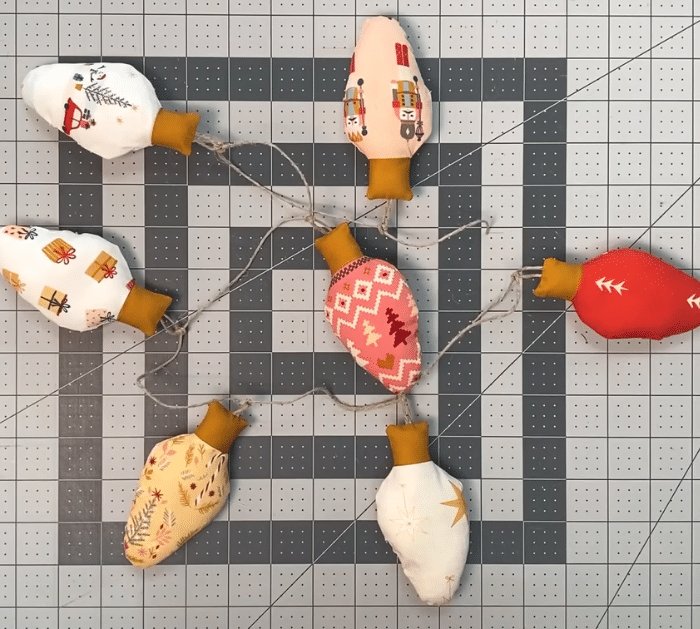
Step 6
Turn it right side out, then poke the edges nicely, and press the light bulb to remove any wrinkles. Stuff the light bulb without overfilling, then tuck in the edges of the opening and stitch it close.
Step 7
Get a long piece of twine, then mark at every 5 inches, and tie a light bulb in each mark.
*All image credit belongs to Art Gallery Fabrics via YouTube. Follow and subscribe to her channel for more!
Fabric Holiday Light Garland Sewing Tutorial


