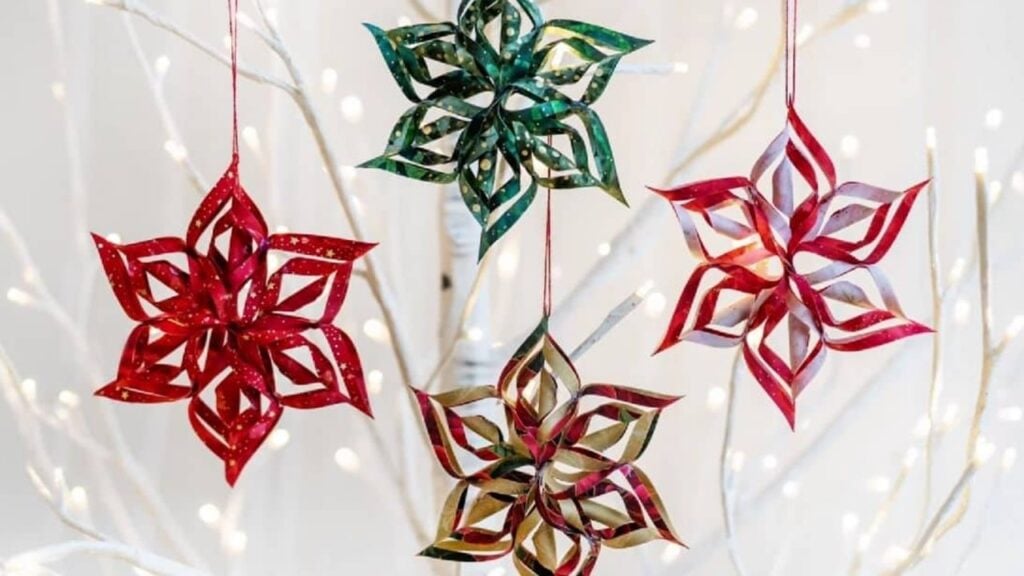
Today’s Christmas craft project involves fabric but not sewing, isn’t that unique and interesting? That might’ve sounded difficult to do, but it’s pretty easy! As the holiday season is nearing we sure needed something that can be done in just a few minutes so that we can still make a few more. This tutorial by Shabby Fabrics on YouTube as always is such a big help, she makes special projects so much easier and fun to do. You don’t also have to worry about how much it would cost because you can use any fabric you want, whether it’s from scraps or old materials, it doesn’t matter because you can repurpose and make them look as good as new.
Materials:
- 2 pcs Fabric (different designs)
- Rotary cutter
- Hot glue
- Double-sided tape
- Needle and thread
- Ruler
Directions:
Step 1
Choose a combination of fabric that you want for the front and back pieces of the snowflake. Cut 2 ½ inches strip of paper and place it on top of a fabric of the same size, press it with iron then remove the paper once it has completely cooled down. Glue or use a double-sided tape to join the two different designs of fabric together, cut them into squares about 4 to 5 inches size each, make sure that you have 6 pieces of squares in total.
[social_warfare]
Step 2
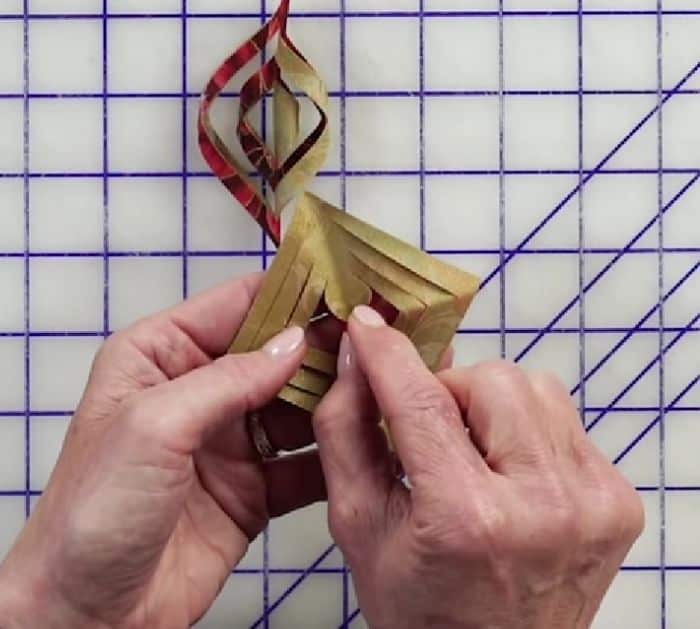
Take one square and fold it in half diagonally, press the fold with your hands, then fold it again in half and the fabric will become triangular. Cut the fabric into ¼ inch strips but not all the way, stop when you’re about ¼ inch away from the edge of the fabric’s side. Open the fabric and take the first two pointed sides and join them in the middle, securing it with hot glue. Flip the piece and join the next two pointed sides in the middle. Repeat the process until the last pair. Do this process to the other 5 pieces.
Step 3
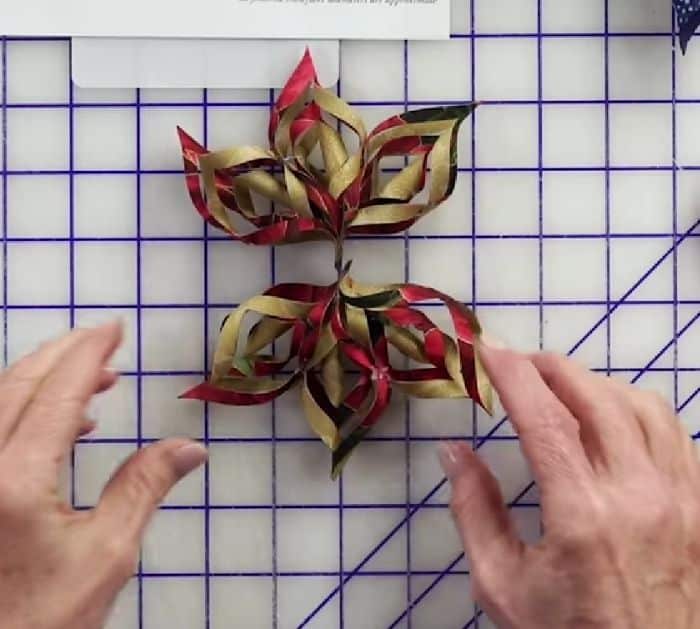
Start assembling the pieces. Separate the 6 pieces into two portions, 3 pieces for the upper part and the other 3 for the lower. Take 1 portion and gather the lower ends together at the center, then secure with hot glue. Do this to the other portion. Connect the pointed ends of the two portions, then start gluing the sides to secure the snowflake. Grab some thread and needle, push it through 1 pointed edge of the upper part and make a loop, then knot the end.
*All these amazing images are thanks to Shabby Fabrics on YouTube. Visit and follow her channel for more.
3D No-Sew Fabric Snowflakes


