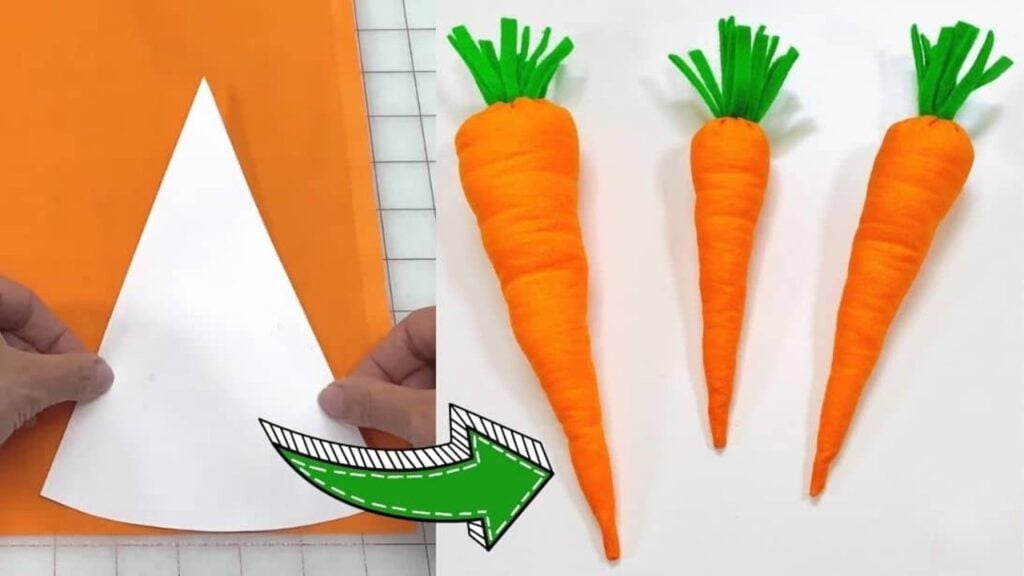
This fun sewing project by Notches Sewing on YouTube will teach you how to make fabric carrots that you can use as decor, gift, or toy. With only a few materials and super easy steps, you can have this adorable carrot in no time. Plus, once you’ve learned the basics, you can modify the size and make one as large as you want.
Materials:
- Orange quilting cotton fabric
- Green craft felt
- Scissors
- Chalk or marking pen
- Pins and clips
- Orange and green thread
- Needle
- Sewing machine
- Polyester fiberfill
- Pattern (click on the link to download the pattern)
Directions:
Step 1
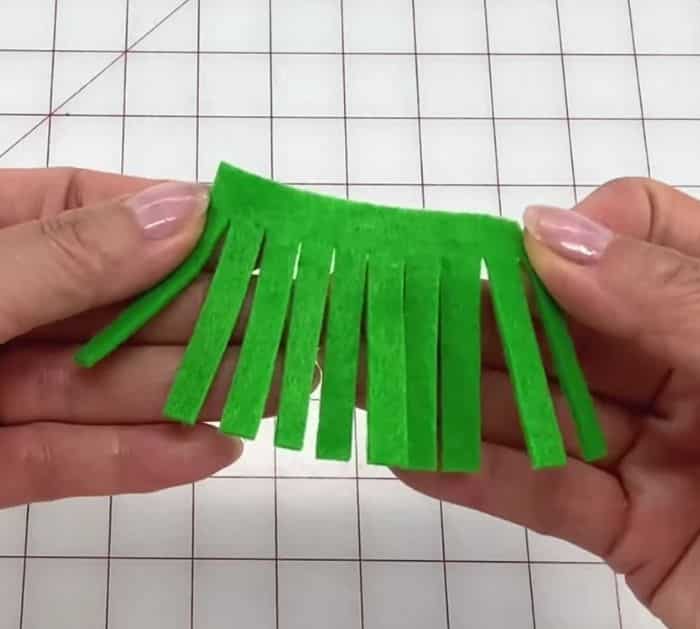
For this project, you can either download the pattern from her website by clicking here or you can draw one on your own. After cutting out your pattern, place it on top of a plain orange-colored quilting cotton fabric, then cut it out. Another way to do this is by folding the pattern in half lengthwise, then placing it on top of a folded fabric, then cutting it out. On the right side of your fabric and using chalk, draw a line that’s about 3/8 inch or 1cm on the wider side of the fabric. Fold it in with their right sides together and with the edges matching, clip or pin them together in place. For the carrot stem, place the stem pattern on top of a green craft felt and cut it out, then clip the top edges together and cut out the quarter-inch strips along the lines on the pattern or do it freehand.
[social_warfare]
Step 2
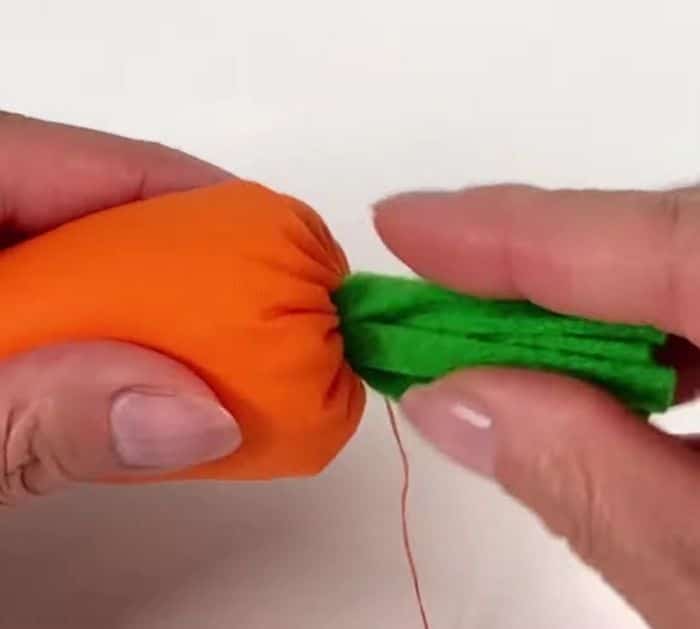
Double thread your needle until you have about15 inches or so to work with, then roll the solid end of the felt tight all around, and secure the ends with a couple of stitches. Then, stitch through all the layers in a couple of places, wrap the thread around the bottom a couple of times about a quarter of an inch from the edge, and knot in place. Sew the orange fabric with a quarter-inch seam allowance, then turn it right side out, poke the corners well, and sew a small running stitch along the chalk line starting near the seam. Fold the top edge in and crease right along the stitch line. Fill the carrot with polyester filling, pull the thread at the top until you just have a small opening left, then sew to hold it in place. Push the green stem into the opening, sew together a bit of the stem with the top of the gather with a small stitch, pull, and knot. Squish on your hands to give them some wrinkles.
*All these images are credited to Notches Sewing via YouTube. Give her channel a visit and subscribe for more!
Easy DIY Fabric Carrots Sewing Tutorial


