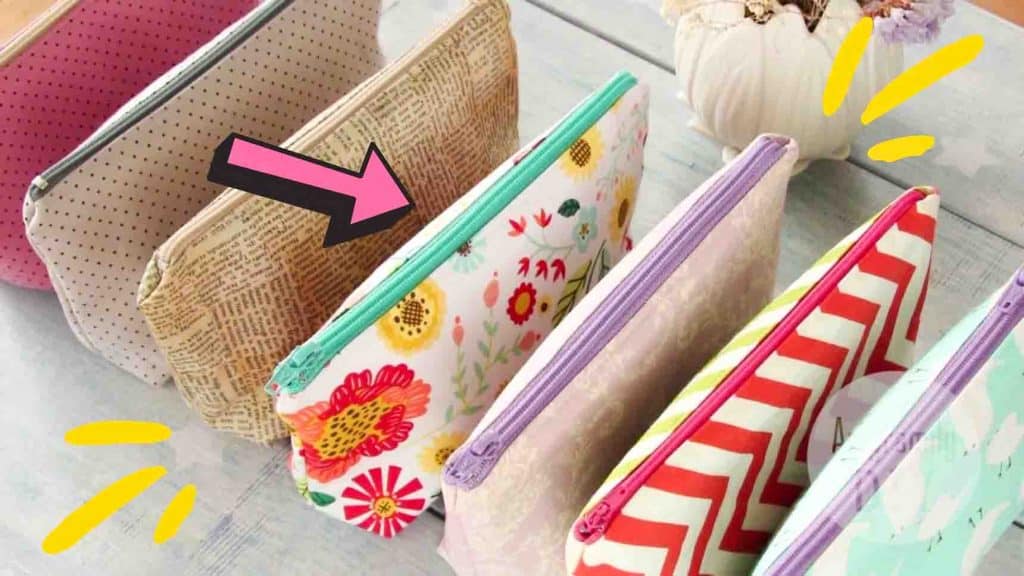
It doesn’t matter if you are a pro seamstress or not; this DIY cosmetic pouch tutorial from AmyFamily DIY on Youtube is so easy to make that you will wonder if you really are a beginner. It’s also a plus if you’re a makeup junkie because I’m sure you’ll never have enough pouch for all those makeup! Learn the steps by watching the video tutorial below.
Materials:
- 2 rectangular pcs (25cm x 17cm) of outer fabric
- 2 pcs (25cm x 17cm) of inner fabric
- 25cm zipper
- 2 rectangles of fusible adhesive
Directions:
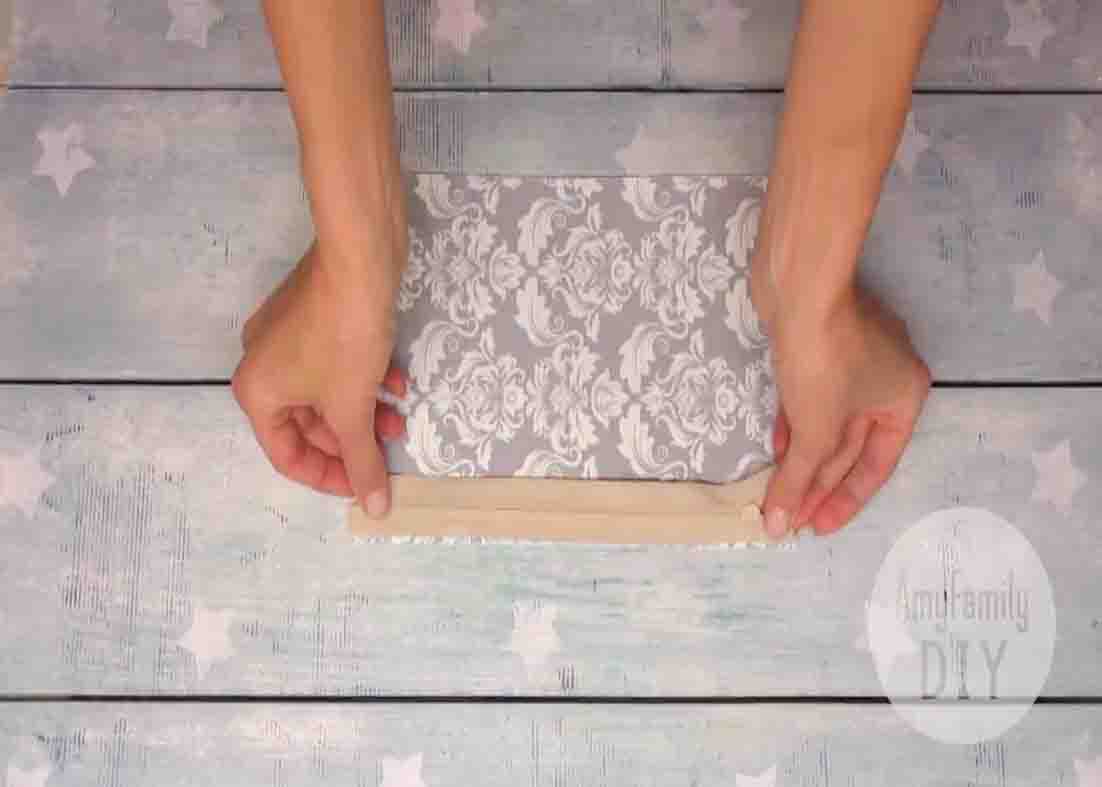
Step 1
Iron the fusible adhesive to the wrong sides of the outer fabric. Next, take the zipper and place it on the right side of the outer cloth, and put the base of the inner fabric on top, right side down. Even out the edges then secure it with pins, then sew it. Open the zipper and sew the remaining part. Unfold the fabric and iron it in the needed position. After this, make another stitch, two to three millimeters away from the edge. (This would prevent the fabric from getting stuck in the zipper while using it.) Next, place the remaining outer part right side up on top, then place the sewn piece on it and cover it with the remaining piece of the inner fabric, right side down. Even out the edges, secure it with pins, then sew it. Unfold the fabric, iron it again in the required position, and sew it.
[social_warfare]
Step 2
To open the pouch inside out, open up the zipper, and fold the fabric from the wrong side to the wrong side, and the right side to the right side. (The zipper blade should be facing the inside fabric.) Fix this in this position and secure it with clips. Secure the perimeter with pins. Leave a gap in the inner fabric to turn the pouch inside out later. Sew along the perimeter, ignoring the gap. After sewing, cut off the corners. Next, open up the corners, put the opposite seams together, and mark a line 4 to 7 cm away from the corner. Do the same on all four corners. Sew all four corners along these lines. After this, turn the pouch inside out, then sew the gap close. Your pouch is now ready.

Easy DIY Cosmetic Pouch Tutorial


