
Got some old denim jeans or just found random denim printed fabric cute but don’t know what to sew it into yet? Try turning it into a cute pouch bag that can fit your small accessories or even your phone with this video tutorial by sewingtimes on YouTube.
Materials:
Outer fabric
- 2 pieces of 10¾ * 5¾ inches
- 2 pieces of 10¾ * 1¾ inches
- 1 piece of 4¾ * 19½ inches
- 1 piece of 4¾ * 12⅝ inches
Lining fabric
- 2 pieces of 10¾ * 5¾ inches
- 2 pieces of 10¾ * 1¾ inches
- 1 piece of 4¾ * 19½ inches
Mid-weight woven fusible interfacing
- 2 pieces of 10¾ * 5¾ inches
- 2 pieces of 10¾ * 1¾ inches
- 1 piece of 4¾ * 19½ inches
- 1 piece of 4¾ * 12⅝ inches
Other supplies you’ll need
- 1 piece of 10 inches zipper
- 1 piece of 1⅝ * 63¼ inches bias tape
- Iron, for pressing
- Fabric clips and pins
- Marking pin
- Scissors or rotary cutter and a cutting mat
- Sewing machine
Directions:
Step 1
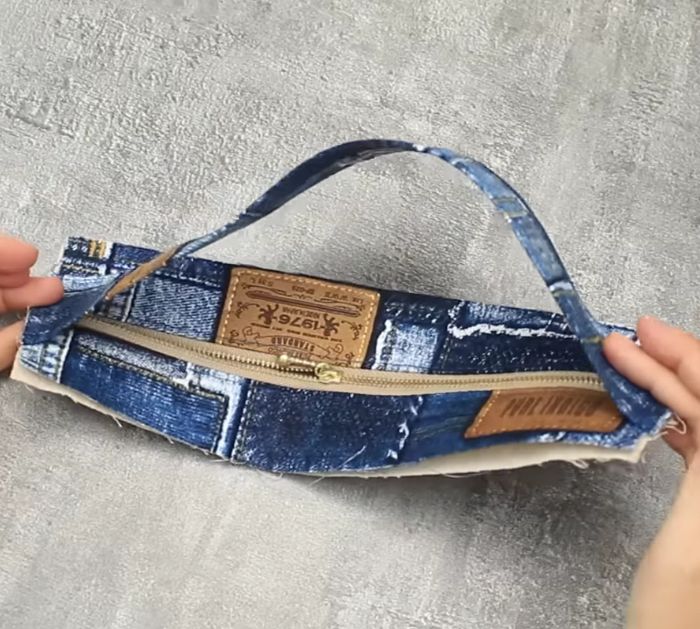
Draw the pattern for each part of the bag on the interfacing pieces of fabric, then cut them out, and use it to cut the rest of the lining and outer fabric accordingly. Refer to the video tutorial to see the exact shape and measurements of each piece. Fuse the interfacing fabric to the denim or outer fabric, then sew them together near the edges or at about ¼ inches seam allowance. Do this step for the rest of the pieces, then sew the two zipper fabric strips on each side of the zipper, and topstitch. Lay the handle of the bag on top of the zipper with their right sides facing up, then line both their shorter sides nicely, and sew them together.
[social_warfare]
Step 2
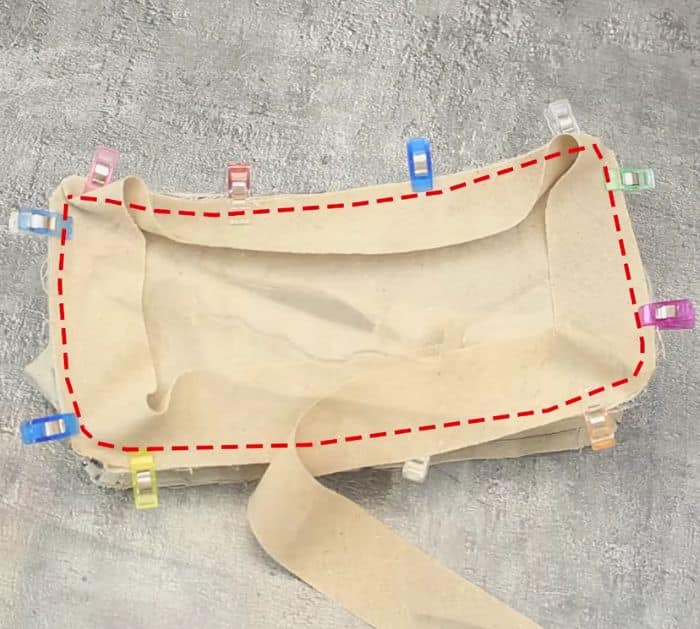
Place this on top of the lining fabric base with their lining sides facing together, then place the base outer on top with its right side facing down. Sew them together on their shorter sides leaving about 3/8 inches gap on each side of the shorter edges, and notch those corners in a box. Turn the whole piece right side out, then sew them together all around the sides with a ¼-inch allowance, and trim out the frays on the edges as needed. Sew the body pieces on each side o the bag, then sew the bias tape all around the inner seams, and you’re done.
*All image credit belongs to sewingtimes via YouTube. Follow and subscribe to her channel for more!
Easy Denim Pouch Bag Sewing Tutorial


