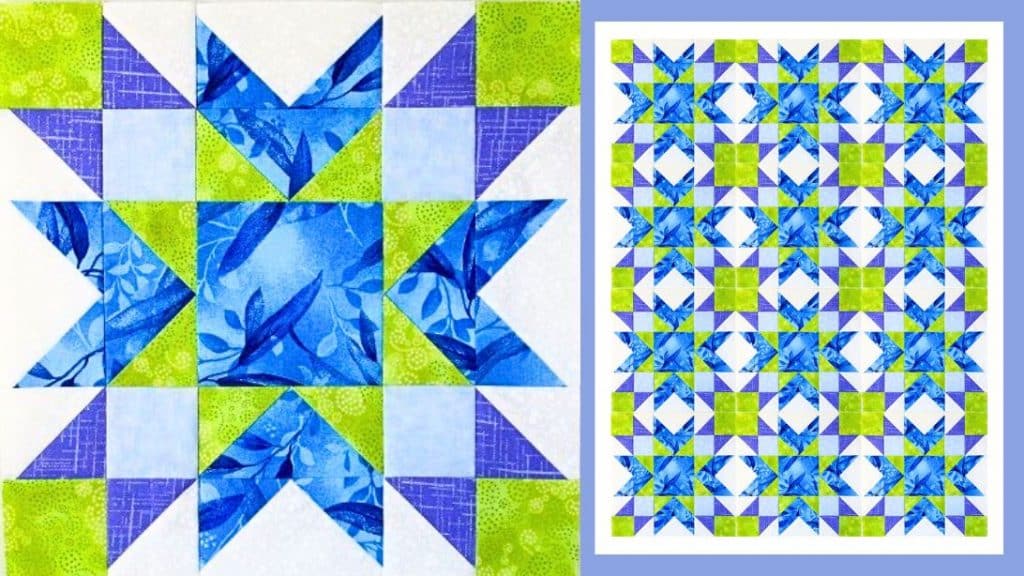
If you love making quilt blocks that are colorful and have lots of characters or shapes in them, then you’ll probably love this project by fabric406 on YouTube. This incredible tutorial is the perfect quilt block for both beginners and seasoned quilters to try. The steps are super easy to follow and the instructions are very detailed so you don’t have to worry about messing up.
RELATED: Easy Helen Quilt Block Tutorial
The tutorial below will show you how to make a 12-inch finished blueberry pie quilt block using a few colored fabrics that resemble the color of blueberries as a reference to its name but you are also free to swap them with a color and print of your choice, and make your version of this block. I bet you’ll love quilting as a hobby even more after trying out this project.
Fabric Requirements:
- Light/White background fabric, cut into (4) 2.5″ x 4.5″ rectangles & (4) 3″ squares
- Light/Blue print fabric, cut into (4) 2.5″ squares
- Medium/Green print fabric, cut into (12) 2.5″ squares
- Dark/Purple print fabric, cut into (4) 3″ squares
- Dark/Blue print fabric, cut into (1) 4.5″ square, (4) 2.5″ x 4.5″ rectangles & (8) 2.5″ squares
Other Supplies Needed:
- Marking pen, pencil, or chalk
- Ruler
- Scissors or rotary cutter and a cutting mat
- Needle and thread
- Iron, for pressing
- Sewing machine
- Pattern (Click here to download the pattern)
Directions:
Step 1: Making the Half-Square Triangles
Lay a 3″ light and dark square together with their right sides facing, then line the wrong side of the square diagonally, and stitch them on either side of the line before cutting them in half. Press the seams toward the lighter fabric, then trim the unit into 2.5″ squares, and repeat the steps to the remaining squares to make a total of 8 units.
[social_warfare]
Step 2: Making the Flying Geese Units
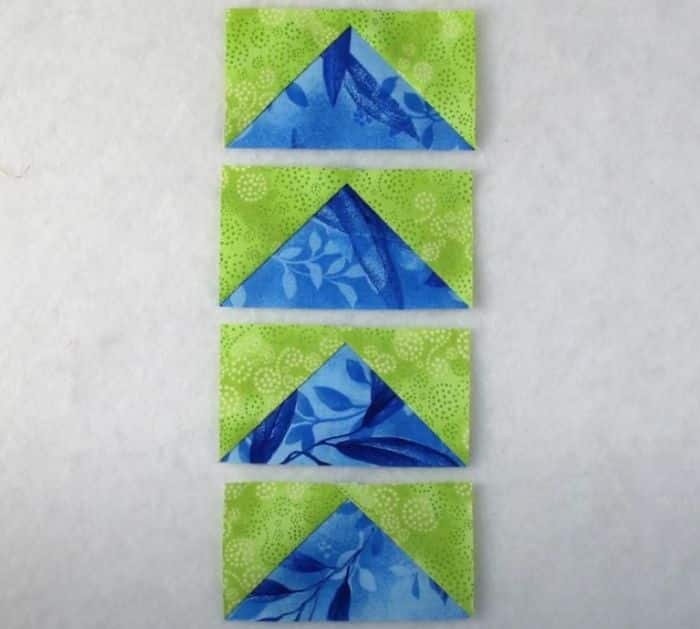
Place the 2.5″ medium square on one end of the 2.5″ x 4.5″ dark rectangle with their right sides facing, then line the back of the square diagonally, and stitch along that line. Trim off the excess with an ¼ inch seam allowance, then press the fabric open, and repeat the same steps to the remaining fabric pieces to make a total of 4 units.

Step 3: Assembling the Units
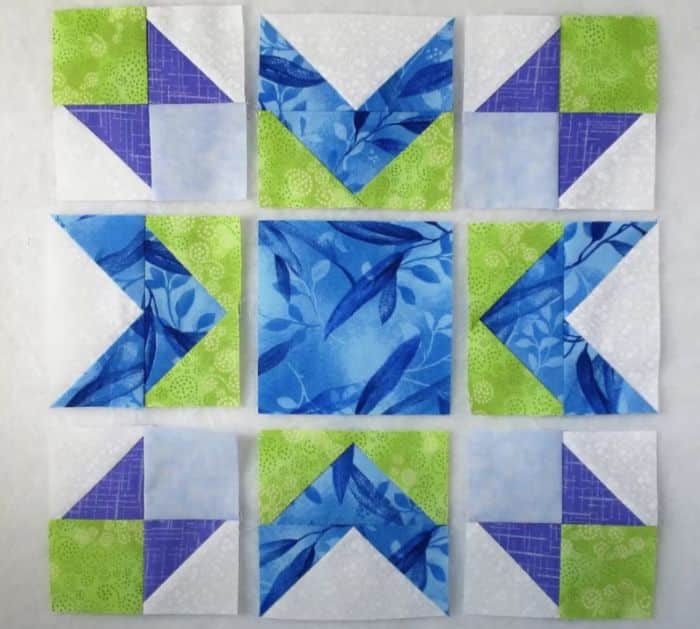
Make another set of flying geese units using the light rectangles and dark squares, then sew together 1 of each flying geese unit as shown in the video, and press the seams away the darker unit. Repeat this step for a total of 4 middle units. Now, piece the corner units together as demonstrated in the video, then assemble the block units making sure to refer to the diagram, and start stitching them per row. Once sewed each row, start stitching the rows to each other and press the seams as you go.

*All image credit belongs to fabric406 via YouTube. Follow and subscribe to her channel for more!


