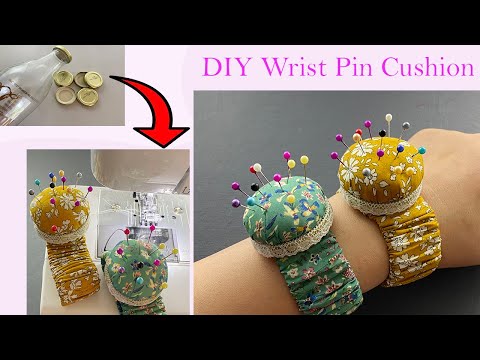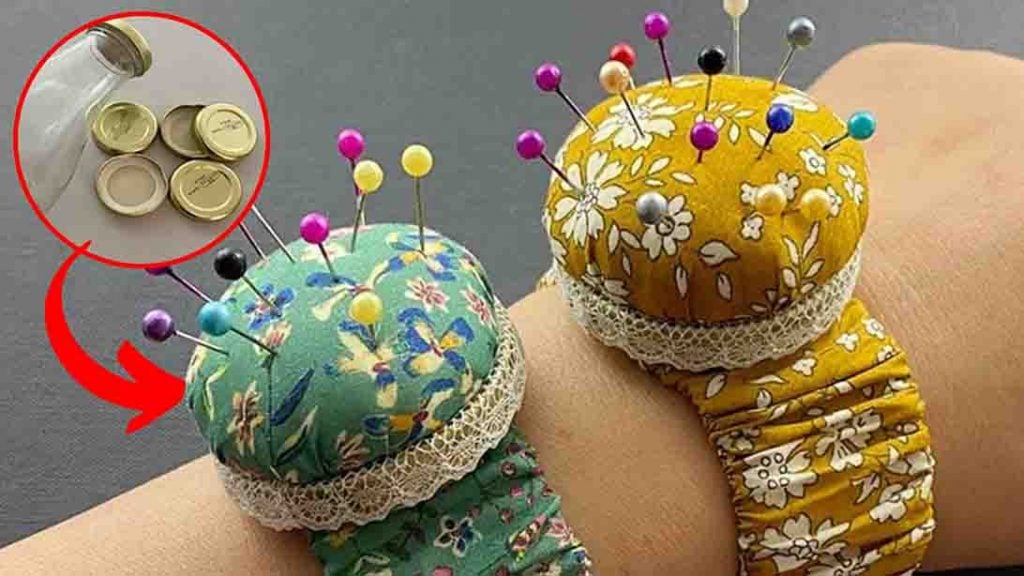
Imagine having your pins always within reach, securely held on your wrist as you work on your latest sewing project. With this easy-to-follow tutorial from Red Blossom Designs, you’ll transform an ordinary bottle cap into a handy and comfortable wrist pin cushion. This project is perfect for beginners and seasoned crafters alike, combining practicality with a dash of creativity.
RELATED: DIY Cactus Pin Cushion Tutorial
All you need are a few basic supplies: a bottle cap, some fabric scraps, a bit of stuffing, and an elastic band. In just a few simple steps, you’ll have a custom-made pin cushion ready for your sewing projects. This DIY wrist pin cushion is not only a practical solution to keep your pins organized but also a great way to upcycle materials you already have at home.
Materials:
- bottle cap
- fabric
- ruler
- scissors
- thread and needle
- cardboard
- cotton filling
- ribbon strips
- all-purpose glue
- hot glue gun
- elastic band
Directions:
Step 1
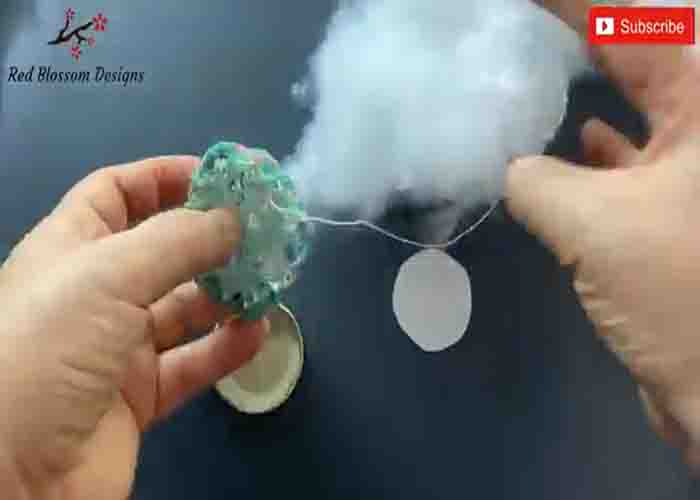
To start, measure the fabric with your cap’s size, cut it out, then stitch the edges. Right before you complete stitching the circle, insert some cotton filling inside, then secure it with a piece of round-shaped cardboard. Continue to stitch all the way through to hold the cotton filling. Once done, glue this at the bottom of the cap with some hot glue, then decorate the sides of the cap with some ribbon strips.
Step 2
Next, make the wristband with an elastic band band and the same fabric you use with the cushion. Cut a piece of fabric, twice the length of the elastic band, then sew it on the long edges, right sides together. Once done, turn it right side out, then insert the elastic band. Sew the edges together afterward. Lastly, glue the cushion to the wristband to finish the project.

DIY Wrist Pin Cushion Using A Bottle Cap