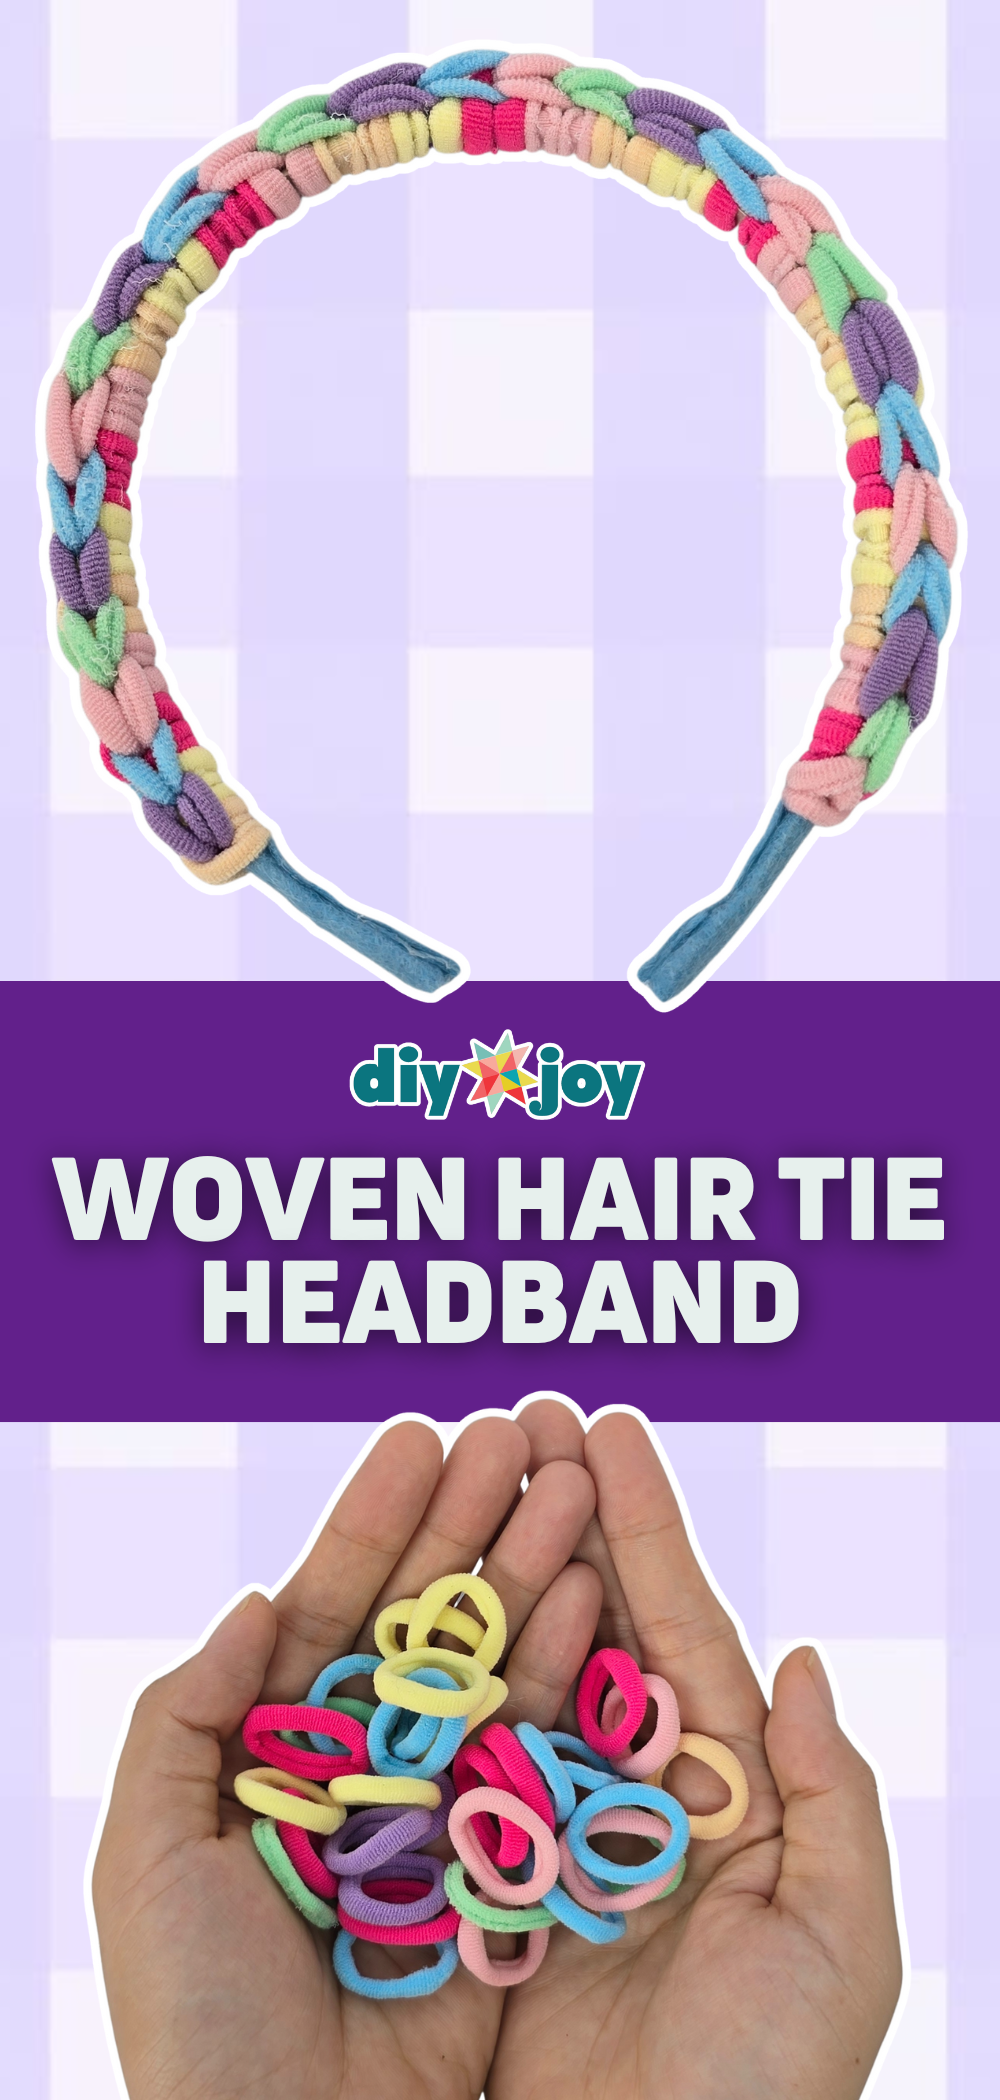
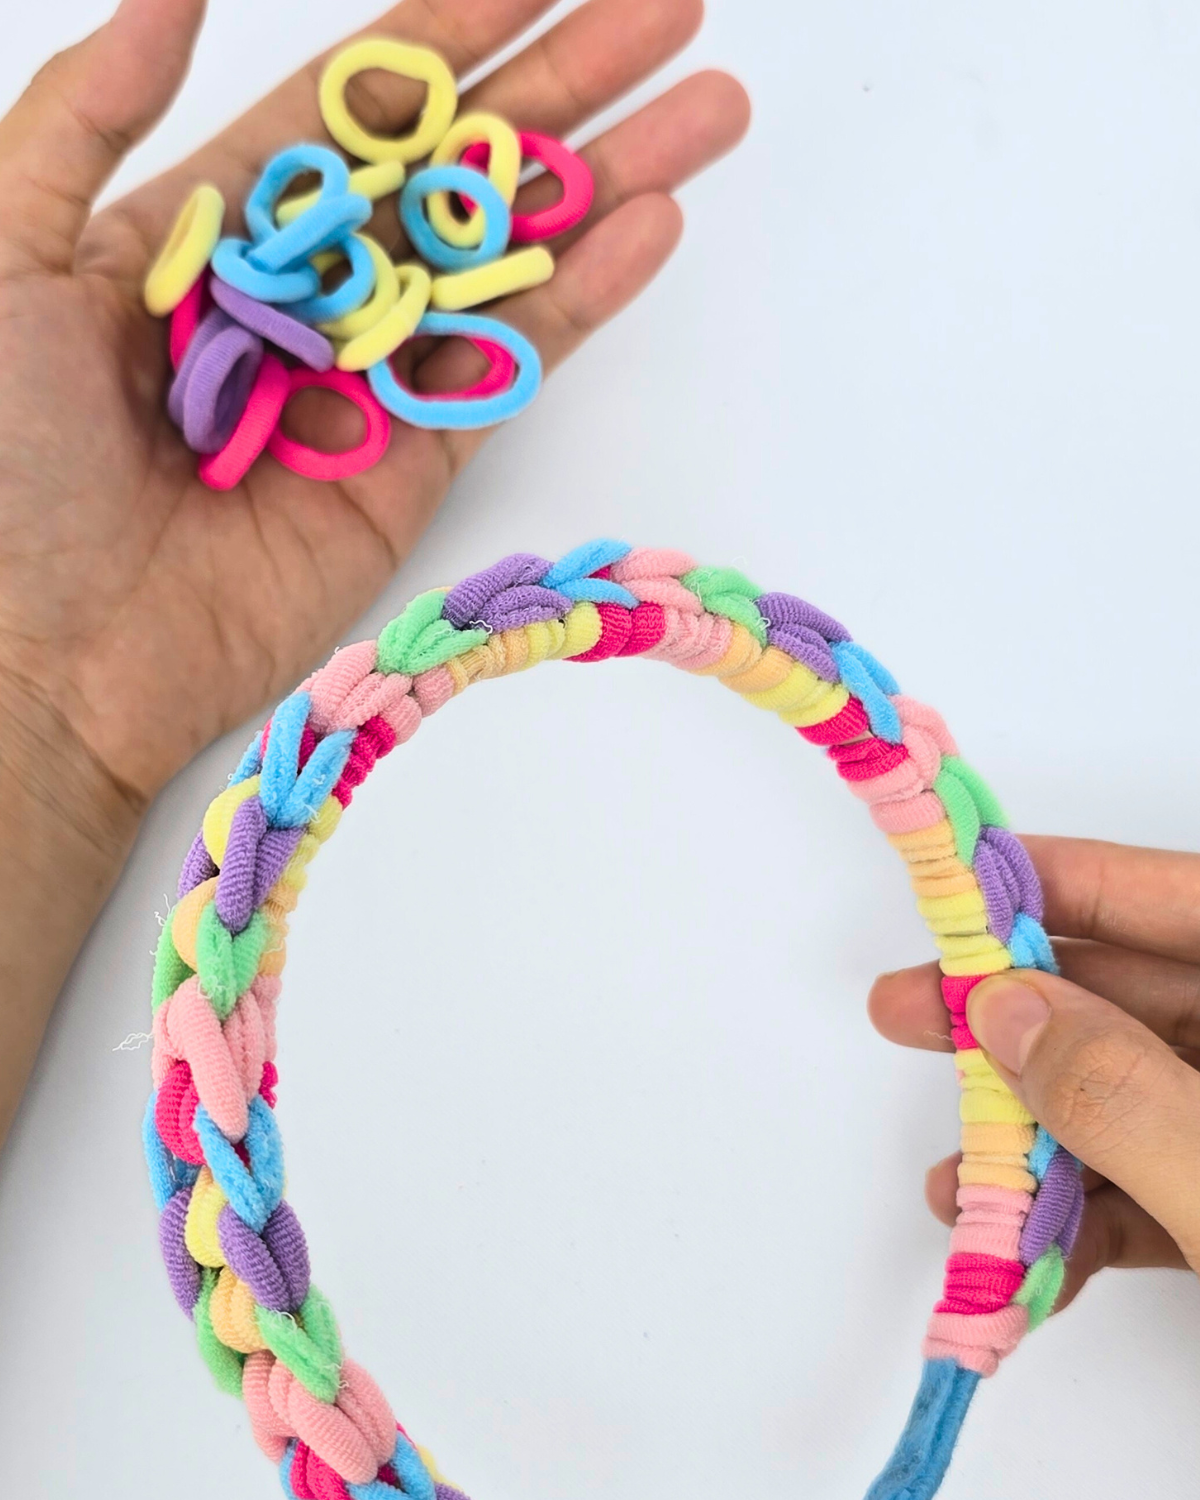
I love finding creative ways to reuse everyday stuff, and just a few days ago, I had a fun idea while digging through my drawer full of old hair ties. Instead of letting them sit there or tossing them out, why not turn them into something wearable? That’s how I discovered weaving hair ties into a headband.
At first, I thought, “How cool could a bunch of hair ties braided together really be?” But as I started weaving, the stretchy texture surprised me. The result? A comfy, chic headband that’s casual, unique, and just so colorful. And guess what? Everyone who saw what I made loved it!

What makes this DIY headband special is how practical and stylish it is. Plus, it’s super easy to make. Just grab some hair ties in colors or patterns you like, then braid or weave them as shown in the pictures below—and if you like a more detailed tutorial, you can also watch the video tutorial that’s right at the bottom of this article. No sewing, no fancy tools — just simple crafting fun.
RELATED: Easy DIY Hair Tie Rings
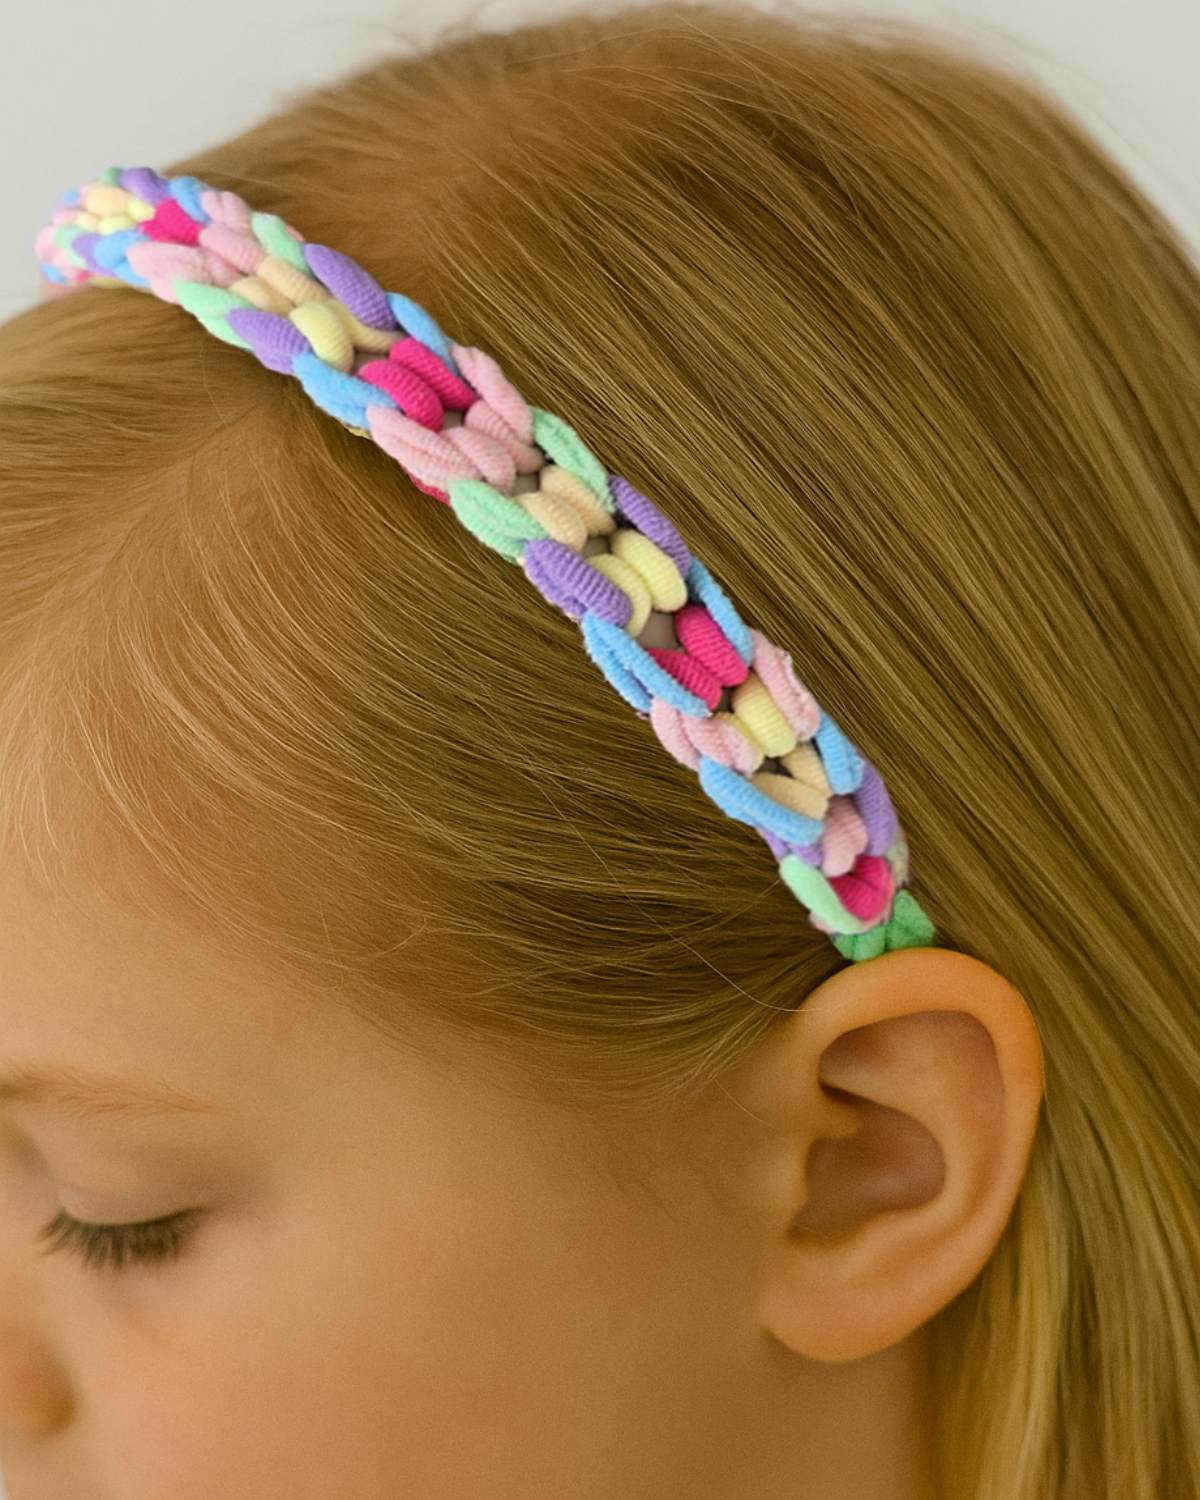
You can mix bright colors for a playful vibe or stick with neutrals for something classic, but for me, personally, I love pastels, so that’s the color that I decided to work on. It’s a quick project that makes a great accessory for yourself or a thoughtful handmade gift. If you’re into easy DIYs that blend style and function, this woven hair tie headband is a must-try. Give it a go—you might just find your new favorite accessory!
What You’ll Need for a Woven Headband
How to Make a Woven Hair Tie Headband
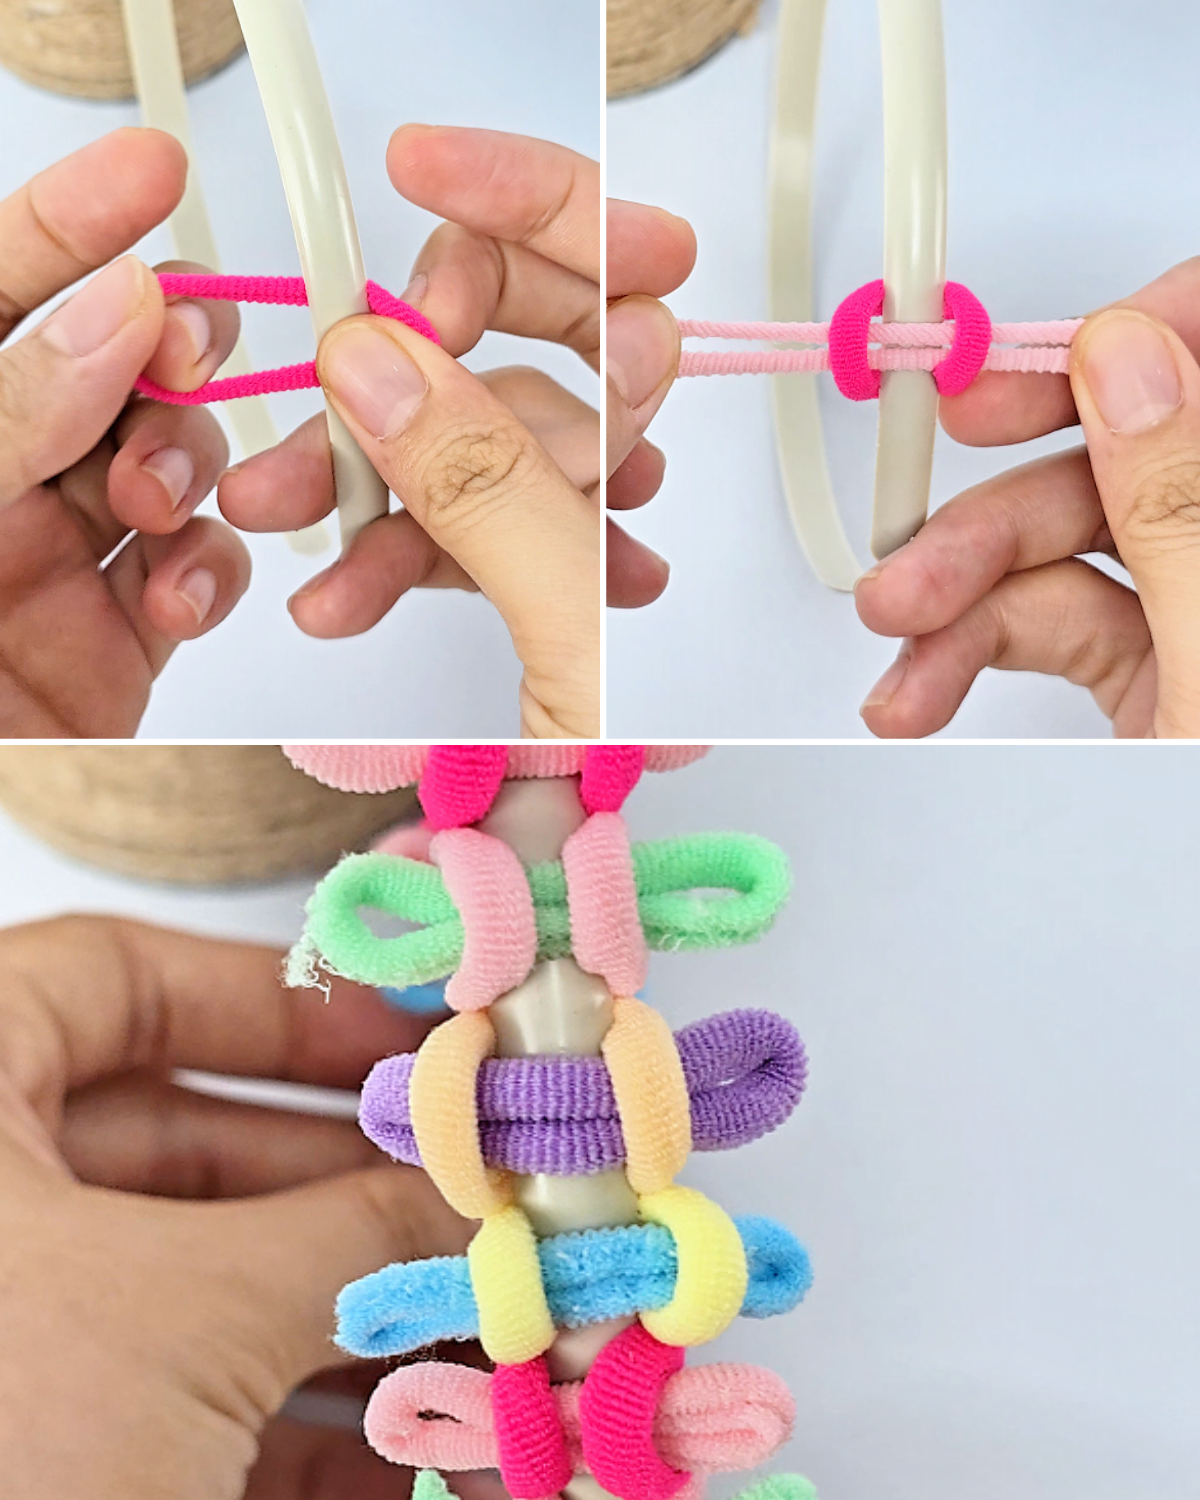
Step 1: Set Up Your Starting Point

Choose a starting point for weaving the hair ties, preferably about an inch or more from the end of the headband. Lay a hair tie horizontally on top of the starting point, then place another hair tie underneath the headband at the same spot. Stretch the bottom hair tie and loop each end over the ends of the top hair tie to secure them in place.Step 2: Weave the Hair Ties
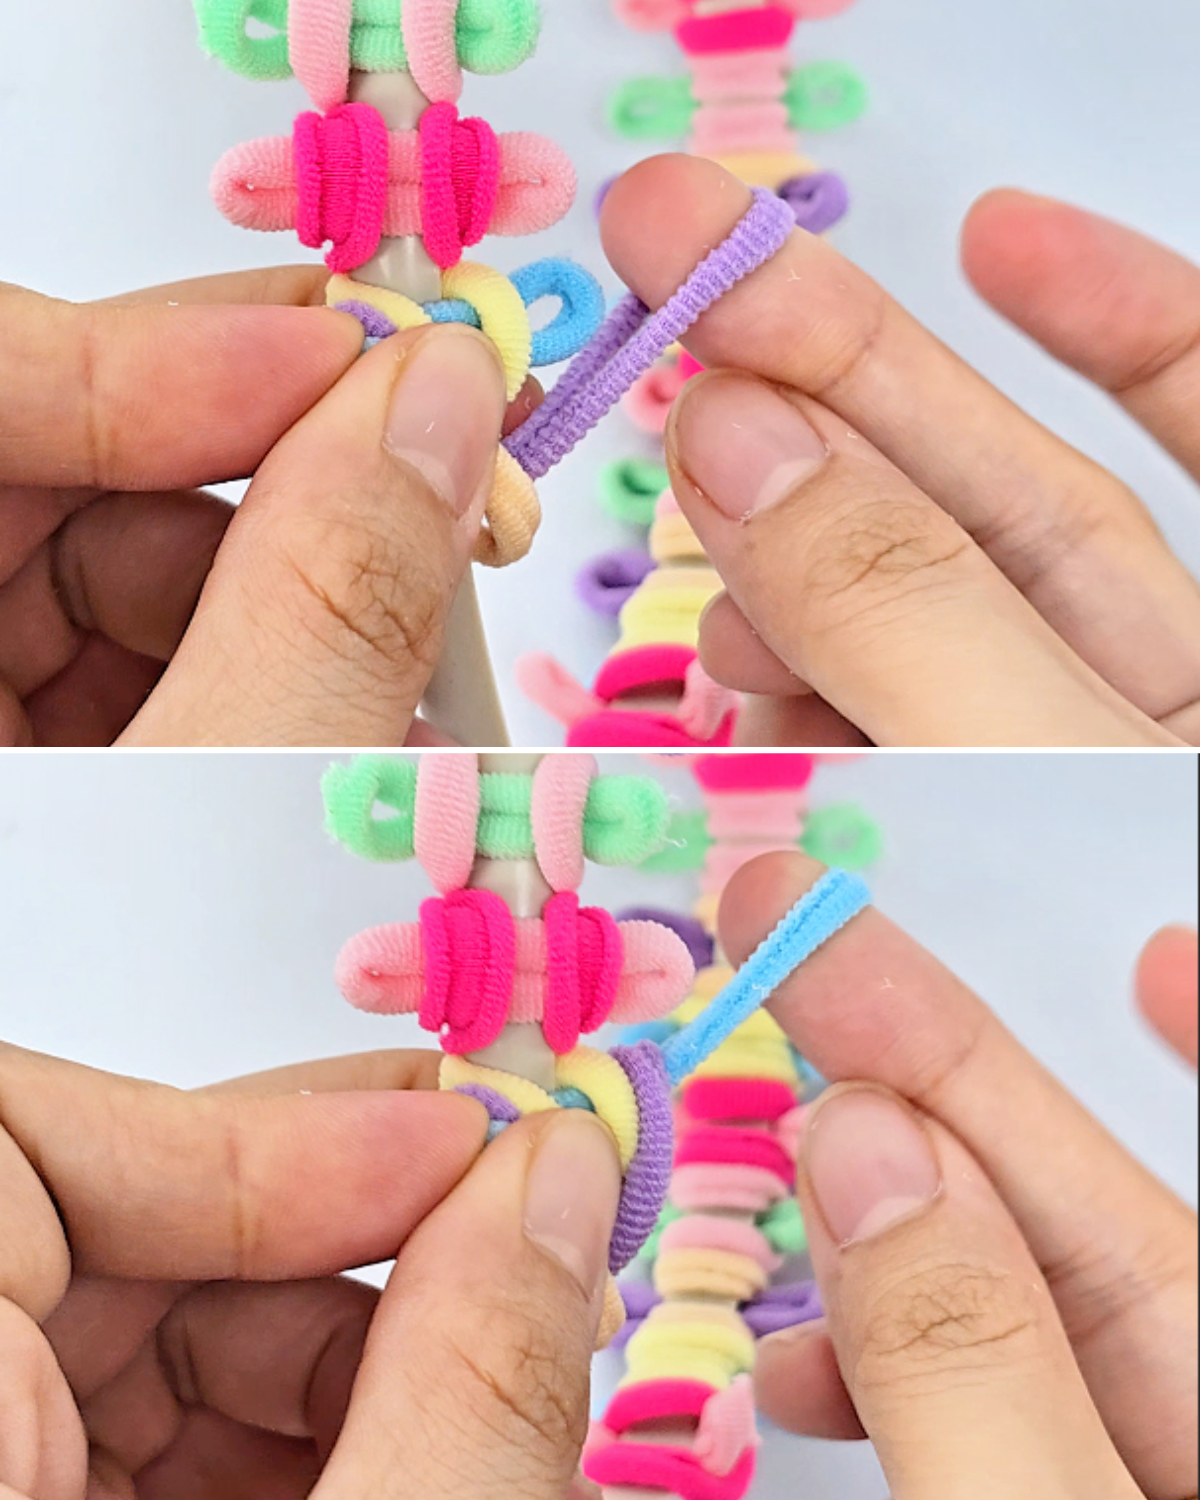
Continue adding hair ties in the same way until you reach your desired endpoint or the other side of the headband. Once all hair ties are in place, return to the first set. Hold the two loops hanging out on each side, stretch them, and bring them over the loops above. Then, pull the loops of the hair ties above and underneath the loops you just moved to secure the weave.Step 3: Complete and Secure the Weave
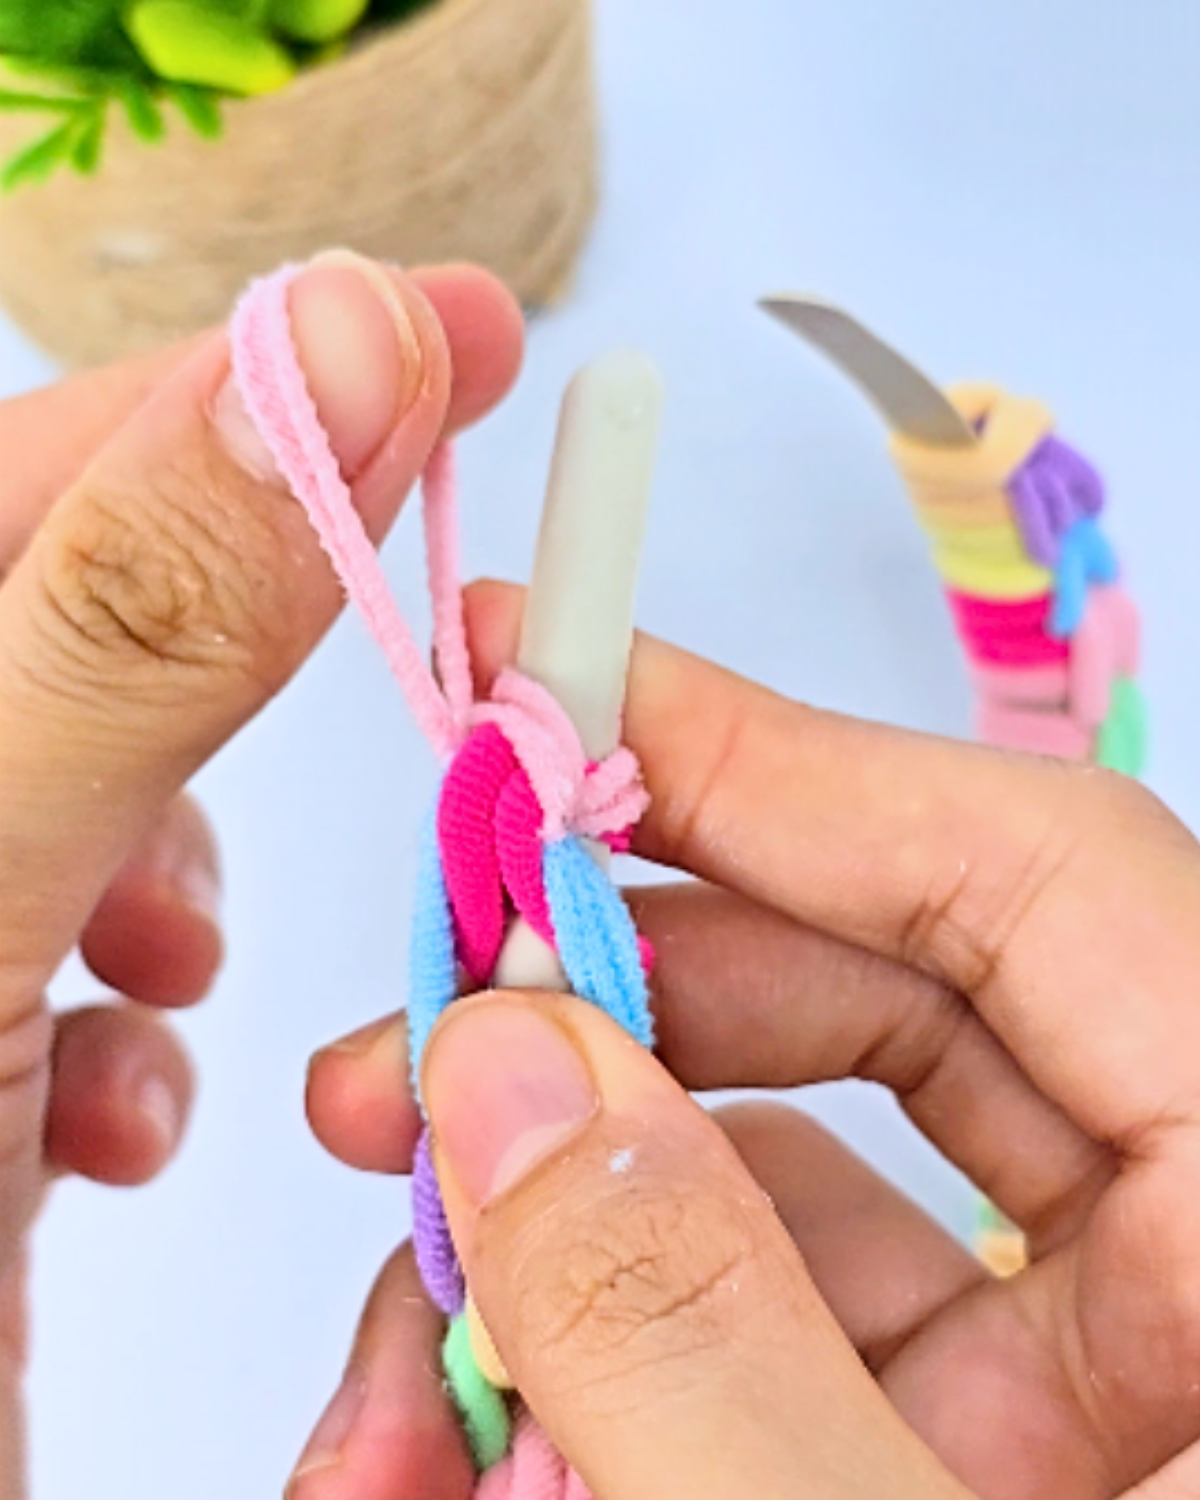
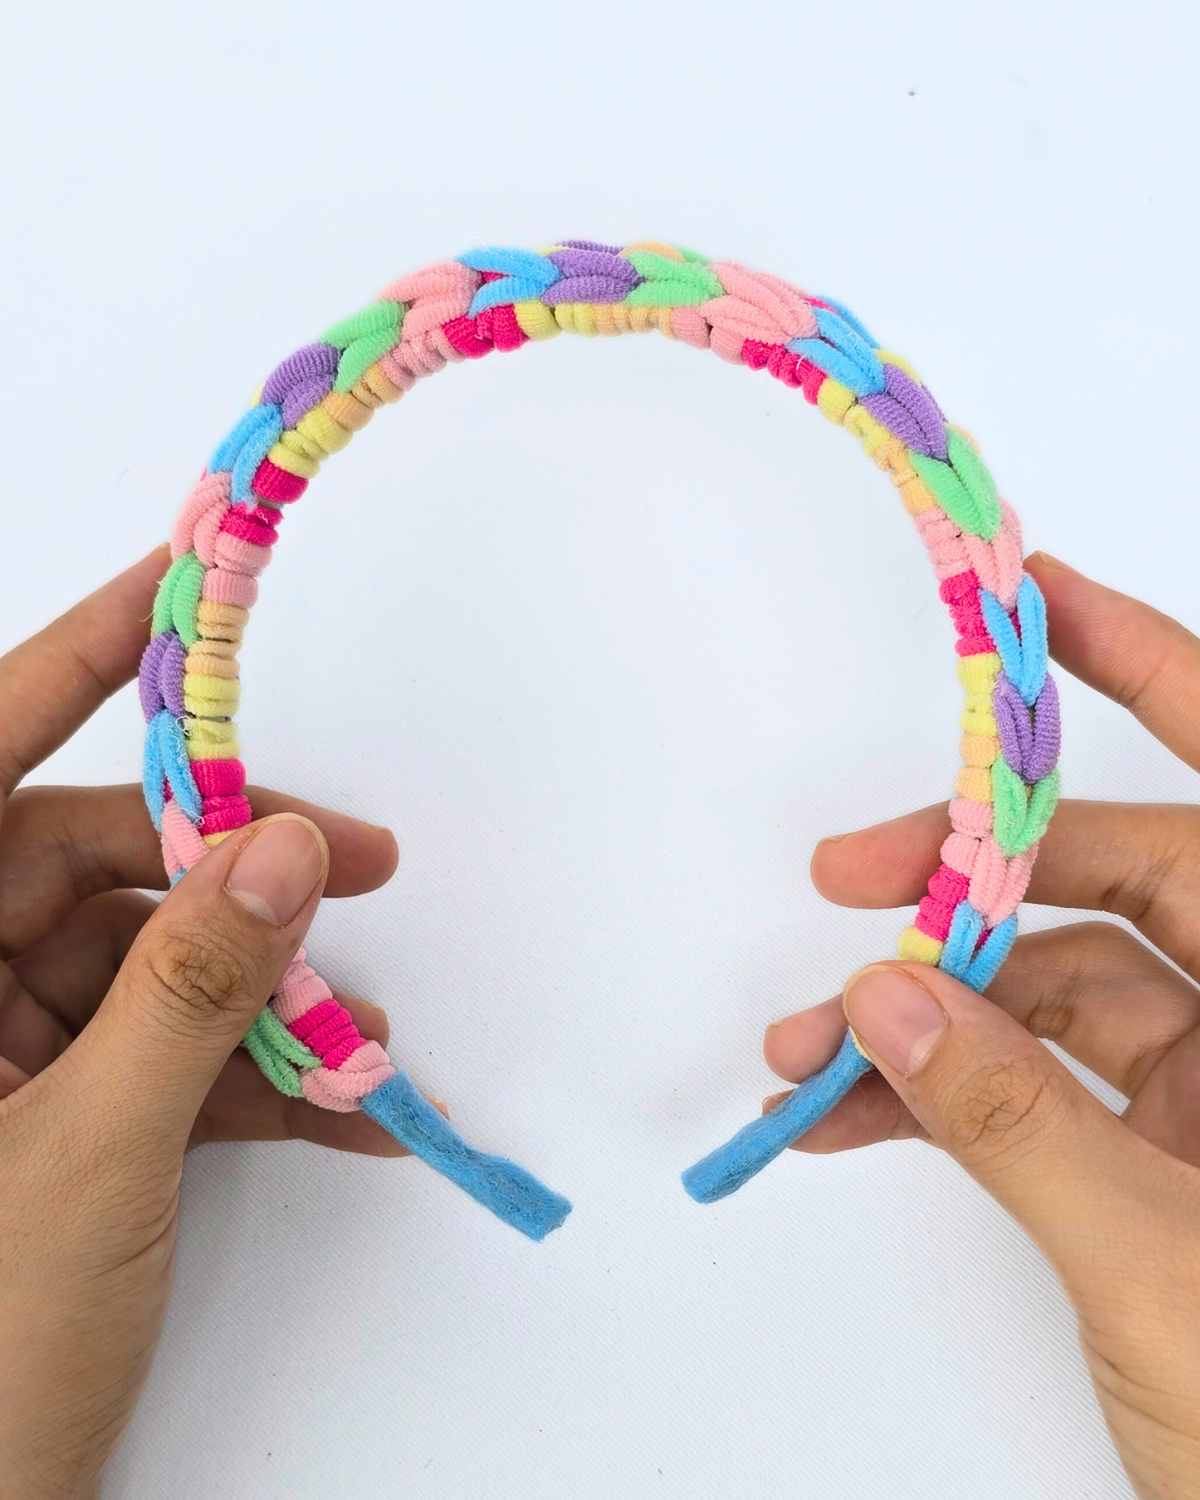
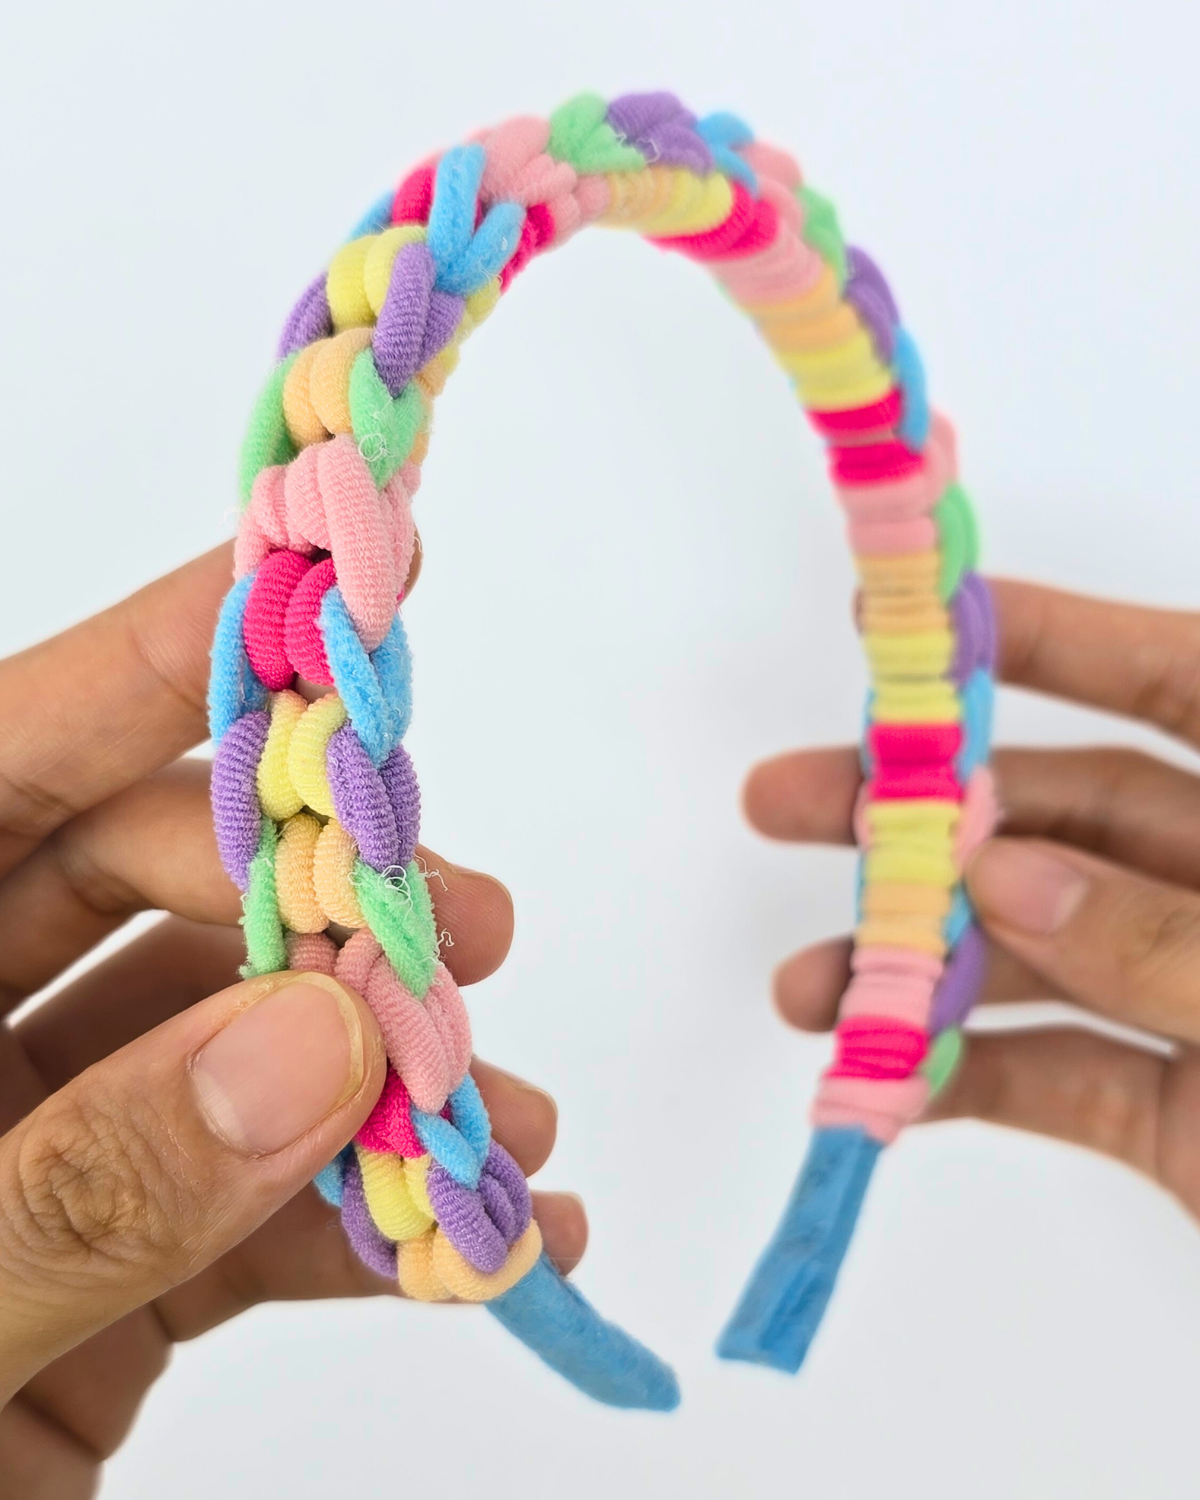
Continue weaving the hair ties until you reach the end of the headband. To secure the weave, hold the final set of loops stretched and insert one loop over the end of the headband. Repeat with the other loop to lock the weave securely in place.Step 4: Finish the Ends
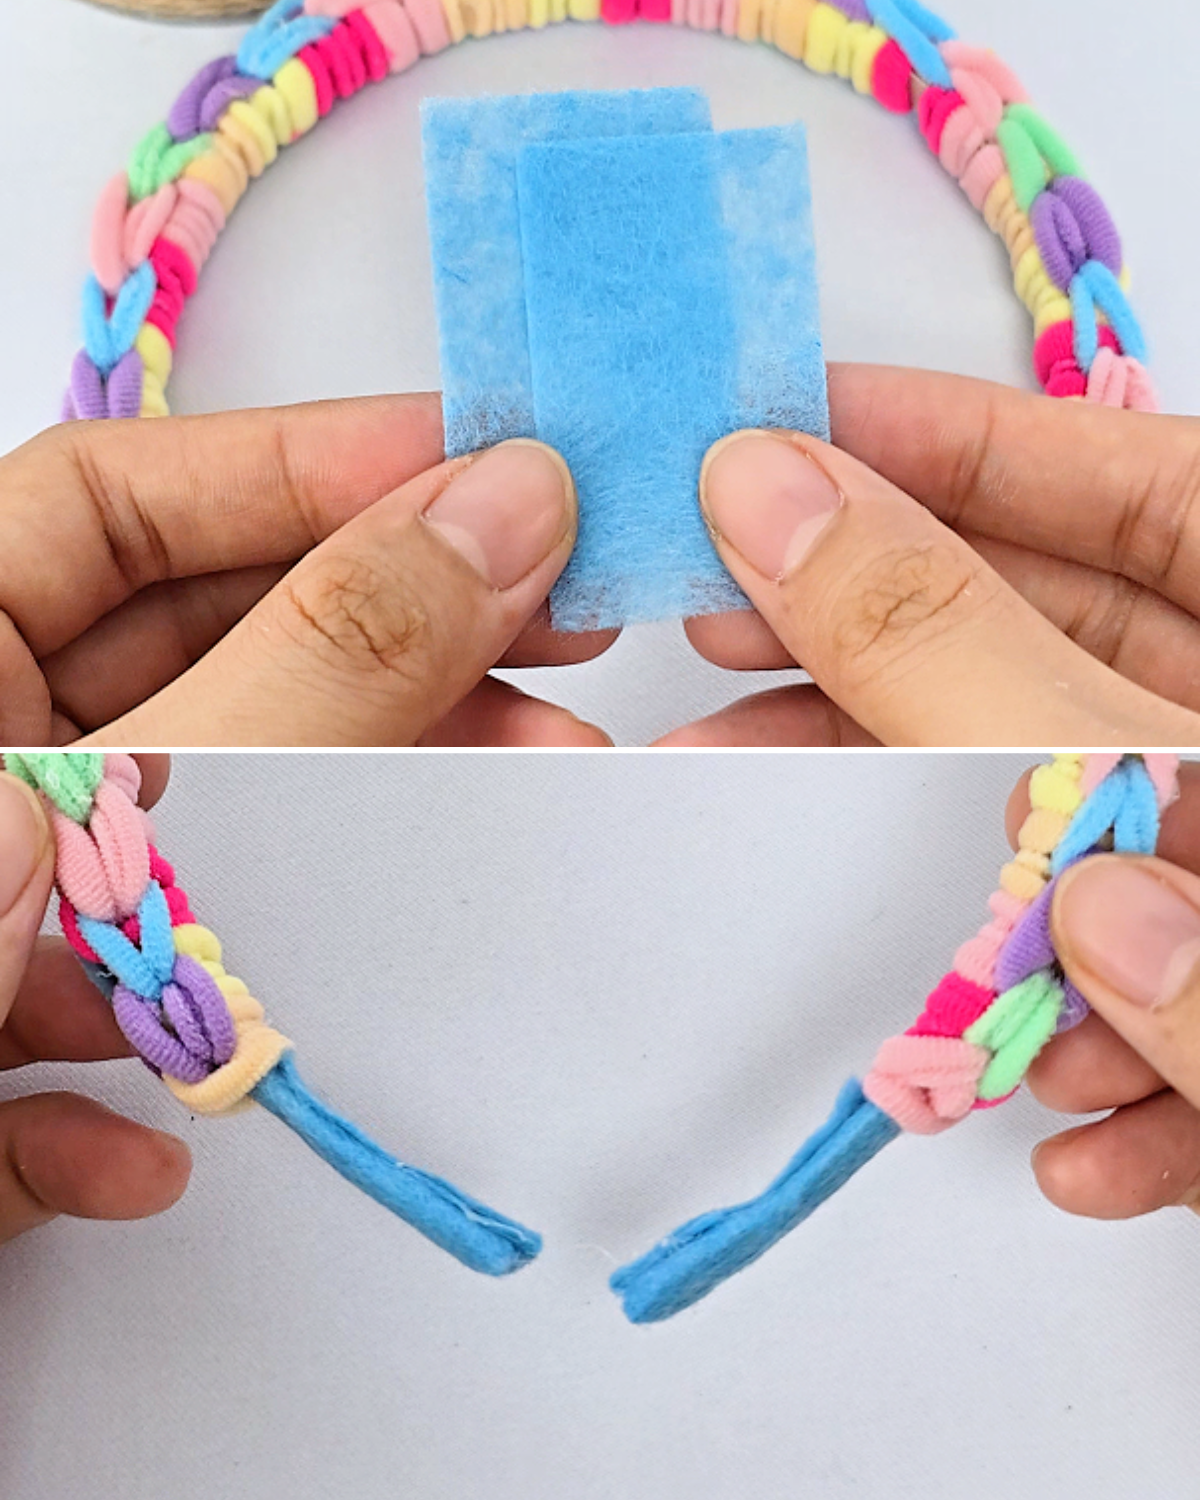
Cut two small pieces of felt into squares or rectangles. Wrap them around the exposed ends of the headband and secure them with hot glue to create a neat, finished look.
Materials
- Headband
- Hair Ties
- Felt
- Hot Glue Gun and Glue Sticks
- Scissors
![]()
Pro Tips 💡
- Choose hair ties that are similar in thickness and elasticity for an even, consistent weave.
- Stretch each hair tie gently but firmly while weaving to keep the weave tight without snapping the elastic.
- If loops start slipping, secure them temporarily with a small clip or clothespin while you finish the weave.
- Coordinate the colors of the hair ties and felt to complement each other for a neat, polished look.
Popular DIYJOY Crafts

Crafts

Paper Flowers

Crafts

Paper Flowers
*If you love this craft, then visit our official website, follow our Facebook page, and subscribe to our YouTube channel for more!
DIY Woven Hair Tie Headband