Store bought baskets add up fast, especially when you need a matching set for one long shelf. These 23 DIY storage baskets let you make exactly the size and color you need, often from things already in the house. A storage basket is any open container that corrals the small stuff: toys, yarn, towels, mail, throw blankets or the pile of chargers on the counter. You’ll find coiled rope and sisal baskets glued around a bowl or bucket, sewn fabric bins and nested buckets, plus cardboard boxes covered in fabric, contact paper or jute so nobody can tell. Sewing machine owners have plenty to choose from, and the no-sew rope and box ideas are great for beginners. Measure your shelf first, then pick a project that fits it!
1. Pottery Barn Inspired Beachcomber Basket

This Pottery Barn inspired beachcomber basket copies the look of a pricey woven tote for about 20 dollars. Start with a plain container with handle openings, then hot glue 1/4 inch manila or sisal rope around the outside, working from the bottom up a little at a time so the glue doesn’t set before the rope goes on. Trim the rope neatly around the handle holes. Line the inside rim with rope too if the container is wide. Thick 1 inch rope wrapped with jute makes the chunky handles.
Get the full tutorial at Celebrate Creativity.
2. DIY Leather Woven Storage Basket

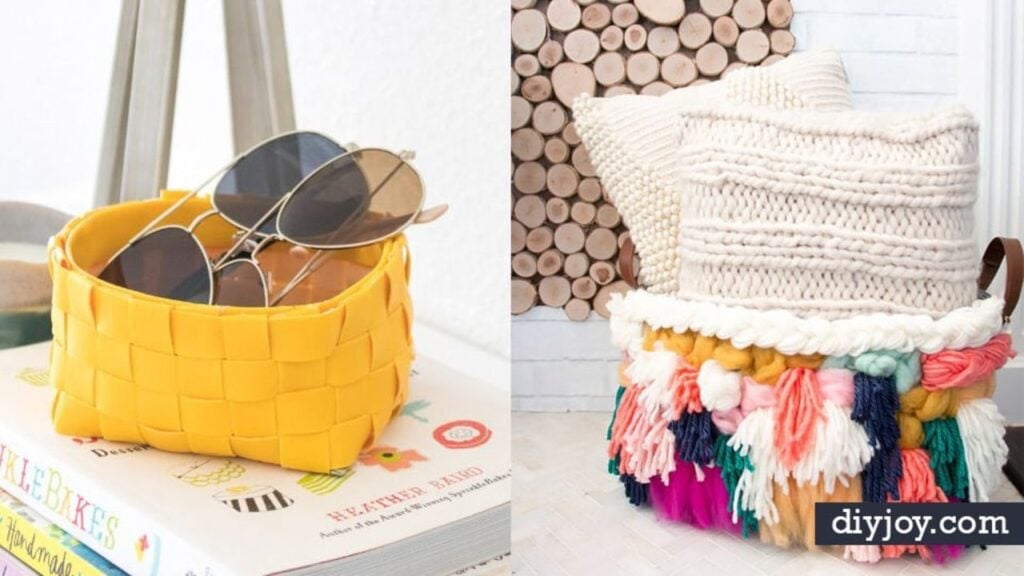
A DIY leather woven storage basket takes about 40 minutes and half a yard of faux leather. Cut about 18 strips, each 3/4 inch by 18 inches; a dual blade cutter keeps them all the same width. Lay seven strips side by side and weave seven more through them for the base, pushing them close together. Then weave a strip around all four corners, pulling it taut so the sides rise, and glue the ends together. Clothespins hold everything while it sets. These measurements make a 5 inch basket, so scale up as needed.
Get the full tutorial at Club Crafted.
3. Fabric + Leather Storage Baskets

Fabric and leather storage baskets make perfect project bins for keeping yarn or sewing supplies together. Trace a 9.5 inch plate onto heavy ticking, quilting cotton and sew in interfacing (cut the interfacing about 3/4 inch smaller). Cut a side rectangle 8 inches tall from each fabric, about the circle’s circumference plus 2 inches long. Sew the side to the base right sides together, starting and ending at the same point, then close the side seam. Bind the top with double fold bias tape and rivet on 1 inch leather strap handles.
Get the full tutorial at Fabric Paper Glue.
4. DIY Reversible Fabric Storage Bins

DIY reversible fabric storage bins finish at about 8.5 by 9 by 7 inches and use half a yard each of an outer and a lining cotton. Cut two 18 by 24 inch rectangles from each fabric and fuse a decor weight stabilizer to the wrong sides. Fold each in half, sew the sides with a 1/2 inch seam, then box the corners by marking 4 inches up from the point and stitching across. Nest the lining inside the outer bin, sew the top and turn. Roll the top edge down to show off the second fabric.
Get the full tutorial at Haberdashery Fun.
5. DIY Rope Basket

This DIY rope basket starts as a dollar store plastic basket, so it costs a fraction of a store bought rope bin. Spray the inside with primer and two coats of matte paint, since the outside gets covered. For stripes, soak half the cotton filler cord in watered down paint, squeezing it under so it absorbs, and let it dry for a few days. Then hot glue the rope around and around, starting under the lip for a straight first row and gluing every inch. Plan on about five or six packages of cord.
Get the full tutorial at IHeart Organizing.
6. Round Bottomed Fabric Storage Bucket

A round bottomed fabric storage bucket comes in mini, small and large sizes, and the source has a printable circle template for each. For the small bucket, cut two 19 1/2 by 10 1/2 inch rectangles and two 6 1/2 inch circles, one of each for the outer and lining. Interfacing is optional and depends on how stiff you want it. Heavier home decor fabric or canvas outside gives more structure, with quilting cotton inside. The large size holds about 15 skeins of yarn, and the small one is perfect for toy cars or blocks.
Get the full tutorial at Film in the Fridge.
7. Collapsible Storage Baskets

Collapsible storage baskets get their shape from recycled cardboard, and they fold flat when you don’t need them. Each basket uses half a yard of outer fabric, a quarter yard of lining and two binding strips cut 1 3/4 inches wide. Cut a 7 1/2 by 9 1/2 inch base and a 6 1/2 by 33 inch side strip from the outer fabric. Chipboard or heavy cardboard panels slide in to stiffen the sides and bottom, and a leather machine needle sews through the card. Bright prints make them nursery ready.
Get the full tutorial at Sew4Home.
8. DIY Fabric Boxes

DIY fabric boxes turn plain cardboard boxes into colorful storage bins with spray adhesive and indoor outdoor fabric, which is thick enough to hide bumps. Cut the top flaps off two 15 inch boxes. Glue a square of fabric to the bottom, then wrap long strips around the inside, rolling the fabric and unrolling it as you spray. Cover the outer sides next, cutting the corners on a diagonal and folding them down. Finish with a cotton cord handle threaded through grommets set in the front so the boxes slide out easily.
Get the full tutorial at IHeart Organizing.
9. DIY Vinyl Storage Basket

This DIY vinyl storage basket is a thrift store floor basket painted in stripes, and it keeps rolls of craft vinyl upright and unbent. Clean the wicker with a diluted vinegar spray first. Tape off the bottom quarter, cover the rest with newspaper inside and out, and spray paint it white. Once dry, tape off the next stripe and paint it coral with a latex sample pot, then add a thin gray band along the top weave. A chalkboard tag labels what’s inside. Frog Tape peels off clean.
Get the full tutorial at Domestically Creative.
10. Easy Fabric Bin

This easy fabric bin is a big round toy bin, about 14 inches high and 17 inches across. Choose two coordinating non directional fabrics, about 1 1/2 yards each, so the 52 1/2 inch side piece can run the length of the fabric. Cut an 18 inch square from each, fold it in quarters and draw a curve to get matching circles. Fuse heavy weight interfacing to the wrong side of the outer fabric for structure. Sew the side into a tube, attach the circular base, then join the lining at the top.
Get the full tutorial at This Big Oak Tree.
11. Ikea Hack Wicker Storage Basket

This IKEA hack turns about 12 dollars worth of wicker belly baskets into three different looks. For the sequin version, start a few rows up from the bottom, run a thin, straight line of hot glue and press gold sequin trim on in short sections, rows and rows of it. It takes hours, so put on a podcast and wear finger caps. The painted version gets a coral and white band using painter’s tape and a foam brush. The third simply gets pom pom trim glued around the rim.
Get the full tutorial at Run To Radiance.
12. Patchwork Bucket

A patchwork bucket is a quilted fabric bin that takes about two hours, and you can make it any size. Find a round object in the size you want and trace it for the base. Bond fabric to cotton batting with spray adhesive or use heavy fusible fleece, then quilt it in a grid using masking tape as a guide. Trace the circle onto the quilted base, stitch around it at 1/8 inch and cut it out. Patchwork the sides from scraps, quilt them the same way and add two 8 inch cotton webbing handles.
Get the full tutorial at Quarter Inch Mark.
13. Make Storage Bins From Cardboard Boxes

Storage bins made from cardboard boxes cost just a few dollars each and can be sized to fit any shelf exactly. Measure the space, trim the boxes to height and cut off the flaps (keep them as dividers if you like). Reinforce the edges with packing tape, then cover the four outer sides with patterned contact paper, smoothing as you go. Line the inside with a thinner, cheaper paper so it wipes clean. A knob screwed into the front makes a handle. Diaper and wipes boxes are an ideal size.
Get the full tutorial at Just Measuring Up.
14. Fabric Basket With Cut-Out Handle

A fabric basket with cut-out handles needs just two fat quarters and half a yard of stiff fusible interfacing, and it’s reversible. Fuse interfacing to both fat quarters, trim them to match and cut a 5 inch square from each corner. Pin a scrap of fabric at each short end, trace the handle template about 2.5 inches from the top, stitch on the line and cut out the center. Clip the curves, push the facing through and press. Pin the corner edges and sew with a 1/2 inch seam to form the basket.
Get the full tutorial at U Create.
15. Nested Fabric Buckets

Nested fabric buckets come in large, medium and small sizes that tuck inside each other, and all three can be sewn in one evening. Even the largest outer bucket fits on one fat quarter if the base uses a second fabric, and the two smaller ones each need a single fat quarter. Fusible fleece gives soft but steady sides. Sew each bucket and its lining, add a fabric handle and you have dividers for a craft space. The source also has a step by step video and a PDF with measurements.
Get the full tutorial at Whipstitch.
16. Spring-form Bucket

A spring-form bucket gets its structure from a metal spring salvaged from a cheap pop up bucket, so it needs no interfacing at all. Before taking the old bucket apart, measure its height and circumference. Cut the outer fabric as a rectangle the circumference plus 1/2 inch wide and the height plus 1/4 inch tall, and the lining the same width and the height plus 1 3/4 inches. A sturdy linen or canvas circle forms the base. The spring is fully encased, and there’s no hand stitching.
Get the full tutorial at badskirt.
17. Crochet a Gorgeous Set of Rainbow Nesting Baskets

These crochet rainbow nesting baskets come as a set of seven, one for every color, sized to stack inside each other. Each starts with a magic ring of six single crochet, then works in a continuous spiral with a stitch marker, increasing six stitches per round for the base before building up the sides. DK yarn, a crochet hook, a darning needle and a stitch marker are all you need. The pattern uses US terms. They’re great for small toys, and sorting them is a fun color game for little ones.
Get the full tutorial at Envato Tuts+.
18. DIY Fabric Trays

DIY fabric trays come in pencil, spare change and magazine sizes, and they’re a great scrap buster. For the medium tray, cut two 12 by 10 inch fabric pieces, a matching piece of fusible fleece and a 9 by 7 inch piece of stiff double sided fusible interfacing. Layer and sew around all four edges with a 1/4 inch seam, leaving a gap, then turn, press to fuse and topstitch the edges closed. Stitch around the stiff rectangle, then pinch each corner and tack it to make the sides stand up.
Get the full tutorial at Noodlehead.
19. No-interfacing Storage Basket

A no-interfacing storage basket is fully washable because its stiffness comes from card panels that slide in and out. Cut two of each pattern piece in centimeters with a 1 cm seam allowance; the source gives a formula for any base width and height. Sew the lining pieces and box their corners, then nest them and stitch along the top. Hem the outer sleeve, slide it over and sew the top edge. Stitch down each corner to form pockets, and slip in four pieces of card about 14 by 11 cm.
Get the full tutorial at Jezze Prints.
20. Burlap Storage Bin DIY

A burlap storage bin can be made to fit any shelf with a little math. Measure the base you want, then add twice the side height to each dimension: an 8 by 10 inch base with 6 inch sides means cutting the fabric 20 by 22 inches. Iron on interfacing for stiffness, cut a square the size of the side height from each corner and sew the corners into a box. Repeat with a lining fabric. Add a burlap handle and a label pocket with clear vinyl, then fold the lining over the top as trim.
Get the full tutorial at Hopeful Homemaker.
21. Baskets Made From Cardboard Boxes

Baskets made from cardboard boxes are the answer when no store basket fits the shelf. A wine box and a boot box both work. Hot glue 4 ply jute string around the outside, row by row, until the cardboard disappears completely. Line the inside with a cut piece of canvas drop cloth, folding it over the top edge for a soft, finished rim. The big box holds bulky things on a bottom shelf, and the smaller one tidies the top. They look just like woven seagrass baskets for the cost of string.
Get the full tutorial at diy Design Fanatic.
22. Sisal Rope Bowl

A sisal rope bowl takes less than an hour with a metal bowl, a dozen glue sticks and 50 to 75 feet of 1/4 inch sisal rope. Start with the handles, gluing the rope in place and hot gluing every second wrap. Tuck the rope end under a handle and glue it all the way around the outside. Finish by wrapping the inside as far down as you like, or until the rope runs out. It works as a fruit bowl, a mail catchall or a home for matchbooks, and the same method covers buckets and cake stands.
Get the full tutorial at Centsational Style.
23. DIY No Sew Rope Baskets

DIY no sew rope baskets are coiled from 3/8 inch cotton piping cord, about 10 to 15 yards per basket. Form a tight coil for the base, hot gluing every inch. Cover a metal pail or bowl with parchment paper, and once the base matches its size, wrap the rope up the sides, still gluing as you go. Slide the form out when it’s tall enough. Stitch or glue the rope end so it won’t unravel. Fabric or leather strips make easy handles, and they turn out surprisingly strong.
Get the full tutorial at Happiness is Homemade.