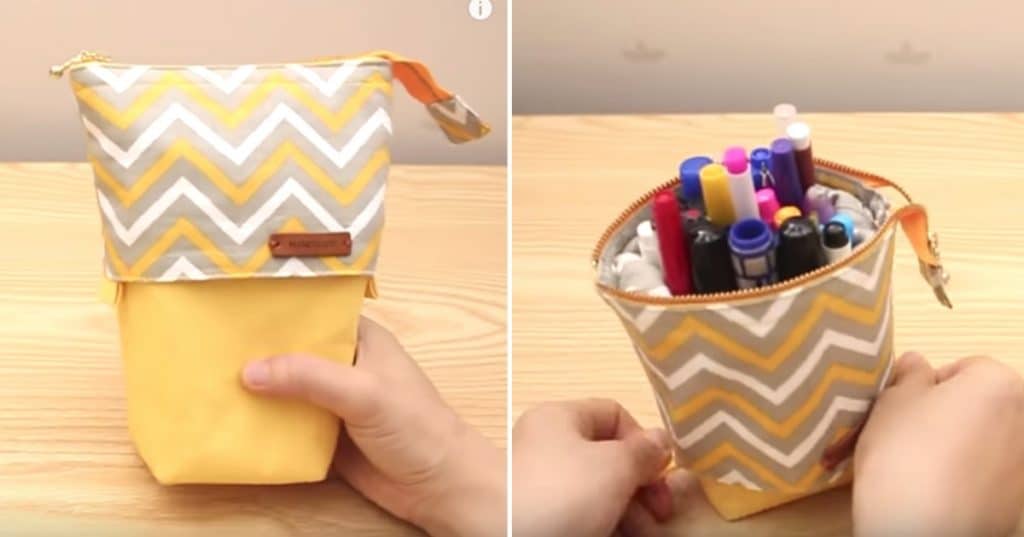
The very best thing about this DIY Standing Pencil Pouch is that it slides down and becomes a desktop pencil holder, it goes straight from book bag to desktop! My daughter just started a drawing class at The Dougherty Arts Center in Austin, Texas. I had to get a lot of supplies for her class like a set of charcoal pencils, a set of Copic markers, and Prism Color fine drawing markers. These were expensive items, just waiting to get lost, so I had to think of a container that fits nicely into her book bag but also was tall enough for the largest markers. I scoured Youtube and found this terrific DIY Standing Pencil Pouch, it was tall enough for her markers and it had a zipper at the top, as well as folding down into a desktop pencil holder.
The sewing instructions are really easy to follow, you just cut out your outer fabric layer and stiff interfacing and start sewing. You can use softer interfacing for a pencil case you would just be using for pencil transport, but if you want your pencil case to stand up on the desk as an attractive holder, use heavy fusible interfacing. The fusible is also an option, but I find these projects go more smoothly and look better with a fusible you can iron right onto the fabric, it becomes a much more durable component to your project. The zipper instructions are also very good, zippers can be tricky and the sewing method shown in the video is super quick and self-explanatory. I loved everything about this project, I think you will to.
Finished size:
- 16㎝(6¼″)W × 20㎝(8″)H × 6㎝(2⅜″)
Materials:
- Outer layer ( fabric ) 18㎝ × 25㎝(7⅛″×9⅞″) 2 10㎝ × 7㎝(4″×2¾″)
- Contrast color fabric 34㎝ × 22㎝(13½″×8¾″) 1 5㎝ × 7㎝(2″×2¾″)
- Lining ( fabric ) 18㎝ × 25㎝(7⅛″×9⅞″)
- Zipper 20㎝(8″)
DIY Standing Pencil Pouch


