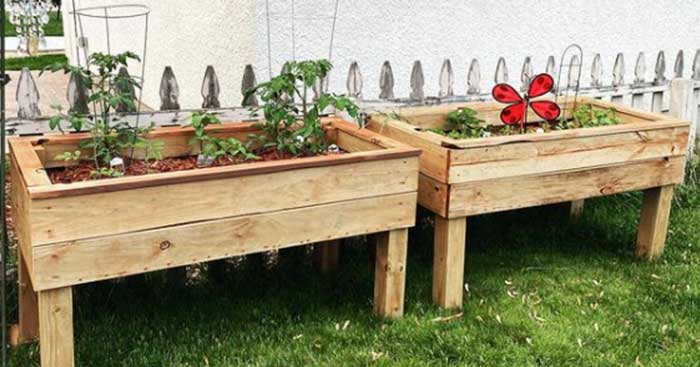
I am amazed by this DIY raised garden bet planter by Anika’s DIY Life. It was so much cheaper than ordering one online. Raised garden beds can cost hundreds of dollars online, and this one only costs a fraction of that.
Materials Needed For This DIY:
- 2×4 Wood Boards
- Exterior Screws
- 2×2 Wood Boards
- Wood Screws
- Pond Liner
- Nail Gun
- Perforated Drain Pipe
Directions:
Step One
Cut all of the wood for the raised bed. The dimensions can be found in the video down below.
Step Two
Attach three of your long pieces using two smaller pieces t brace it and the exterior screws. Repeat this process again so you have two long sides.
Step Three
Attach your three short pieces using 2×2’s and exterior screws. The process will be similar to step one, just using shorter boards. Repeat this process again so you have two short sides as well.
Image by. Anika’s DIY Life via YouTube video.
Step Four
Attach the small sides to the long side using the 2×2’s you already screwed on. Use exterior screws for this as well.
Step Five
Build the legs for the flower bed. Make sure you do this on a flat surface to be sure the bed will stand up straight. Attach the boards with pockets holes so there are no screws hanging out on the sides. This will also help the legs to hold up longer and be more sturdy.
Step Six
Attac the leg to the flower bed you built in the previous steps. You can then stain or paint the base as you would like.
Step Seven
Lay the 2×4’s on the base of the flower bed to make a bottom. Attach them using wood screws.
Step Eight
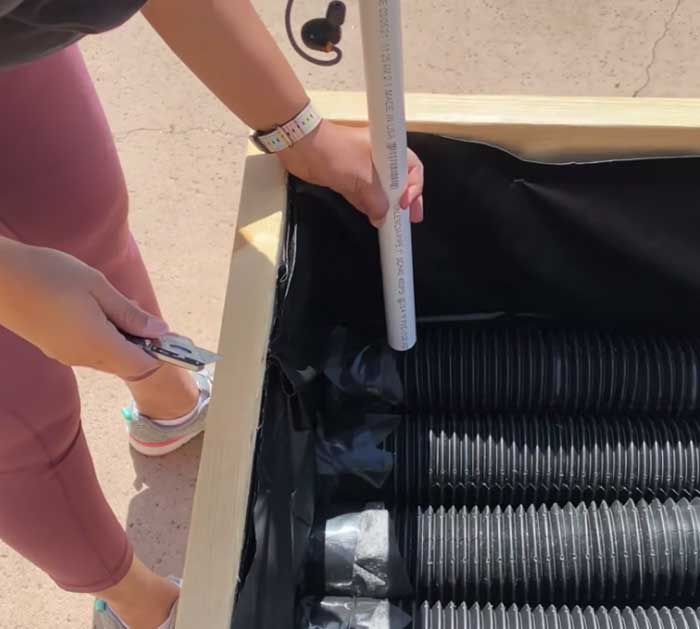
Now to make it self watering. Start by trimming and attaching a pond liner to the flower bed using a nail or staple gun.
Step Nine
Cut your perforated drain pipe into equal sizes that are the length of the planter’s base. Place a PVC pipe in one end to water and then a pipe into the other side for drainage.
Image by. Anika’s DIY Life via YouTube video.
That’s it! This DIY is super simple and will save you a lot of money.


