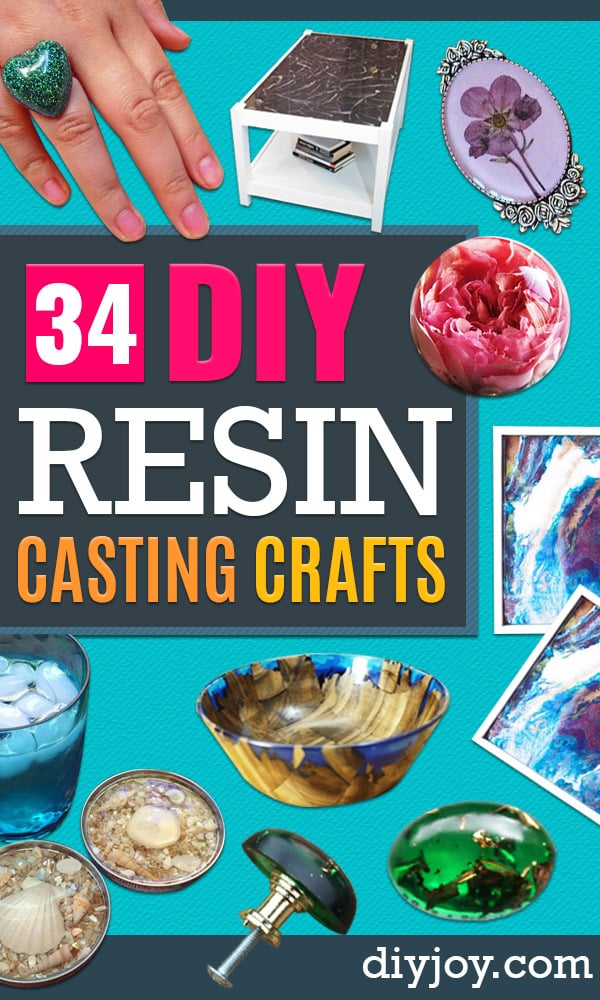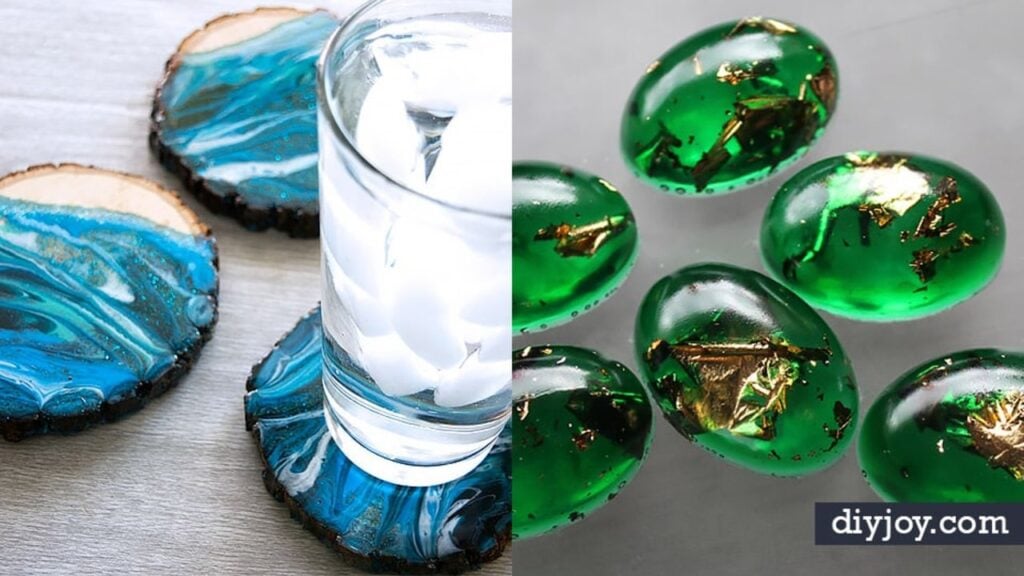
Resin is the craft that makes people ask where you bought it. These 24 DIY resin casting crafts cover jewelry, coasters, paperweights, cabinet knobs and full tabletops, from a glitter ring that fits in one tiny mold to a coffee table with a glassy pour across the top. Beginners can start with a photo resin coaster or a set of clear paperweights, where the hardest part is honestly the waiting. Two rules run through nearly every project here: measure exactly, because eyeballed resin never cures, and work somewhere ventilated with gloves on. Many of these make unique handmade Christmas gifts, the kind nobody else at the party is giving, which is half the fun.
1. Handmade Resin Pastel and Gold Leaf Bangles
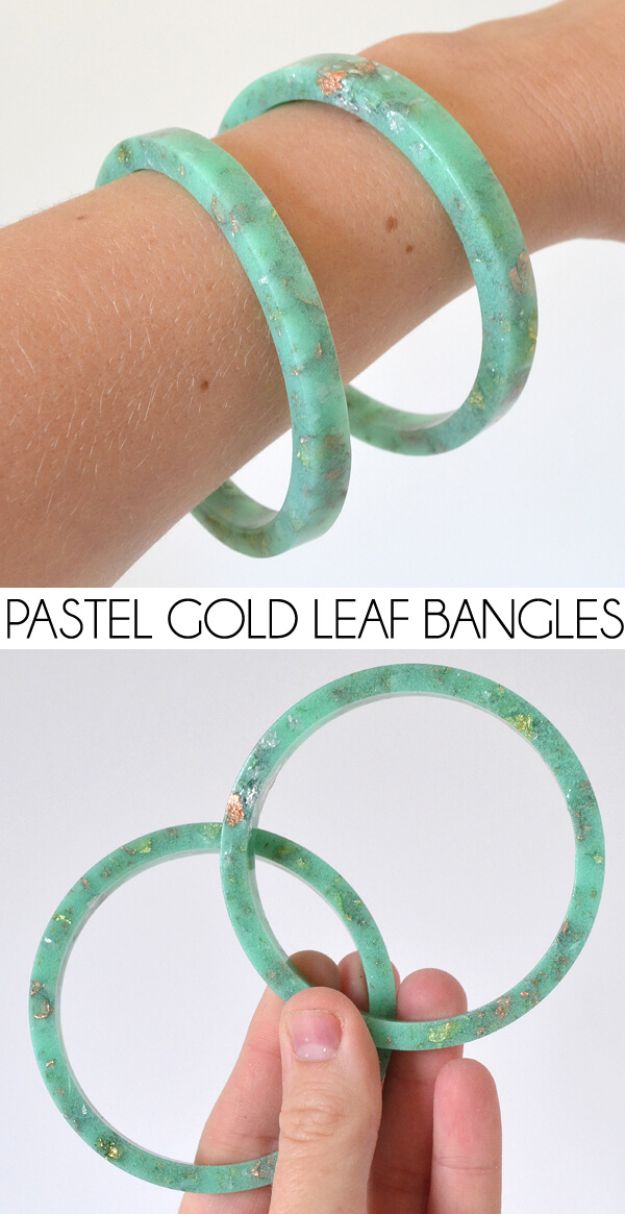
Mint bangles flecked with gold were $50 a set in the shop, so these are the homemade answer. Mix casting resin according to the package, stir in a small dollop of pastel acrylic paint, then add the gold leaf. Here is the lesson learned the hard way: big chunks of leaf do not work. Rub the flakes between your fingers until they are tiny. Pour into a bangle mold, let it cure, pop it out and wet sand the edges smooth. A clear version with barely any tint looks great stacked with the pastel ones.
Get the full tutorial at Dream a Little Bigger.
2. Glitter Resin Ring
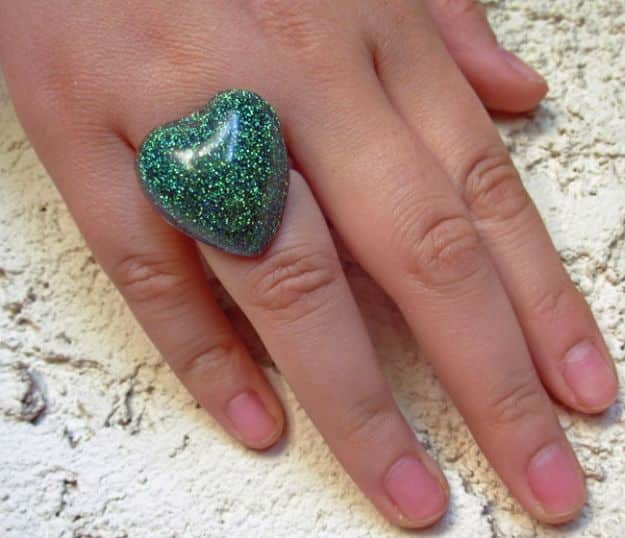
A chunky heart ring packed with glitter, and the rule that matters is measure the resin exactly. Eyeball it and the resin never sets, and you will cry. Pour a little into the jewelry mold, blow through a straw to pop the bubbles, fill nearly to the top with loose glitter and cover it with another thin layer. Give it 24 hours. Add one more thin layer, set the ring blank face down in it and wait another day. File the edges smooth. Short on patience? Glue the blank on with E6000 instead.
Get the full tutorial at Crafty Chica.
3. Gold Leaf and Emerald Resin Cabinet Knobs
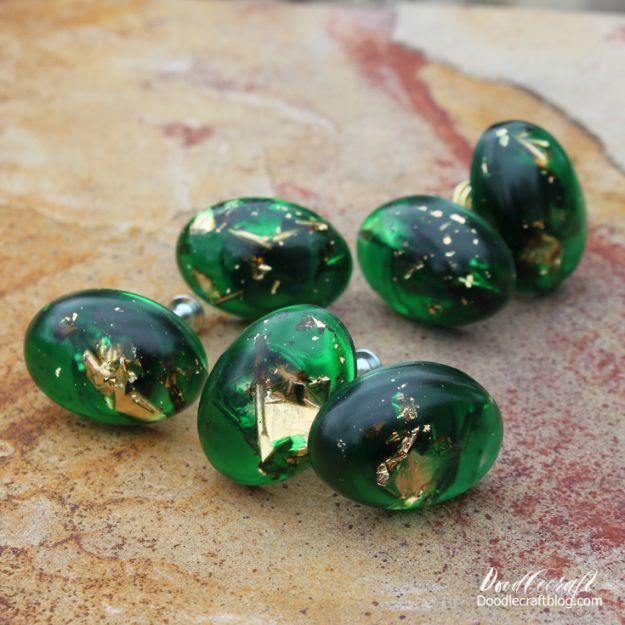
Emerald green knobs with gold leaf suspended inside, inspired by a castle on Downton Abbey, of all things. Clear polyester casting resin, transparent green dye, oval knob molds, gold leaf and knob hardware glued on with E6000 are the kit. Fill the molds halfway and wait about an hour until the resin turns gel like, then tuck in rolled bits of gold leaf. It gets everywhere. No worries. Top up and let it set. Fair warning: this resin is very smelly, so take it to the garage rather than the kitchen table.
Get the full tutorial at Doodlecraft.
4. Clear Casting Resin Paperweights
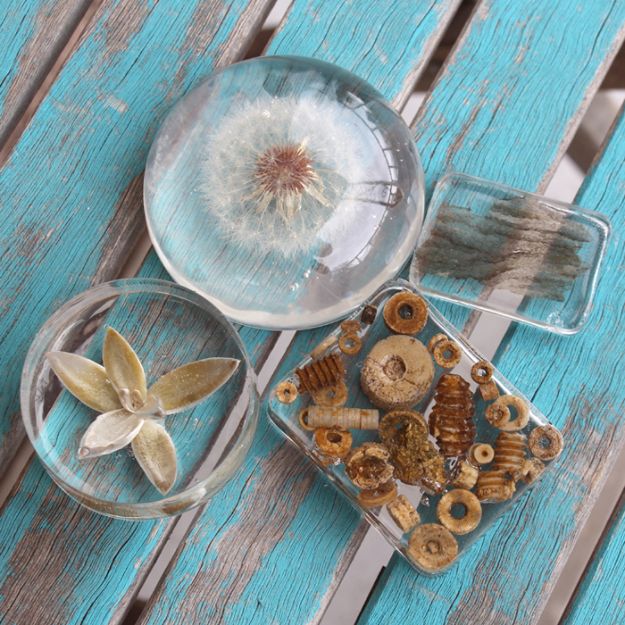
Paperweights with a dandelion puff, a succulent or a handful of fossils frozen in crystal clear resin, and this is a perfect first resin project. Read the instructions, then read them again. Spray the molds with release, pour about 1/4 inch and let it gel, which takes an hour or two. Set your item face down into the gel, wait a couple more hours, then fill the mold. Now the patience part: let it cure for about a week. Heads up, fresh green plants lose some color in resin. Still really cool.
Get the full tutorial at Resin Crafts Blog.
5. Seashell Coasters Made With Resin
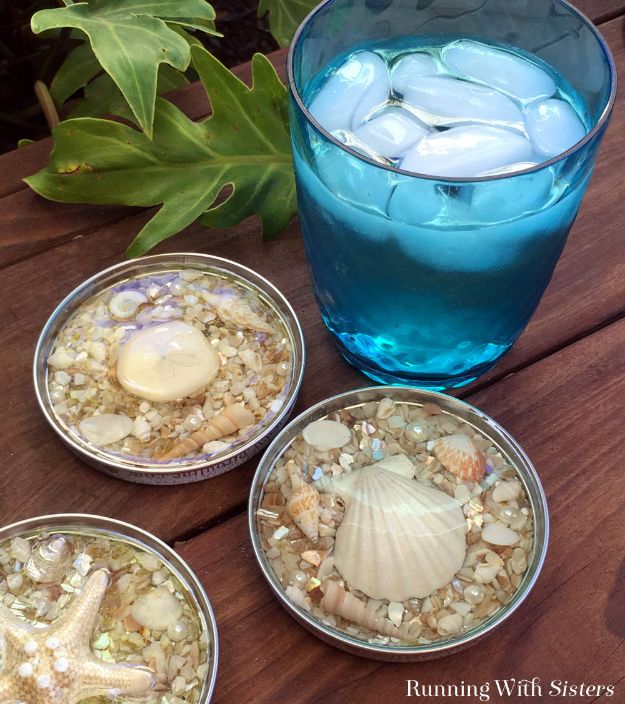
Jar lids spray painted silver become beachy coasters filled with shell chips, small shells and a pearl or two under clear resin. Glue a large shell in the center first, then slide a ruler across the rim to make sure it sits lower than the edge. Measure 3 ounces of resin and 3 ounces of hardener, stir for two minutes, pour into a clean cup and stir one more minute. Drizzle it into every nook up to the lip, on a level surface. Small bubbles show up after a few minutes, and a gentle breath over the top releases them. Let them cure for 48 hours somewhere dust free.
Get the full tutorial at Running With Sisters.
6. Floating Glitter Necklace Using Resin
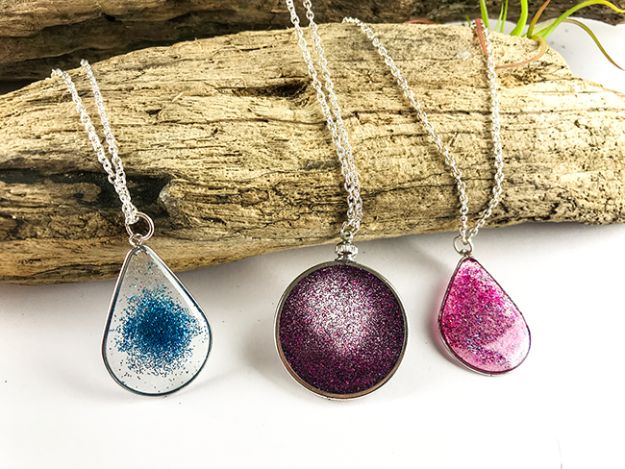
Glitter that looks like it is floating inside a pendant, slightly see through so the light catches it from every angle. This one is easy but it is not quick, so do it on a slow weekend rather than the night before a birthday party. A small jewelry resin kit goes a surprisingly long way: one made eight pendants with about half left over. Open bezels in teardrop and round shapes give that suspended look. Choose a few glitter colors and keep each pendant to one shade for the cleanest finish.
Get the full tutorial at Clumsy Crafter.
7. Fabric Covered Resin Table
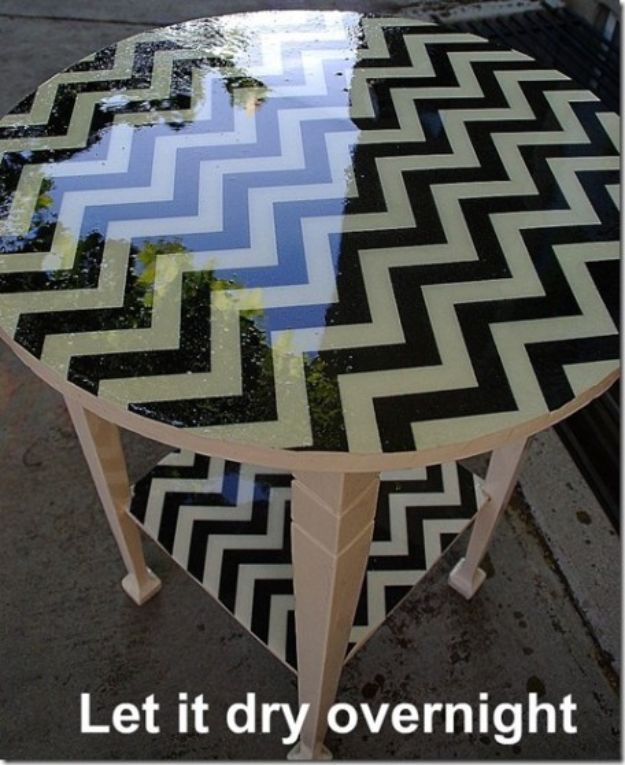
A peeling garage sale porch table got sanded, primed, painted off white and topped with black and white chevron fabric under a coat of pour on resin. The step that saves the whole thing: seal the fabric first. Resin soaks into fabric or paper and discolors it, so Mod Podge goes under the fabric and two coats go over it, then it dries overnight. Measure and time the resin perfectly, mix for exactly two minutes, pour and spread with a foam brush. A quick pass with a small torch made the bubbles vanish.
Get the full tutorial at Tatertots and Jello.
8. Resin Heart Buttons
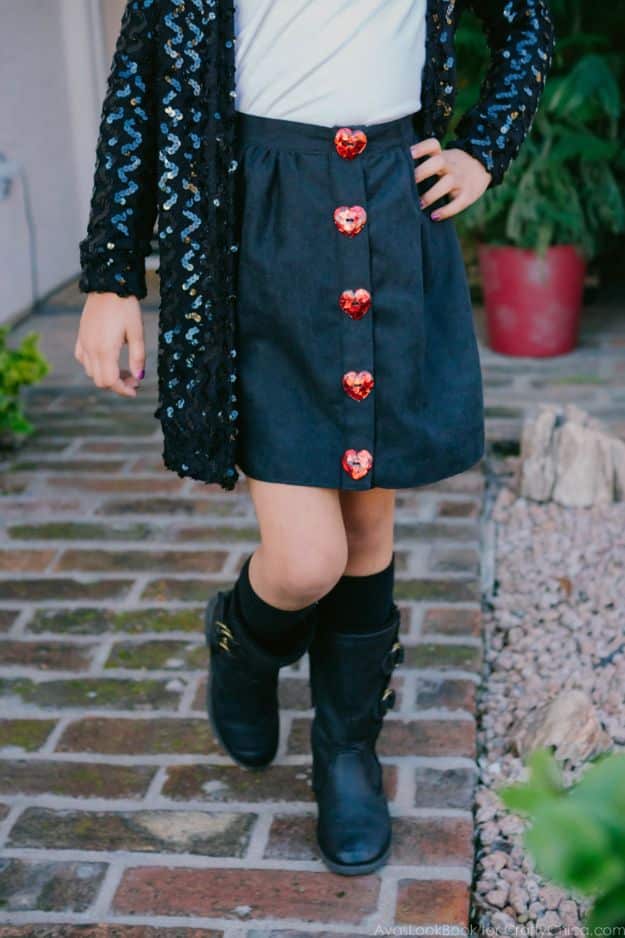
Oversized heart buttons cast in clear resin with heart confetti inside turn a simple handmade skirt into something special for Valentine’s Day. The resin here mixes at a 1 to 1 ratio, and gloves are not optional because it is sticky and stubborn on skin. A mask helps too. A silicone button mold does the shaping. The catch is that the mold only had one cavity, and each button needs hours to cure, so a row of buttons took a few days. Buy a multi cavity mold if you are in a hurry.
Get the full tutorial at Crafty Chica.
9. Coffee Table Refinished With Resin
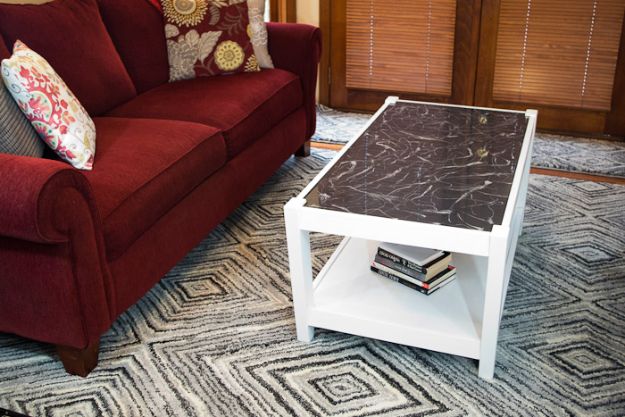
A scuffed coffee table gets a fresh coat of paint and a glassy resin top that shrugs off coasters you forget to use. Chalk paint goes on first because it needs no sanding. Then the most important prep step, and the one people skip: level the table front to back and side to side. Shim the legs with stir sticks if the floor is off, or the resin pools to one side. Have every cup, brush and stir stick within reach, since resin moves fast. A dust free spot keeps lint out of the finish.
Get the full tutorial at Resin Crafts Blog.
10. Resin Coated Fabric Bookmarks
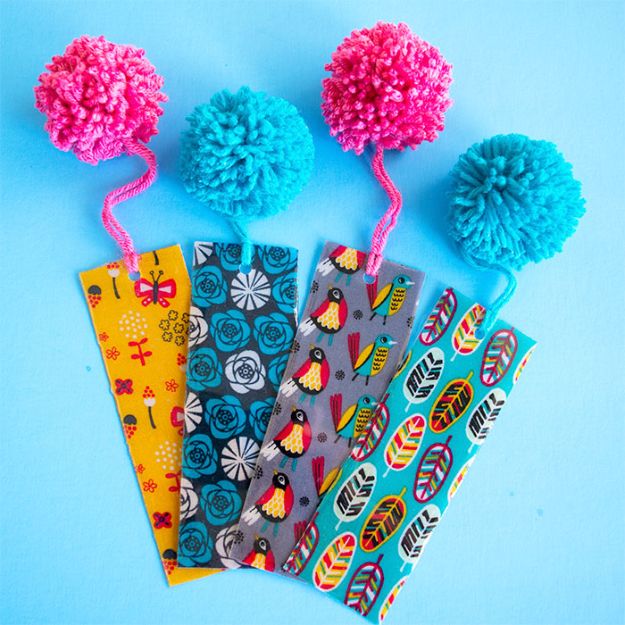
Fabric scrap bookmarks that never fray and need zero sewing, all thanks to a thin coat of pour on resin. Cut scraps to about 2 by 6 inches. Darker fabrics work best, and here is a smart preview trick: wet the fabric first, because wet fabric shows roughly the color it will turn under resin. Dry and iron it completely before coating. Lay the strips on a silicone mat, brush on well mixed resin and let it cure. They stay a little flexible. Top each one with a yarn pompom for a little flair.
Get the full tutorial at Resin Crafts Blog.
11. DIY Resin Fruit Jewelry
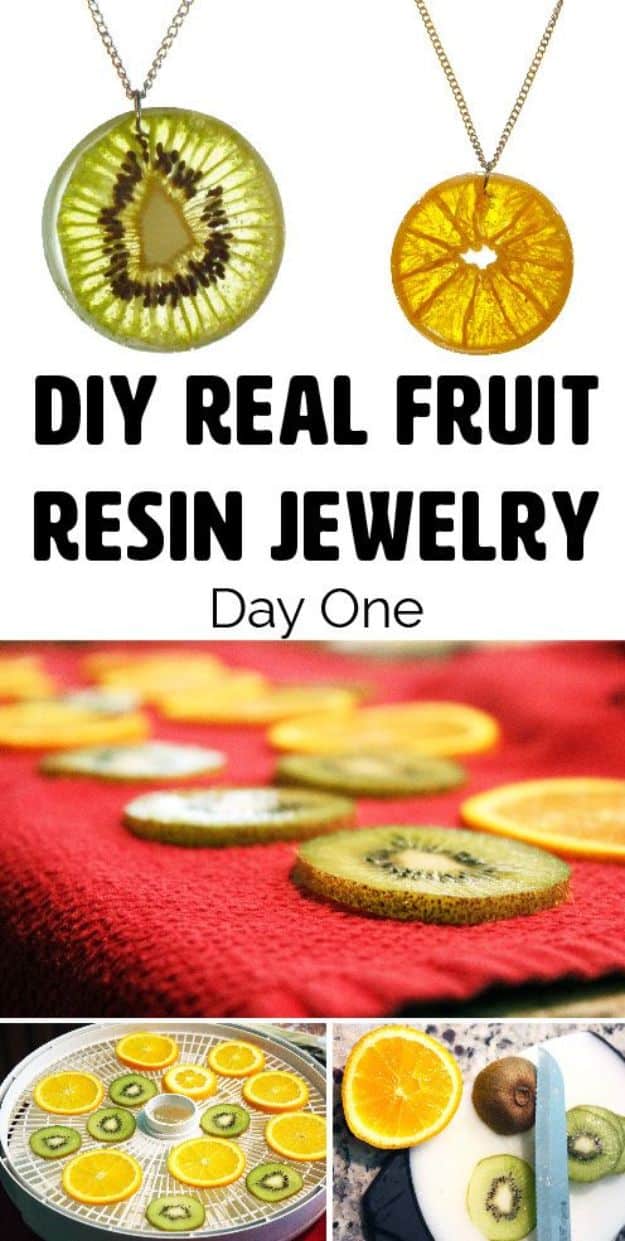
Real kiwi and orange slices preserved in resin as pendants, and fair warning, this one took two years of trial and error to perfect. It runs over three days. Kiwis and oranges look gorgeous sliced, starfruit turns out very unique and blood oranges are a gamble on whether the red shows. Skip starchy fruits and vegetables because they do not turn out well. The slices are dried before they ever meet resin. Make a big batch at once, since they are wonderful end of year teacher gifts and a guaranteed conversation starter.
Get the full tutorial at That Girl Who Never Talks.
12. DIY Wood and Resin Bowl
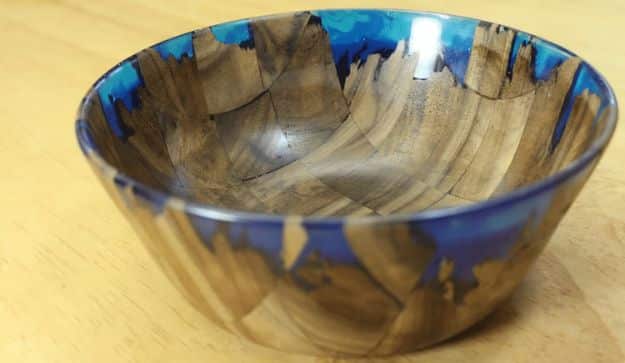
Walnut strips get cut an inch wide and an inch thick, then smashed with a sledgehammer, which might be the most satisfying first step in all of woodworking. Blue tinted polyester resin fills every jagged crack, cures for several days and then the whole block goes on the lathe. Hollowing it took close to an hour, compared with 15 to 20 minutes for an all wood bowl, because resin fights the tools. The payoff is a bowl that looks like ocean water washing over a rocky shore. Advanced, yes, but jaw dropping.
Get the full tutorial at My Modern Met.
13. Epoxy Resin Desk Top
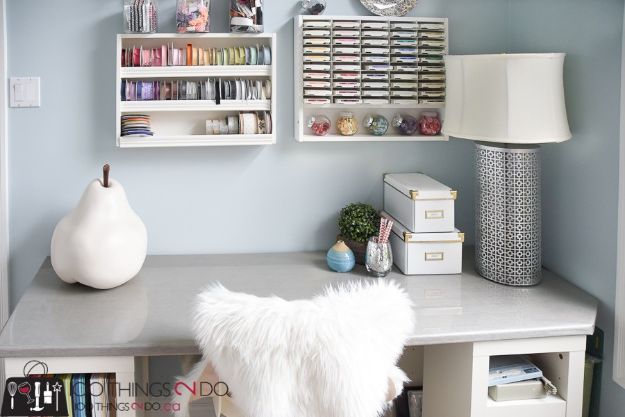
Leftover grasscloth wallpaper plus a coat of pour on epoxy turned a craft desk into a glossy, durable work surface. The grasscloth was never wetted. Double sided adhesive holds it down with about a 2 1/2 inch overhang, tucked and stuck under the edges for crisp corners. Then the epoxy goes on top, and the shine is rated as equal to 50 coats of varnish, which is a lot of varnish you never have to brush. Once fully cured, a little furniture polish brings up a mirror sheen. It wipes clean of glitter and glue too.
Get the full tutorial at 100 Things 2 Do.
14. Easy DIY Photo Resin Coaster
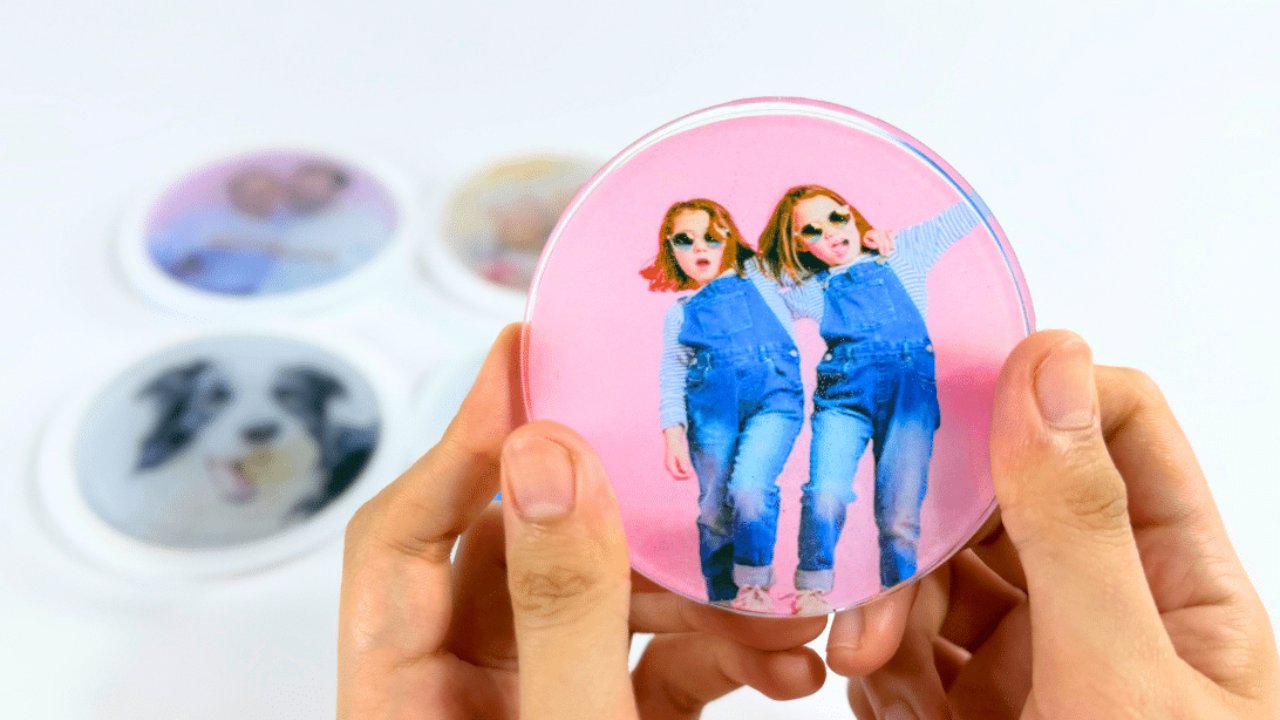
A favorite photo sealed inside a clear resin coaster, and this one really can come out perfect on the first try. Mix about 36 grams of epoxy resin with about 12 grams of hardener for a 3 to 1 ratio and stir slowly for 5 to 10 minutes, since fast stirring whips in bubbles. Pour a thin layer into a silicone mold. Trace a round object the size of the mold onto your photo, cut it out, set it in centered and pour the rest on top. After 24 hours, pop it out. Pets make adorable ones.
Get the full tutorial at DIY JOY.
15. Poured Resin Wall Art
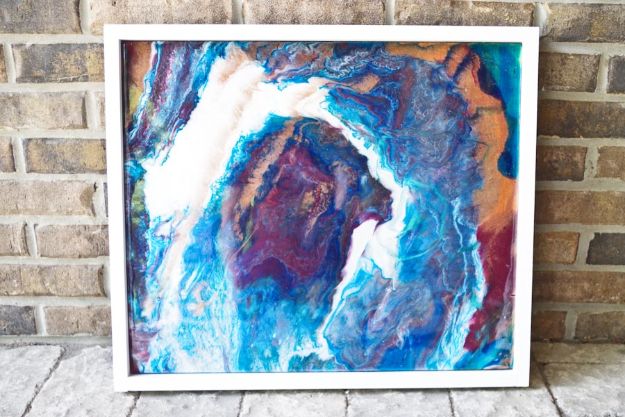
Poured resin wall art looks like a slice of agate or a stormy ocean, and it is far easier than the result suggests. Here is the hard won tip: use a wooden board, not a stretched canvas. The weight of the resin made a canvas sag in the middle, so if you do use one, support it from underneath. Tint the resin with pigment dyes or acrylic paint and pour colors right next to each other. Set the board inside a box or tray bigger than it, because there will always be dripping. Gloves are a must. Resin does not wash off.
Get the full tutorial at Hazel + Gold Designs.
16. Marbled Resin Wood Coasters
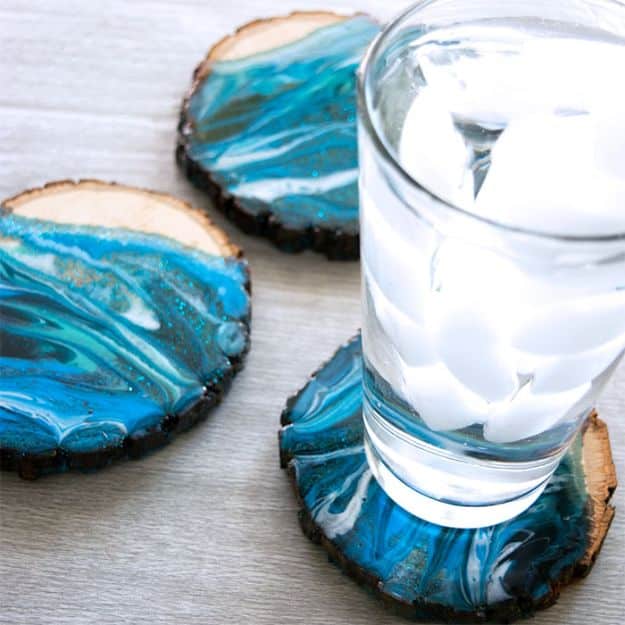
Bark edged wood coasters with poured, marbled resin that looks like ocean waves rolling onto a beach. Cover the table with wax paper first and work somewhere ventilated with gloves and eye protection on. Mix equal parts resin and hardener, 3 ounces each for 6 total, for 2 minutes, then pour it into a fresh cup and mix one more minute. That second cup is what gets everything blended. Divide it into several small cups for pigments, dyes and glitter, then pour and swirl. Resin gives a depth that paint pouring never quite manages.
Get the full tutorial at Resin Crafts Blog.
17. Beetles in Resin Jewelry
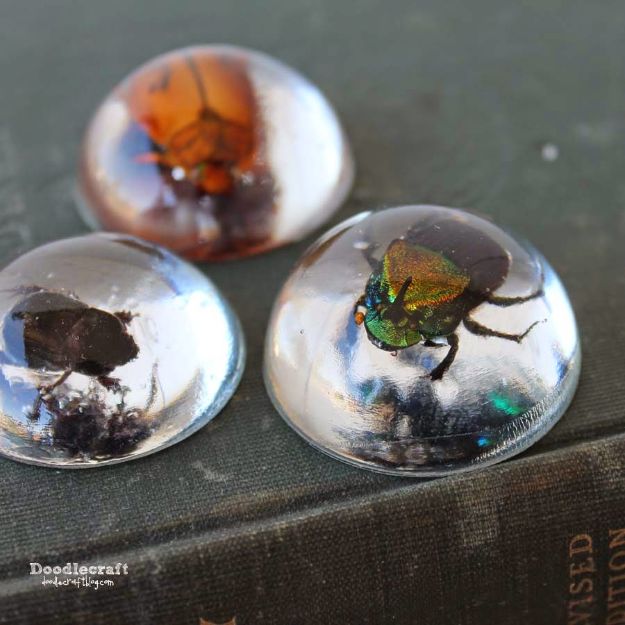
Real beetles cast in clear resin domes, then turned into creepy necklaces just in time for Halloween. The bugs were found, not caught, in a swimming pool and under a bug zapper. A silicone cake pop mold makes the domes, and it should never go back to food duty after this. Mix about 1/2 cup resin with roughly 15 drops of catalyst, pour about a quarter inch, cover and let it gel about 10 minutes. Place the beetle with tweezers, then fill. Let it set a day or two. Cloudy domes buff clear with a soft cloth.
Get the full tutorial at Doodlecraft.
18. DIY Epoxy Resin Jewelry
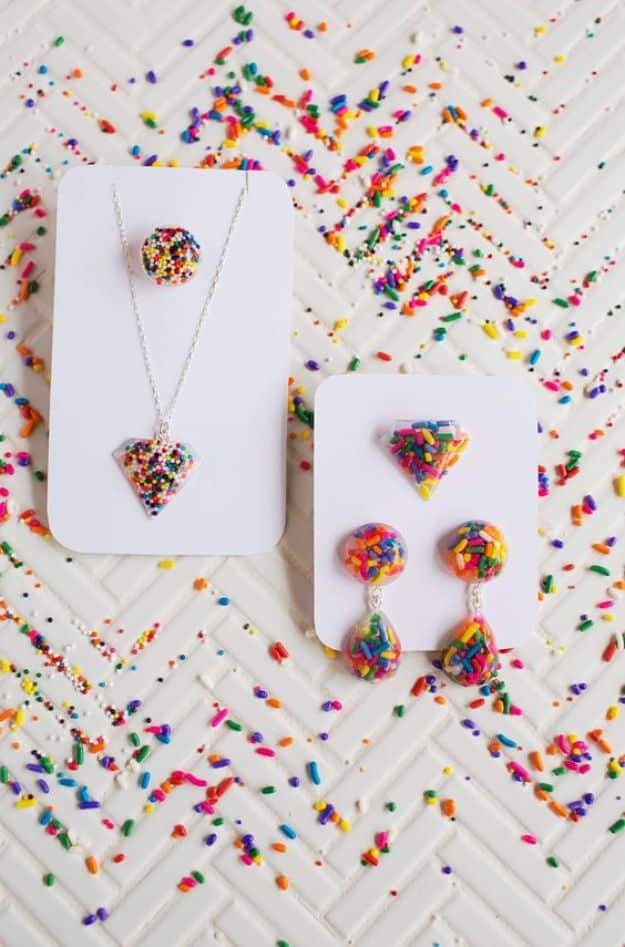
Sprinkles, glitter and confetti suspended in clear epoxy turn into kitschy earrings, necklaces, rings and pins. Decide what each piece will be first, and if pieces will hang together, bend an eye pin into the mold before pouring. Mix only what you need, because mixed epoxy stays workable for about 20 minutes. Fill the silicone molds halfway, add the sprinkles and push them under the surface with a toothpick, then check again a few minutes later since they settle. A heat gun or kitchen torch passed over the top a few times pops the bubbles. After 12 to 24 hours, unmold and glue on the hardware.
Get the full tutorial at A Beautiful Mess.
19. Resin and Ink Pendants
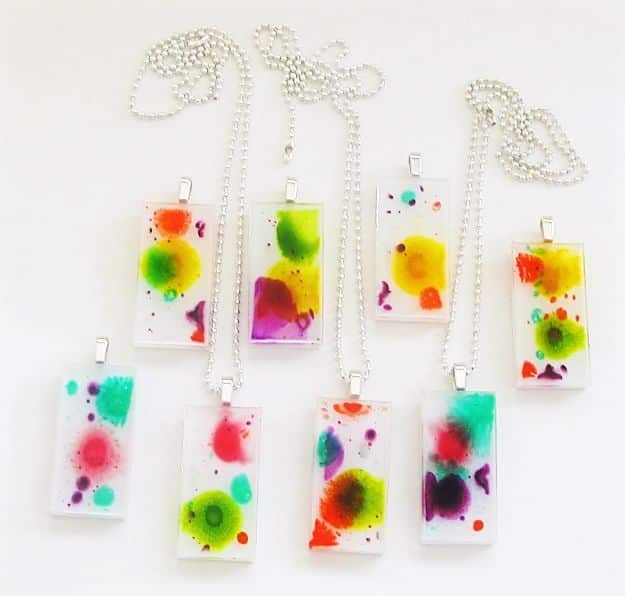
Alcohol ink drops in clear resin bloom into watercolor spots, and these pendants are easier than the popular petri dish look. Mist the mold with release about 30 minutes ahead. Mix just 1/2 ounce of clear jewelry resin, and use graduated cups because inaccurate measuring is one of the biggest reasons resin never cures. Here is the important part: use alcohol inks made for resin. Other inks can change color or vanish completely. A little white pigment underneath makes the colors pop, and insulin syringes place tiny drops exactly where you want them.
Get the full tutorial at Resin Obsession.
20. Resin Coaster with Dried Flowers
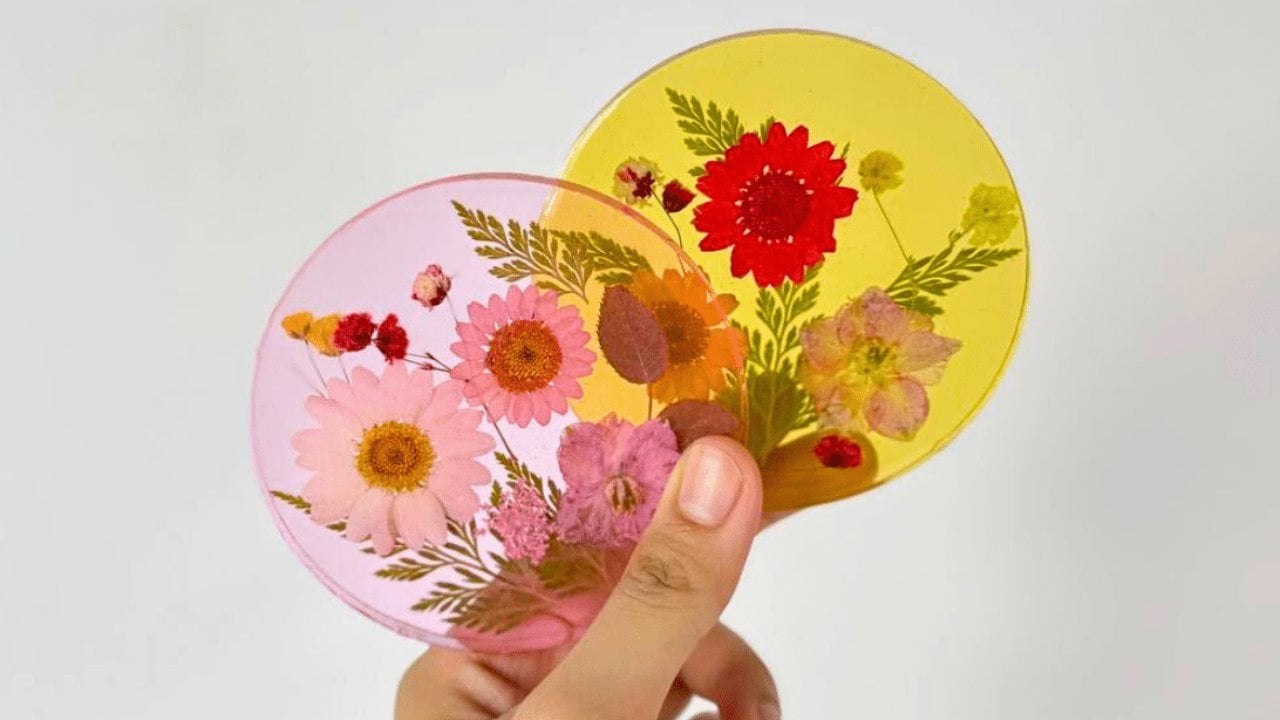
Pressed flowers in tinted resin make coasters that look like stained glass when the light hits them. Mix about 36 grams of epoxy resin with about 12 grams of hardener, a 3 to 1 ratio, but check your own bottle. Stir slowly for 5 to 10 minutes, then add 2 or 3 drops of pigment. Pour half into a clean mold, arrange the flowers with tweezers and pour the rest. A lighter pops bubbles. Here is the clever finish: a thin coat of UV resin on the front, cured under a lamp, makes it clearer and shinier.
Get the full tutorial at DIY JOY.
21. Resin Layer On Polymer Clay
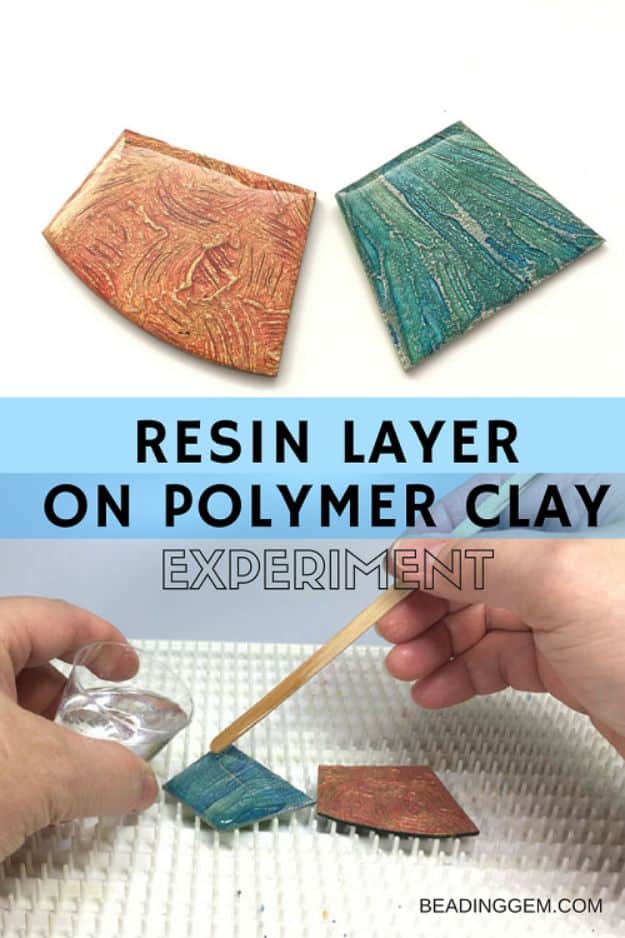
Can you pour epoxy resin over polymer clay? Yes, and this test with textured scraps proves it looks fantastic. The resin used mixes 2 to 1, stays crystal clear and is a low bubble producer. A great trick: microwave Part A for just 6 to 7 seconds before mixing, which keeps bubbles to a minimum. Pour over the pieces set on a silicone doming tray so drips are easy to peel away later. New to resin? Resist the urge to pour too much, or it runs right off the edges.
Get the full tutorial at The Beading Gem.
22. Candy Sprinkles Resin Keychain DIY
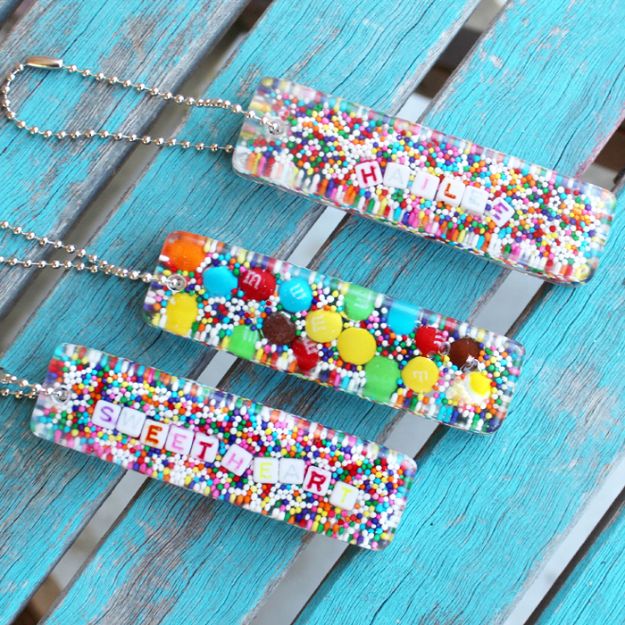
Candy sprinkles and alphabet beads in clear resin bar keychains, and October is the perfect month for them. Cover your table, read the mixing directions and work somewhere ventilated, a garage ideally. Spray rectangular pull molds with release, mix about 3 ounces of resin with its catalyst, stir a full minute and pour about 1/8 inch. Wait about 20 minutes until it is gel like, not runny, then pile in sprinkles and candy and fill. One real warning: red beads bleed the most, and blue, green and yellow fade. Still adorable.
Get the full tutorial at Resin Crafts Blog.
23. Texturized Resin
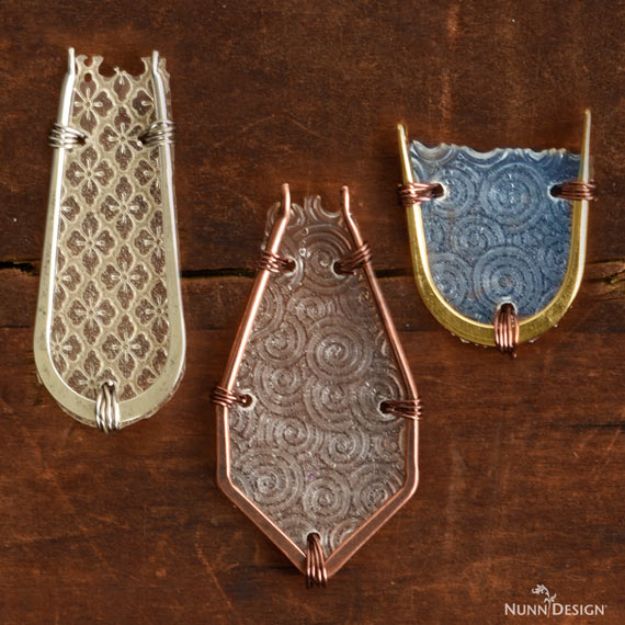
Textured resin pendants with lace and swirl patterns, made by pouring resin onto a rubber texture pad dusted with baby powder. The lesson from a first attempt that went wrong: let the resin get good and thick before pouring it onto the pad. Fresh, runny resin soaks into the rubber and sticks. Spread it even with a stir stick and wait about 6 hours for the soft cure stage, firm but not tacky. Then peel it off and cut or punch your shapes right away, because it keeps hardening over the next 48 hours.
Get the full tutorial at Nunn Design.
24. Seal Images In Resin
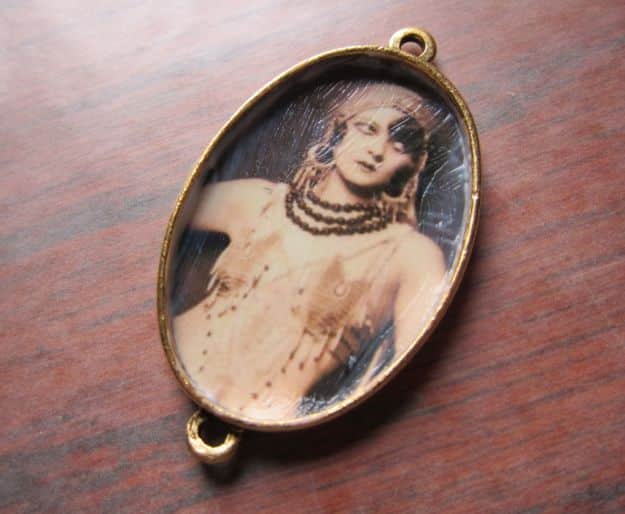
Photo pendants look so simple, but pour resin straight onto an unsealed picture and it seeps in and turns it blotchy. The fix is sealing. Quick version: sandwich the image between two pieces of clear packing tape. The better version: brush Mod Podge on the front, wait ten minutes, coat the back, wait ten more, coat the inside of the bezel, set the picture in and seal the edges. Then let it dry a full half hour. A 1 1/2 inch oval punch matches a common bezel size. Want a dome? Pour a second thin layer the next day.
Get the full tutorial at Sihaya Designs Jewelry.