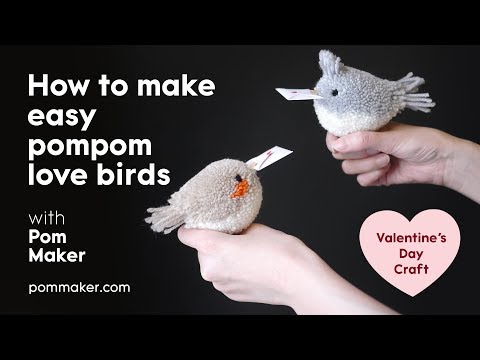
Are you looking for a weekend project to do with your kids? Try making these adorable pom pom birds from Pom Maker on Youtube! This is the perfect DIY to bond over with your kids. It’s super easy to make, only needs basic crafting materials, and they’re incredibly cute. You can gift this to your friends or even sell them at a local craft fair! Watch the video tutorial below to learn how to make these.
Materials:
- yarn (your favorite colors plus a bit of black for the eyes)
- pom maker
- fabric scissors
- fabric glue
- mini clothes peg
- paper
- pen
- waxed thread
Directions:
Step 1
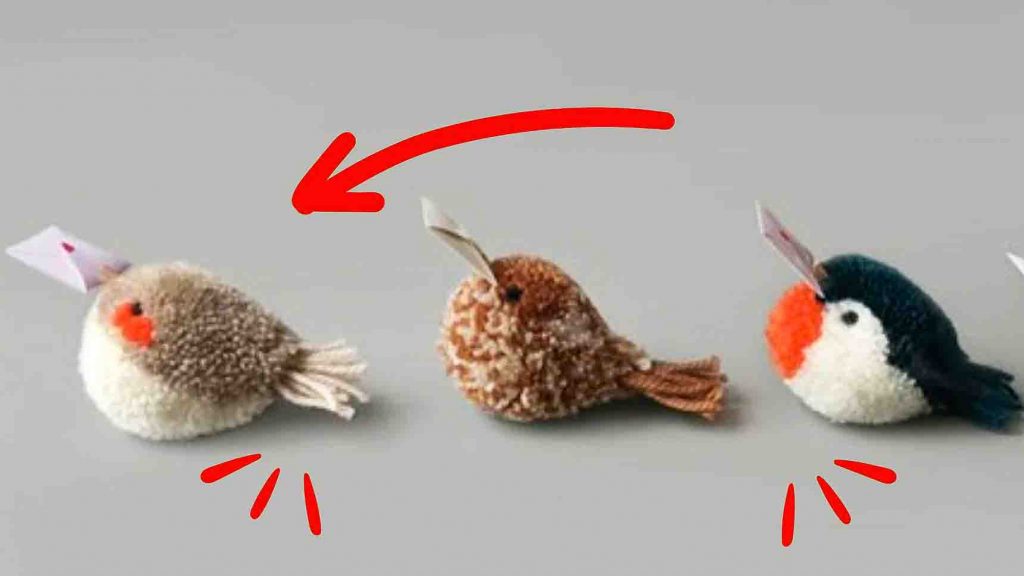
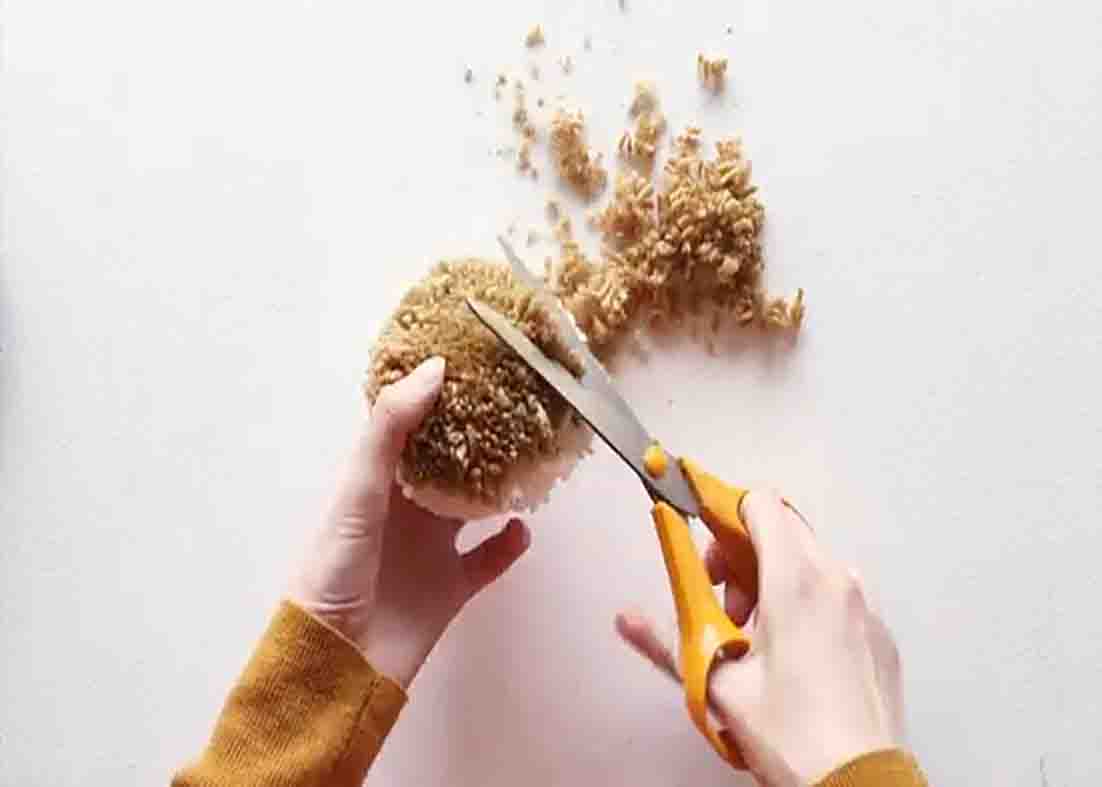
To start, wrap one half of the pom maker in one color until full. To make a two-toned colored bird, wrap the other half in the second color. (You can hold multiple strands of yarn together to wrap it faster.) Try to experiment and create different combinations for your birds. Now, assemble the pom maker halves and cut through the middle, then tie it strongly with waxed thread. After this, trim the pom into a basic bird shape. First, decide which side will be the head/back of the bird and trim that side to form a flat top. Continue trimming all the way around where the two colors meet to form a drop-like shape. One end would be round for the head while the other end should become narrow and pointy for the tail.
[social_warfare]
Step 2
After trimming, add the mini clothes peg to act as the little beak that carries messages. Cut a good length of waxed thread and thread it through the small metal loop in the middle of the clothes peg. Then, push the handle end of the peg into where you want the beak to be. Once satisfied with the position, tie the thread on the opposite side. For the tail, wrap the tail yarn around your fingers a few times, then tie it in the middle. Fold it in half then glue at the tail end of the pom bird. After this, cut through the loop and trim a bit. Now for the eyes, make a knot in the middle of a short piece of black yarn, trim the end short, then glue it to the eye part of the pom bird. Finally, make a tiny envelope for the bird’s beak to carry.

DIY Pom Pom Love Birds Tutorial