A phone goes everywhere, so it might as well have some fun accessories. These 11 genius DIY phone hacks are mostly quick crafts made from things already around the house. Binder clips and a toilet paper roll become phone stands, two paper cups become speakers and a wooden box with a magnifying glass becomes a movie projector for the backyard. There is also a family charging station, a sewn charger holder pocket, a silicone bracelet bumper case, nail polish headphones and a cigar box that hides an old phone jack. One is a DIY JOY original with a video tutorial: a pipe cleaner flower vine charger cord. A quick tip for freeing up storage space rounds it out. Grab a roll of washi tape and start with the easiest one.
1. Family Charging Station
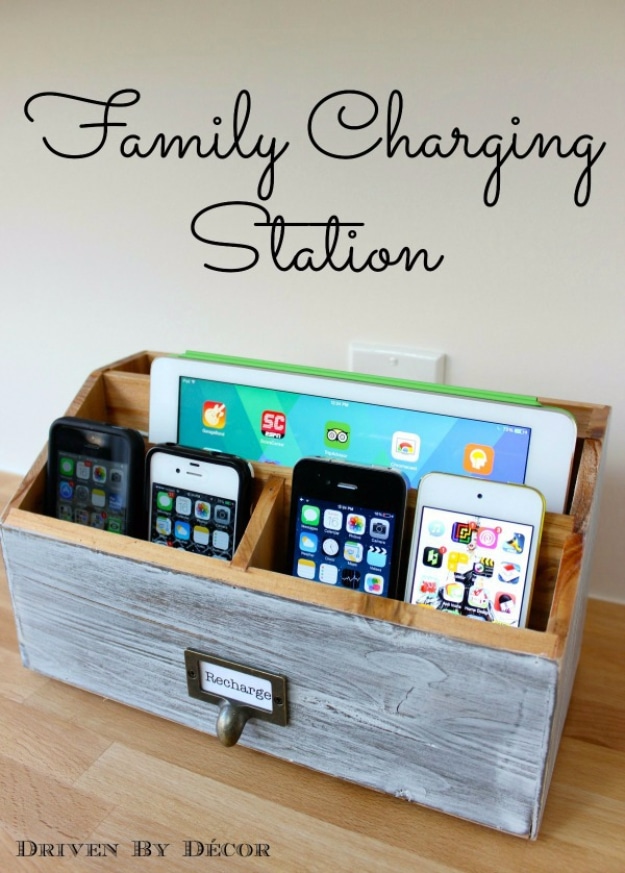
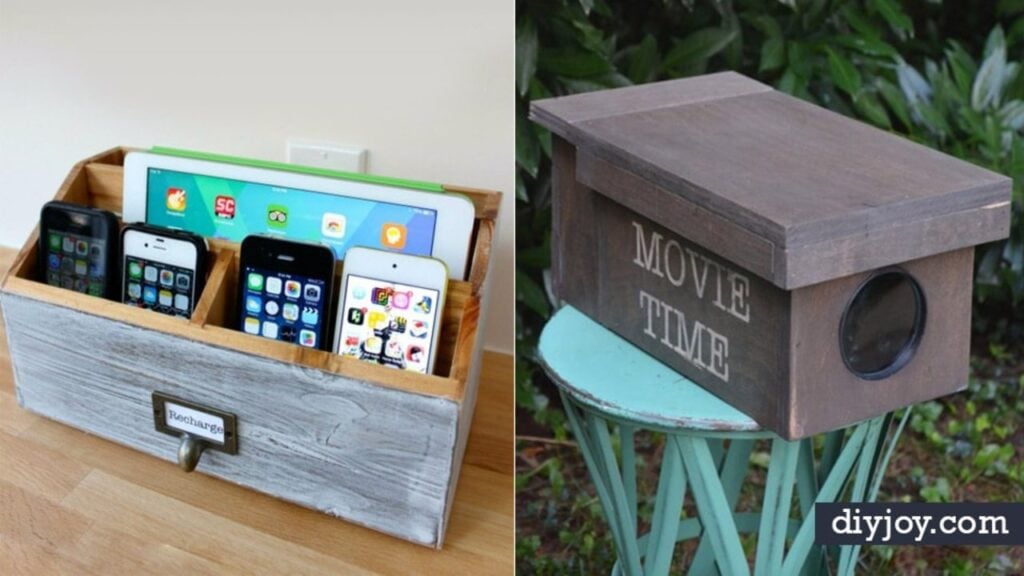
An open wooden desk organizer from a home goods store becomes a charging station with a slot for every phone in the house. Drill small pilot holes in the bottom first, then widen them just enough for the small end of each cord. Felt pads underneath lift it so the cords slip out the back to the outlet. Short cords stay in place full time, so nobody hunts for a charger. The outlet behind it was swapped for a four port USB outlet, with the breaker switched off first.
Get the full tutorial at Driven by Decor.
2. DIY Smartphone Stand With Binders
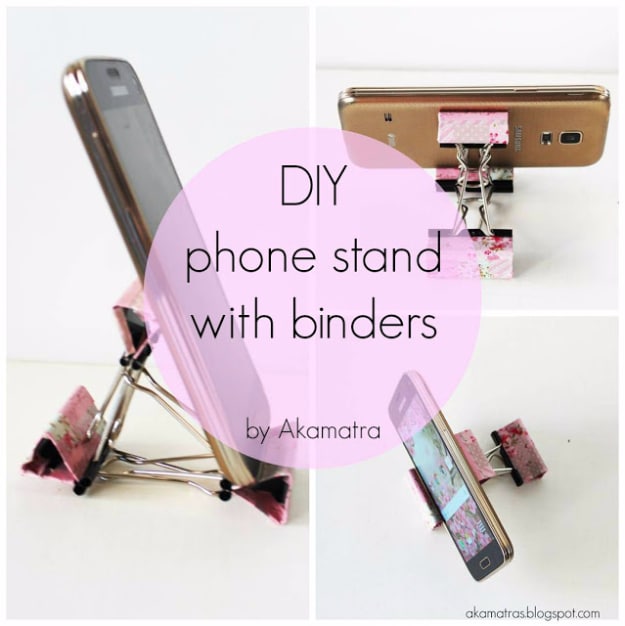
Three binder clips from the office supply drawer become a sturdy phone stand in about five minutes. You need two large clips, one medium clip and some washi tape. Cover the clips with tape first, wrapping the extra around the edges so it stays put. Then lay the two large clips facing each other, interlock their metal handles and press them flat. Clip the medium one on top to lock everything together. Swap the tape pattern to match any phone case.
Get the full tutorial at Akamatra.
3. DIY Movie Projector For Your Smartphone
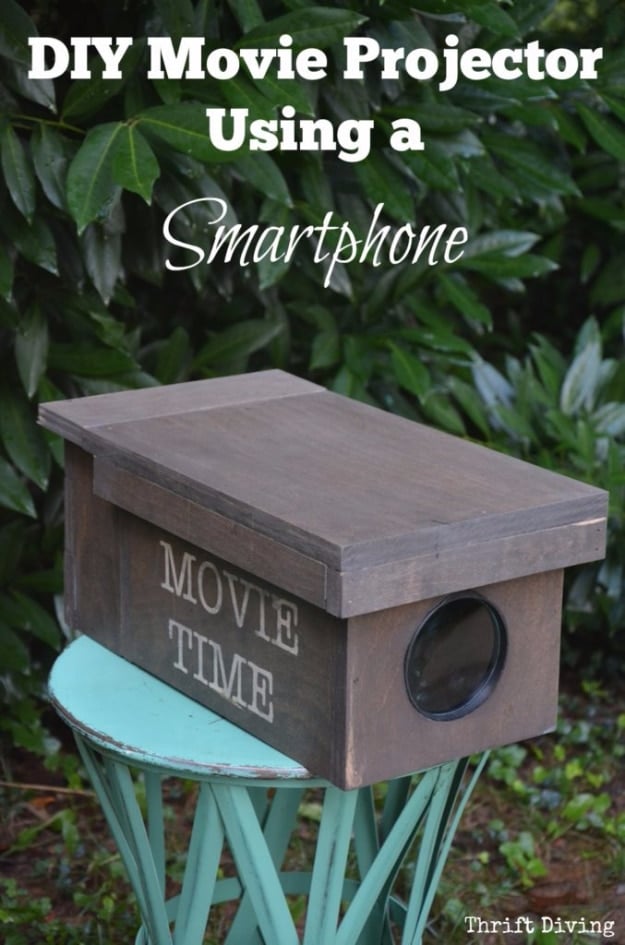
A plywood box and a magnifying glass from the dollar store turn your phone into a movie projector for backyard nights. One 2 by 4 foot piece of birch plywood was enough for the whole build. Trace the magnifier on the front panel, cut the handle off with a small hacksaw and cut the opening with a jigsaw. Paint the inside glossy black. The box ended up longer than a shoebox so the lens could focus, so measure for your own magnifier.
Get the full tutorial at Thrift Diving Blog.
4. DIY Phone Jack Cover
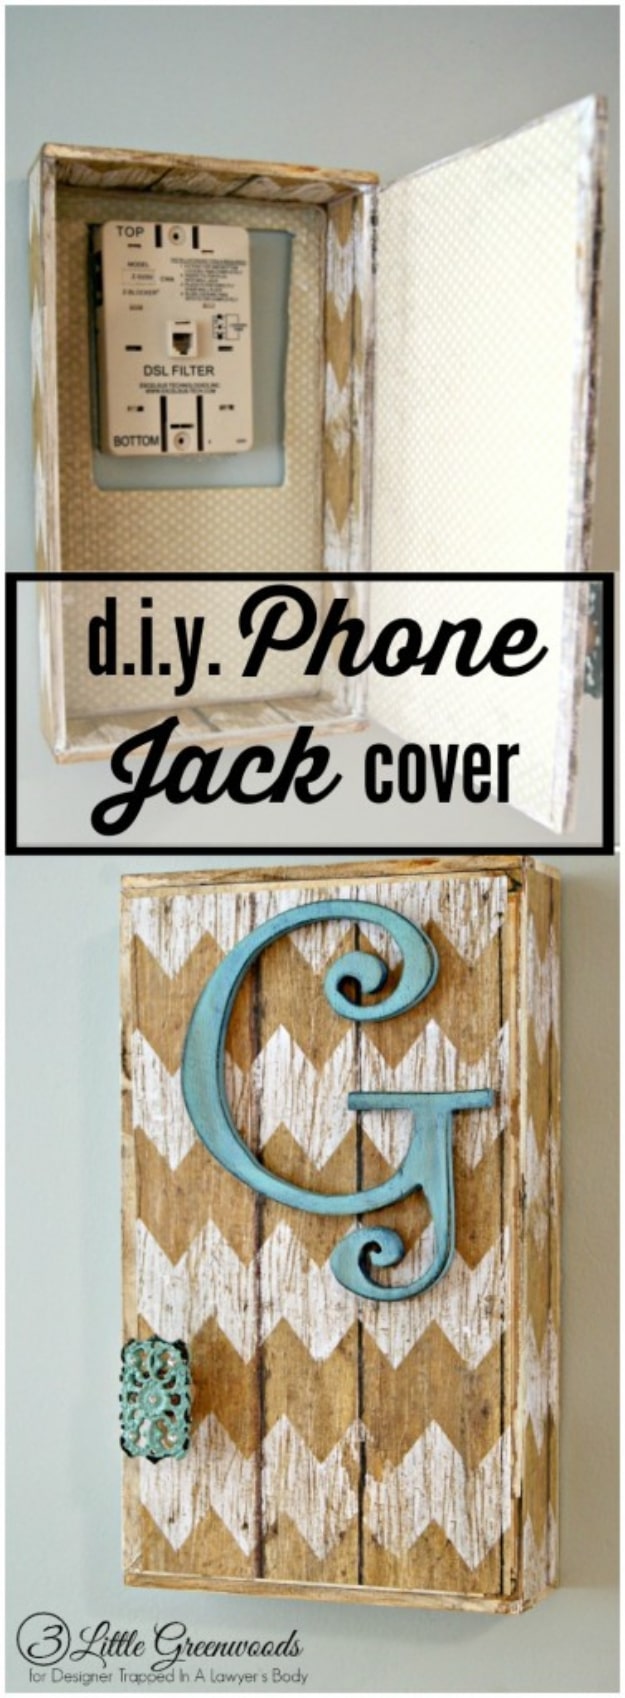
That old wall phone jack nobody uses can hide behind a decorated cigar box for under $10. Measure the jack, trace it on the back of a thin wooden cigar box, score the outline with a retractable knife and tap the piece out with a hammer. The box then sits flush over the jack. Paint it, add scrapbook paper with Mod Podge, a wooden monogram and a knob. Bonus: the inside becomes a little hidden storage spot.
Get the full tutorial at Kaleidoscope Living.
5. DIY Phone Stand From Recycled Toilet Paper Rolls
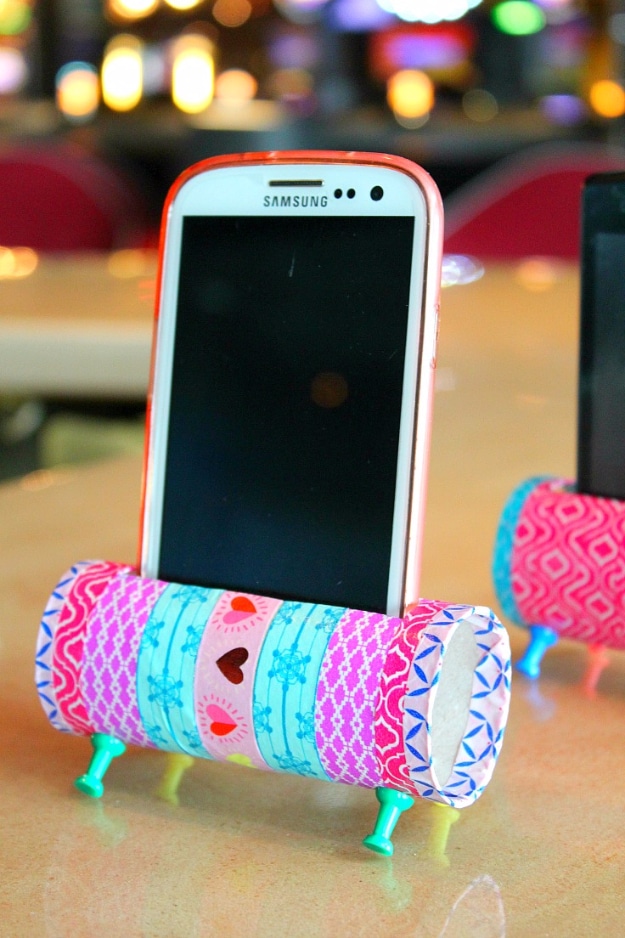
An empty toilet paper roll, washi tape and four push pins make a phone stand that costs basically nothing. Trace your phone on the roll and cut out the slot. Wrap the roll in washi tape, then cut small V shapes at the slot edges and tuck the tape inside for a clean finish. Push pins at each end act as little feet. Space them wider than the phone so the screen never gets scratched. Mixing tape patterns makes it extra cute.
Get the full tutorial at Easy Peasy Creative Ideas.
6. Easy DIY iPhone Bumper Case
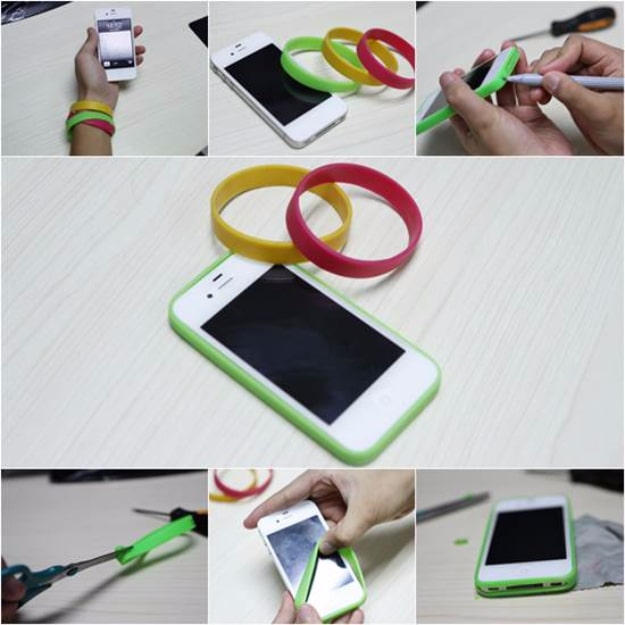
A silicone bracelet stretched around the edges of your phone makes an instant bumper case, and it takes about two minutes. Pick a bright color, stretch the band around the phone and use a pen to mark where the buttons, charger port and headphone jack sit. Take it off, cut out those slots with scissors or a utility knife and slip it back on. Adjust the openings until everything lines up. Swap colors whenever you like.
Get the full tutorial at i Creative Ideas.
7. Paper Cup iPhone Speakers
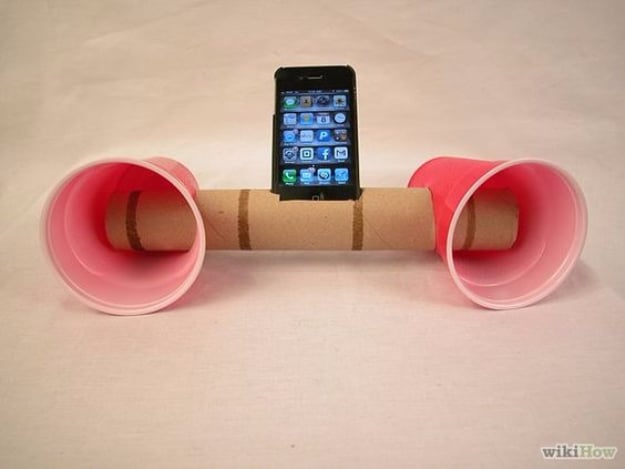
Two paper cups and an empty toilet paper roll make speakers that boost a weak phone speaker in a pinch. Trace the bottom of your phone on the middle of the roll, cut three sides with a craft knife and fold the flap up as a backrest. Trace the roll on the side of each cup near the base, cut the circles and push the cups on an inch or two. A line of hot glue steadies a wobbly fit. Then decorate.
Get the full tutorial at wikiHow.
8. Nail Polish Colored Headphones
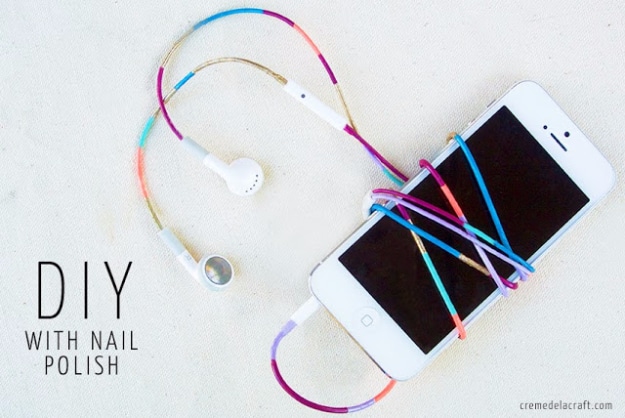
Those nail polish colors you never wear can give plain headphones a colorful makeover. Tape off sections of the cord with masking tape, pressing it down firmly so the polish does not seep under. Hang the headphones between two clothespins so you can paint all the way around. Let the polish dry completely before peeling the tape, then paint the bare sections. Finish with a thin coat of clear polish to stop chipping. Matching a phone case is optional.
Get the full tutorial at Creme de la Craft.
9. Free Up Space In Your iPhone

Out of storage right when you want to snap a photo? Start with the storage screen in your Settings app, which lists your apps from biggest to smallest. Delete the ones you never open. Photos are usually the biggest culprit, so turn on automatic cloud backup and clear old shots off the phone. Saving a second normal copy of every HDR photo doubles them up, so switch that off. Old podcasts and years of text messages are worth clearing too.
Get the full tutorial at Crazy Organized.
10. Pipe Cleaner Flower Vine Charger Cord
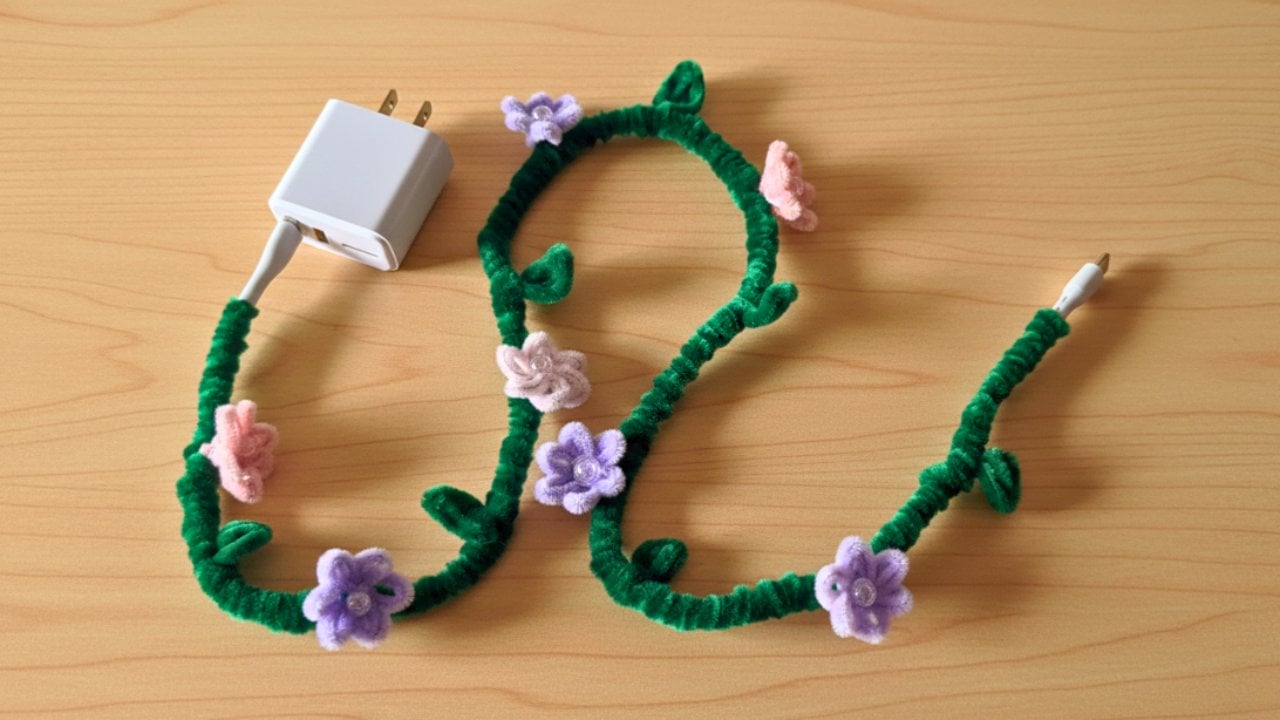
Pipe cleaners wrapped tightly around a charger cord add a little flower garden and some extra protection where cables tend to fray. Wrap a pipe cleaner around a marker to make a mini flower, add a green stem and glue a bead in the center. Fold small leaves from short pieces. Lay the stems along the cord, then wrap over them with green pipe cleaner to lock everything in. Keep the wrap thin near the plugs so the cord still bends.
Get the full tutorial at DIY JOY.
11. Easy DIY Phone Charger Holder
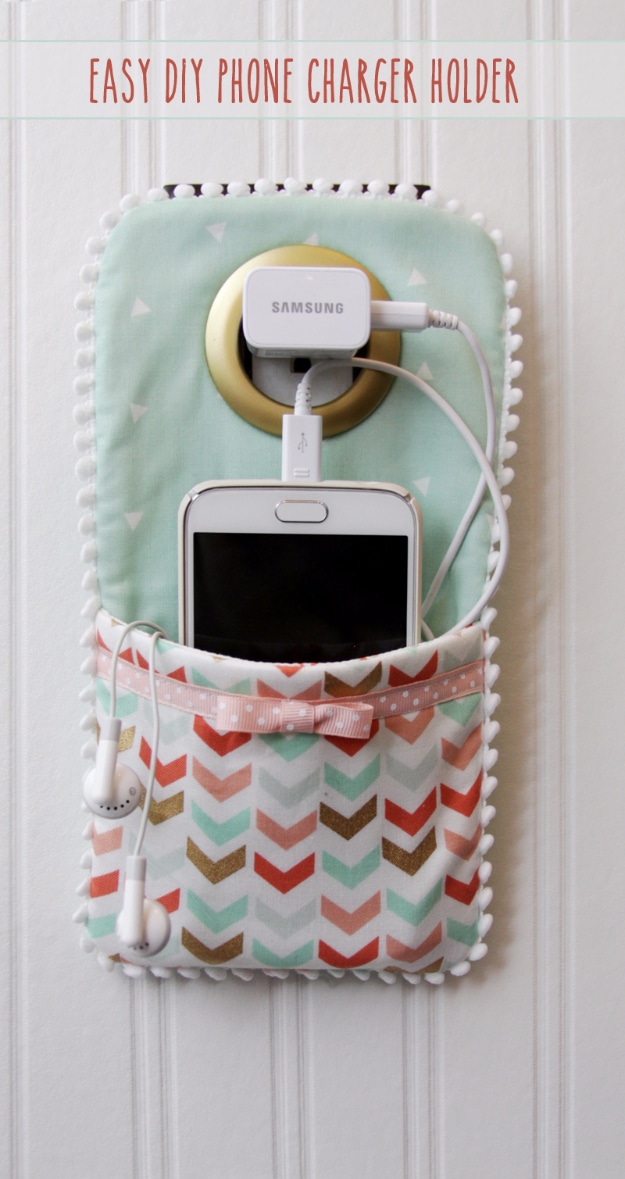
A fabric pocket with a bow keeps your phone, cord and even earbuds together near the outlet instead of on the floor. It sews up in about 30 minutes from two main pieces and two pocket pieces backed with fusible fleece. A ribbon bow and pom pom trim dress it up, and a plastic curtain grommet at the top needs no tools. Hang it on a small adhesive hook beside the outlet, not from the charger itself, so nothing strains the plug.
Get the full tutorial at Flamingo Toes.