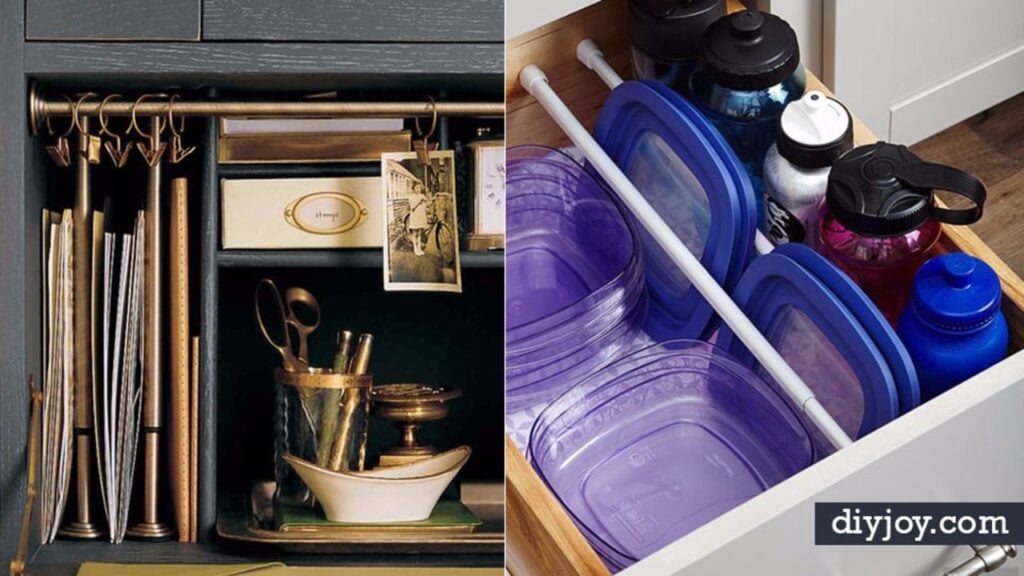
A tension rod costs a few dollars, needs zero drilling and is quietly the most useful thing in the curtain aisle. These 12 DIY tension rod hacks prove it, room by room. Three rods turn a single yard of fabric into a Roman shade in under 30 minutes, and two more hang a French cafe awning over a kitchen window. Others hang spray bottles under the sink, keep spice jars in neat rows, hide the cords under a bed and give the kids a bunk bed fort with a curtain that actually slides. Every idea comes out without a mark on the wall, which makes them a gift for renters. Measure twice, buy the rod whose spring range fits, and twist it in snug.
Table of Contents
- DIY Tension Rod Hacks
- 1. Organize Under The Sink With A Tension Rod
- 2. Small Bathroom Jewelry Storage With Tension Rods
- 3. Ribbon Organizer
- 4. Cheap Bath Toys Organizer
- 5. Remove Clutter Under The Sink
- 6. Window Awning
- 7. DIY Cafe Curtain Rod
- 8. No Sew Bottom Bunk Fort
- 9. Creative Paper Towel Storage
- 10. No Sew Faux Roman Shades
- 11. Skirted Bed
- 12. Spice Drawer Divider
DIY Tension Rod Hacks
1. Organize Under The Sink With A Tension Rod
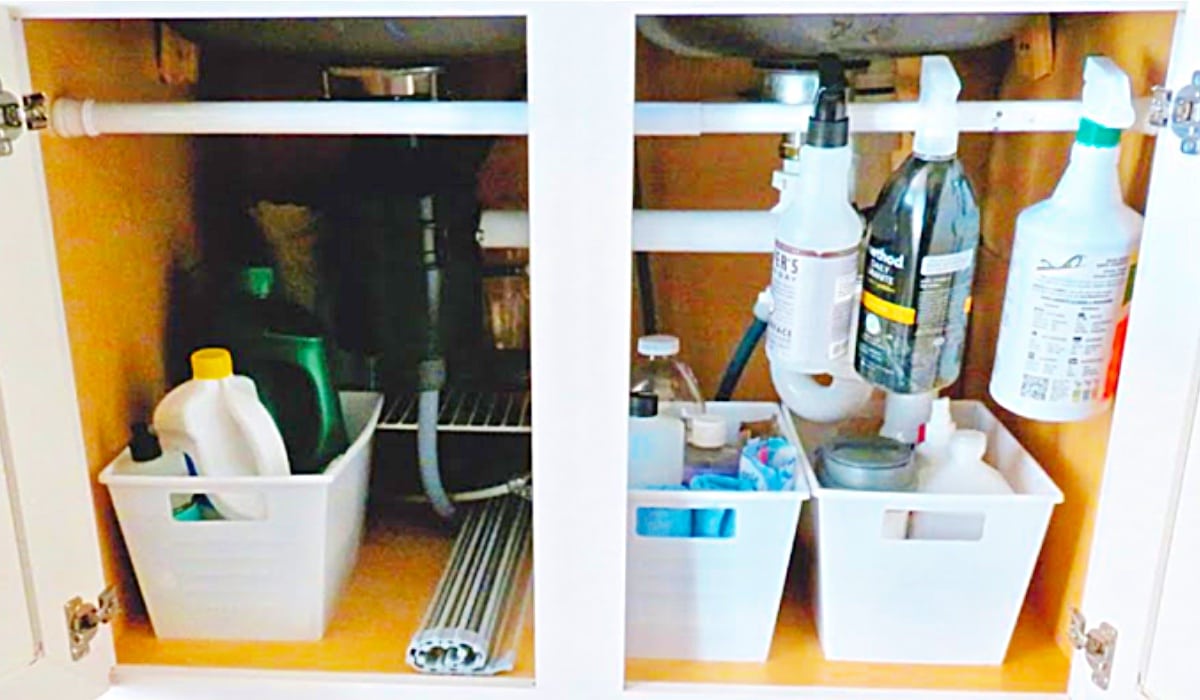
Every spray bottle under the sink has a trigger, and that trigger is exactly what makes this work. Clear the whole cabinet out, wipe it down, then wedge a tension rod across the top of the space and hang the bottles from it by their necks. The floor of the cabinet opens up for a riser shelf and a couple of small bins, and the cleaners stop tipping over every time the door opens. Bonus: things you can actually see get used before they expire.
Get the full tutorial at DIY JOY.
2. Small Bathroom Jewelry Storage With Tension Rods
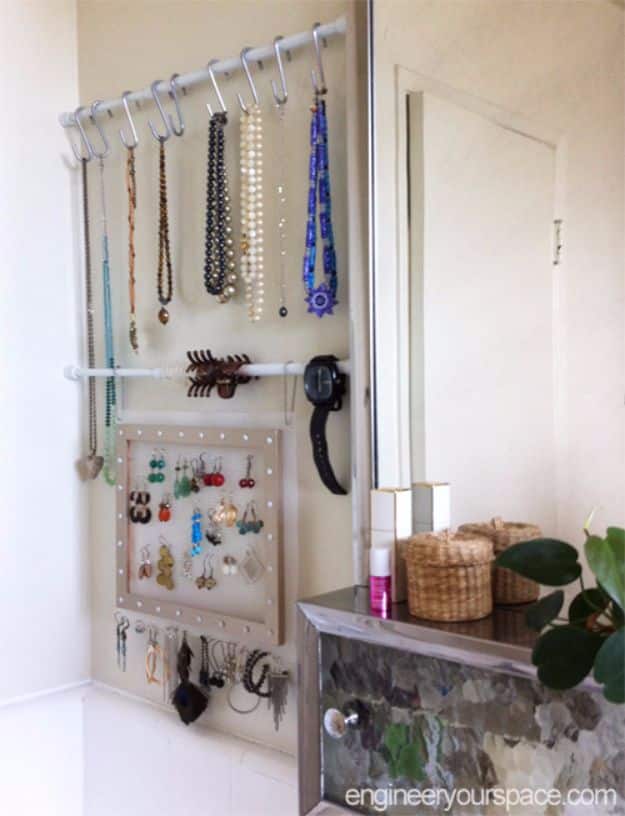
Two tension rods fitted between the wall and the frame of the bathroom mirror, and a whole jewelry box moves onto the wall where you can actually see it. Necklaces hang from S hooks on the top rod so they never tangle. The bottom rod holds hair clips and watches, with room left over for an earring board. No mirror frame to wedge against? A towel rail screwed to the wall or the back of a door does the same job, and the counter finally stays clear.
Get the full tutorial at Engineer Your Space.
3. Ribbon Organizer
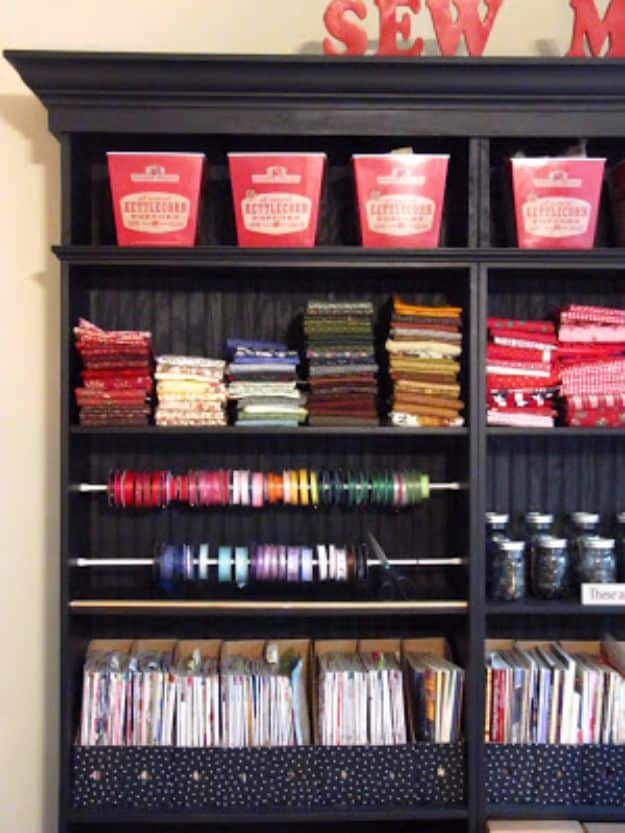
Slide the rubber tip off a tension rod, thread on spools of ribbon, pop the tip back on and twist the rod into a shelf. That is the whole organizer, and it costs about what one spool does. The smart extras are the reason to copy it: a yardstick cut to the shelf width and stuck on with Command strips, so measuring happens right there, and a pair of scissors tied to the rod with, naturally, a ribbon. Nobody will ever borrow those scissors again.
Get the full tutorial at Sew Many Ways.
4. Cheap Bath Toys Organizer

Bath toys multiply. That’s just science. This fix is a shower curtain spring rod, a set of shower curtain rings and four to six small plastic bins from the dollar store, strung together on the floor and then sprung into place low on the tub wall. Short bins want the rod mounted near the bottom so the tub tilts them outward and they hold toys. Pull off any metal bin handles first, since they will rust. Kids can reach it, so kids can tidy it.
Get the full tutorial at Cleverly Simple.
5. Remove Clutter Under The Sink

Tension rods are not just for curtains, and the cabinet under the kitchen sink proves it. Spring one across the cabinet and hang every spray bottle from it, which lines them up neatly and frees the shelf below for everything else. They’re cheap, totally removable and leave no marks, which makes them perfect for awkward spaces where a real shelf won’t fit. The same trick stands cutting boards, baking sheets and pot lids upright in a cupboard so they stop sliding into an avalanche.
Get the full tutorial at DIY JOY.
6. Window Awning
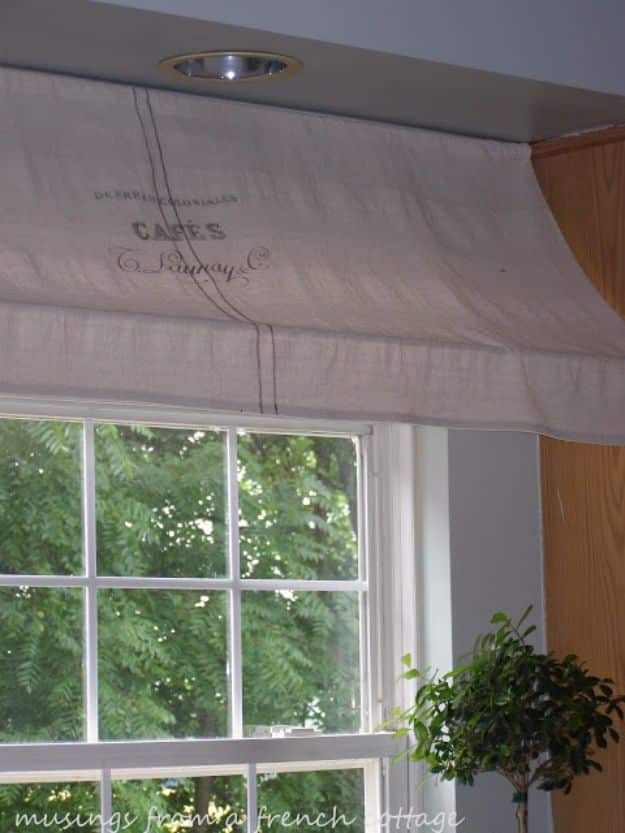
A painted canvas awning over a kitchen window, hung on two tension rods and not a single screw. One rod goes up high near the soffit and holds the top of the fabric. The second goes lower and further forward, so the canvas drapes over it into that crisp awning shape. Hem the sides and bottom of a drop cloth, sew a rod pocket at the top, then add a grain sack stripe and a French cafe logo with fabric paint. It looks like it came from a Paris bistro.
Get the full tutorial at Musings From a French Cottage.
7. DIY Cafe Curtain Rod
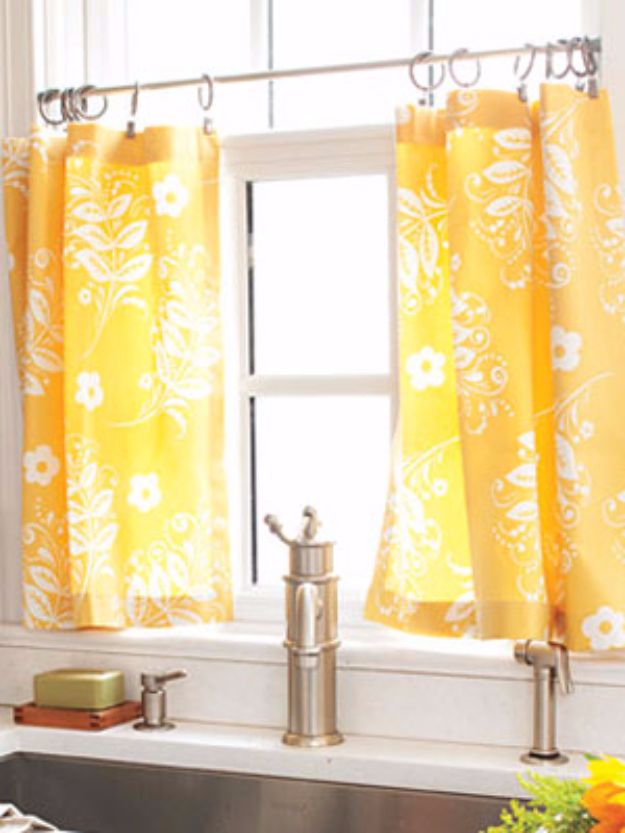
Cafe curtains cover the bottom half of a window, so the street gets less of a view and the kitchen keeps all its light. A tension rod mid window holds them with no drilling, and clip rings make them easy to slide. Quilting fabric works, and old dish towels or napkins work even better. For the panels, add 6 inches to the length, then multiply the width by 3 and divide by 2 for a soft gather. Double fold hems all around and they’re done.
Get the full tutorial at Woman's Day.
8. No Sew Bottom Bunk Fort
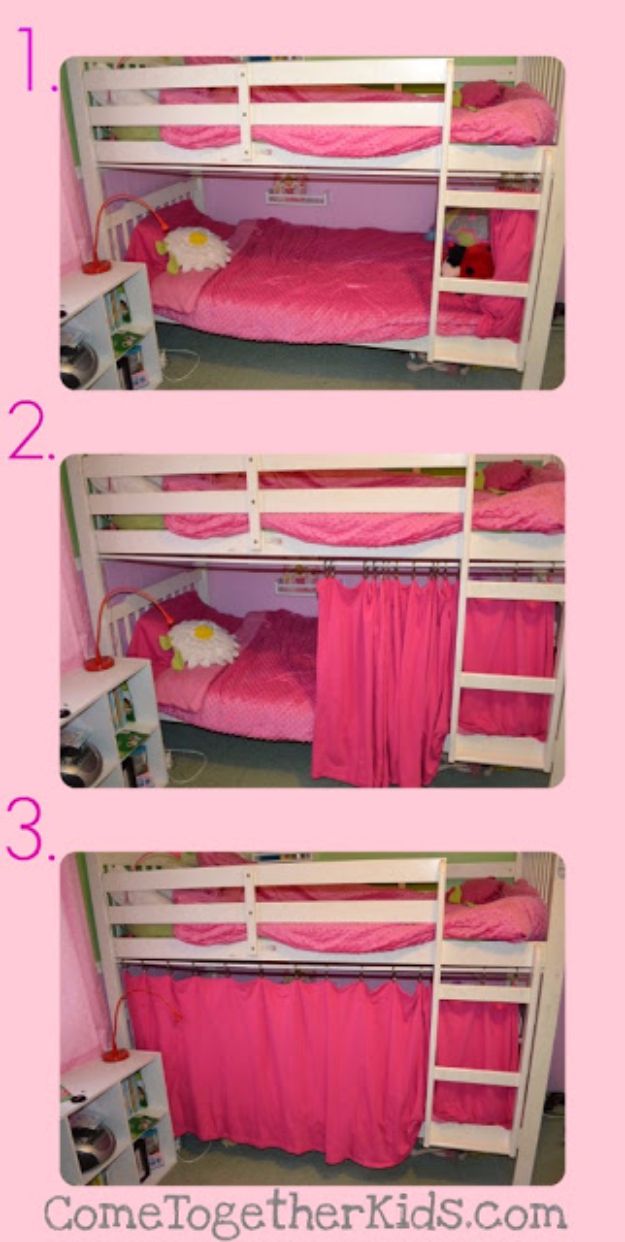
Kids build forts out of every sheet in the house anyway, so give them one that stays put. A sturdy shower curtain tension rod mounted under the top bunk, a package or two of clip curtain rings and a twin flat sheet folded in half lengthwise is all it takes. Clip the sheet along the fold and it slides open or closed. Five minutes, no cutting and no sewing. Use a heavy rod, not a skinny curtain one, because forts see some action.
Get the full tutorial at Come Together Kids.
9. Creative Paper Towel Storage

Under the kitchen sink there’s a dead zone right at the top of the cabinet, and a tension rod turns it into a paper towel holder. Spring the rod across the cabinet just below the frame and slide a roll or two onto it, so the towels hang ready while the bins of cleaning supplies sit underneath. One heads up from the comments, worth knowing: spray bottles can be too heavy for a rod and fall, but paper towels stay put.
Get the full tutorial at DIY Inspired.
10. No Sew Faux Roman Shades
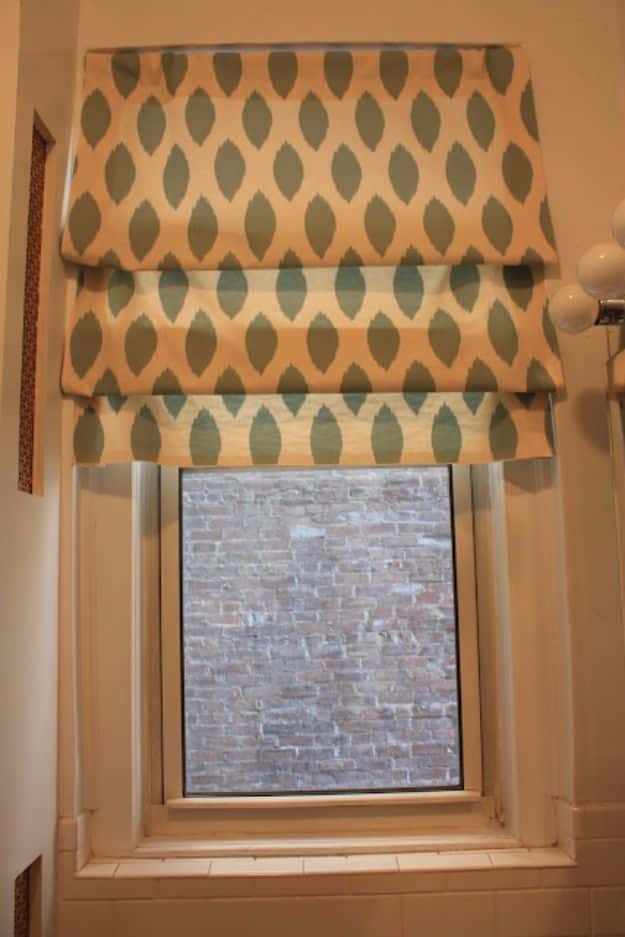
A yard of fabric, iron on hem tape and three tension rods make a Roman shade with no sewing machine in sight. Hem the sides and top with the tape, hang the first rod at the top of the window and let the fabric fall. Then spring the second rod lower and pull the fabric over it into a fold, and repeat with the third about six inches further down. Wider spacing gives a looser look. Done in under 30 minutes for less than $30.
Get the full tutorial at Southern in the City.
11. Skirted Bed
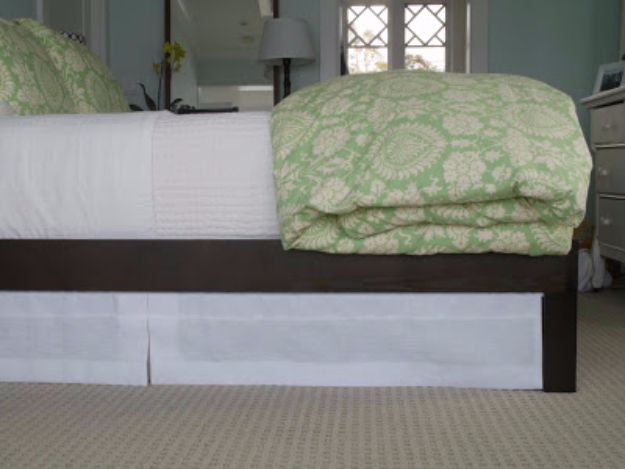
Cords, chargers and lamp plugs under a bed with exposed legs are not a good look, and a regular bed skirt won’t fit a frame like that. The fix is a tension rod sprung under the frame with a linen panel hung from it, a simple pleat in the middle to stop puckering on the long run. Remnant linen keeps it cheap, and the rod itself is only a few dollars. Crisp, tailored and every cord hidden. Measure the gap under the rail first.
Get the full tutorial at Seagrass Interiors.
12. Spice Drawer Divider
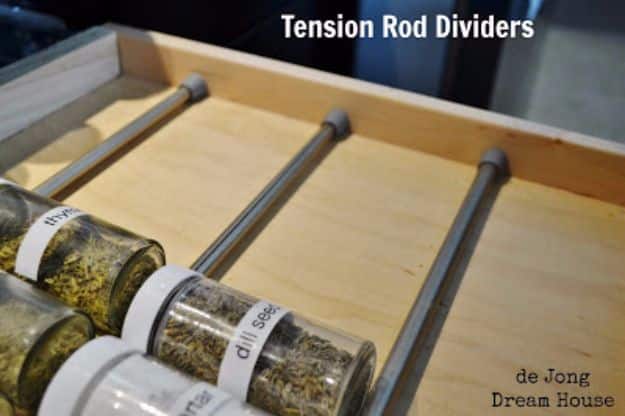
Spice jars lying in a drawer roll around every time it opens, so the jars end up in a heap. Tension rods sprung across the drawer make instant dividers that hold each row in place, label side up. They’re far cheaper than built in dividers, and when the jars change size, slide the rods to new spacing. A full extension drawer under the cooktop puts every spice in reach. A label maker on the lids is optional but deeply satisfying.
Get the full tutorial at de Jong Dream House.