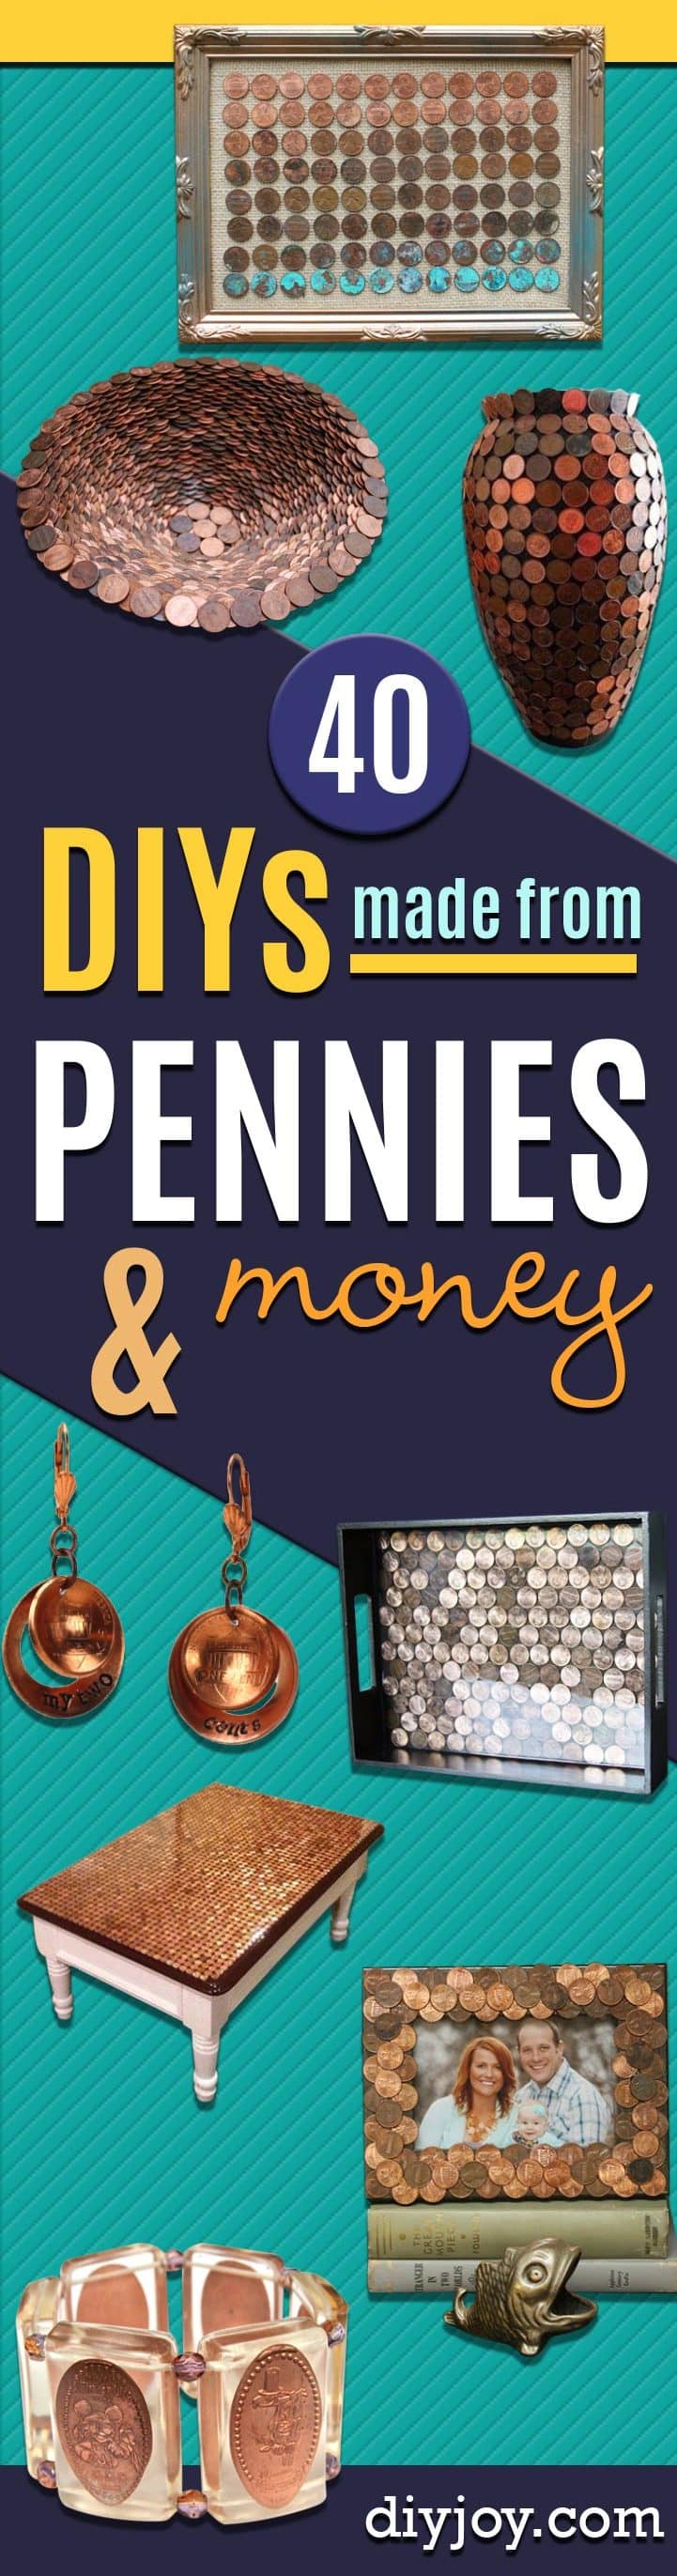
A jar of pennies is the least useful money in the house. Nobody spends them, the bank charges you to count them, and there they sit. These penny crafts turn that jar into copper mosaic tile, which is what a penny really is if you stop thinking of it as currency. Some are one evening projects, like a vase wrapped in 252 coins or a ring glued to a shank in five minutes. Some are genuinely serious: a breakfast nook wall took 19,400 pennies and a floor in Chicago took 59,670 and 128 hours. Most of it comes down to glue, patience and a pour of bar top epoxy. Every tutorial below belongs to the maker who worked it out, and their links are on each project.
DIY Ideas With Pennies and Coins
1. Penny Vase
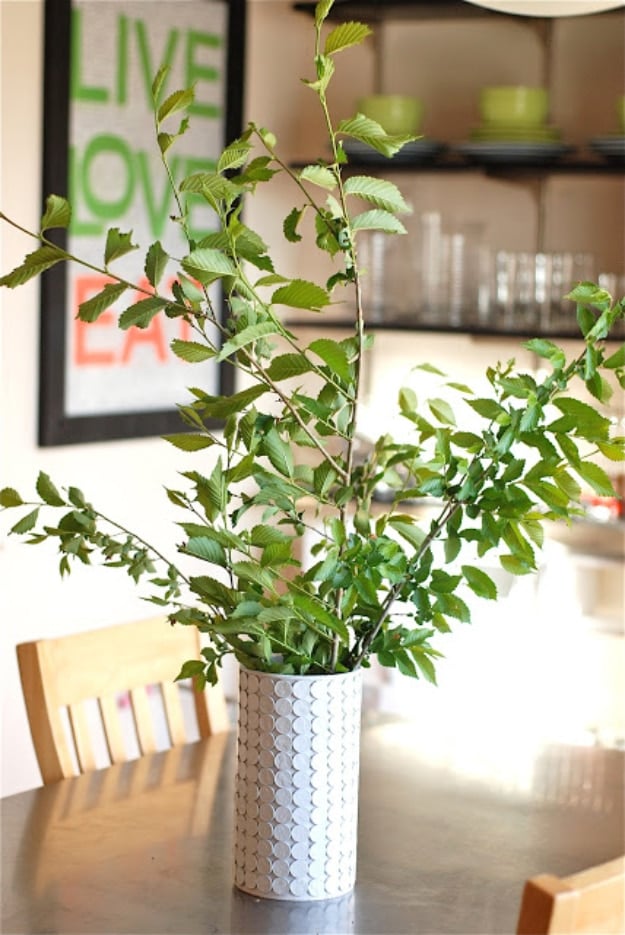
A tall vase with a bumpy beaded surface standing on a dining table with cut greenery in it, and under the white paint there are 252 pennies stuck to an empty oatmeal container. kreyv wraps the coins on in rows with a hot glue gun and then sprays the whole thing white, which is the step that turns loose change into texture instead of money. The instruction worth repeating is to line that first row up against the seal at the base, because every row above it inherits that line. It went together in less time than a television episode. Keep it decorative, since the container is not waterproof.
Get the full tutorial at kreyv.
2. Upcycled Thrift Store Penny Table
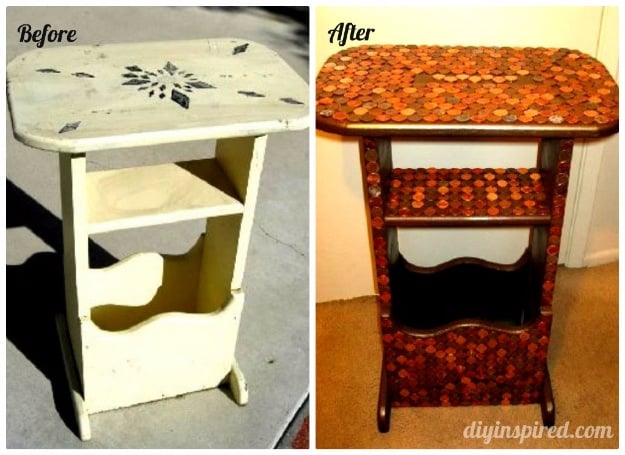
A before and after of a beat up thrift store side table, chalky cream in the first shot and a shimmering copper top in the second. DIY Inspired spent about ten dollars in rolled pennies, filled the dents, sanded, spray painted the base, then set each coin one at a time like tile using a fine tipped Liquid Nails. The clever part is the sorting. Some coins were cleaned with Tarn-X for a rainbow tarnish, some kept their green residue, and a cluster of shiny 2012 pennies marks the center. Clear sealer, no epoxy.
Get the full tutorial at DIY Inspired.
3. Initial Penny Art
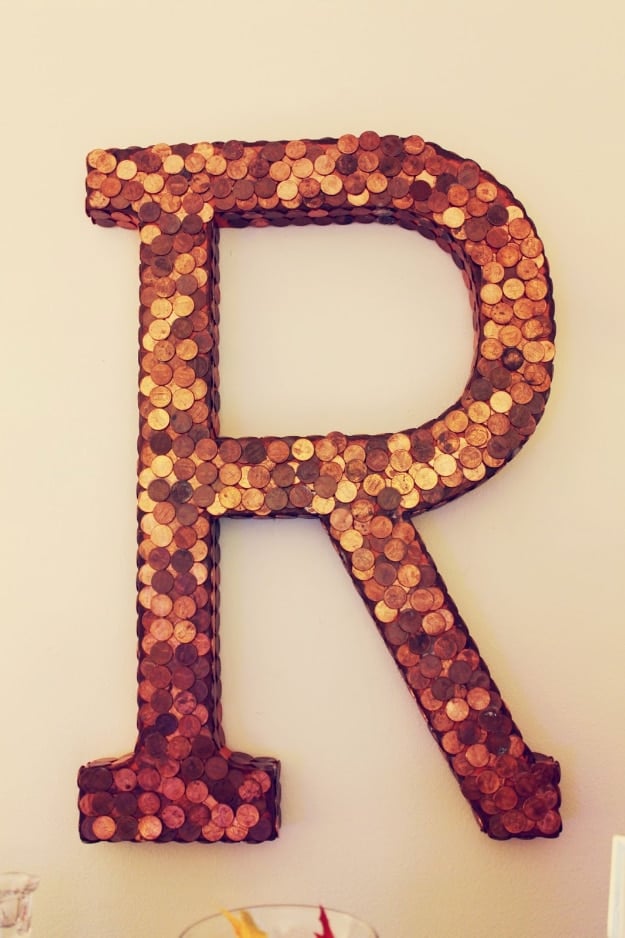
A large letter R on a wall, filled corner to corner with pennies in every shade from bright copper to nearly black. Miss Mash DIY starts with a papier mache letter from the craft store and paints it copper first, which matters, because that base color hides every sliver of gap you cannot cover with a round coin. Brown paint on the edges, then coins hot glued in two layers, the second layer sitting over the negative space the first one leaves. Mod Podge seals it. Hang it on something sturdy, because it ends up heavy.
Get the full tutorial at Miss Mash DIY.
4. Penny Tiled Mirror
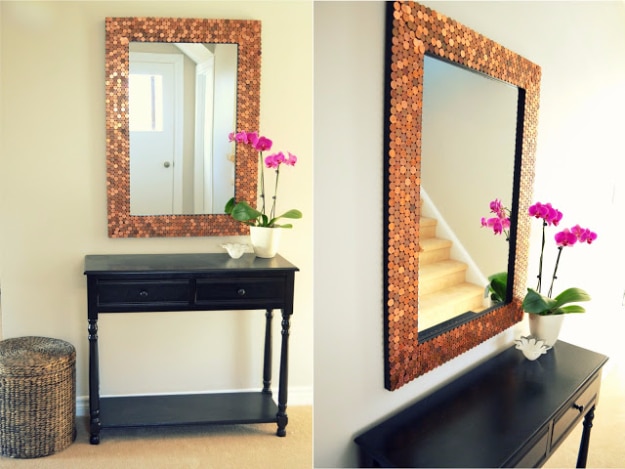
Two views of the same entryway mirror, one straight on above a dark console and one at an angle, the wide frame tiled edge to edge in coins. Honey Sweet Home used about nine dollars in Canadian pennies and super glue, laying them out and shuffling the arrangement before committing to any of it. The detail worth stealing: a penny is dished, not flat, so the glue goes on the raised rim rather than in the middle of the face. Extra coins go on top wherever the gaps between circles start showing.
Get the full tutorial at Honey Sweet Home.
5. DIY Penny Jewelry
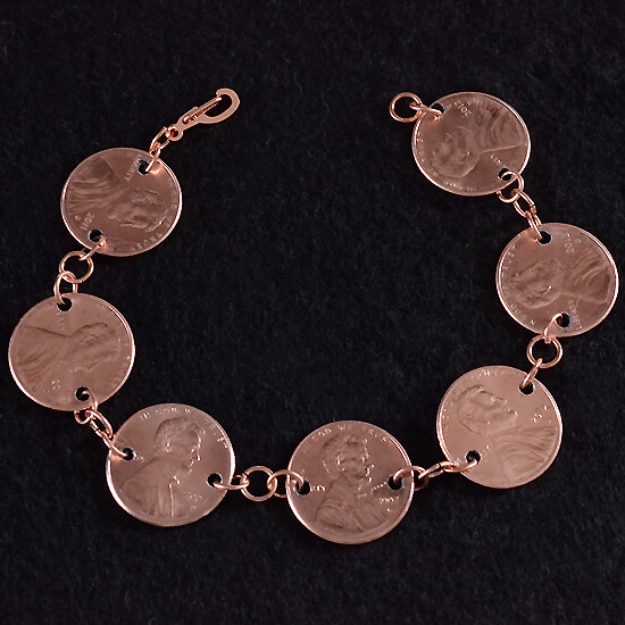
A bracelet of seven pennies linked face to face with copper jump rings, photographed flat on black so the coins read as warm metal discs rather than as change. Dream a Little Bigger drills two holes in each coin, one behind Lincoln and one in front, then cleans them with a vinegar and baking soda paste and a toothbrush until they come up pink. Newer pennies drill easier because there is less copper in them. Jump rings chain the coins in sequence, a lobster clasp closes it, and the materials cost seven cents.
Get the full tutorial at Dream a Little Bigger.
6. Penny Tile Floors Using Copper Coins
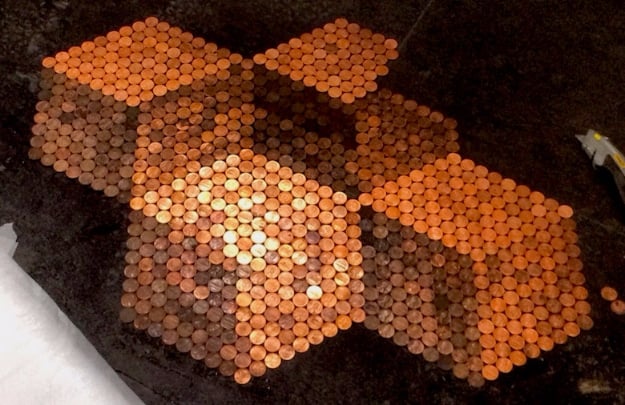
A floor mid lay, pennies fanning out in hexagonal blocks across bare subfloor with a few unfilled patches still showing, which is the most honest picture of this project anyone has published. Homeli tells you the numbers that decide whether you attempt it. The Chicago couple whose bedroom floor started all of this covered 234 square feet, which took 59,670 pennies, about six hundred dollars of coins, and 128 hours of laying. Cheap in materials and expensive in time, which is exactly backwards from most flooring, and why hiring it out runs into the thousands.
Get the full tutorial at Homeli.
7. Vintage Money Desk DIY
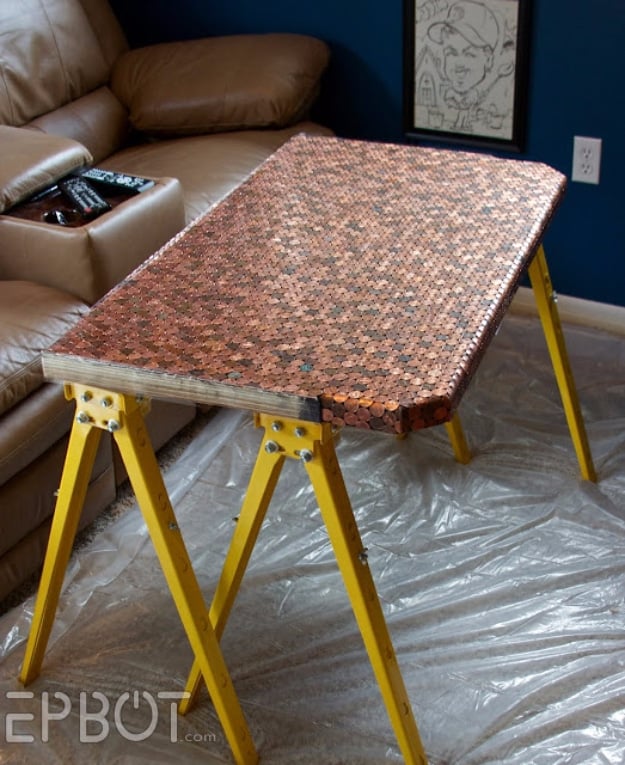
A desktop under construction on yellow sawhorses, the plywood already covered in coins and waiting for its epoxy pour. EPBOT is unusually straight about the cost and the hours: roughly 2,000 pennies at twenty dollars, ten dollars of plywood, forty five dollars of bar top epoxy, about eighty five dollars and twenty hours spread over six nights. The coins get polished with Tarn-X and placed for color, the edges trimmed with a Dremel, then the pour goes on and a creme brulee torch pulls the bubbles up. Wheat pennies and foreign coins break up the field.
Get the full tutorial at EPBOT.
8. Next Level DIY Penny Table
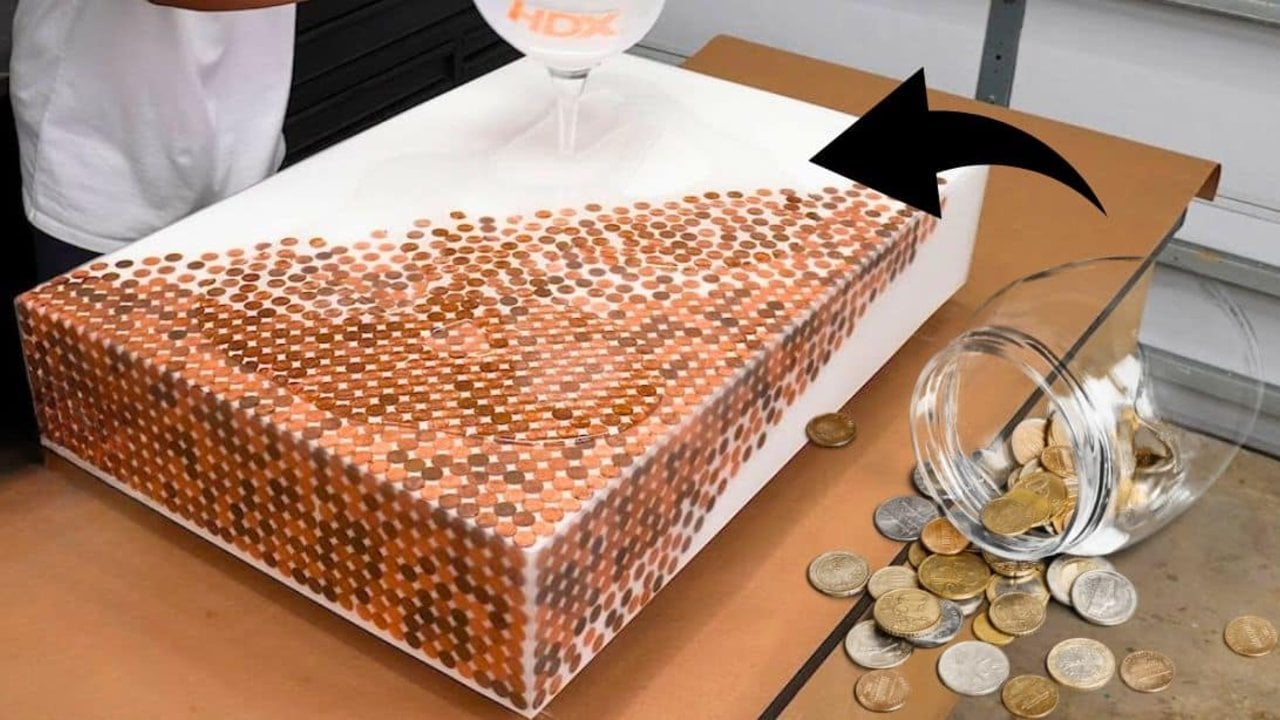
A tabletop under a resin pour, the surface packed edge to edge with pennies and a jar of coins tipped over beside it, with LED strip lighting hidden underneath so the whole slab glows from below at night. That lighting is the difference from every other penny table on this list. Coins go down on a table painted white, tight through the middle and deliberately scattered toward the edges so the pattern breaks up, then the epoxy goes on in layers with a torch passed over each one. Sand at 320 grit between coats.
Get the full tutorial at DIY Joy.
9. DIY Penny Tray
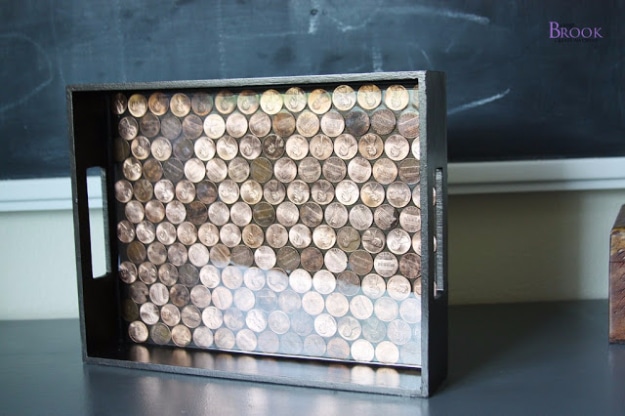
A black handled tray, the sort that sells for a couple of dollars in a discount bin, filled with mixed coins and locked under a glassy resin pour, photographed against a chalkboard. BeingBrook primed the tray, painted it with a metallic glaze, washed the coins with soap and water, laid them in and poured EnviroTex Lite over the top for about ten dollars. Mix and pour immediately, because the working time is short. It self levels well, dries to the touch overnight and wants several days before anything heavy sits on it.
Get the full tutorial at BeingBrook.
10. Penny Top Coffee Table DIY
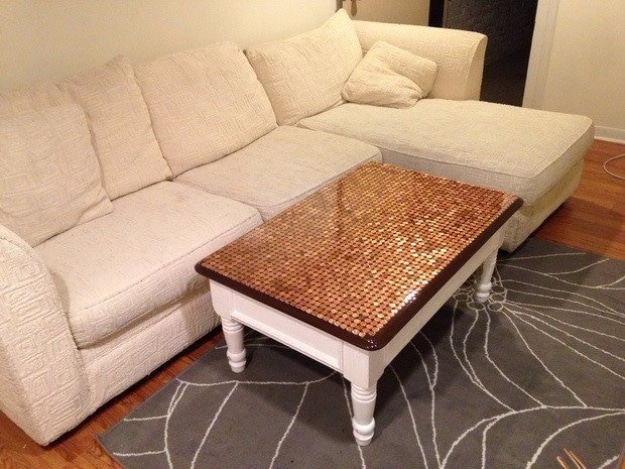
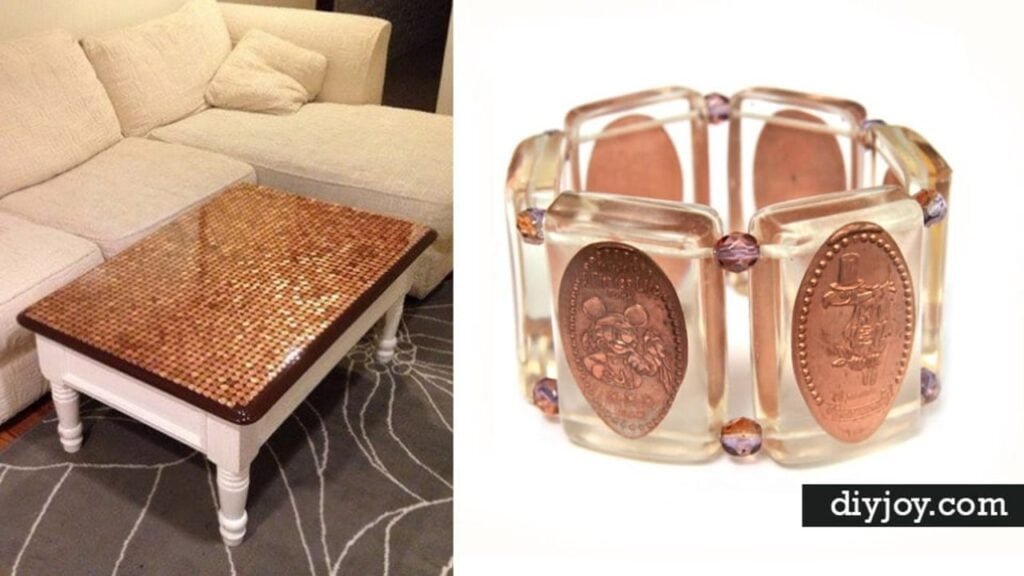
A cream sectional with a white legged coffee table in front of it, the top a solid sheet of copper under glass clear resin. RemoveandReplace.com covered a secondhand table with 2,000 pennies at twenty dollars, super glued them down and poured Super Glaze over the top at twenty five, so about fifty dollars all in. The warning they lead with is the one that ruins these projects: level the table before pouring, or the resin finds the low corner and stays there. Shim the low legs until a level reads true. A blow torch clears the bubbles. Three days start to finish.
Get the full tutorial at RemoveandReplace.com.
11. Penny Wall Accent
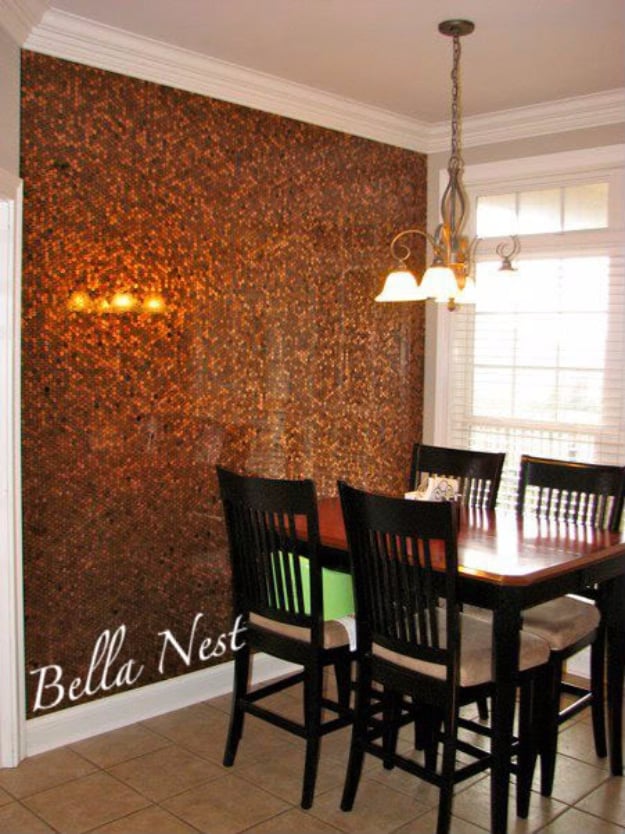
A breakfast nook with an entire wall in pennies behind the table, glowing under a chandelier, and the scale of it only lands when you count the chairs against it. Bella Nest covered nine feet by eight, which came to 19,400 coins at 136 to a row, laid on black painted MDF, glued with super glue and finished with a self levelling bar top epoxy torched to clear the bubbles. It cured two and a half weeks before going up. They hid wheat pennies, Canadian and Bermudan coins, a flower shape and a family birthday timeline in it.
Get the full tutorial at Bella Nest.
12. DIY Penny Cornice Board Window Treatment
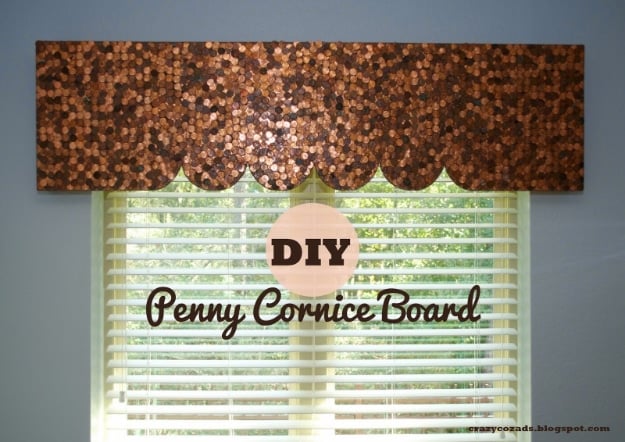
A scalloped cornice board mounted above a blind, the whole face covered in pennies so it reads as a band of beaten copper across the top of the window. Crazy Cozads cut the scallops from half inch MDF with a jigsaw, chose MDF over plywood because it handles bathroom humidity better, spray painted it copper first so the gaps disappear, then glued roughly 3,000 coins in two layers. It took eight tubes of E6000 and about eighty dollars, thirty of that in pennies. Dented and smashed coins went in on purpose.
Get the full tutorial at Crazy Cozads.
13. Coin Barrettes
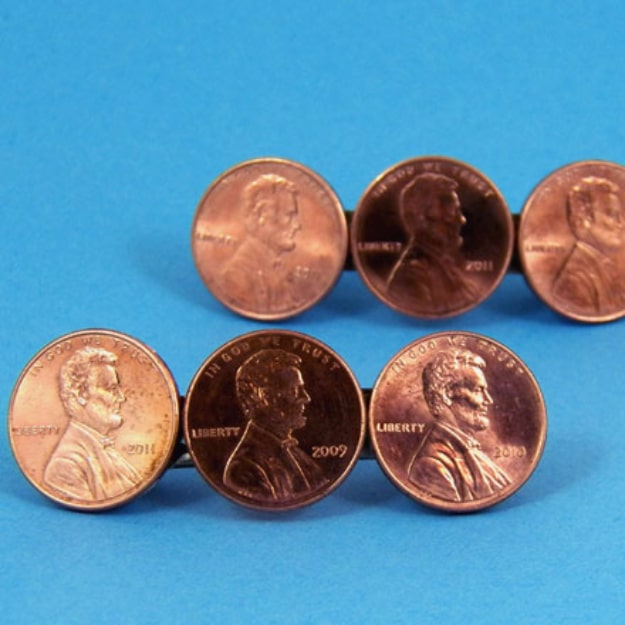
Six bright pennies laid on a blue background in the arrangement they will take on the barrette, which is a good way to see how few coins this actually needs. Aunt Annie works in new shiny pennies on craft store barrette backs, glued one at a time with contact cement, super glue or E6000, holding each one down until it grabs because the back is curved and flat coins want to slide off it. Five pennies cover a large barrette and three cover a small one. Stack a coin at each end so it does not slip, and leave it a full day to cure.
Get the full tutorial at Aunt Annie's Crafts.
14. Penny Napkin Ring Holders
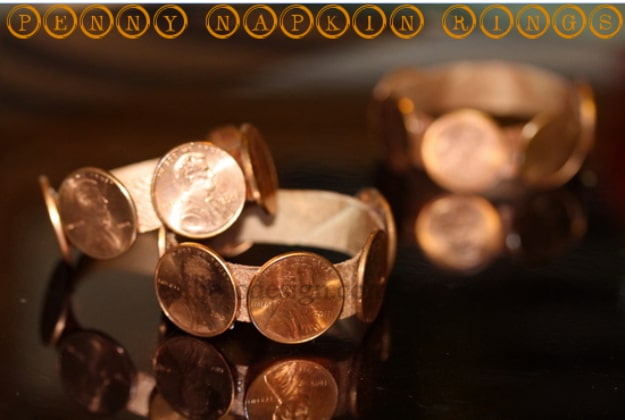
Copper napkin rings photographed on a dark reflective surface under a typeset title, and the rings underneath the coins are cut from a paper towel tube. Kosher on a Budget sprays the tube copper first, marks it at half inch intervals, cuts the rings and hot glues pennies around each one. How many coins depends entirely on how close you set them and whether you cover just the top of the ring or carry it all the way round. Skip the spray paint by wrapping ribbon instead. Boxed up they make a real gift.
Get the full tutorial at Kosher on a Budget.
15. Bowling Ball Yard Art
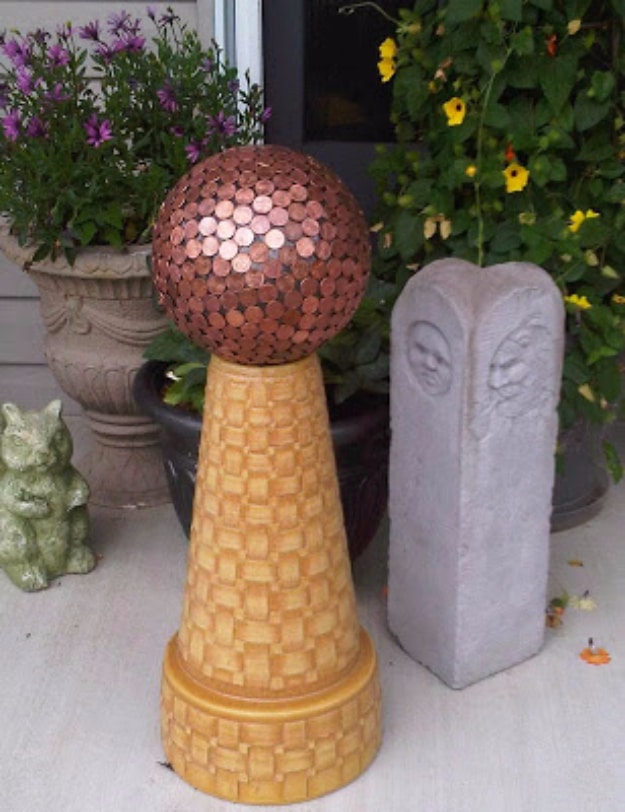
A gazing ball on a painted terracotta pedestal beside a garden marker, and the ball is an old bowling ball under a skin of pennies. House of Hawthornes stuffs the finger holes with paper towel and caulks over them, cleans the coins in white vinegar and table salt until they come up bright, then glues them on with DAP clear silicone sealant for doors and windows, all facing heads up. About four dollars and fifty cents of pennies covers a ball. Silicone rather than glue is the reason it survives outside.
Get the full tutorial at House of Hawthornes.
16. DIY Penny Vase
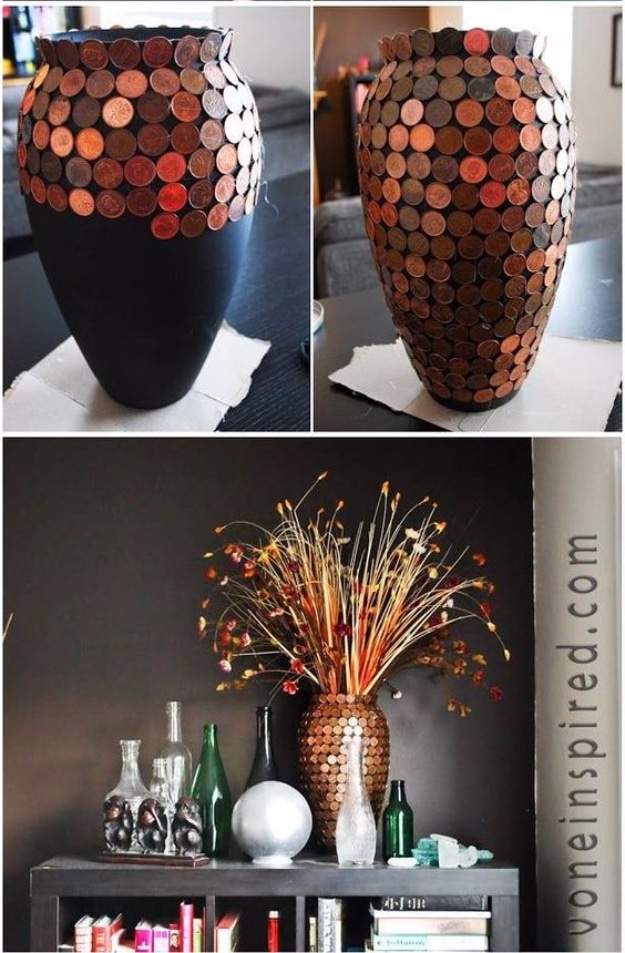
Three shots of the same vase, two mid build showing the coins going on over a matte black body and one styled on a shelf with copper spray in it. This is DIY Joy’s own, and the difference from the first vase on this list is the base shape: a curved urn rather than a straight sided tube, so the rows have to shrink as the form narrows and the coins sit tighter toward the neck. Cleaned pennies and a strong adhesive is the whole materials list. Start at the widest point and work both ways.
Get the full tutorial at DIY Joy.
17. DIY Penny Floor
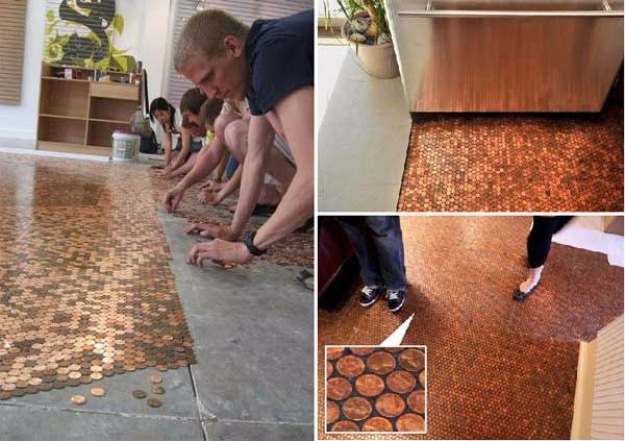
A four panel build of a full penny floor, people on hands and knees laying coins across a bare slab in one panel, a finished copper expanse running under a cabinet in another, and a close up of the coins in the corner. A detAiled House prices the material at roughly two dollars a square foot in pennies, depending how tightly you space them, and names Weldbond tile and glass glue as the adhesive most of these floors used. Lay the coins all facing the same way, then seal with polyurethane, an epoxy coat, or both. Soak them in vinegar first if you want them bright.
Get the full tutorial at A detAiled House.
18. DIY Penny Photo Frames
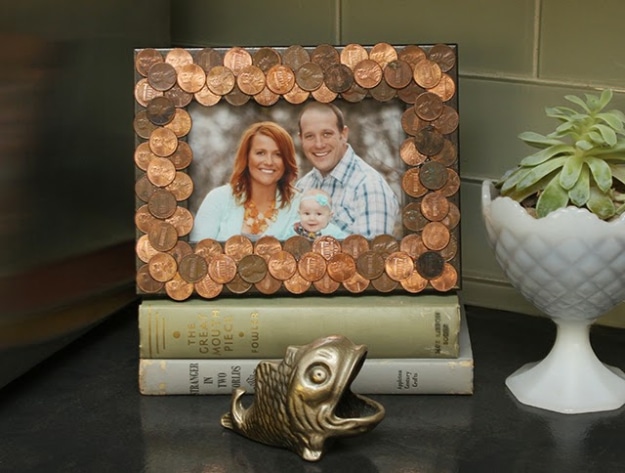
A square photo frame faced in pennies standing on a stack of old books beside a brass fish, with a family snapshot in the opening. Oh So Lovely Blog lines the coins up in a first pass, then lays a second layer over the diamond shaped gaps that round coins always leave between them, repeating until nothing shows through. Their pick of adhesive is deliberate: super glue over hot glue, because the slower grab lets you nudge a coin back into line instead of committing to wherever it landed. Older, unevenly toned pennies make a better frame than new ones.
Get the full tutorial at Oh So Lovely Blog.
19. DIY Penny Buttons
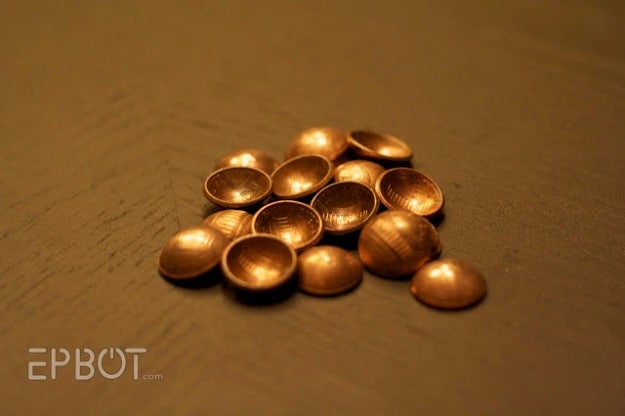
A dozen pennies domed into shallow copper cups, tipped over on a plain brown surface so you can see they are no longer flat. EPBOT hammers each coin into a doming block to get the curve, then presses two part epoxy putty into the hollow back and beds an O ring into it with the joint facing inward, which is what turns a domed coin into a working shank button. Mix the putty in small amounts, because you get about five minutes with it. Check the ring depth with a toothpick before it hardens, and wear gloves.
Get the full tutorial at EPBOT.
20. Penny Countertop
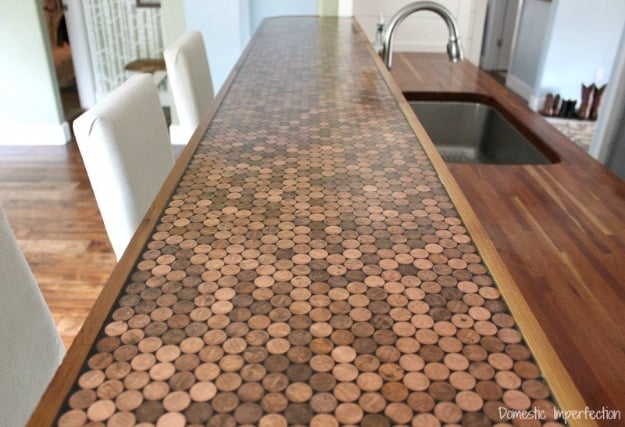
A long kitchen counter run in pennies, sweeping past a sink and out of frame, finished flat and glassy with a wood edge holding it in. Wildfire Interiors works out the number that makes this plannable: roughly 260 pennies to the square foot, so a counter can be priced before a single coin is glued. Their best tip is to pull three or four times the coins you need from the bank, pick the ones you want and take the rest back. One thick epoxy coat beats two thin ones, and cedar one-by edging holds the pour in at the front.
Get the full tutorial at Wildfire Interiors.
21. Smashed Penny Bracelet In Resin
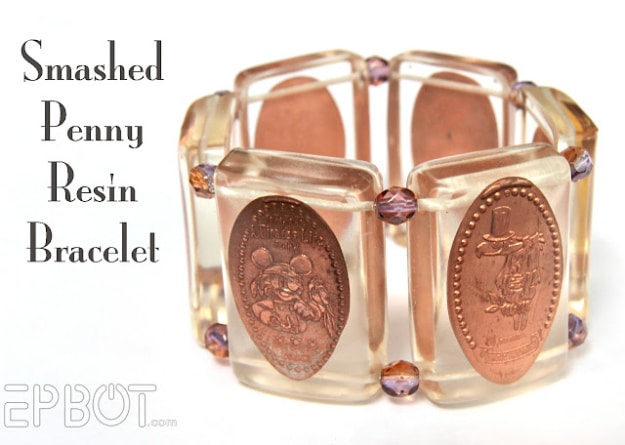
A stretch bracelet of elongated souvenir pennies, each one suspended in a clear resin tile with faceted beads between them, laid on a pale surface beside a typeset title. EPBOT built it from the pressed pennies that machines at theme parks stamp out, which otherwise live in a drawer. The coins are polished with Brasso, cast into resin molds and left overnight, then trimmed, filed and drilled through. Drill slowly on a wood block so nothing shifts, and layer the resin so the coins do not sink to the bottom of the mold.
Get the full tutorial at EPBOT.
22. Quick And Easy Penny Ring
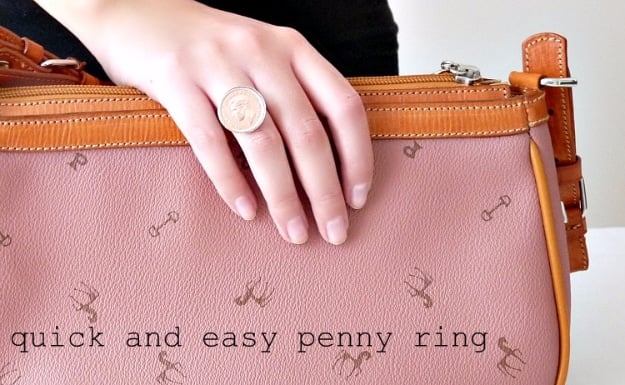
A hand resting on a pale pink leather handbag wearing a single penny on a plain ring shank, under typeset lettering, and it is as simple as it looks. Dans le Lakehouse soaks the coin in vinegar with salt for a few minutes, rubs it with baking soda paste for extra shine, dries it completely, then sets it on the shank with a small amount of gel epoxy. Use less glue than feels right so nothing squeezes out at the edge. It sets in about five minutes, and the same method works for buttons or medals.
Get the full tutorial at Dans le Lakehouse.
23. Pounding Pennies To Make Beautiful Pendant
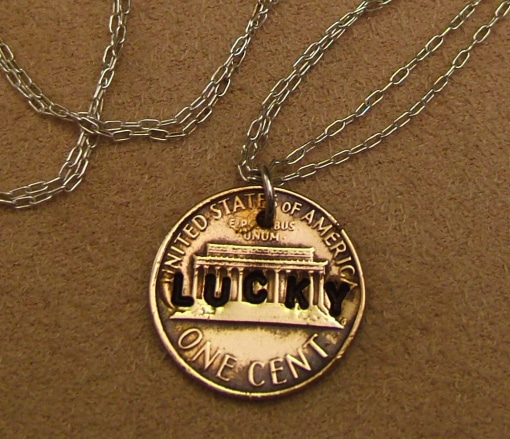
A penny hammered thin and wide, stamped with the word LUCKY straight across the middle, hanging on fine chain against a warm brown background. Tamara Central starts with a pre 1983 coin on purpose, because those are ninety five percent copper against the zinc slug with copper plating that came after, and copper is what takes a hammer and a stamp. The kit is short: 2mm steel letter stamps for around eight dollars, a steel block, a small ball peen hammer, a drill, an awl and a jump ring. Clean the coins first.
Get the full tutorial at Tamara Central.