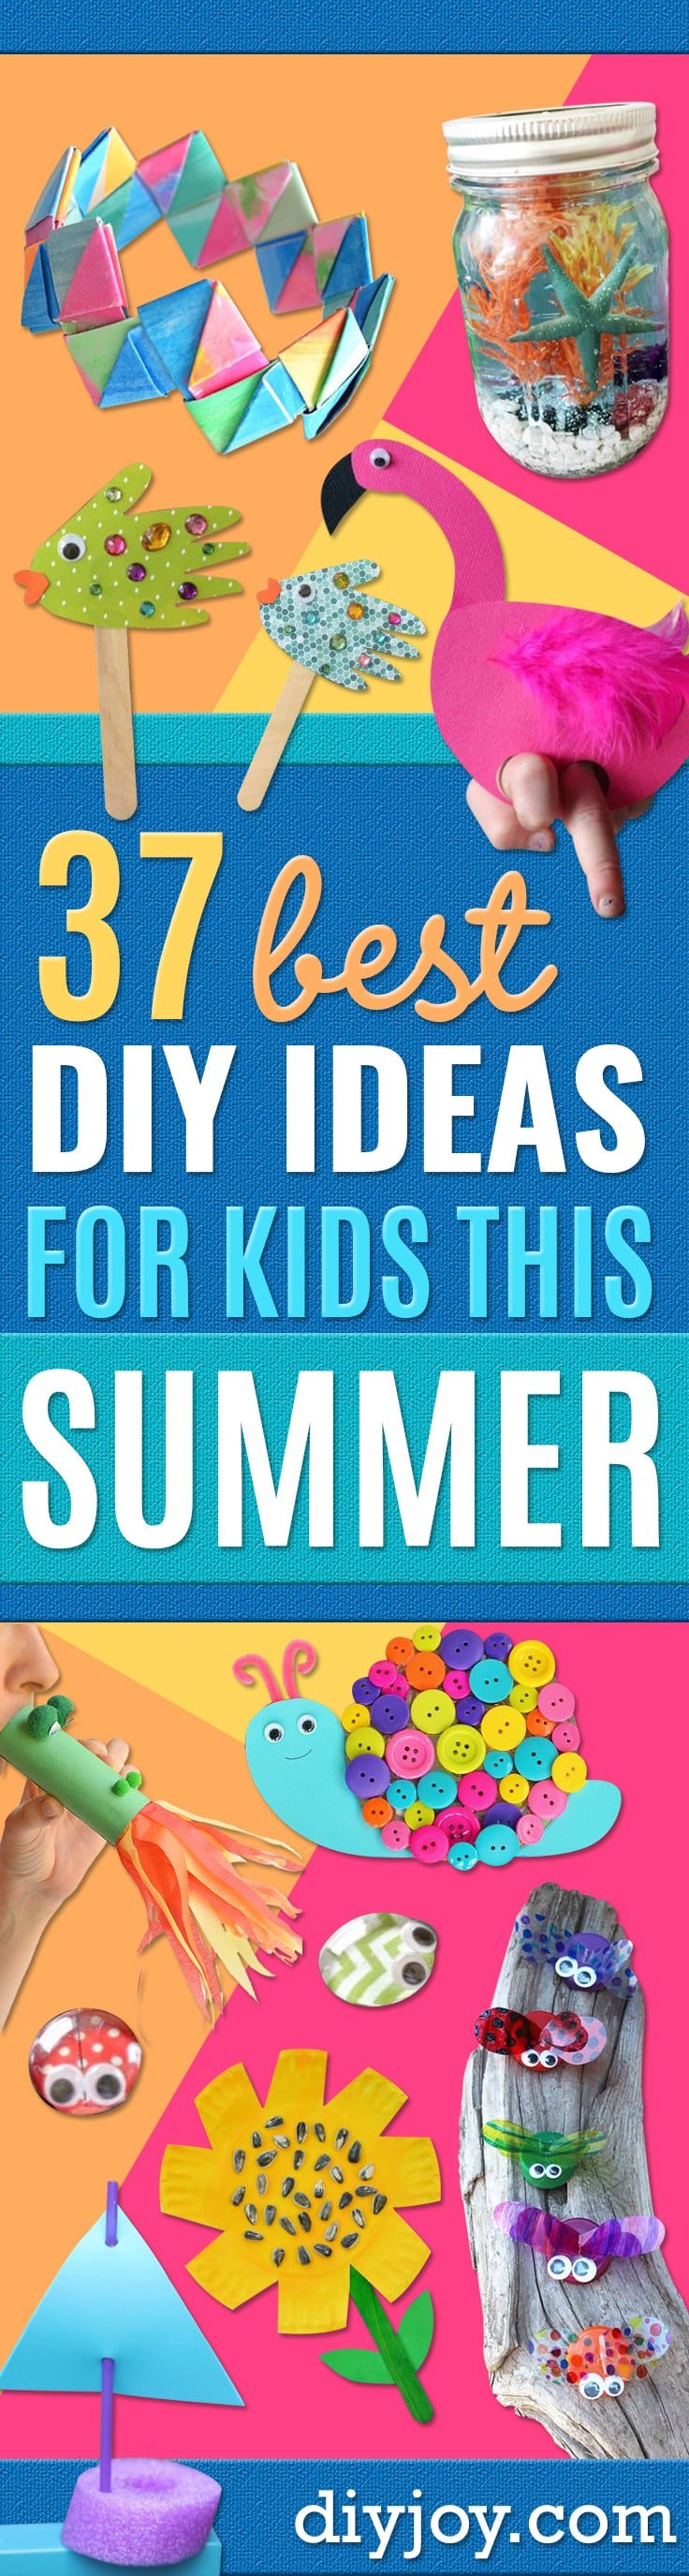
School stops and the boredom arrives on day eleven, give or take. These 31 summer crafts for kids are the ones worth having on hand for it, and almost all of them come out of a recycling bin or a kitchen cupboard: paper plates, egg cartons, bottle caps, toilet roll tubes, coffee filters, craft sticks. Some are quiet indoor jobs for the hottest part of the afternoon, suncatchers and folded paper bracelets and a kaleidoscope. Others are loud and wet and belong firmly in the yard, squirt gun painting on an easel, a pool noodle that turns into a sprinkler, homemade foam paint squeezed straight onto the sidewalk. Sort them by mess and by weather and you have most of a summer covered.
1. Bottle Cap Bugs
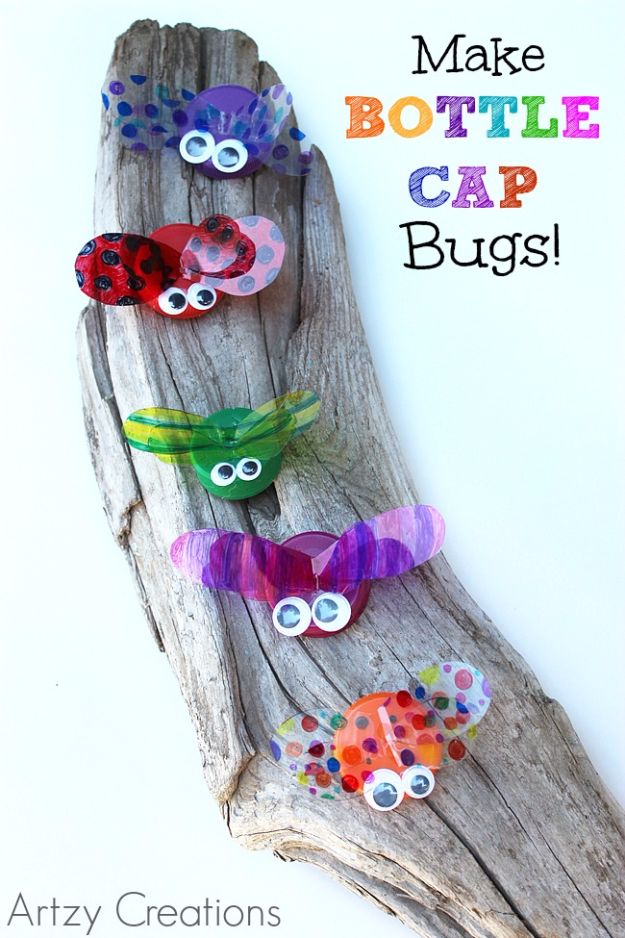
Saved bottle caps, a sheet of transparency film and a pack of googly eyes. Cut wing shapes out of the transparency, color them with Sharpies, then glue a pair to the back of each cap and two eyes to the front. Hot glue is faster, school glue is safer for smaller hands, and both hold fine. The one thing worth telling a child before they start: Sharpie on transparency stays wet for a moment and streaks if a hand drags across it, so color slowly and lift the hand away. The translucent wings are what make these look like real beetles.
Get the full tutorial at This Grandma Is Fun.
2. Rainbow Paper Plate Tambourine
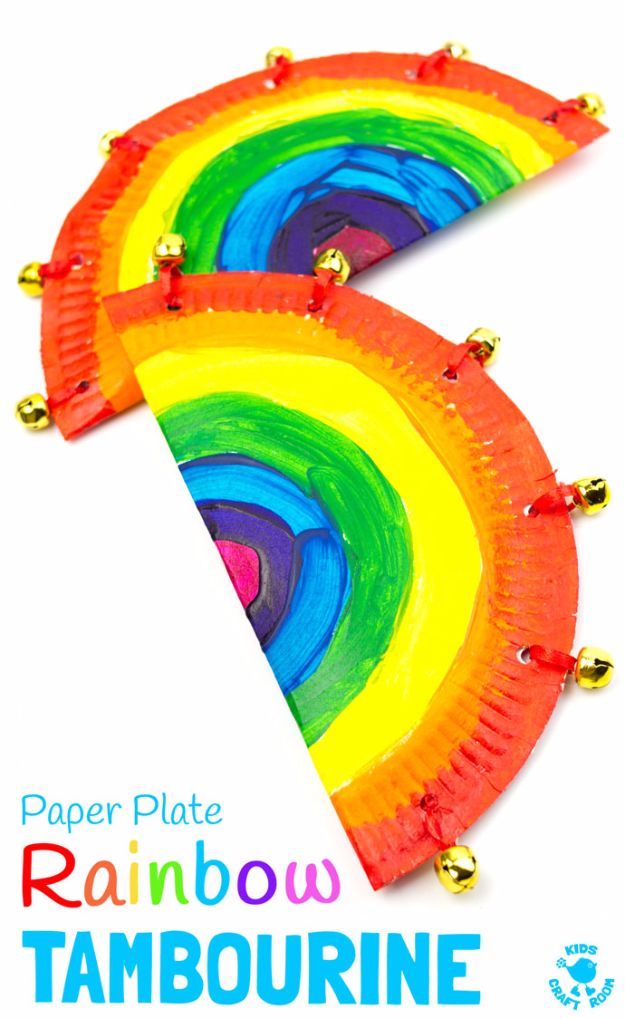
One paper plate, painted in rainbow arcs and left to dry completely, then folded in half. Mark the bell positions around the curved edge with a pencil and punch through both layers at once so the holes line up. Thread thin ribbon through each bell and tie it to the plate, leaving the loop loose enough that the bell can actually swing and ring. Stuff cotton balls inside before you glue the edges shut and peg them with clothespins while they set. Small bells are a choking hazard, so this is not a leave-them-to-it craft for the very youngest.
Get the full tutorial at Kids Craft Room.
3. Popsicle Stick Tent
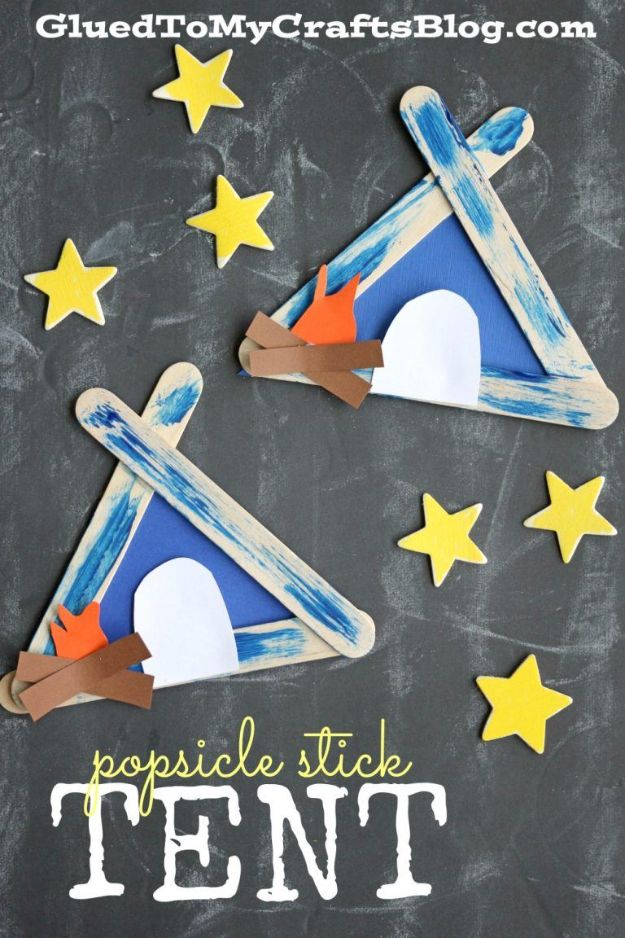
Three jumbo craft sticks per tent, glued into a triangle and left to dry properly before anything else happens, because a half-set triangle collapses the moment you press paper onto it. While they dry, cut a triangle of cardstock to fill the opening, a white piece for the tent door and a small campfire shape for the front. Paint the stick triangles once they are solid, then glue the paper pieces in place behind them. It is a small craft with a lot of room in it: kids will want a whole campsite, and at three sticks each they can have one.
Get the full tutorial at Glued to My Crafts.
4. DIY Birdhouses
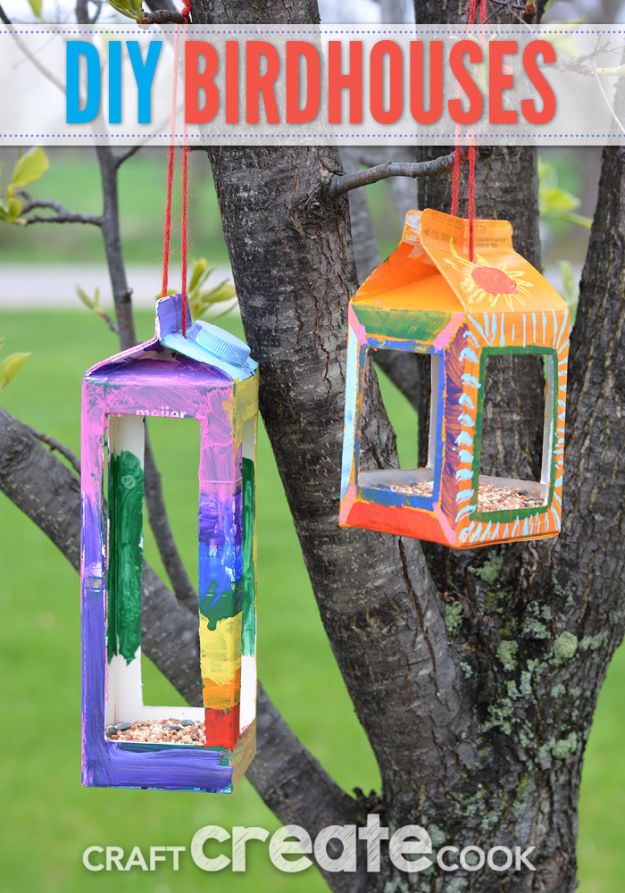
Washed cartons, the half and half kind or a cracker box, cut open on the sides by an adult with a utility knife. Everything after that is a child’s job: paint the outside in whatever they like, let it dry, then an adult pokes a hole through the top on each side with a nail or a screwdriver. Thread yarn through, knot it at the top, fill the base with birdseed and hang it in a tree. Food-grade cartons hold up outdoors far better than plain cardboard, which is worth knowing before anyone reaches for a cereal box instead.
Get the full tutorial at Craft Create Cook.
5. Pool Noodle Boats
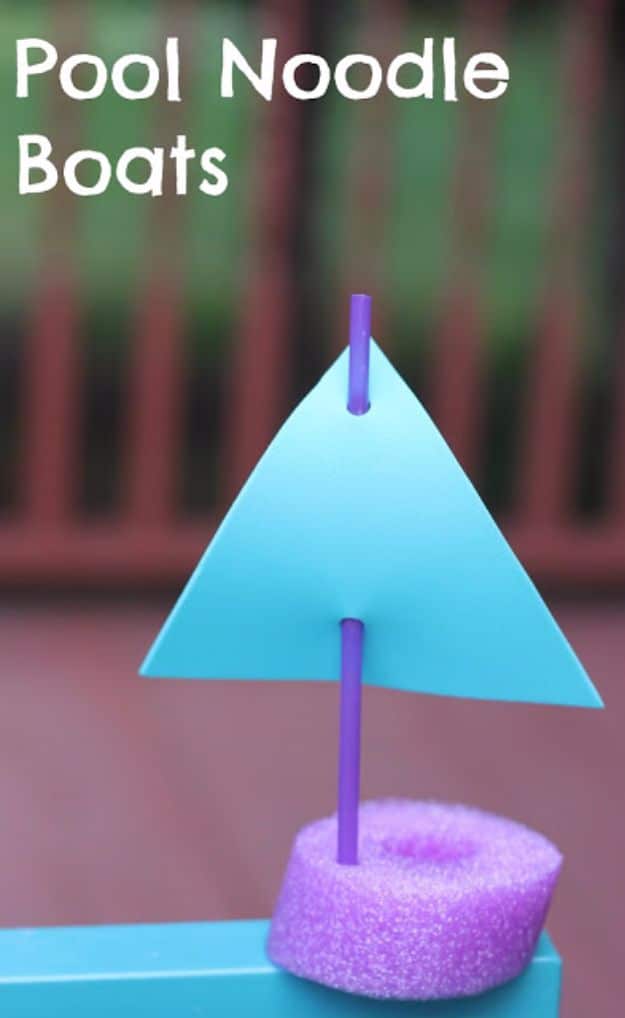
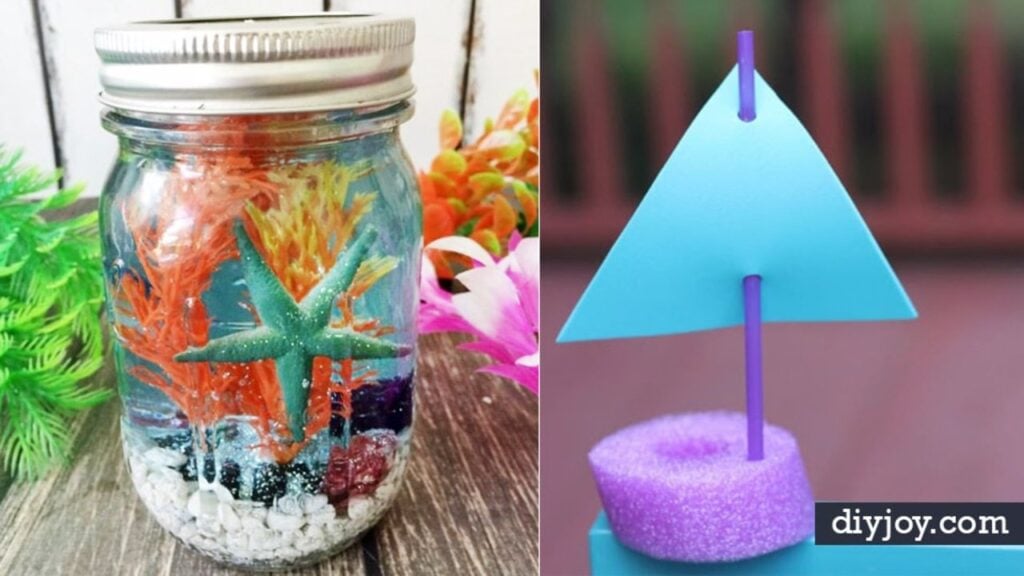
A pool noodle, a straw and a foam sheet, and the noodle makes a dozen of them. An adult slices the noodle into pieces one to three inches thick, and that is the only part a child should not do. Cut a triangle from the foam sheet for the sail, punch a hole near the top and another near the bottom, thread the straw through both so the sail sits flat against it, then push the straw down into the noodle slice. They race in a bath, a kiddie pool or a bucket, and they cannot sink, which removes all the drama.
Get the full tutorial at The Chirping Moms.
6. Button Snail Craft For Kids

An old CD is the snail’s shell, which is a tidy use for a stack nobody can play any more. Cut a snail body from cardstock, sized so the CD sits on its back, then run glue over the disc and let a child fill it edge to edge with buttons. Pipe cleaners bent into antennae, a pair of googly eyes and a mouth drawn on in black marker finish it. If there are no CDs in the house, a cardboard circle does the same job. Sorting the buttons by color first turns this into two activities instead of one.
Get the full tutorial at I Heart Arts n Crafts.
7. Fish In A Bag Slime

A quarter cup of water into a bowl, then a six ounce bottle of clear or glitter glue, whisked briskly with a fork until it comes together. Colour it now if you are using plain glue. Then half a cup of liquid starch stirred right through, and here is the step people rush: let it sit five to ten minutes so the mixture absorbs the last of the water, and only then knead it with your hands until it turns bouncy. Drop the ball into a treat bag with a plastic fish on top and tie it with twine. Liquid starch, not borax.
Get the full tutorial at My Frugal Adventures.
8. Giant Paper Pinwheels

Nothing in a yard says summer quite like a row of these turning along the edge of a flower bed, and the oversized ones are the only ones grown ups stop and look at. Work in two contrasting papers rather than one, because a blade that shows a second color as it comes round is what makes a pinwheel read as moving at all. Give the big ones a proper wooden dowel instead of a pencil, and something solid behind the pin, or one gusty afternoon works the whole thing loose. Then plant a line of them down a path and let the yard do the rest.
Get the full tutorial at Kids Activities Blog.
9. Paper Plate Mouse

Black and white tempera mixed together to make grey, which is a perfectly good excuse to stop and ask a child what two colors they think will make it. Cut the plate into a mouse shape, using the free printable template if you want it quick, and paint it. Circles of patterned scrapbook paper make the ears, nose and eye, and a strip curled round a pencil becomes the tail. Older children can trace and cut their own circles. It takes minutes beyond the drying time, which is exactly what you want on a hot afternoon.
Get the full tutorial at Housing a Forest.
10. Yarn Monsters

Bend a thirty centimetre pipe cleaner in half and twist it about a third of the way down from the fold. Wrap yarn around three or four fingers, many times, until you have a fat bundle, slide one leg of the pipe cleaner through the middle and twist it tight. Cut through the loops at the bottom and even the lengths up. Fold the strands down over the twisted section to hide it, trim the stragglers, then bend the bottom loop out flat so the monster stands up on its own. Curl the remaining pipe cleaner into tight spirals for eyes. Cotton pipe cleaners glue better.
Get the full tutorial at Blue Bear Wood.
11. Tissue Paper Mason Jars

Recycled jars, torn tissue paper in a mix of colors and patterns, and decoupage medium. The method is simple enough for a child to do on their own, which is the whole point of it, and the result is good enough to leave out on a table. Torn pieces overlap onto the glass and get sealed over the top, and the overlaps are what give you that stained-glass depth when a tea light goes in. Fill them with treats and a candle and they become gifts. Out on a patio in a row after dark, they change the whole feel of an evening.
Get the full tutorial at DIY Joy.
12. Firefly Suncatcher

Cut tissue paper into strips and then into small squares, yellow and green. Tape a piece of contact paper sticky side up at the corners so it cannot shift, and let a child cover it with the squares. Then lay a second piece of contact paper over the top and smooth the air bubbles out toward the edges. Cut the sealed sheet into a teardrop for the firefly’s glowing body, add a head and wings cut from black cardstock, and tape it to a window. Taping the contact paper down first is the step that decides whether this is calm or chaotic.
Get the full tutorial at I Heart Arts n Crafts.
13. Fun DIY Kaleidoscope

Ten dollars or less and twenty minutes. Cover a paper towel tube in scrapbook paper and decorate it. Then trace the tube end onto thin clear plastic from packaging and cut three circles. Hot glue one to the bottom, tip in translucent beads until they almost cover it, and set the second circle in loosely so the beads can still move. Three cardboard strips, an inch wide and slightly shorter than the tube, get wrapped in foil and glued into a triangle inside the tube, and that foil triangle is the mirror that makes the pattern. The last circle seals the viewing end.
Get the full tutorial at Life With Darcy and Brian.
14. Paper Plate Sunflower Craft

Cut into the rim of a paper plate twice and remove a small wedge each time, and what is left between the cuts becomes the petals. Paint the plate yellow and a craft stick green, and let both dry. Real sunflower seeds glued into the middle give it a texture no amount of brown paint achieves. Two leaves cut from green foam go on either side of the stick, and the stick glues to the back of the plate. It is a proper scissor-skills craft for preschool and kindergarten hands, and the cutting is genuinely the activity.
Get the full tutorial at The Resourceful Mama.
15. Marshmallow Shooters

A clear cake pop container and one ordinary balloon, and the whole thing takes two minutes. Knot the balloon, then cut the rounded bottom off it. Stretch the cut opening over the base of the container and, if you want it to last past the first afternoon, slip a rubber band over the join. Load mini marshmallows, pull the balloon back and let go. If you cannot find cake pop containers, the original’s readers have tested plenty of substitutes: toilet roll tubes, plastic cups with the bottom cut out, sliced pool noodle sections and tennis ball tubes.
Get the full tutorial at Coffee Cups and Crayons.
16. Bubble Wrap And Paper Plate Jellyfish

Half a paper plate per jellyfish, so one plate makes two and a party makes a whole shoal. Paint the half plate for the body. Cut bubble wrap into long strips for the tentacles and paint those to match, which is the bit kids will happily do for twenty minutes because painting bubble wrap is oddly satisfying. Tape the strips to the back of the plate so they hang down, then glue two googly eyes to the front. Save bubble wrap out of parcels through the year and this costs nothing but a dollar plate and some eyes.
Get the full tutorial at The Resourceful Mama.
17. DIY Paper Spinner

Print or draw two circles, colour them in, cut them out and glue one to each side of a cardboard circle of the same size. Poke two holes through the middle, close together, thread about twenty eight inches of twine or thin rope through both and knot the ends into a loop. Hold a loop in each hand, swing the disc over to twist the string, then pull and relax, pull and relax, and it spins and hums. The more colour on the disc the better, because a plain one just looks like a spinning circle while a patterned one blurs into rings.
Get the full tutorial at Make and Takes.
18. Trolls Poppy Popsicle Stick Craft

Cut one popsicle stick in half and lay the two pieces horizontally an inch and a half apart, then glue seven whole sticks vertically across them to make the face panel. Paint it pink and let it dry. Felt ears go on the back, a felt nose and two googly eyes on the front. Then the hair: cut faux fur an inch wider than the panel and about four to five inches tall, glue it above the eyes, fold the top sides into a point and secure the edges round the back. A green felt headband, small blue flowers, a marker smile and dabs of pale pink for cheeks.
Get the full tutorial at Craft Create Cook.
19. Ocean Animal Coffee Filter Suncatchers

Paint a white coffee filter all over with watercolor and let it dry flat. Go darker than you think you need to, because watercolor lightens considerably as it dries and a pale filter has nothing to catch the light. While it dries, print the animal outlines onto dark blue or black paper and cut them out. Dark blue is easier to cut around than black if the lines are hard to see. Glue a dolphin, shark, whale or fish onto the dried filter and hang it in a window, where the silhouette floats in a wash of color.
Get the full tutorial at A Little Pinch of Perfect.
20. Squirt Gun Painting

Set an easel on the lawn, clip two sheets of watercolor paper to each side, fill squirt guns with liquid watercolors and stand back. That is the whole method, and the results genuinely look like art rather than a mess. Two things from the source worth repeating: use watercolor paper, not copy paper, which disintegrates the moment it is hit, and skip the cheap multipacks of squirt guns because they break within hours. A better single gun lasts the summer, and spray bottles work just as well if water pistols are not something you want in the house.
Get the full tutorial at Fireflies and Mud Pies.
21. Folded Paper Bracelets

Sixteen to twenty two paper strips make one bracelet, each twelve centimetres by three, which is a one to four ratio you can scale up or down as long as you keep it. Cutting them up is a small maths lesson in itself. Each strip is folded into the same basic unit, then threaded through the loops of the one before it, and that interlocking is the fiddly part that needs an adult beside a younger child for the first few. Make the loops a little larger than feels right when working with kids, because a tight loop is almost impossible for small fingers to feed through.
Get the full tutorial at Picklebums.
22. Paper Roll Fire Breathing Dragon

A toilet roll tube, a piece of construction paper, four pom poms and two googly eyes. Wrap the tube in paper, glue two large pom poms on top with eyes on them and two small ones below for nostrils, then glue strips of tissue paper inside one end so they hang out like flames. Blow through the other end and the tissue streams out and flickers. Pom poms are notoriously hard to glue, so a mini glue gun or glue dots hold far better than a stick. A cut down paper towel tube works if you would rather not use the other kind.
Get the full tutorial at One Little Project.
23. DIY Sidewalk Foam Paint

One cup of flour into a gallon zip bag, then two four ounce bottles of washable school glue on top of it, then four to five cups of plain white shaving foam. Seal the bag and knead it for a few minutes until it is properly mixed. Snip a corner and squeeze the mixture into sandwich bags, one per colour, add ten drops of food colouring to each and knead again until the colour is even throughout. Squeeze bottles with the tips cut wider are easier than bags, but a tiny snipped corner works. Washable glue and white foam, not gel, and it rinses off concrete.
Get the full tutorial at The TipToe Fairy.
24. Craft Stick Harmonica

Two jumbo craft sticks, one wide rubber band, two small rubber bands and a drinking straw cut into two pieces an inch to an inch and a half long. Stretch the wide band along one stick, slide a straw piece underneath it near one end, lay the second stick on top and fix that end with a small band. Put the other straw piece on top of the wide band at the far end and secure it with the second small band. Blow, do not hum. Sliding the straws closer together shortens the vibrating section and raises the pitch, which makes this a physics lesson disguised as a toy.
Get the full tutorial at Frugal Fun For Boys and Girls.
25. DIY Dream Catchers

A six inch wooden embroidery hoop, covered in small pieces of washi tape and then wrapped tightly in two colours of yarn, about three metres of each. Felt hearts get cut from a template, whip stitched together and lightly stuffed with batting before being closed. Paper pinwheels made from three by four inch pieces get painted with watercolours, and each child makes two pom poms. Then everything hangs from the hoop on strings of different lengths with about fifteen beads distributed among them. Budget three to four hours, or make the components in advance and it comes down to about ninety minutes.
Get the full tutorial at Art Bar Blog.
26. Easy Egg Carton Ladybugs

Cut an egg carton into single cups and paint them red on a paper plate to keep the mess in one place. Let them dry a few hours or overnight; if waiting is not going to happen, red crayons or markers get you to the same place immediately. Cut black pipe cleaners into two inch lengths and bend each into an L for the antennae. Glue googly eyes onto a black pom pom, let that set, then attach the pom pom and the antennae to the cup. Black marker dots for the spots. A glue gun holds the small parts far better than white glue.
Get the full tutorial at One Little Project.
27. Easy Tile Art for Kids

Four inch white ceramic tiles, permanent markers and rubbing alcohol. Colour the tile in blocks, stripes, circles, whatever, then drop small puddles of alcohol onto it with a spoon, a straw or a dropper. The ink lifts and blooms and runs together. Add the alcohol a little at a time rather than flooding the tile, because too much at once mixes every colour into brown and there is no undoing it. Let them dry an hour or two, adding a drop more to any area that has gone flat. They work as coasters, as gifts, or grouped as a backsplash.
Get the full tutorial at Natural Beach Living.
28. Shimmering Fairy Wand

A stick from the yard, paint and a handful of sequins. Paint the stick and let it dry completely. Then run a strip of hot glue down one side and add sequins before it sets, which sounds fiddly and is not, because the easy way is to spread the sequins in a shallow tray and roll the glued side of the stick straight through them. Work round the stick one face at a time until the top end is covered. It is a preschool craft that costs nothing and comes from a walk you were going to take anyway.
Get the full tutorial at Where Imagination Grows.
29. Altoid Tin Reuse Buggles

Flat backed clear gems, scraps of patterned paper and tiny googly eyes. Glue a gem onto a piece of paper, pressing until the adhesive spreads out under it, and leave it to dry properly before doing anything else. Then cut the paper away around the gem with scissors, which gives you a domed bug body with the pattern magnified underneath it. Two googly eyes finish each one. Decorate an empty Altoids tin with paper and ribbon and the bugs have a home to live in and travel in. A strong clear glue works far better than a glue stick here.
Get the full tutorial at Making Life Blissful.
30. Easy DIY Pool Raft
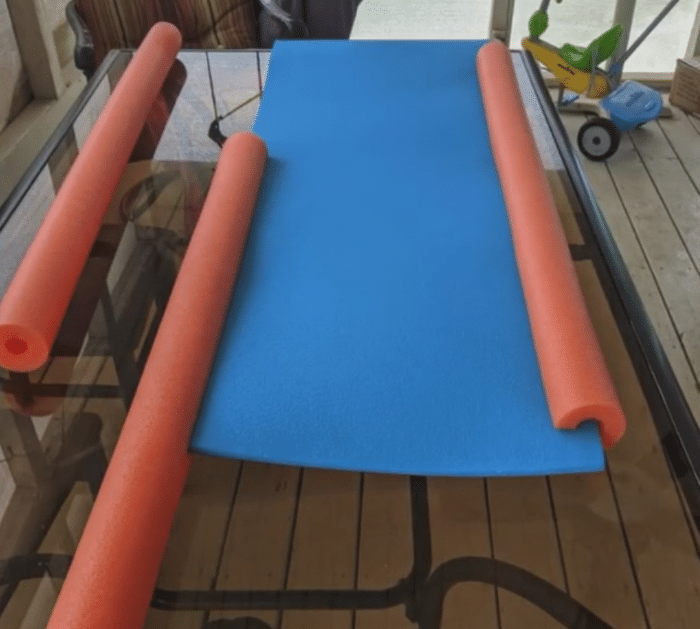
Three pool noodles, a rubber camp mat and Gorilla glue. Split two noodles down their length and slide one along each long edge of the mat. Gorilla glue needs a damp surface to cure, so run a moistened cloth along the join first, then lay a thin bead of glue down the same path. The third noodle is cut and slit to build up a pillow at one end. Clamp the pillow while it dries, using two scraps of wood and a couple of screws, because that is the joint that takes the weight of a head and it will not hold if it is only pressed by hand.
Get the full tutorial at DIY Joy.
31. DIY Pool Noodle Sprinkler
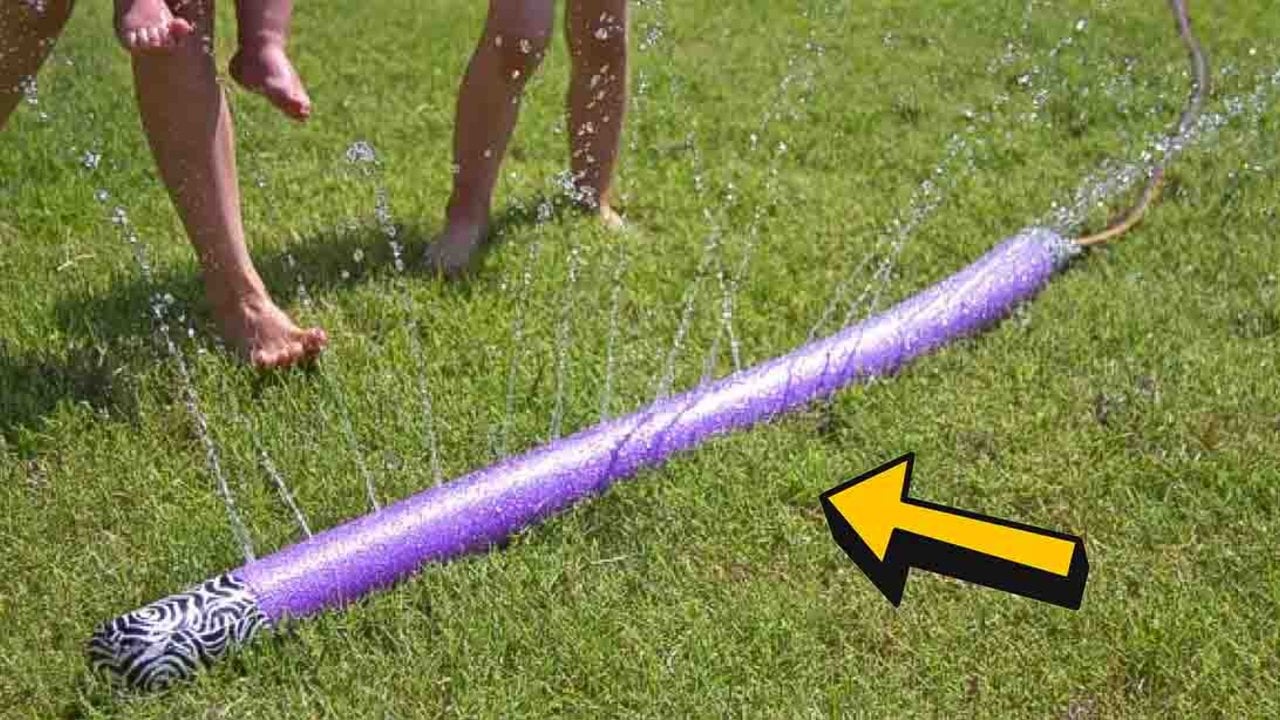
One pool noodle, a garden hose, duct tape and something metal and pointed to make the holes. Cut a short section off the noodle and quarter it, then push two of those quarters into one end and tape it shut so no water escapes there. Poke holes along the top of the noodle with the metal skewer, and here is the choice that decides the whole thing: one row of holes two to three inches apart sends up tall jets, while more rows spread the water wider and lower. Push the hose into the open end, wedge it with the remaining two quarters and tape it.
Get the full tutorial at DIY Joy.