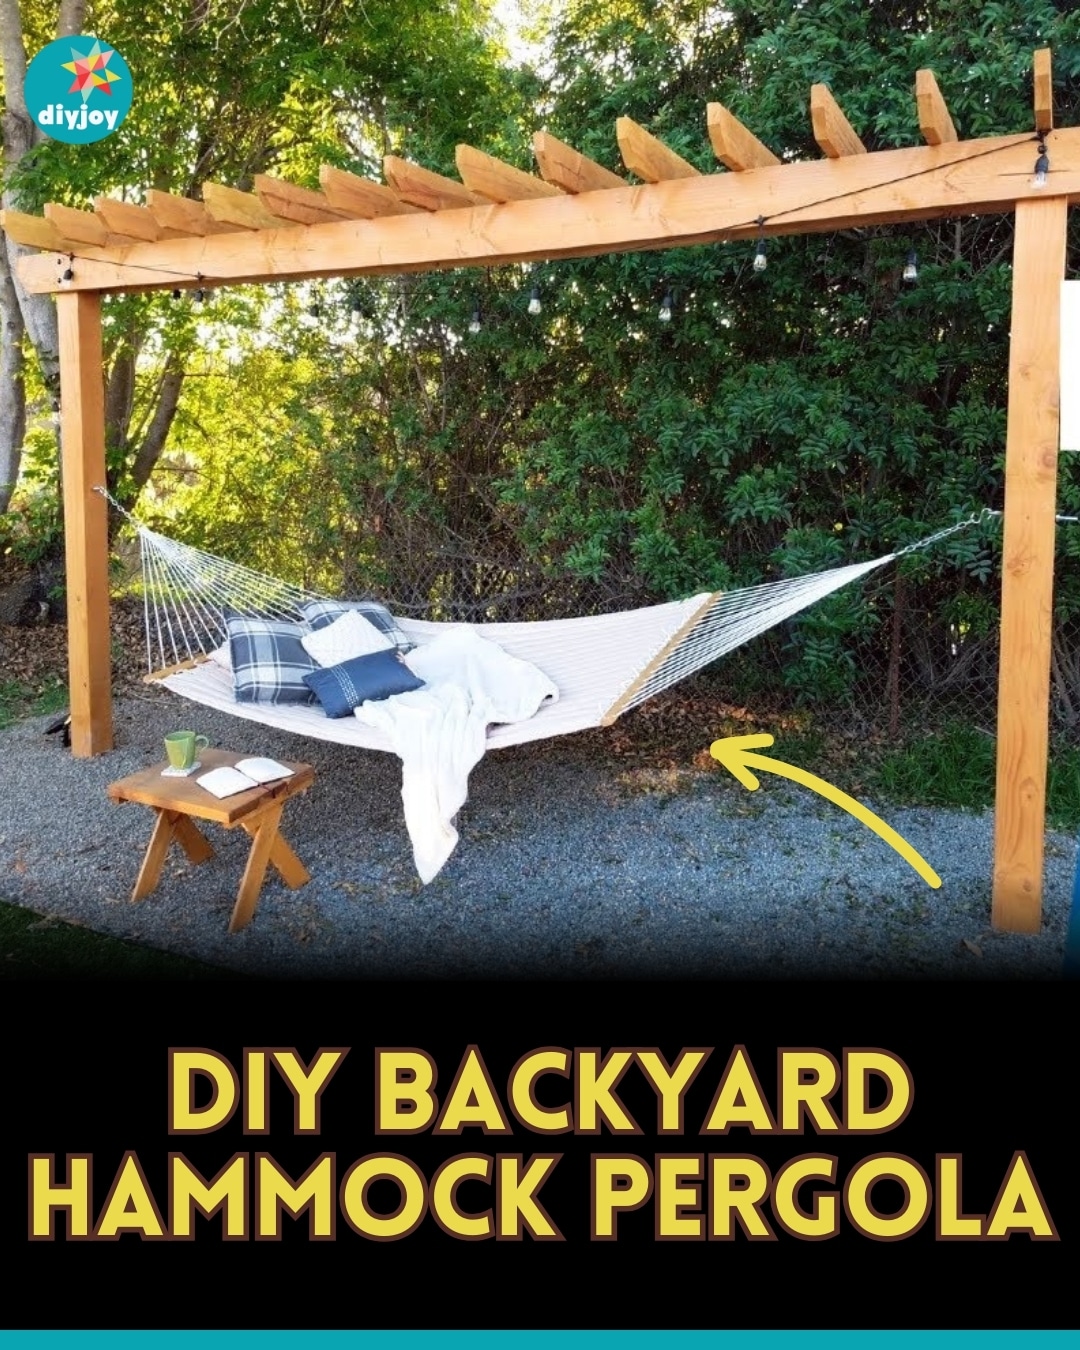
Imagine lazy afternoons spent lounging in the gentle sway of a hammock, creating a serene sanctuary in your own backyard with this DIY hammock pergola from Let’s Wing It on YouTube! It’s so easy, you won’t even believe you build it yourself.
RELATED: How To Build A Pergola On A Cement Patio
There’s no better time to transform your outdoor space into a tranquil retreat with this DIY project, don’t you think? In this comprehensive tutorial, Let’s Wing It will guide you through the step-by-step process of building your own oasis, where relaxation and rejuvenation await in your custom-crafted hammock pergola. From selecting the perfect spot to hanging the hammock, you’ll surely love every step of the way building this pergola.
Materials:
- 2 – 6 x 6 x 10
- 2 – 2 x 8 x 16
- 4 – 2 x 6 x 10
- 4 – 1/2″ x 10″ galvanized bolts
- 2 – 1/2″ x 8″ eye bolts
- 6 – 1/2″ washers and nuts
- 1 box – 4″ drive screws
- 9 – 50 lb bags fast-setting quikrete
- 1 gallon – exterior sealant/stain
Directions:
Step 1
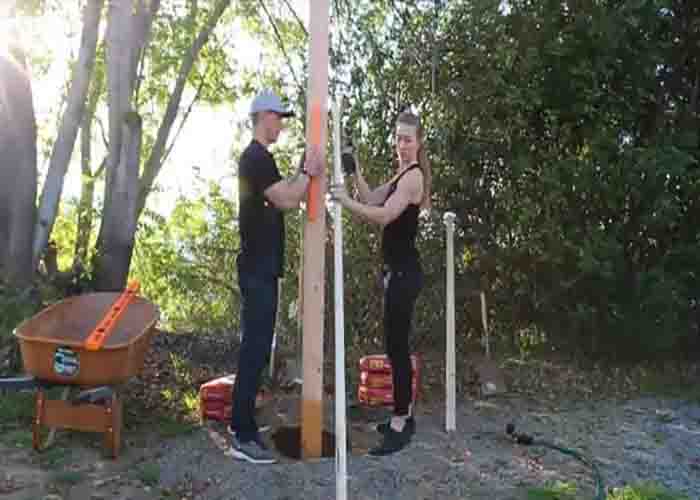
To start, dig out 24″ deep, 18″ in diameter holes in opposite directions in your desired spot. Next, place the 6 x 6 x 10 on each hole, then screw two 2 x 6 x 10 on each post for support (make sure to use a level to make everything straight). Once done, mix water in Quikrete until peanut butter consistency, then fill each hole with it to secure the posts. Leave them overnight.
Step 2
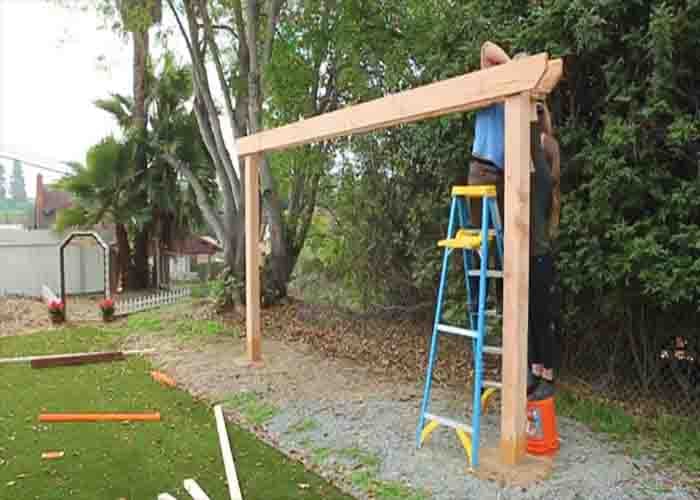
Once the posts are sturdy, you can now remove the 2 x 6 x 10 on each post. Next, cut ears to 45 degrees on each 2 x 8 x 16 wood, then place them parallel with one another on top of the posts. Secure them with drive screws temporarily, then pre-drill the holes for the bolts. Use a 24″ long, 1/2″ drill bit to drill those 6 x 6, then hammer the 10″ long and 1/2″ bolts through and tighten up the washer and the nut on the backside with a wrench. Once done, you can now remove the temporary drive screws. Attach the rafters 12″ apart using 4″ drive screws. Finally, put up your hammock and you’re done!
DIY Backyard Hammock Pergola Tutorial