The neighbor who shovels your walk, the friend who never forgets your birthday, the family three doors down who drops off cookies every December: these DIY gifts for friends and neighbors are how you say thank you without spending a fortune. Every one is handmade, most come together in an afternoon and plenty can be made in batches for the whole street. There’s a Santa wine bottle gift made from a sock (yes, a sock), a snow globe gift card holder that turns a plain card into an actual present, a coffee body scrub for the friend who runs on caffeine and photo resin coasters starring their dog. Need a dozen Christmas gifts for neighbors? DIY candy packages, cinnamon pecans and a nacho gift that gets a laugh every time are in here too. Perfect for Christmas, housewarmings, thank yous, birthdays and the neighbor who has everything.
1. Nacho Ordinary Neighbor Gift

Some neighbor gifts take a whole weekend. This one takes a trip to the grocery store. Grab a bag of tortilla chips and a jar of nacho cheese (salsa is a welcome extra), wrap them together in cellophane, tie on a big bow and add the free printable tag that reads “This is nacho ordinary Christmas gift because you are nacho ordinary friends.” There are tag versions for friends, neighbors and teachers. It’s silly, it’s cheap and nobody else on the street is giving it.
Get the full tutorial at Fun-Squared.
2. DIY Casserole Carrier

Every neighborhood has a potluck hero, and this is the gift for them. The casserole carrier is basically a big quilted square with loops and a handle: two 22 inch squares of fabric, two 23 inch squares of insulated batting like Insul-Brite, a 5 by 22 inch strip for the handle and two small pieces for the loops. Thread the loops through the handle and it hugs anything from a pie plate up to an 11 by 14 inch dish. It’s reversible, so pick two prints they’ll love. Hand it over with a pie inside and you’re a legend.
Get the full tutorial at DIY JOY.
3. Bucket O Chalk

A plain white dollar store bucket gets a serious glow up here. Cut circles from adhesive vinyl and stick them on like polka dot stickers, add the family’s name and the words “Bucket of Chalk” in vinyl lettering, then stuff it with bright tissue paper and sidewalk chalk (homemade chalk if you’re feeling ambitious). It’s a cheap gift that doesn’t look cheap, and it’s a fun one for neighbors with kids. They’ll be drawing hopscotch the second the snow melts.
Get the full tutorial at How Does She.
4. DIY 3 Set Hanging Mirrors

For the friend who just moved in, a set of three little hanging mirrors costs about $10 total and needs no drilling or glass cutting. The trick is mirrored candle plates, which run under $3 each at craft and decor shops. Tape around the edges, cover the center with paper and spray paint the borders (black and vintage gold look sharp together). Glue triangle hangers to the back, twist small wire rings around a pencil and hang them from strong chains. Instant gallery wall.
Get the full tutorial at decor8.
5. Simple Patterned Pillows

This one takes a plain white cushion cover from boring to boutique with nothing more than black fabric paint, a brush and some yarn. Dab short strokes across the front (they don’t need to match, just keep them roughly evenly spaced), let it dry and iron over it with paper in between to set the paint. Then wind four pom poms on cardboard rings traced from a glass and stitch one to each corner. Minimal skill, minimal time and one very happy couch.
Get the full tutorial at The Lovely Drawer.
6. DIY Monogram Clay Key Chains

Key chains are the kind of gift you can make by the dozen, which is exactly what you need when the list includes the whole block. Roll oven bake clay flat on parchment, cut circles, rectangles and diamonds, then press in initials with a clay embossing kit. Poke a hole with a toothpick, bake at 230°F for 40 minutes and add jump rings and a key ring. Granite clay with silver flecks looks especially fancy once it’s baked.
Get the full tutorial at Homey Oh My.
7. Homemade Vanilla Extract

Homemade vanilla extract needs exactly two ingredients and one thing most people are short on in December, which is patience. Split 3 to 5 vanilla beans lengthwise, drop them in a glass bottle and cover them with a 16 ounce bottle of decent vodka. Seal it, tuck it in a dark cupboard and shake it every few days for 6 to 8 weeks, so start by early November for Christmas. Add the free printable label and it looks like it came from a gourmet shop.
Get the full tutorial at My Uncommon Slice of Suburbia.
8. Hand Painted Coffee Mug

Good morning sunshine, in your own handwriting. Ceramic markers go on a clean plain mug, and unlike a regular Sharpie, they wipe away while still wet, so that wobbly letter can be fixed. Don’t go over the same spot too many times or it gets goopy. Set the mug in a cold oven, bake at 375°F for 40 minutes, then turn the oven off and let it cool inside so it doesn’t crack. Pair it with a bag of coffee beans and done.
Get the full tutorial at Urk-Art.
9. Thankful For You Gift DIY

Not every gift has to be handmade from scratch, and this one proves it. Fill little kraft berry baskets with a few treats: a seasonal snack bar, caramel filled chocolates and a tube of honey lip balm (everyone needs lip balm in November). Tuck it all into polka dot paper bags, stamp a simple “Thankful for You” tag and tie it on with orange ribbon. It was made for teachers, but it works just as well for neighbors, coworkers or the mail carrier.
Get the full tutorial at Smashed Peas and Carrots.
10. Cinnamon Pecans

If the friend in question keeps a snack drawer, cinnamon sugar pecans are the move. Mix 1/2 cup sugar, 2 teaspoons cinnamon and 1/2 teaspoon salt. Beat one egg white until frothy and tripled, toss in 4 cups of pecans, then the cinnamon sugar. Spread them on a rimmed sheet and bake at 325°F for 10 minutes, stir, then bake 10 more. They crisp as they cool and keep up to two weeks in an airtight jar. Tie a ribbon on that jar and you’re done.
Get the full tutorial at Num's the Word.
11. Thankful For You Neighbor Gift

Mini loaves of quick bread are the classic neighbor gift for a reason, and these free printable tags make them look polished. Bake a favorite apple bread (or banana, or pumpkin) in mini foil loaf pans, wrap each one in kraft paper, tie it with twine and clip on a “Thankful for You” tag with a mini clothespin. The printables come in a chalkboard version and a fall colors version. Bake a big batch on Saturday and deliver on Sunday.
Get the full tutorial at Eat Sleep Make.
12. DIY Relaxing Spa Gift

December is exhausting for everyone, so a relaxing spa basket is a gift nobody returns. Line a small basket and fill it with lotion, body wash, a loofah, a pillar candle and a jar of homemade holiday spice bath salts. Wrap a little jute twine around the bottles so everything matches, a tiny touch that makes it look boutique. For a friend who really needs a break, slip in a massage gift card. Great for the neighbor who hosts every party.
Get the full tutorial at Mom Endeavors.
13. DIY Santa Chocolate Jar
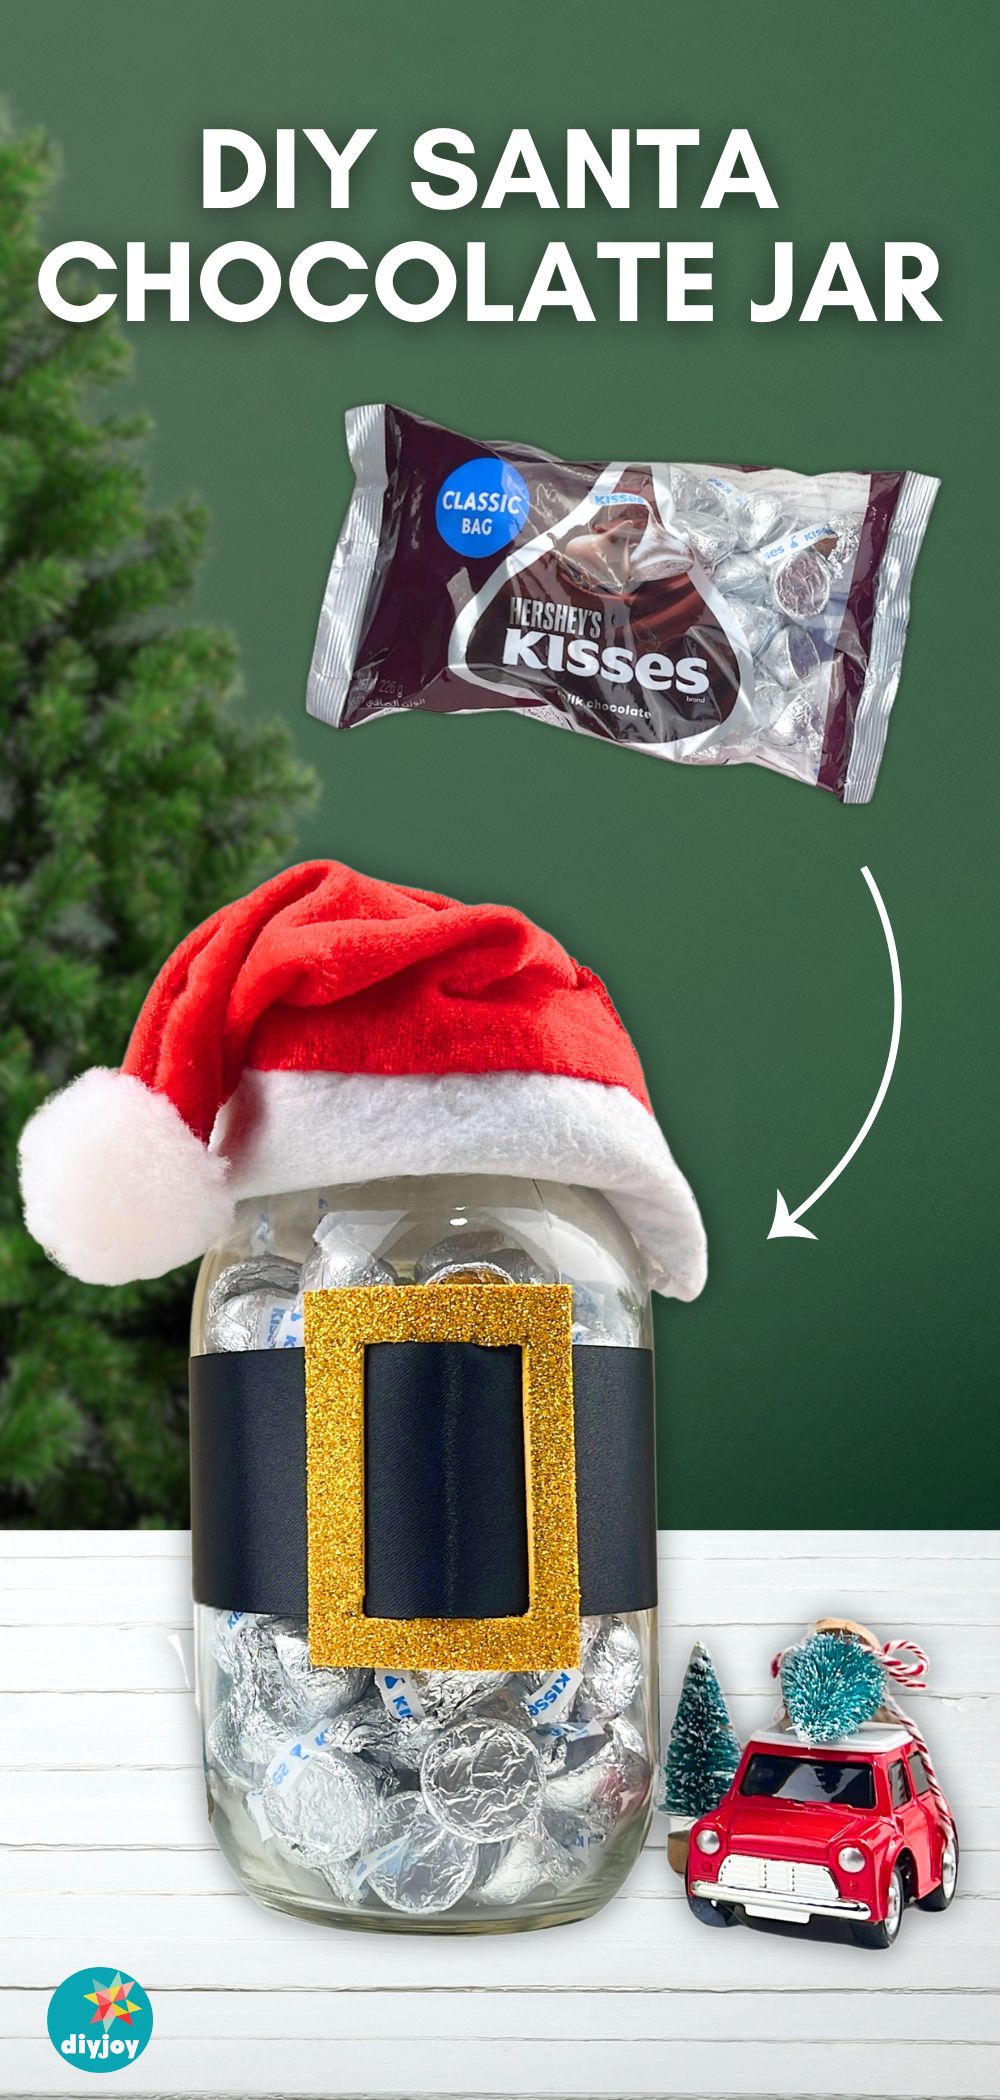
A mason jar, a Santa hat and a bag of chocolate kisses walk into a craft room and come out as the cutest last minute gift on this list. Measure the lid to resize the hat, trim it, hot glue the seam and stick the pom pom back on top. The belt is black ribbon with a buckle cut from gold EVA foam, about 2 3/4 by 2 inches. No sewing at all. Fill it with chocolate, hot cocoa or candy and it doubles as a centerpiece.
Get the full tutorial at DIY JOY.
14. DIY Santa Wine Bottle Gift

Wine is the easiest neighbor gift there is. Wrapping the bottle is the hard part. Skip the gift bag and turn the bottle into Santa with one sock and a scrap of faux fur. Cut the sock, glue the open edges inside out and use the long section as the hat. Cut the faux fur from the back (so you don’t chop off the fluff) into a beard, hot glue it at the neck, pull on the hat and add a pom pom nose. Silly and adorable in equal measure.
Get the full tutorial at DIY JOY.
15. Custom Holiday Wine Labels

Here’s the upgrade for when one Santa bottle isn’t enough. Soak the bottle in vinegar and soapy water for 30 minutes, peel the front label and clean off leftover glue with rubbing alcohol. The back label stays, so they’ll still know what they’re drinking. Then stick on a free printable label (Naughty, Nice or I Can Explain is the crowd favorite) and finish with a tiny Santa hat and scarf cut from a regular hat. Make your own designs in Canva if you like.
Get the full tutorial at DIY JOY.
16. DIY Snow Globe Gift Card Holder

Gift cards are practical, but they’re a bit of a shrug in an envelope. Put one in a waterless snow globe and suddenly it’s a present. Save a jam, pickle or pasta sauce jar, glitter a plastic lid to raise the scene, then glue on a bottle brush tree, a tiny red car or a snowman. Drop in mini foam balls for snow, tuck the gift card in and glue red velvet ribbon and a bow around the lid. Small jar? Use a cardboard card so it bends.
Get the full tutorial at DIY JOY.
17. DIY Customized Mug Using Sharpie
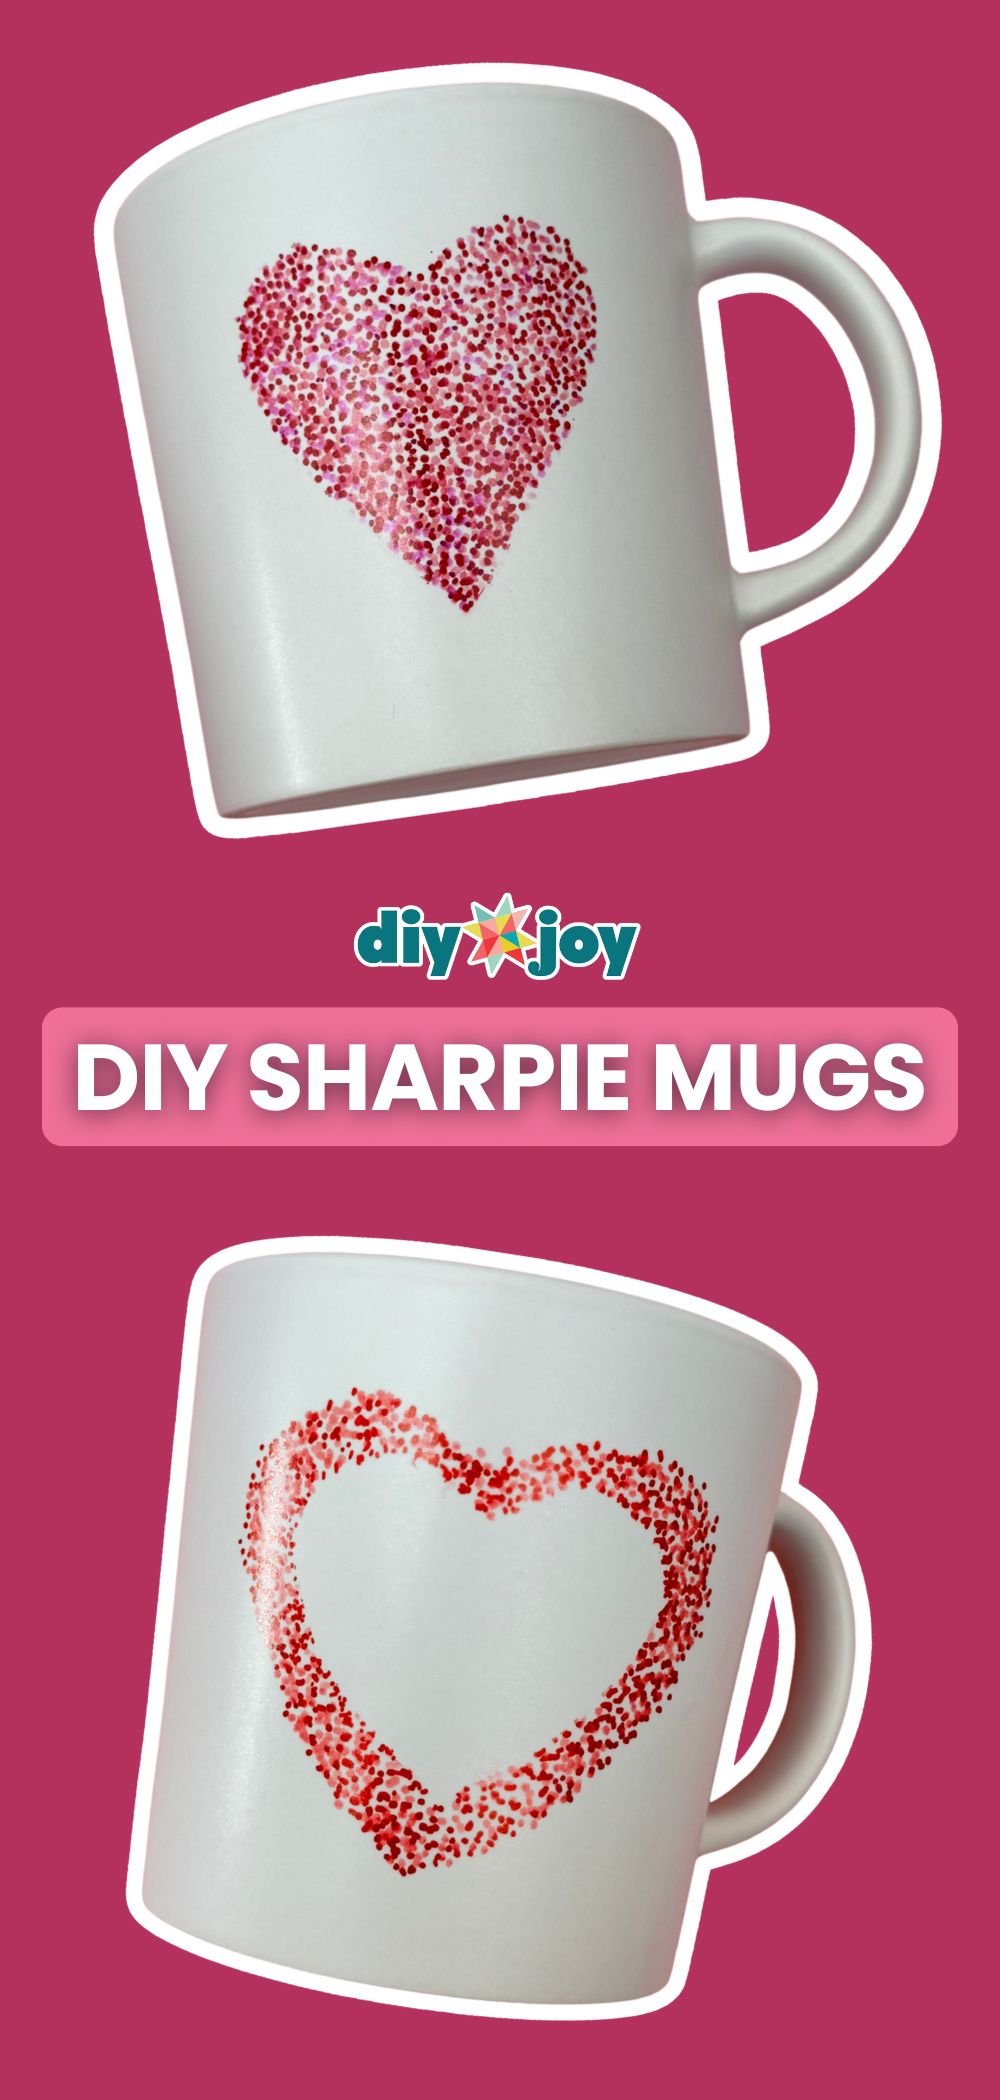
Sharpie dot mugs look like hours of work and take minutes. Cut a paper heart, coat the back with a Zig 2 Way glue pen and wait until the glue turns from blue to white, so it sticks like a sticky note. Press it on the mug, dot red and pink Sharpie all around the edge, then peel it off for a crisp heart outline. For a design that survives the dishwasher, use oil based paint markers, let it sit 24 hours and bake from a cold oven.
Get the full tutorial at DIY JOY.
18. How to Customize a Mug Using Sharpie
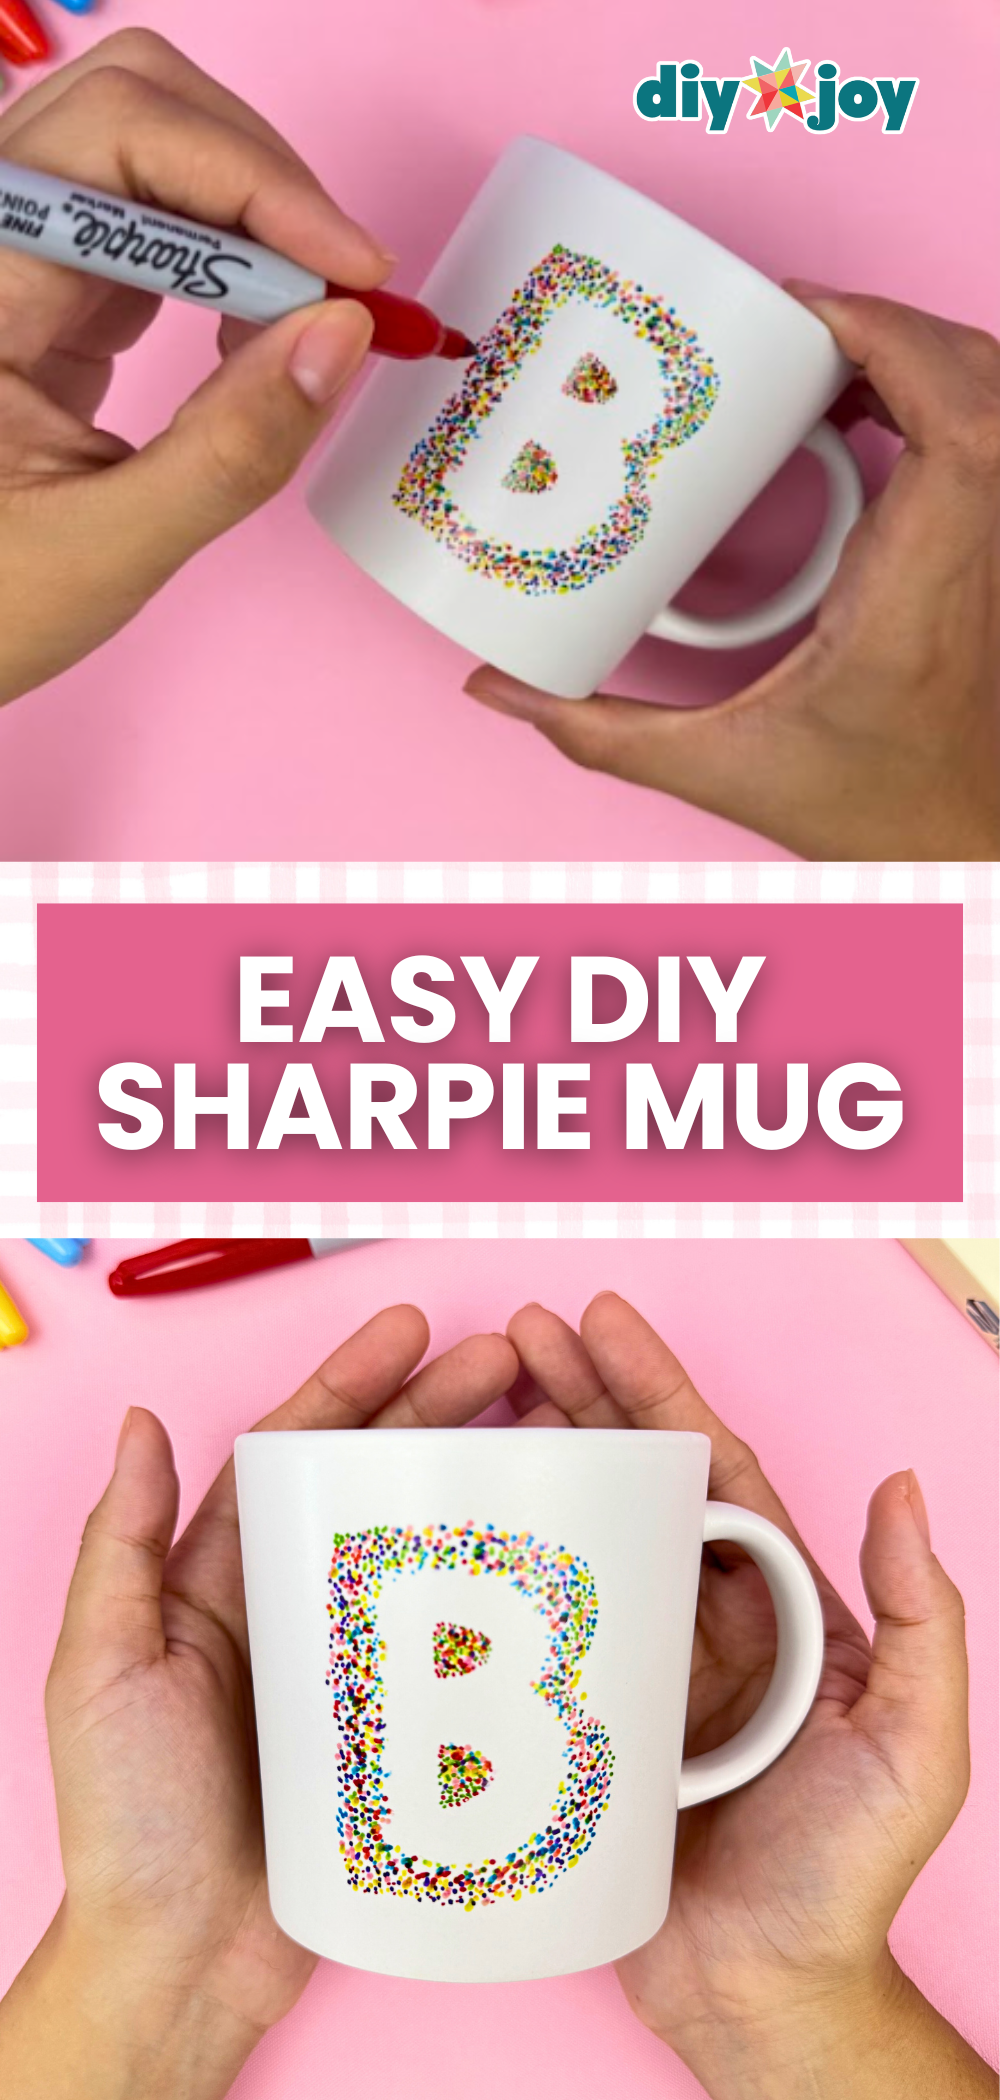
Same trick, different personality. Write a big initial on paper, cut it out, coat the back with a Zig glue pen and let it dry white before pressing it onto a plain white mug. Then dot rainbow Sharpie colors around the edges of the letter until it looks like confetti. Peel away the paper and the letter pops out clean and white. Practice the letter size on paper first. A monogram mug with a bag of good cocoa is a sweet neighbor gift.
Get the full tutorial at DIY JOY.
19. DIY Coffee Body Scrub Recipe

For the friend who can’t function before coffee, here’s the scrub version. Fine sugar, coffee grounds, a scoop of coconut oil, a splash of castile soap and vanilla extract go into a clean jar and get stirred until everything is evenly mixed. No vanilla? Coffee extract works. Want more grit for heels and elbows? Add more sugar. A reused jam jar with the label scrubbed off is all you need, and a twist of twine around the lid is all the wrapping it needs.
Get the full tutorial at DIY JOY.
20. DIY Blueberry Scrub
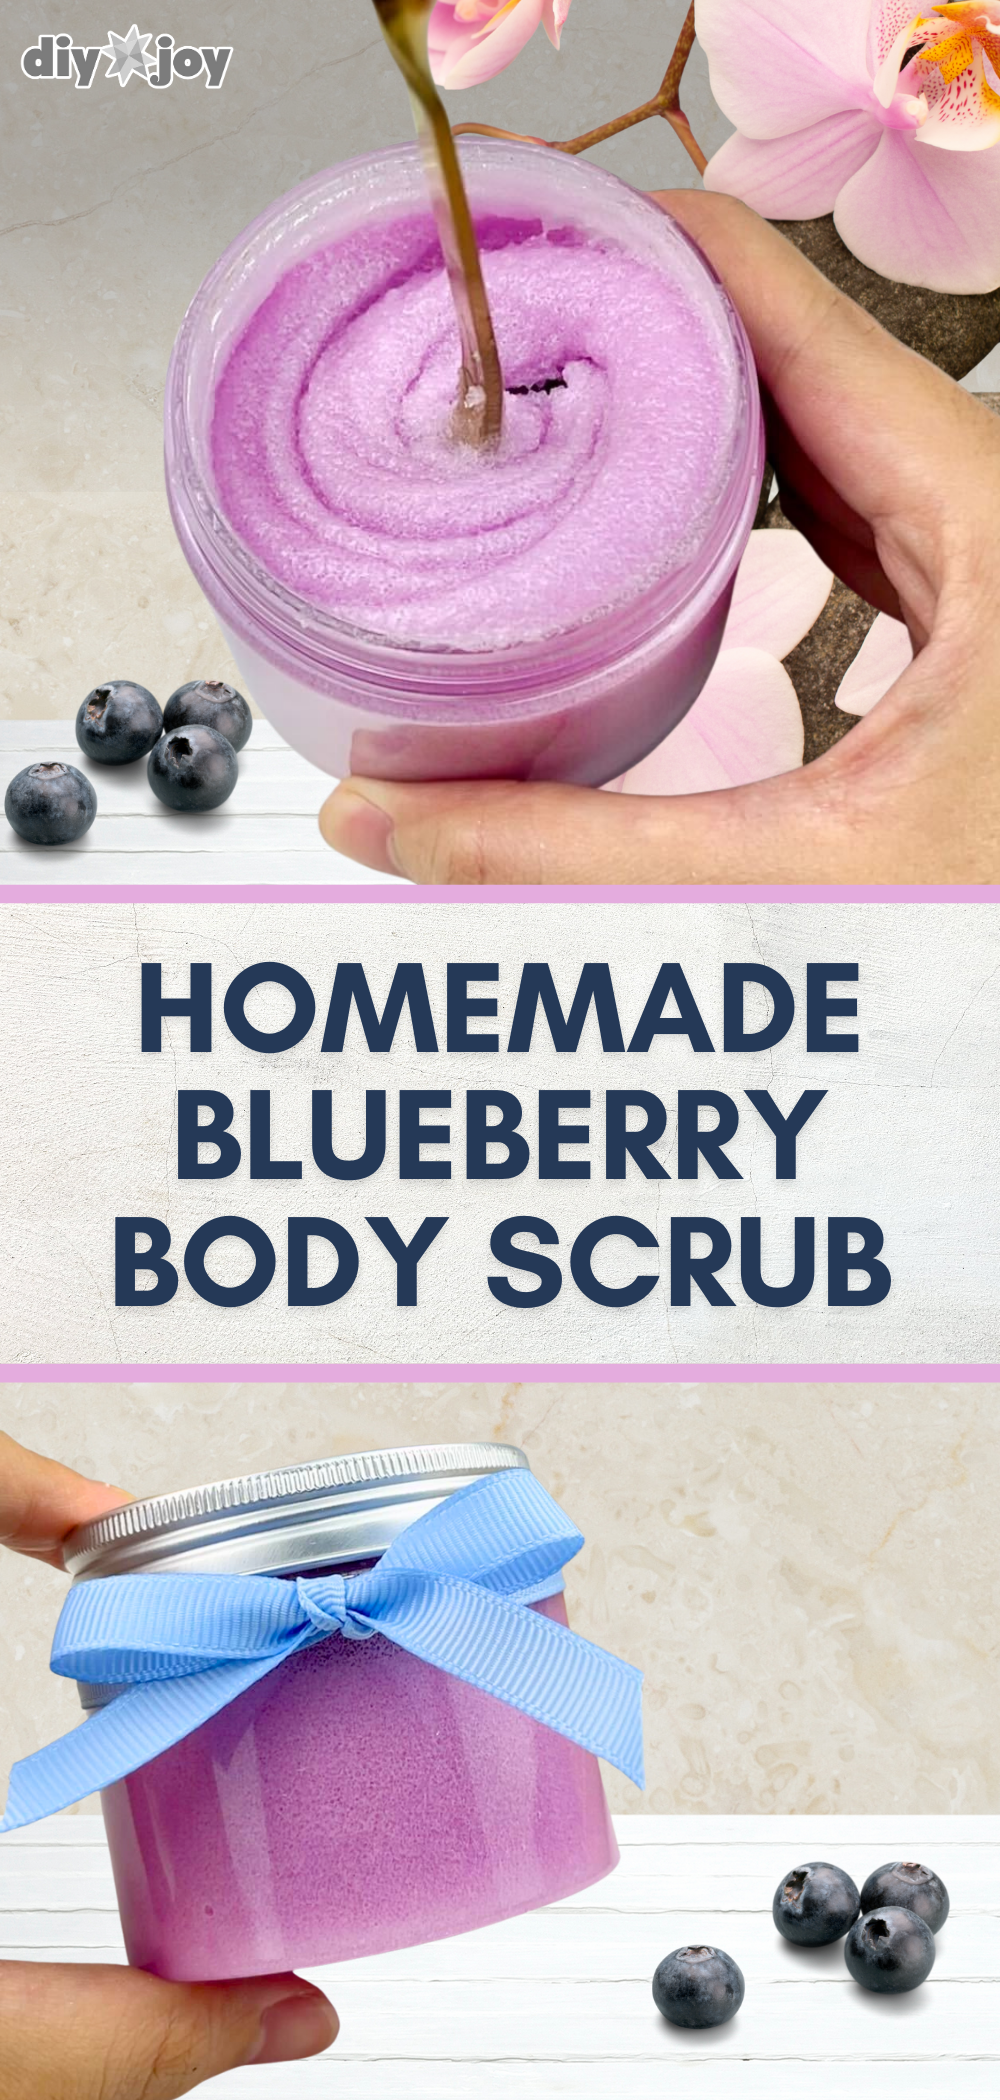
This one is pure purple fun. Start with 1/2 cup of fine sugar, add about 1/4 teaspoon of violet or blue mica powder, then 1/4 cup of coconut oil, 10 drops of blueberry oil and 1 tablespoon of castile soap. Stir until it’s evenly colored and fluffy. Swap in Epsom salt if they like a grainier scrub, or trade the blueberry oil for another scent. A blue satin bow on the lid and it looks like it came from a bath shop. Just check for allergies first.
Get the full tutorial at DIY JOY.
21. DIY Paper Candy Package Tutorial
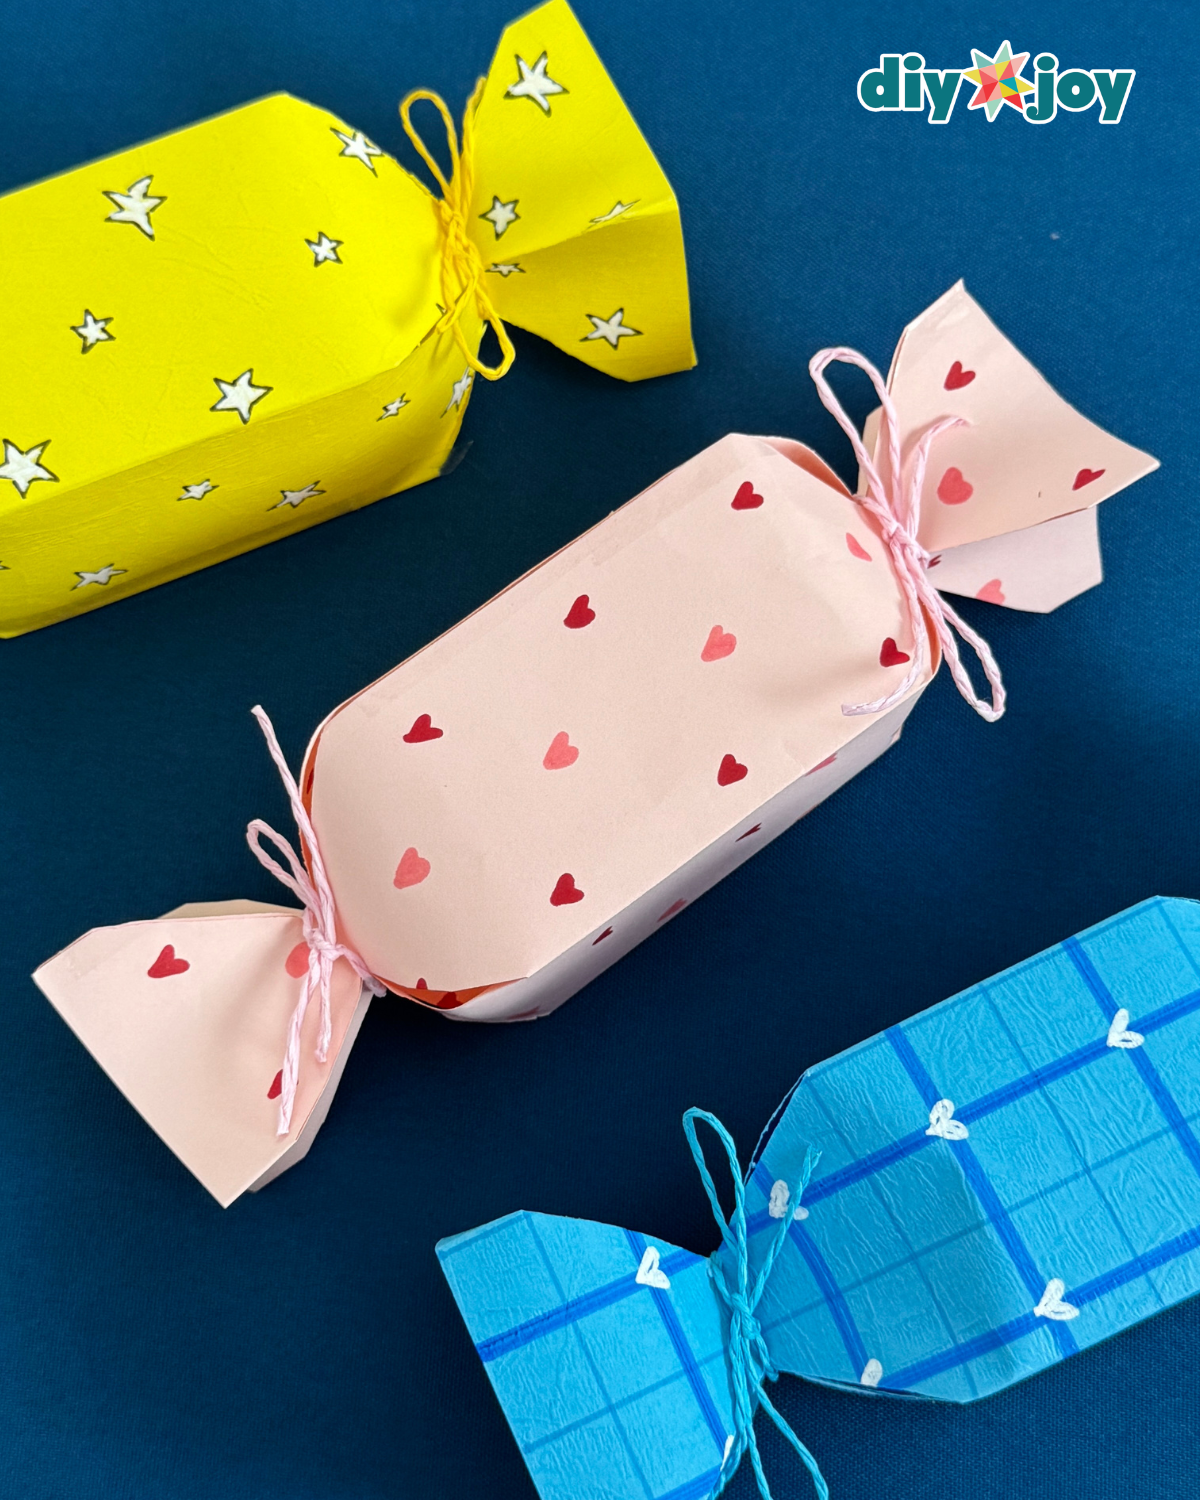
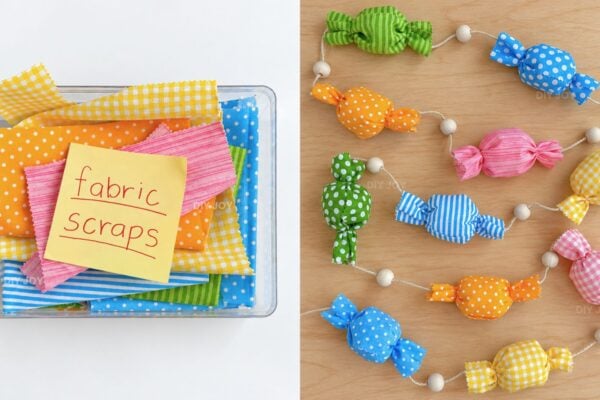
Small gifts deserve fun packaging too. This one turns a single square of sturdy paper into a giant wrapped candy. Doodle stars or hearts with a Sharpie, fold the sides to the center crease and tape, fold the ends in about 1 1/2 to 2 inches, clip the corners and shape it. Tie one end with string, fill it with candy, a gift card or a tiny piece of jewelry and tie off the other end. Make a stack for the whole street in one evening.
Get the full tutorial at DIY JOY.
22. Easy No-Sew Felt Fruit Coasters

These are as cheerful as a fruit stand and need zero sewing. Cut felt circles in layers (yellow and white for a lemon, green, white and pink for a watermelon), add little felt segments or teardrop seeds and hot glue it all together. The apple uses a simple paper template. Stiff craft felt keeps them from flopping, and tailor’s chalk keeps the tracing lines invisible. A full set comes together in under an hour, and they look adorable tied in a stack.
Get the full tutorial at DIY JOY.
23. Easy DIY Photo Resin Coaster
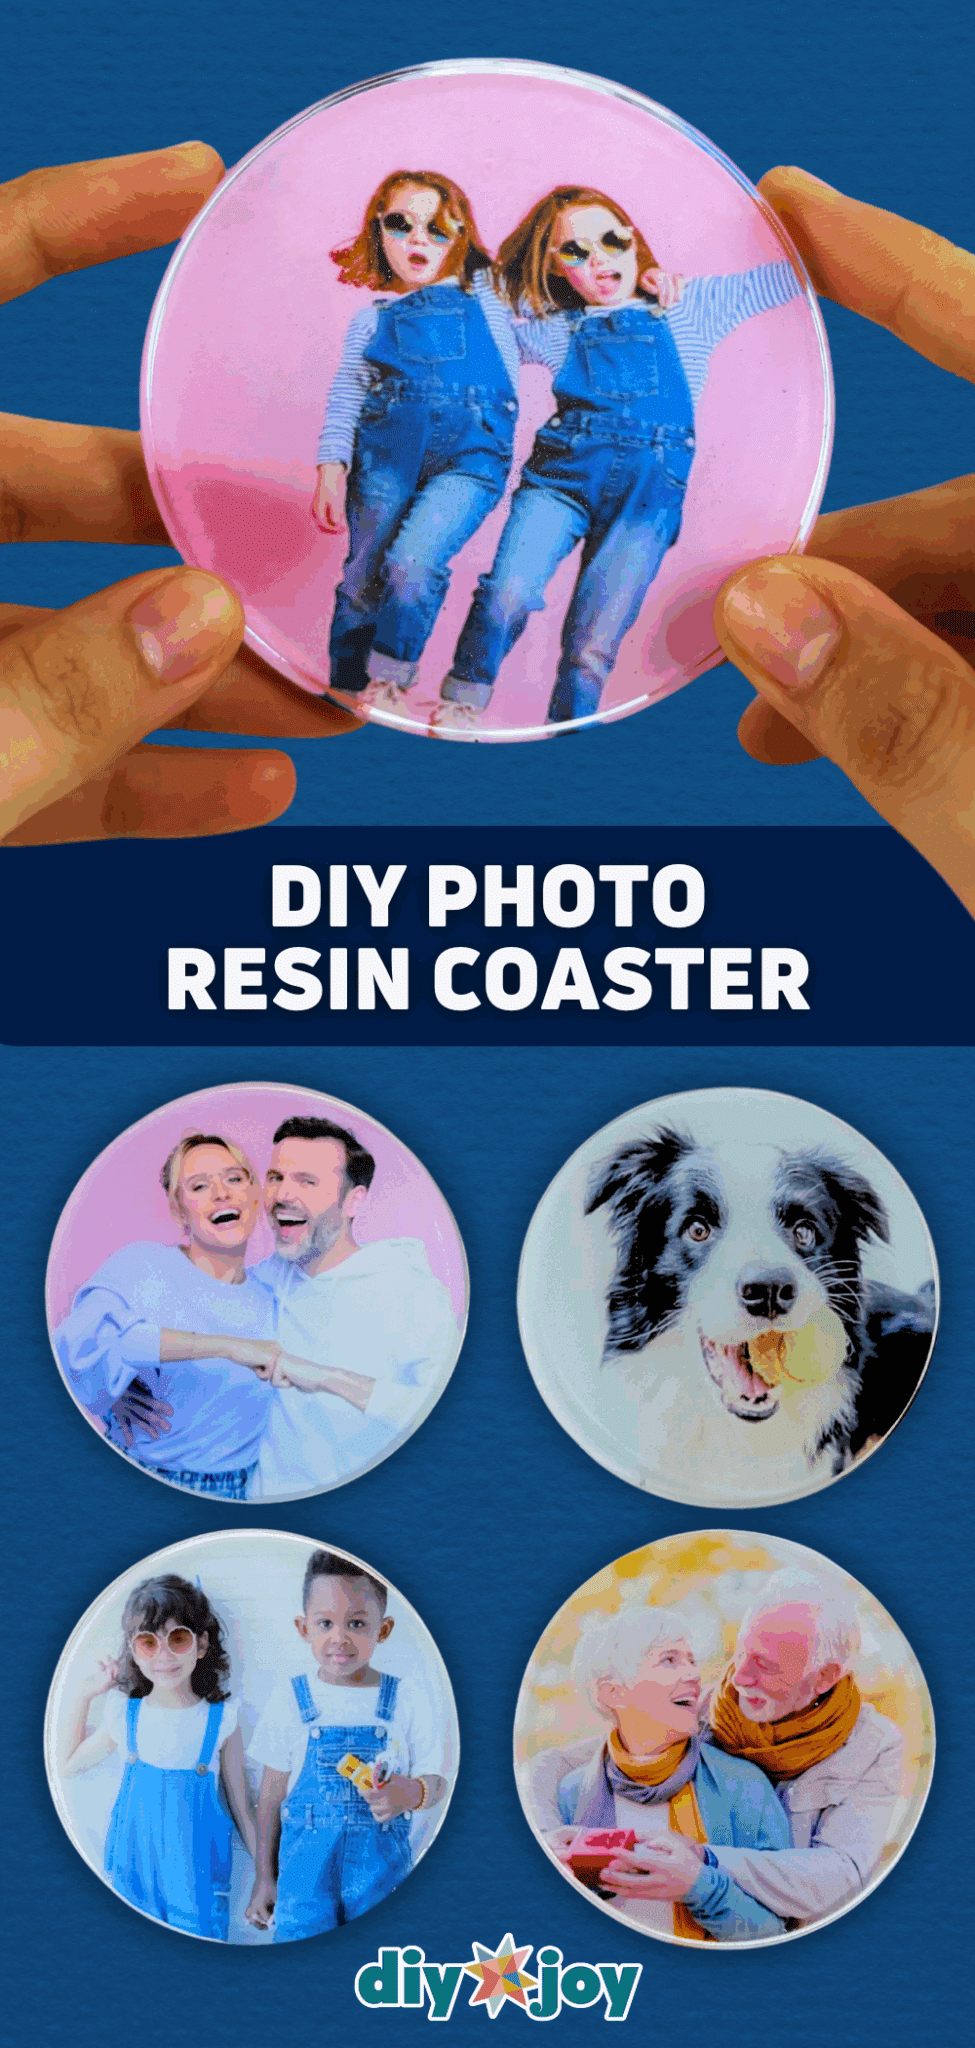
A photo of the neighbor’s dog in a glossy resin coaster? They will never stop talking about it. Mix about 36 grams of epoxy resin with 12 grams of hardener (a 3 to 1 ratio) and stir slowly for 5 to 10 minutes so it stays clear. Pour a thin layer into a round silicone mold, trace the mold shape on your photo, cut it out and set it in. Fill the mold, let it cure 24 hours and pop it out. Wear nitrile gloves.
Get the full tutorial at DIY JOY.
24. Resin Coaster with Dried Flowers
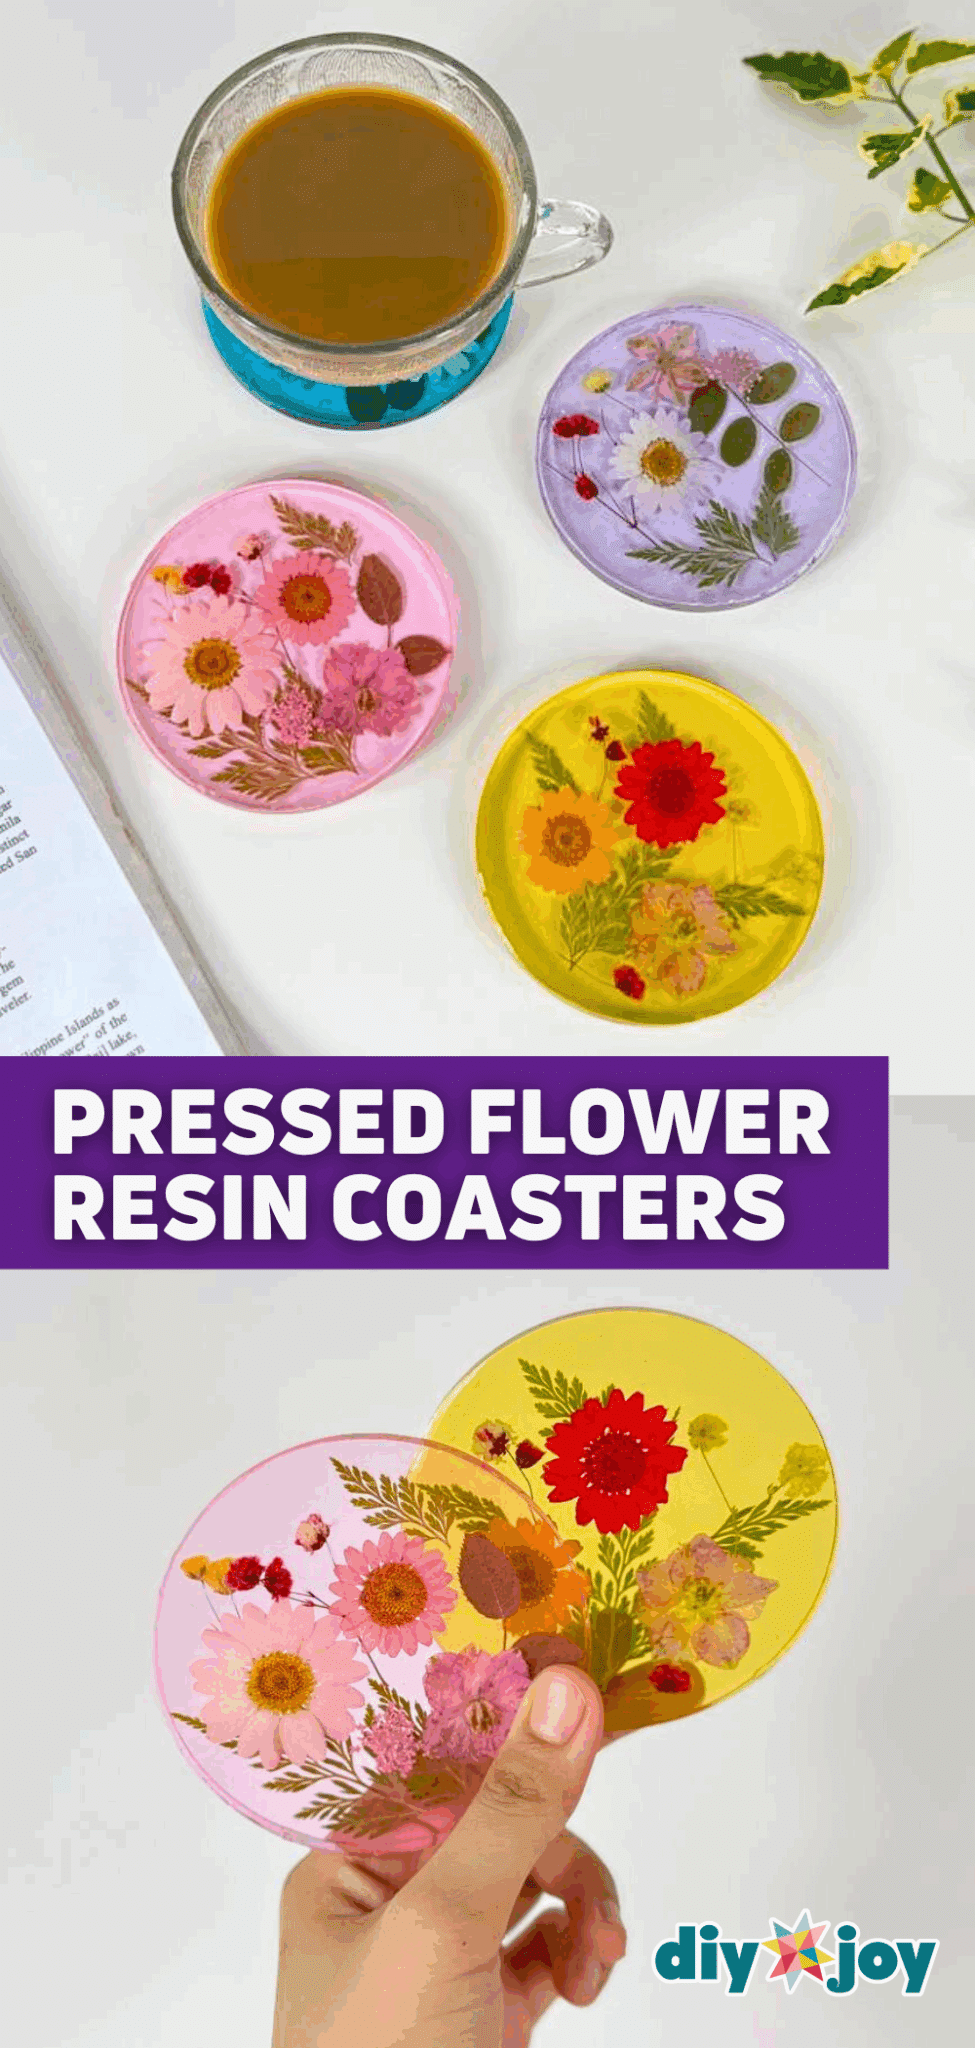
Real flowers frozen in tinted resin feel fancy enough for a boutique. Mix 36 grams of epoxy resin with 12 grams of hardener, add 2 to 3 drops of pigment and let it rest a few minutes. Pour half into a clean mold, arrange pressed flowers with tweezers, then pour the rest on top and pop bubbles with a lighter. After it sets overnight, a thin coat of UV resin cured under a lamp gives it a glassy shine. Pink, lavender and yellow make a pretty set.
Get the full tutorial at DIY JOY.
25. Easy DIY Flower Pot Candy Jar
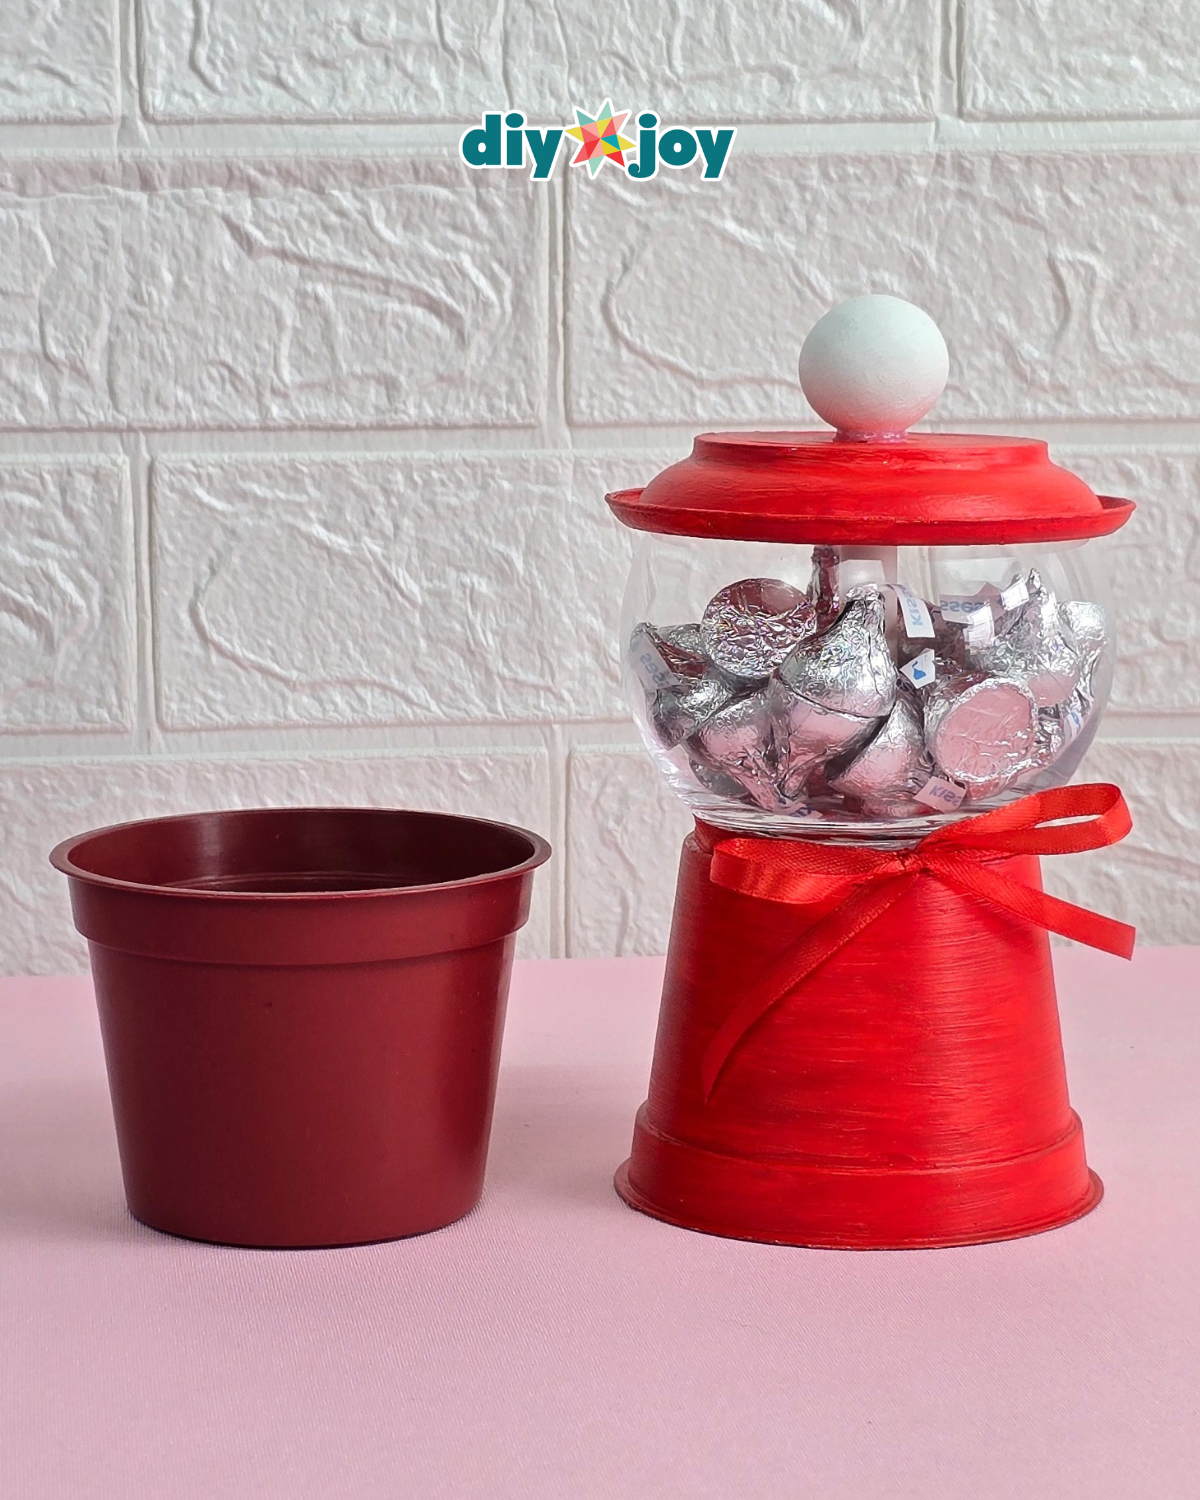
A gumball machine made from a flower pot is the most fun way to hand over a bag of chocolates. Prime and paint a small pot, its tray and a wooden ball (red reads very gumball). Glue the ball on top of the upside down tray to make the lid, then join a glass fish bowl to the pot with E6000 plus hot glue and let it cure overnight. Tie a ribbon around the seam and fill it with wrapped candy. Swap the colors for any holiday.
Get the full tutorial at DIY JOY.
26. Easy DIY Woven Yarn Mug Cozy
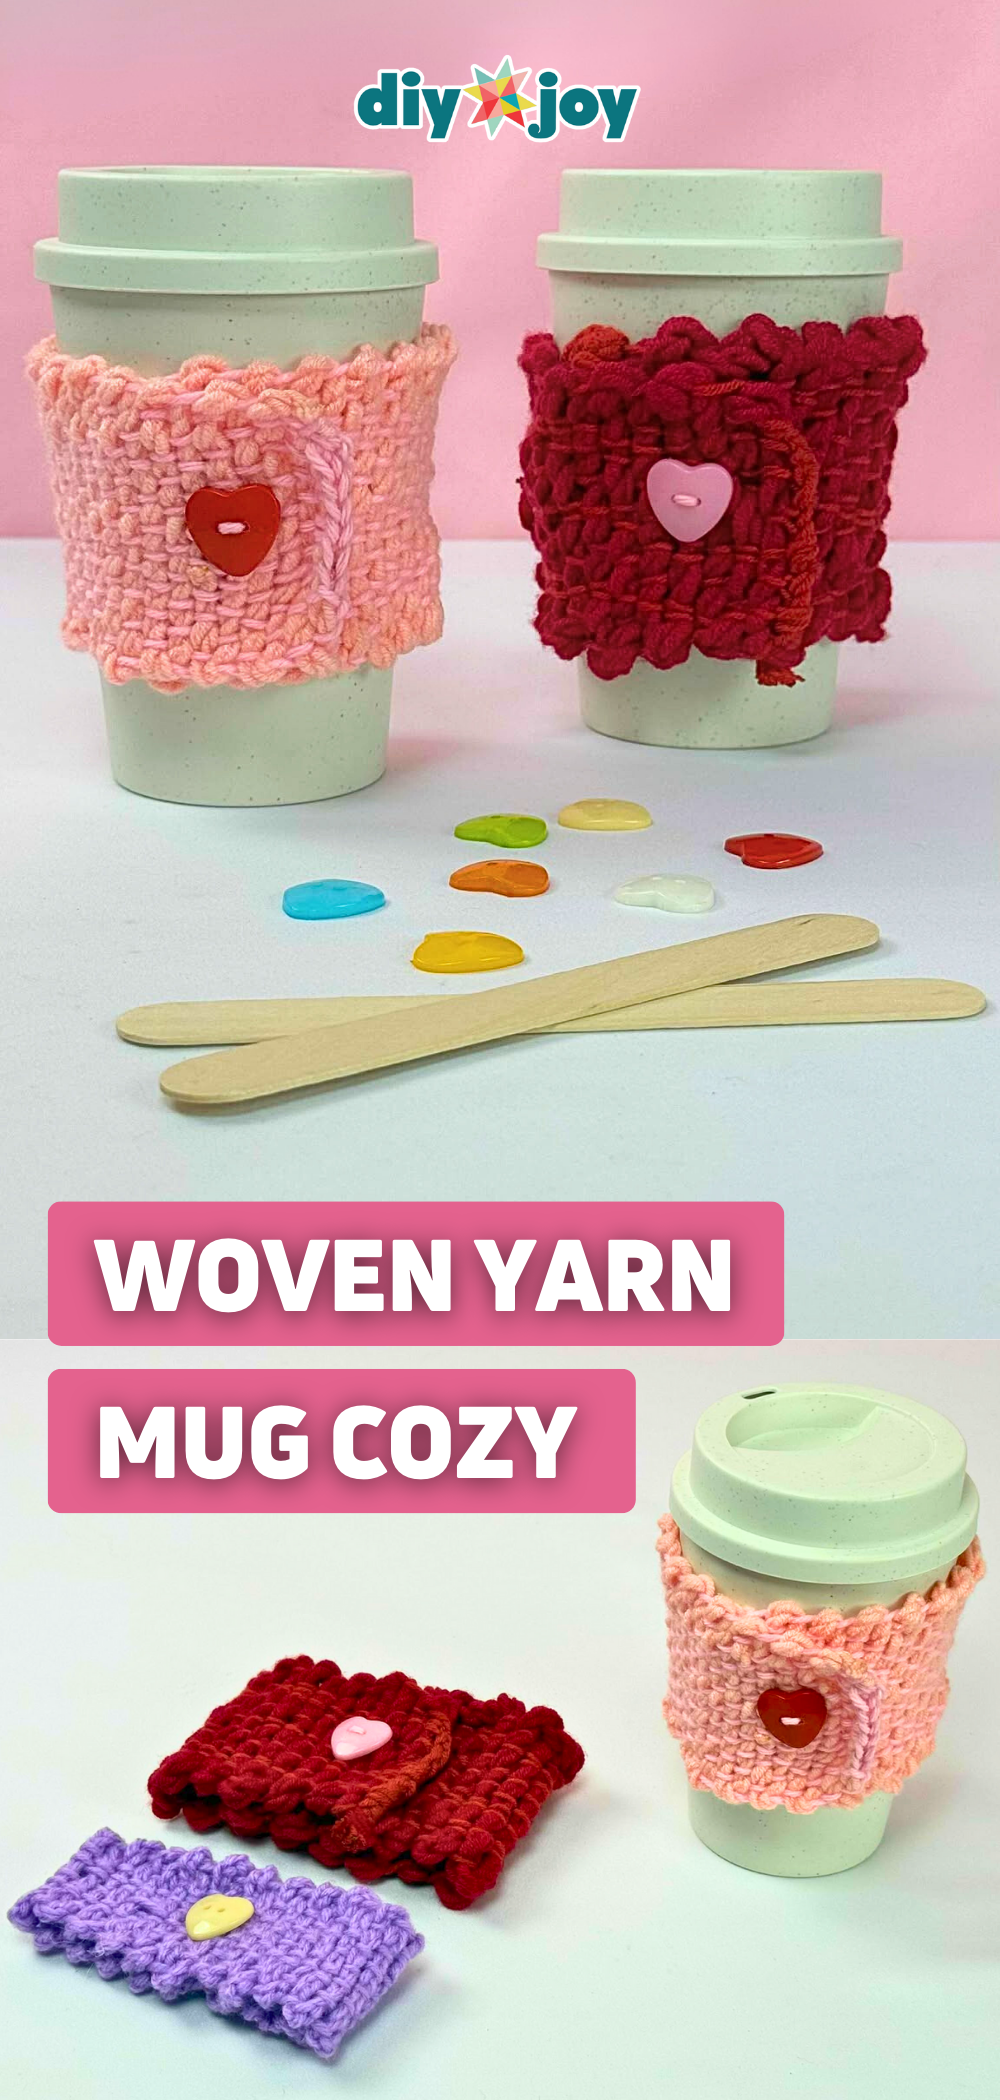
Want the look of crochet without learning crochet? This mug cozy is woven on a piece of cardboard. Cut it to fit around the cup, notch the ends about 1 cm apart, string yarn up and down through the slits, then weave twisted yarn back and forth with a popsicle stick threaded through a slit. Pop the loops off, chain stitch the ends with a crochet hook and sew on a heart button. It’s relaxing TV work, and coffee loving friends will use it daily.
Get the full tutorial at DIY JOY.
27. DIY Citrus Print Tea Towel
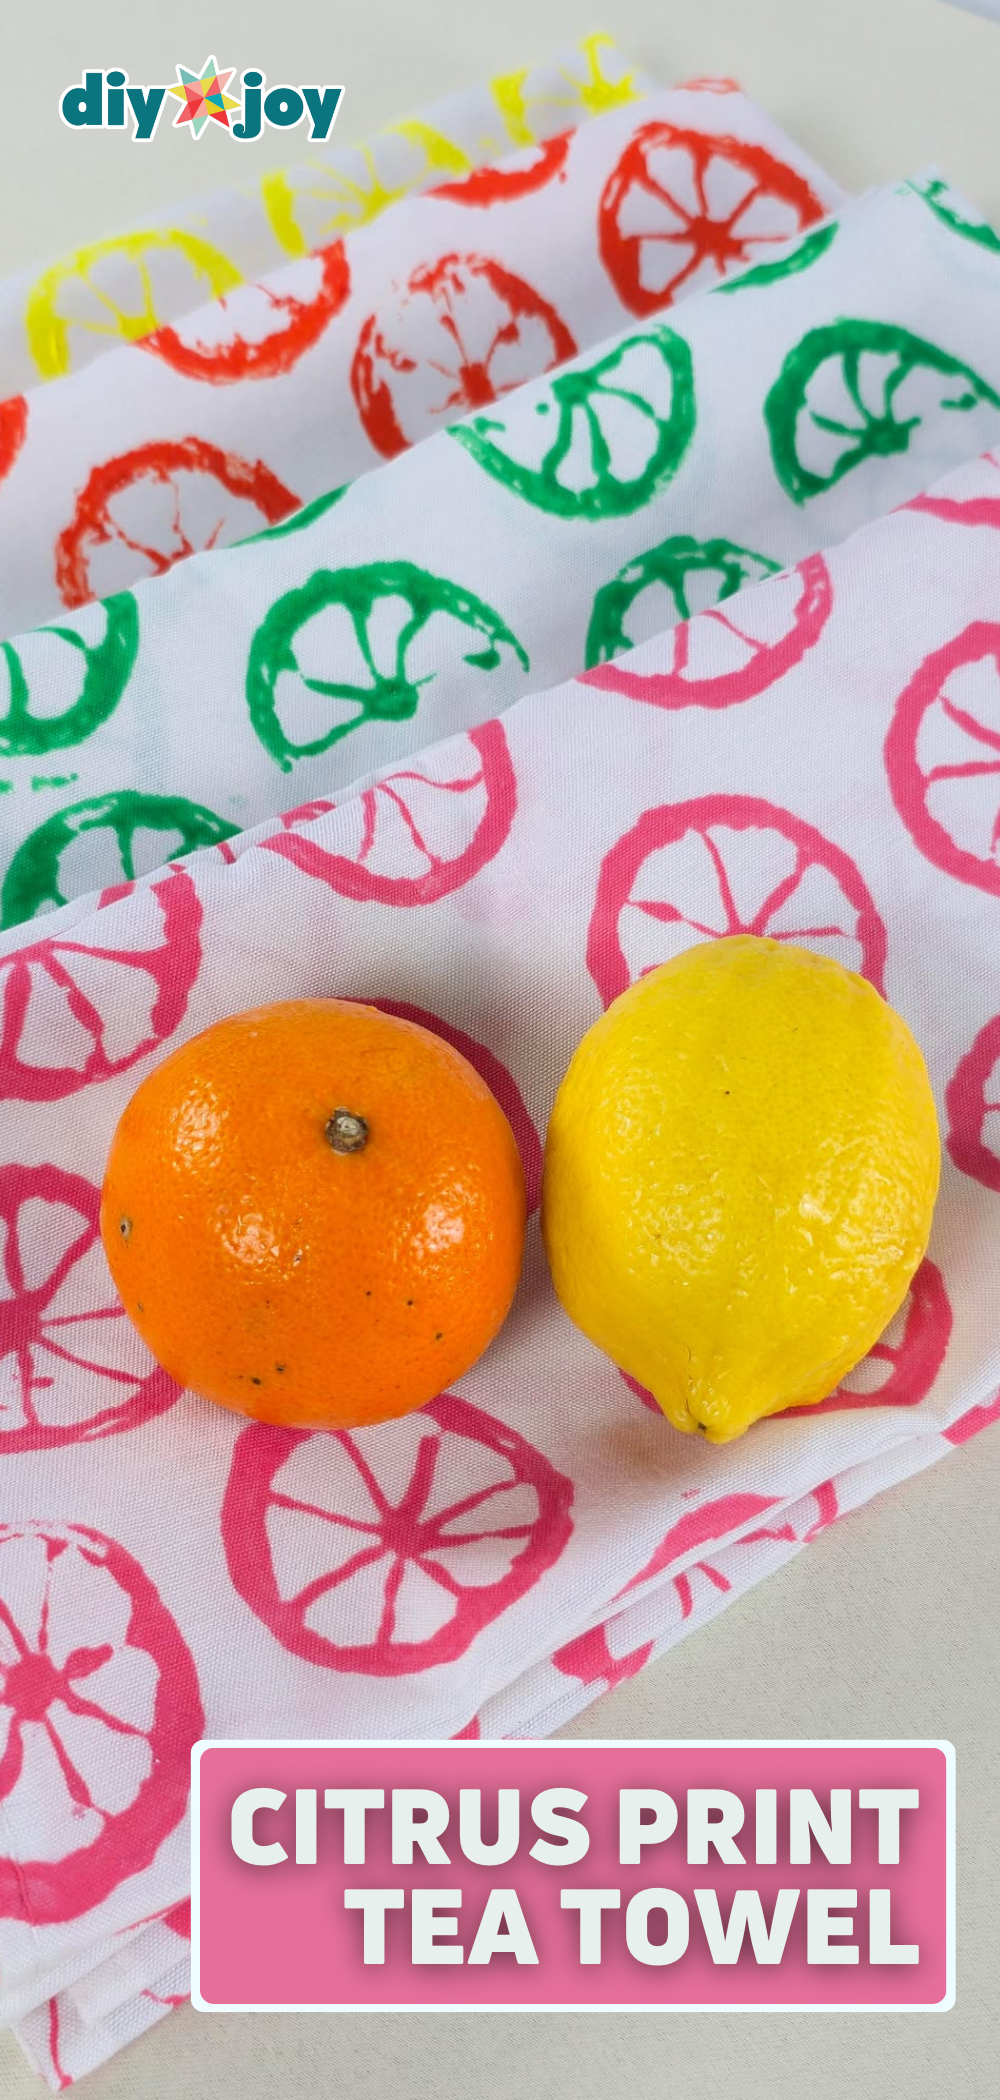
Stamping with real lemons and oranges is weirdly satisfying, and the towels look like they came from a boutique. Cut the fruit in half, scoop out the pulp without tearing the membrane walls and pat it dry. Mix fabric paint with an equal amount of textile medium, brush a thin coat on the membranes and rind, then stamp in offset rows. Too much paint blurs the pattern. Cut wedges for smaller prints, and slip paper underneath because paint seeps through.
Get the full tutorial at DIY JOY.
28. Easy DIY Watercolor Christmas Gift Card
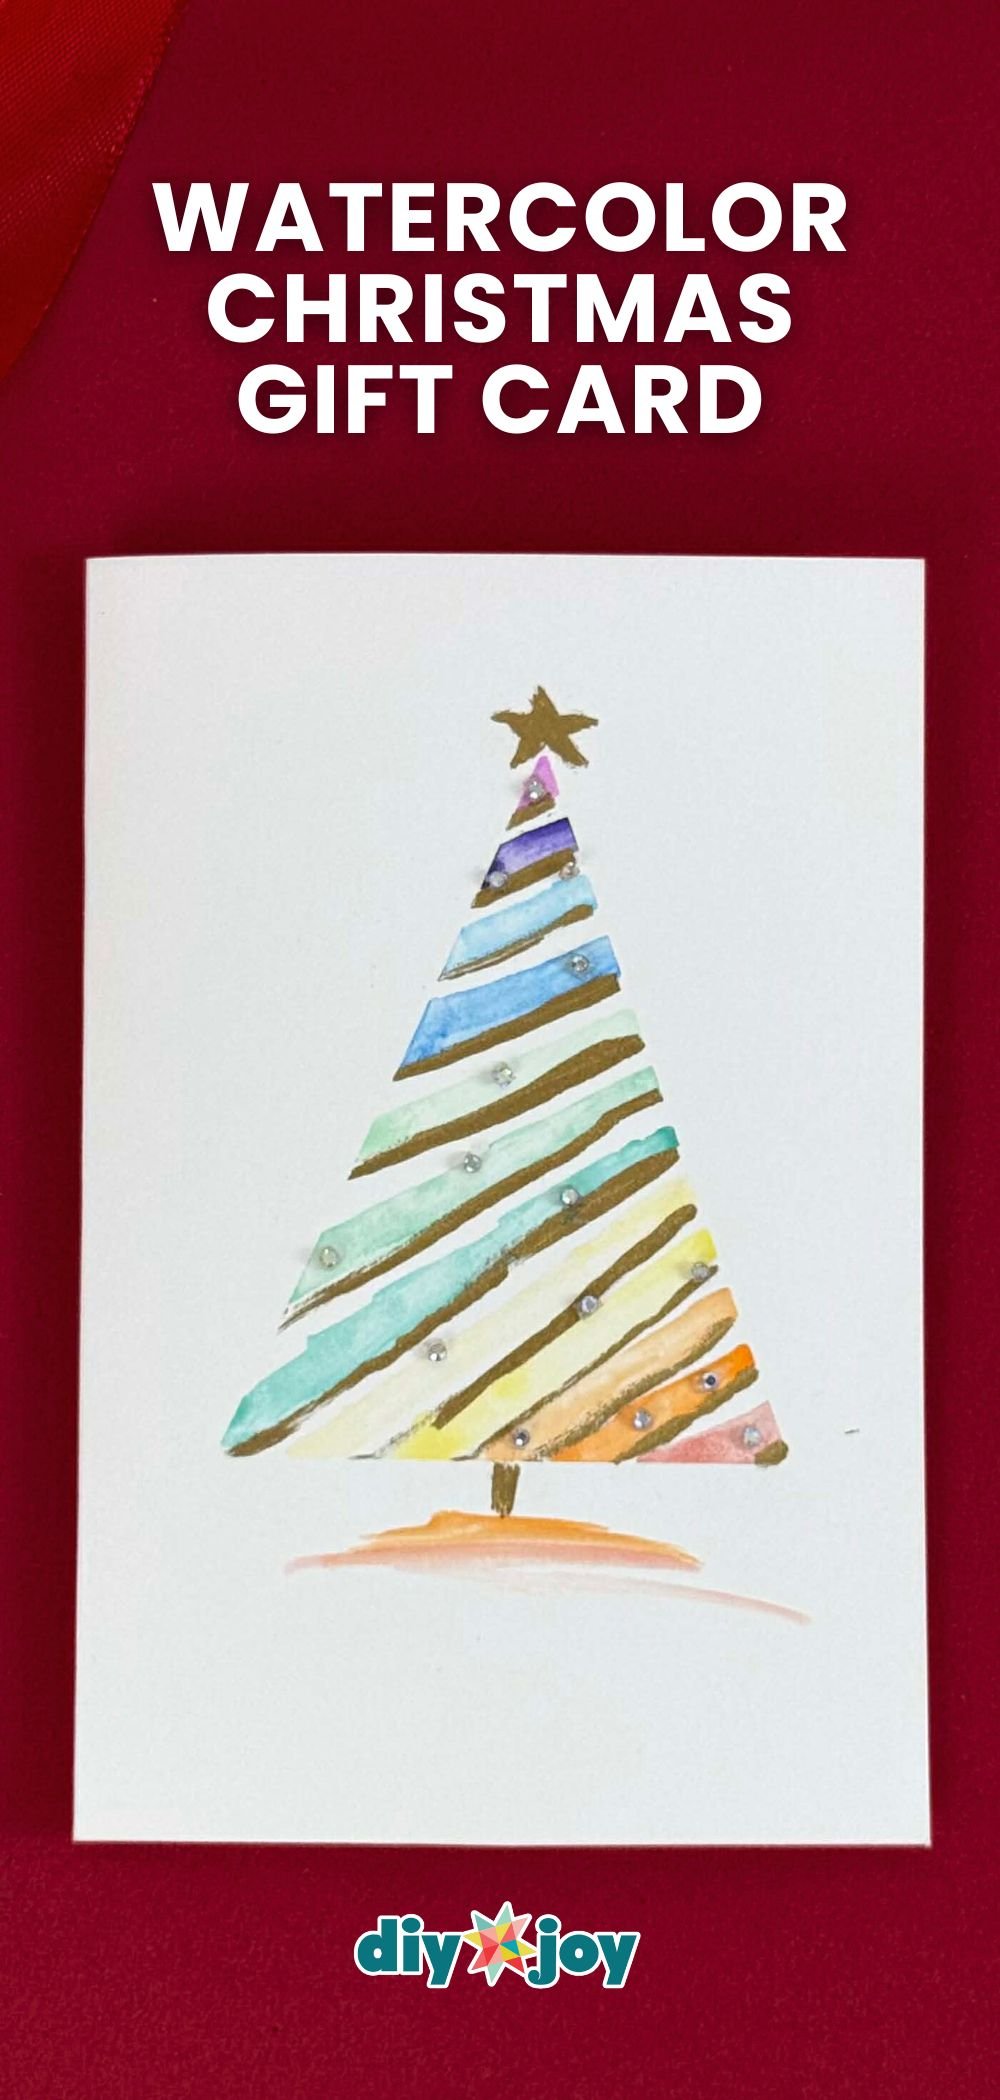
Even if the gift inside is store bought, the card can be handmade. Lay washi tape in a triangle on cardstock to outline the tree, paint diagonal watercolor stripes in any colors you love, then brush gold paint along the bottom of each stripe. Peel the tape for perfectly straight edges, add stick on rhinestones and paint a gold trunk and star. No drawing skills needed, the tape does the heavy lifting. Make a whole stack while the cookies bake.
Get the full tutorial at DIY JOY.
29. Upcycled Ferrero Rocher Jewelry Box

Eat the chocolates, keep the box. That’s a gift plan everyone can get behind. Peel the label off the clear lid with wide tape (press and pull a few times), then Mod Podge pressed flowers on the inside of the lid. Wrap gold washi tape around the edge of the chocolate tray, let it dry and fill the little cups with rings and earrings. No Mod Podge? Equal parts white glue and water works. A friend who loves jewelry will be delighted.
Get the full tutorial at DIY JOY.
30. Easy DIY Fun Photo Bookmarks
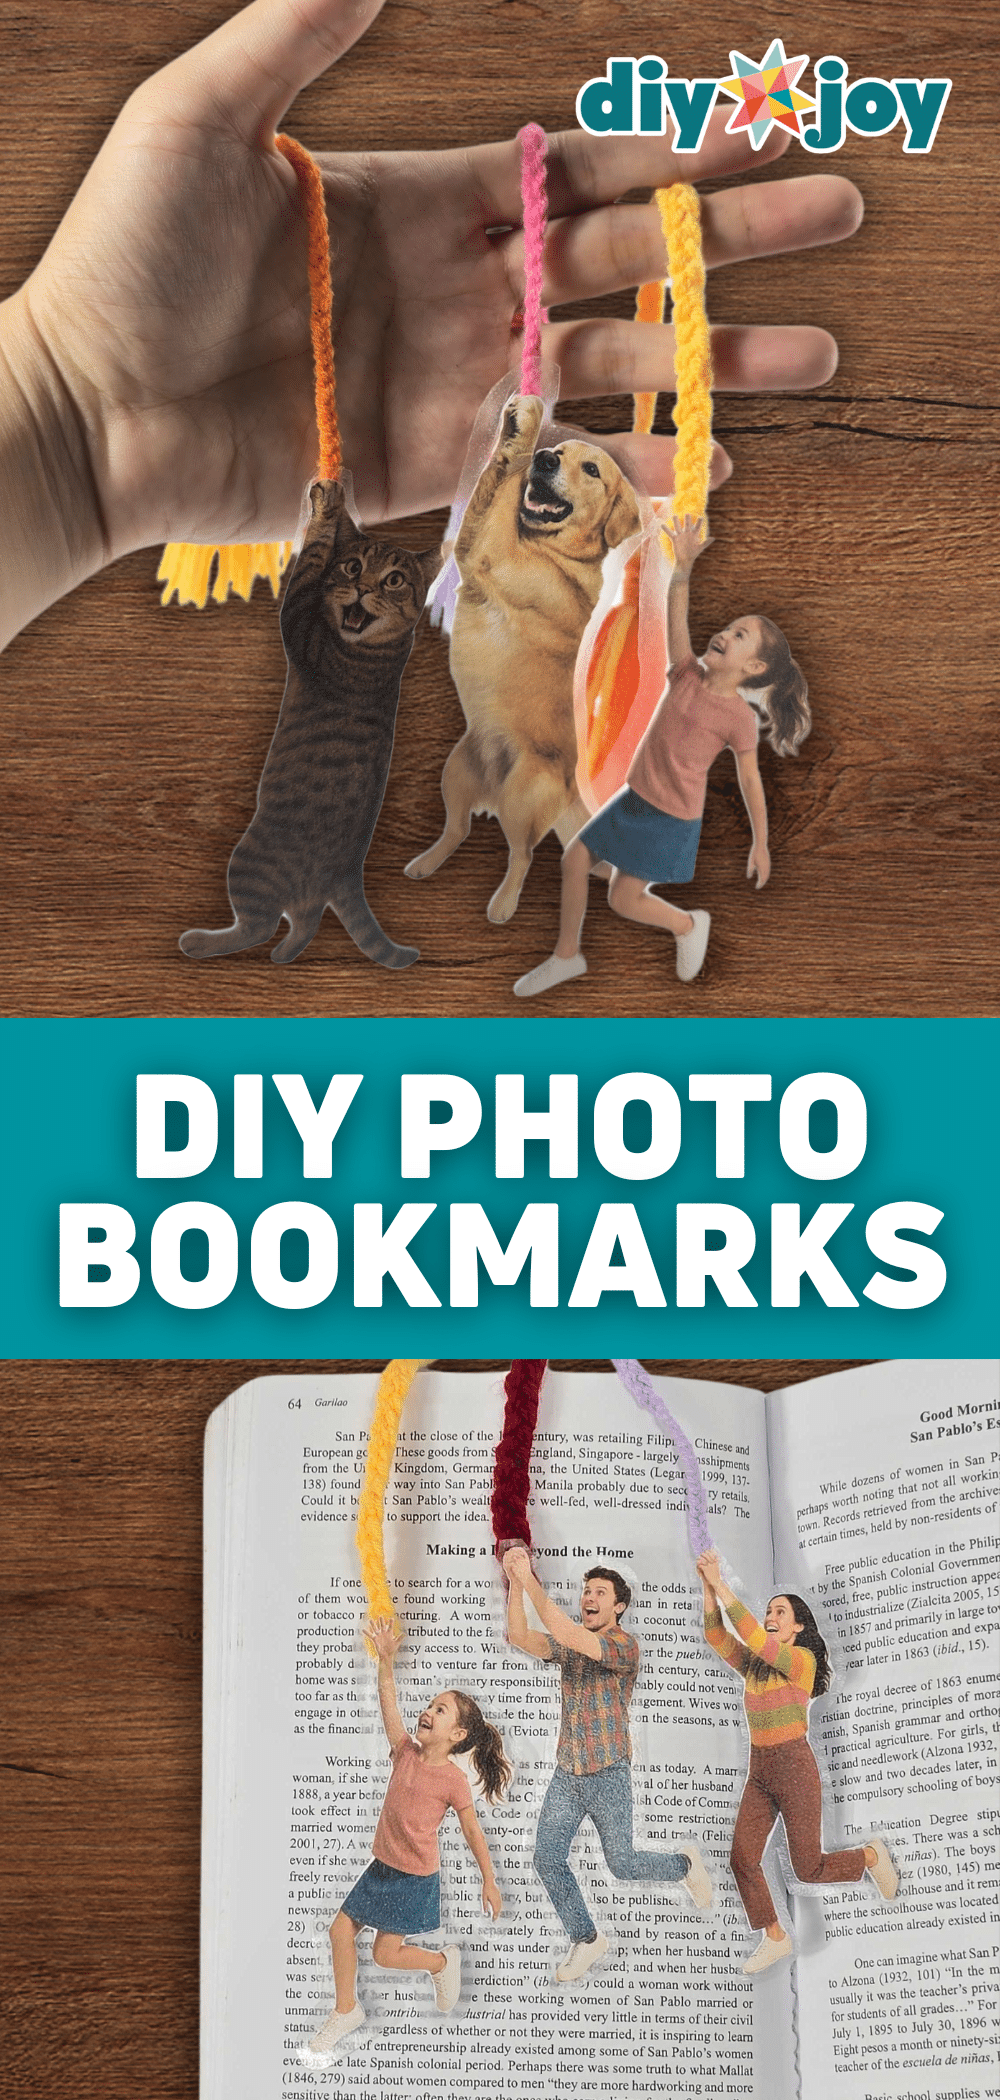
Book club friends, this is the one. Print a photo of the kids, the dog or the whole family hanging on for dear life, then cut it out close to the edges. Glue it to cardstock, leaving the hands unglued so a tassel loop can slip in between. Cover the front and back with contact paper, smooth out the bubbles and trim, leaving about 1/8 inch. Now the dog dangles from the top of the page, and that joke never gets old.
Get the full tutorial at DIY JOY.
31. Mini Hot Glue Photo Frame Magnets

These tiny gold frames look like antique store finds, and they’re made from hot glue. Print photos at about 0.85 by 1 inch. Chill a wax seal stamp on an ice pack and dry it, squeeze a generous blob of clear hot glue over the photo and press the cold stamp in. After 10 to 15 seconds, lift it, trim the extra glue and paint the frame gold. Stick a magnet on the back. A 15W glue gun helps avoid bubbles.
Get the full tutorial at DIY JOY.
32. Mason Jar Fairy Lights With Pressed Flowers
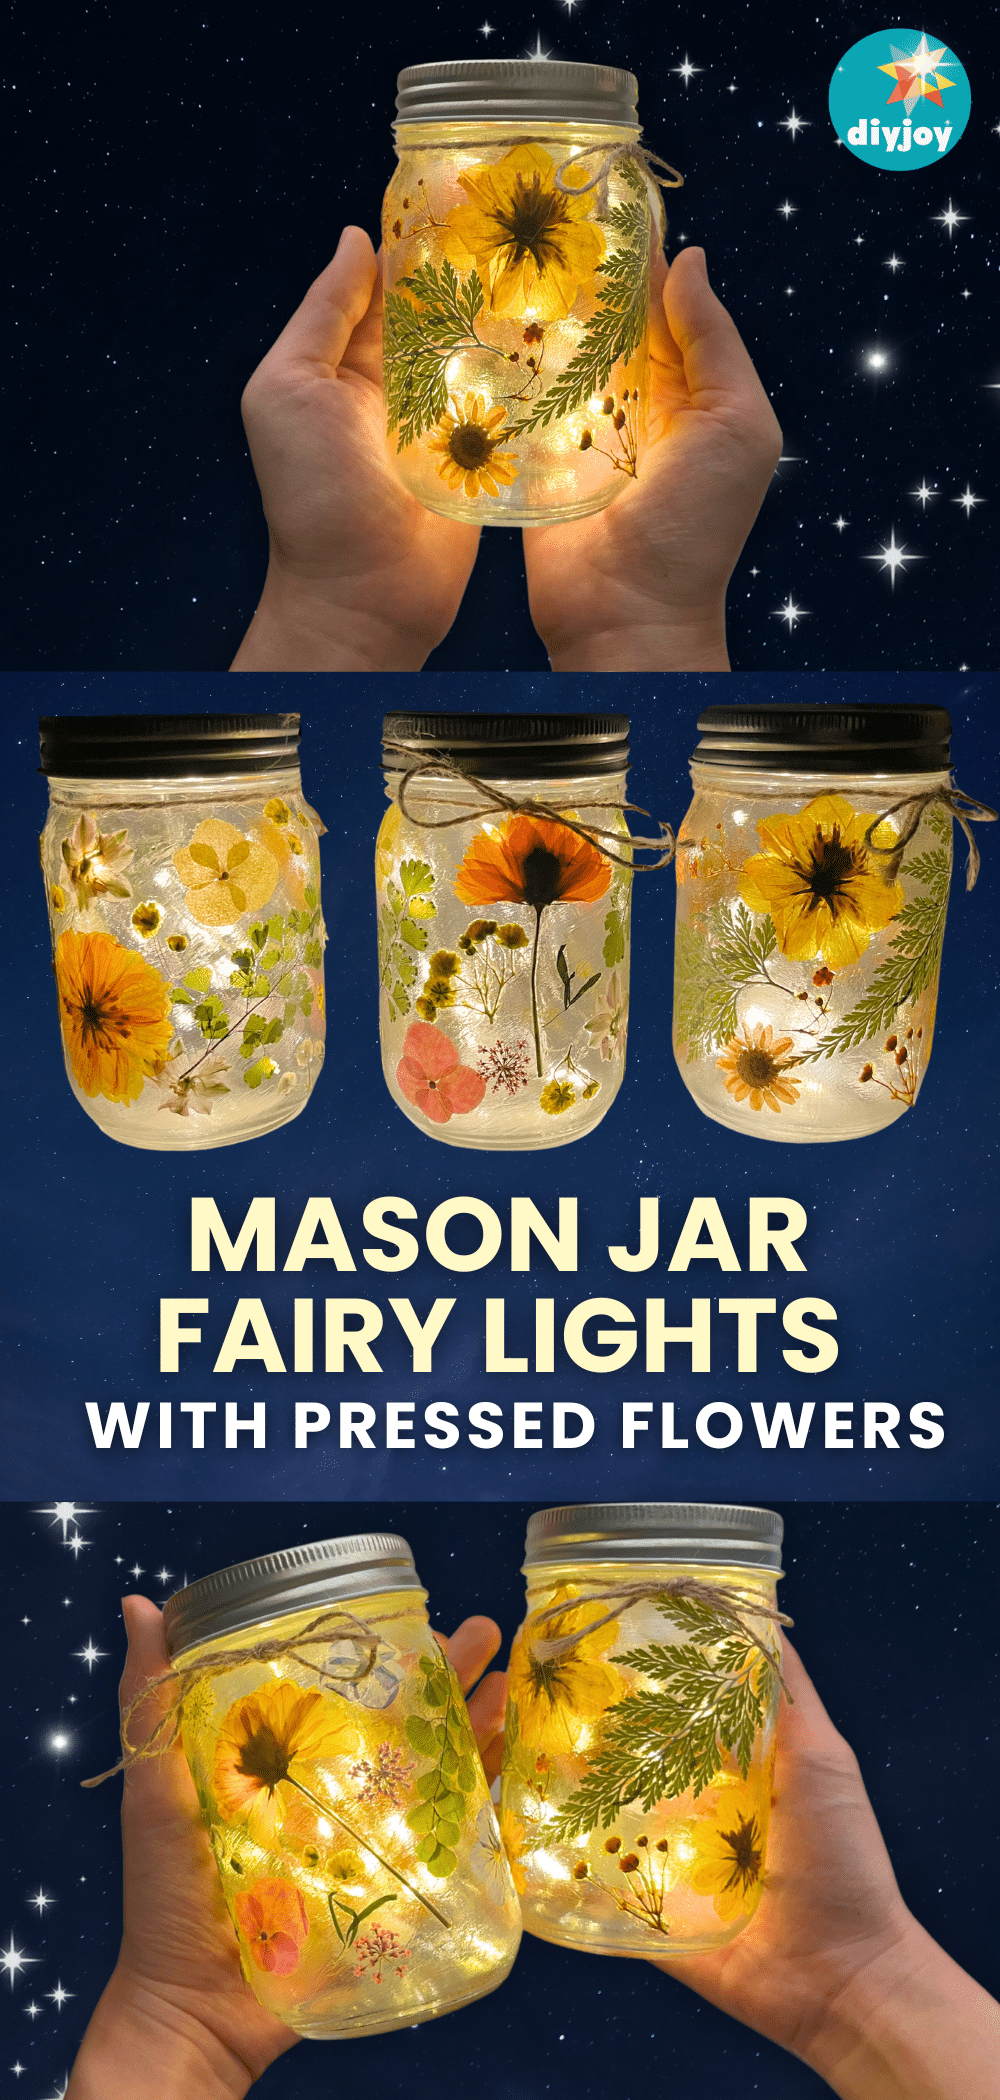
Turn on the fairy lights and this jar glows like a little garden at night. Clean the jar, brush on a thin layer of Mod Podge and press the flowers into place one section at a time, brushing more glue over each one. Thin flowers and leaves let more light through, so skip the bulky ones. Add a second coat to seal, drop a string of fairy lights inside and tie twine in a bow at the neck. Pick their favorite flowers for a personal touch.
Get the full tutorial at DIY JOY.
33. Easy DIY Fairy Jar Lanterns
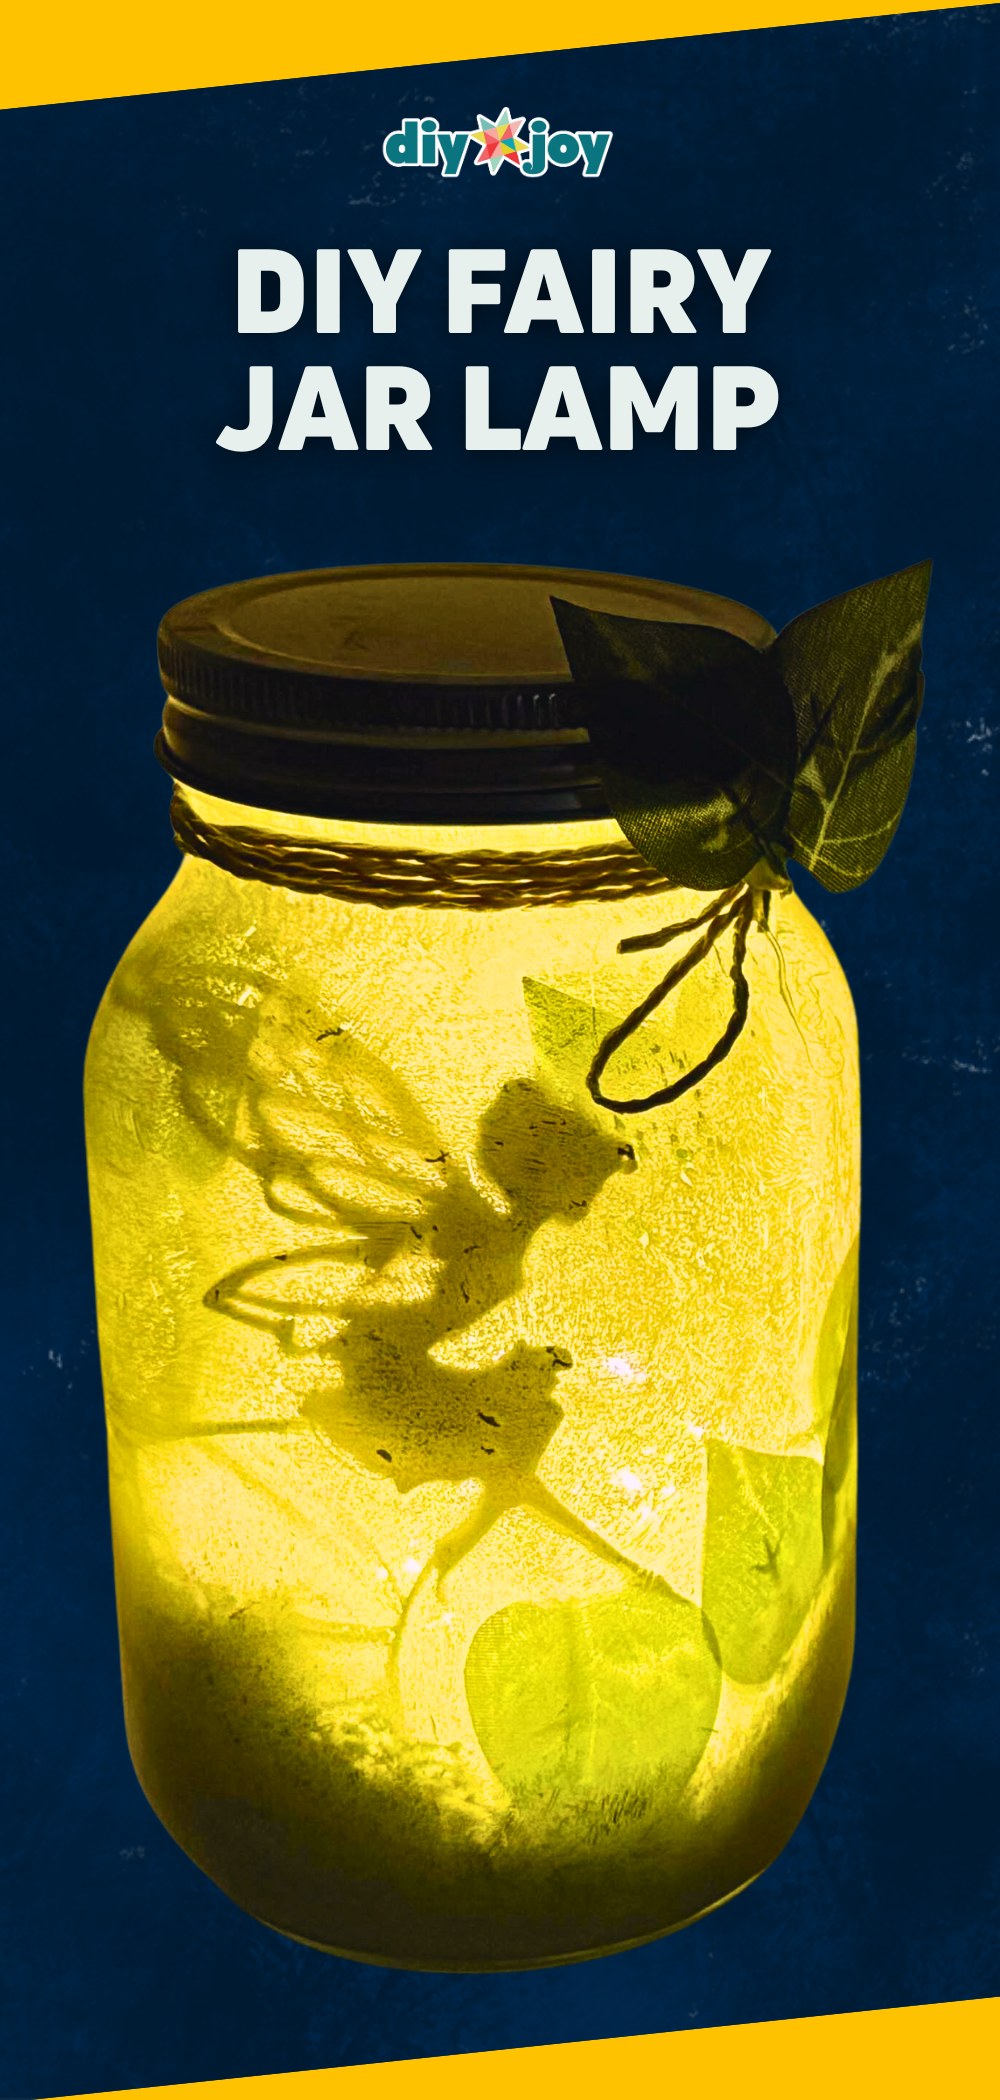
A pickle jar becomes a soft little night light with a fairy hiding inside. Print a fairy silhouette (or trees, mushrooms or a tiny house), cut it out and paint the inside of the jar with white acrylic or primer, keeping it thin enough for light to pass through. Add fake moss to the bottom, hot glue the silhouette inside and tuck in a few leaves. Drop in fairy lights, then tie twine and leaves around the neck. Pure magic in the dark.
Get the full tutorial at DIY JOY.
34. Beginner Sewing Project Tutorial: Coffee Cozies

Coffee cozies are the gateway sewing project, and they use up the fabric scraps you can’t bear to toss. Trace a cardboard coffee sleeve onto fabric, add a 1/4 inch seam allowance and cut an outer, a lining and a batting layer. Sew each pair right sides together, leaving a 2 to 3 inch gap, turn, layer and topstitch. A hair elastic loop and a button close it. Pair one with a coffee shop gift card and the neighbors are set.
Get the full tutorial at DIY JOY.
35. Upcycled DIY Light Bulb Mini Planter Tutorial
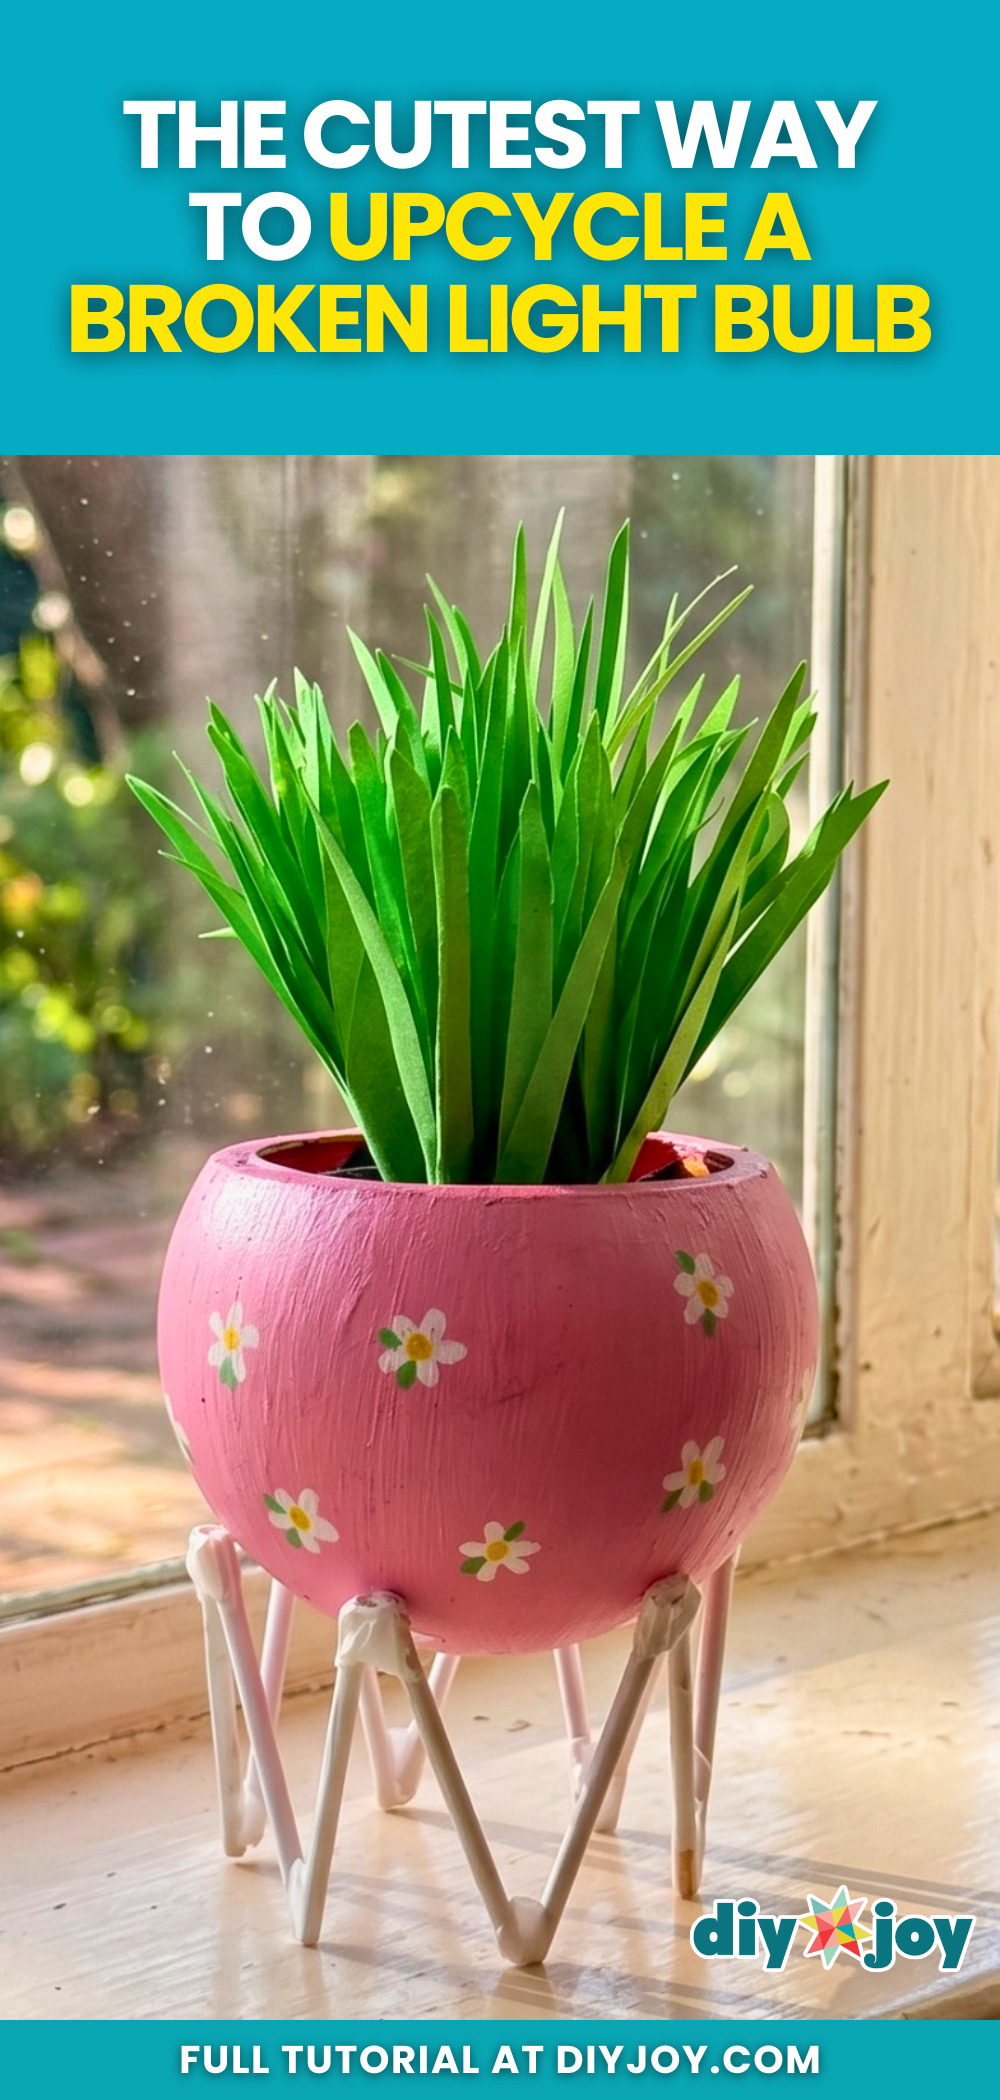
Broken light bulb? Don’t toss it. The round glass becomes a tiny planter that looks adorable on a desk. Separate the glass from the base and sand the sharp edge smooth. Paint it, then draw flowers with POSCA pens. Hot glue pairs of 2 inch sticks into A shapes and join them in a circle for the stand. Fill the bulb with crumpled brown paper and rolled paper grass, or a tiny succulent. A quirky gift for the friend who can’t keep real plants alive.
Get the full tutorial at DIY JOY.
36. Easy Colorful Clothespin Trivet
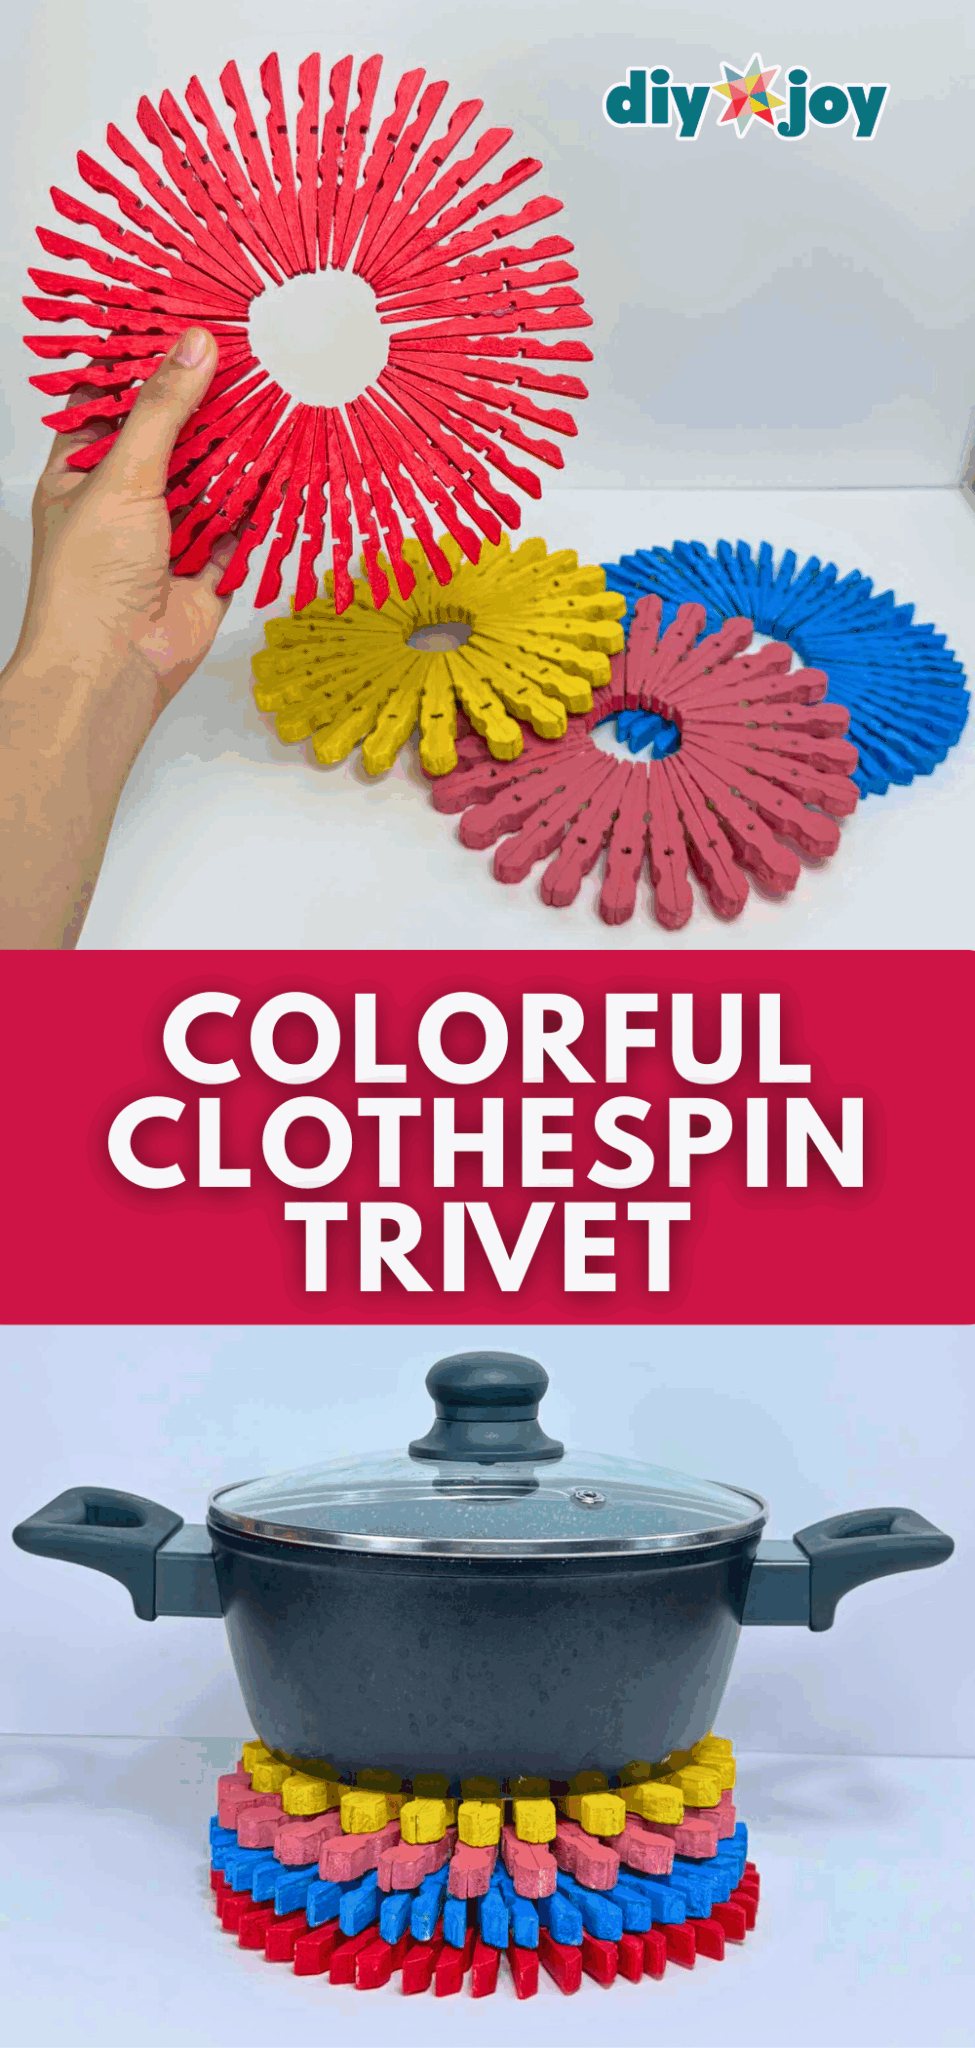
A pack of wooden clothespins turns into the most cheerful trivet. Pull each clothespin apart and remove the spring, prime the pieces, then paint them in any colors (rainbow or neutrals both work). Hot glue the slanted end of each piece to the back of the next and keep going until it closes into a circle. For hot pots, use wood glue or a heat resistant adhesive instead, and add felt pads underneath so it won’t slide. Great housewarming gift for new neighbors.
Get the full tutorial at DIY JOY.
37. DIY Hot Glue Keychain Tutorial

Leftover glue sticks and a jar of glitter are all it takes. Draw a shape on parchment paper (cherries, a heart, a flower or an initial), trace it with hot glue and pour glitter over the top. Shake off the extra and repeat until the whole design is covered. Poke a small hole at the top and add a keychain hook and chain. They’re surprisingly sturdy once set. Work over a tray, because glitter will absolutely try to follow you home.
Get the full tutorial at DIY JOY.
38. DIY Air-Dry Clay Decoupage Jewelry Dish
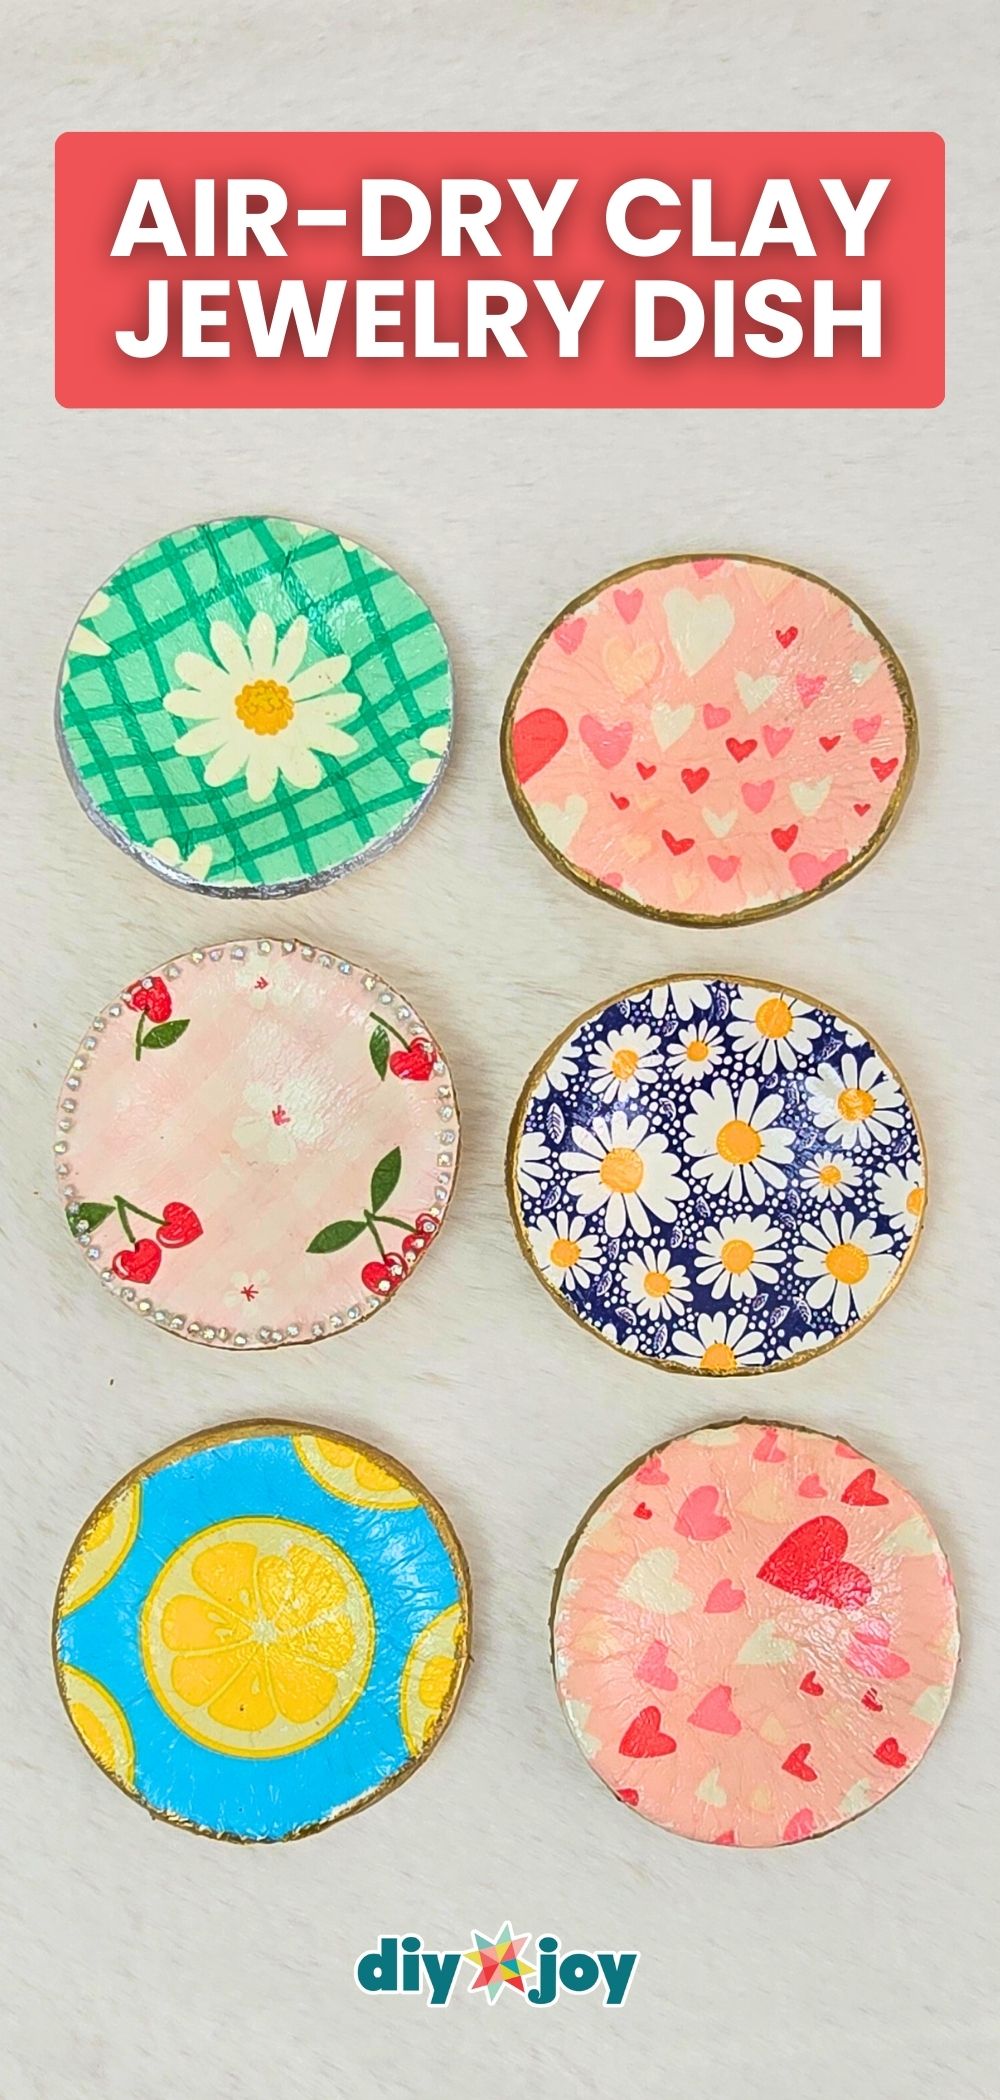
Pretty paper napkins are the secret behind these little jewelry dishes. Roll out air dry clay, peel the backing layer off a printed napkin and lay it on top. Cut a circle with a jar lid or cookie cutter, brush on Mod Podge, then press the clay into a muffin pan to shape the bowl and let it dry overnight. Paint the rim gold and seal with gloss varnish. Daisies, lemons, cherries or hearts: pick a different print for each friend.
Get the full tutorial at DIY JOY.
39. Easy DIY Wine Cork Reindeer
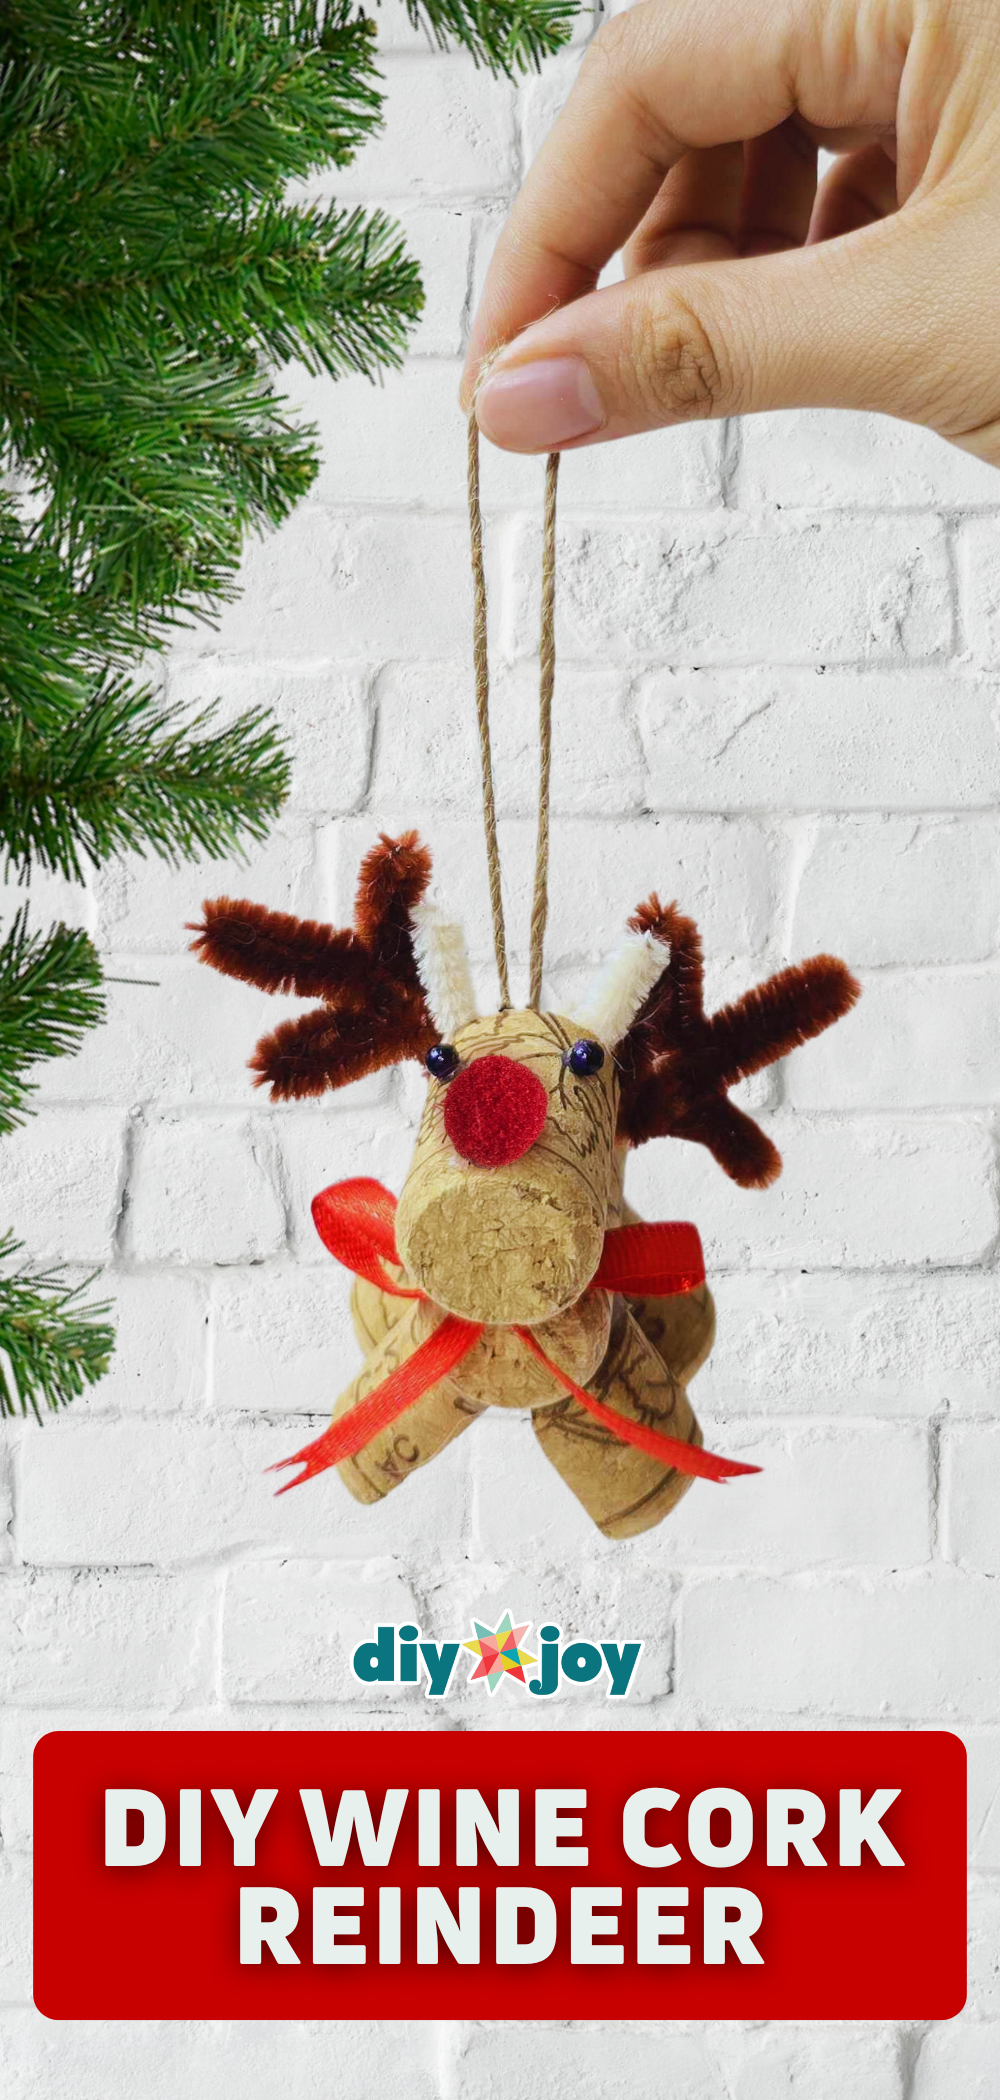
Saved a stash of wine corks? Here’s what they were meant for. Cut one cork lengthwise into four pieces for legs, trim a small piece for the head and use a whole cork for the body. Hot glue it together, twist brown pipe cleaners into antlers, then add black bead eyes, a red pom pom nose and a red ribbon scarf. Add twine to hang it as an ornament. One reindeer is cute, but a little herd tucked into a gift basket is a showstopper.
Get the full tutorial at DIY JOY.
40. Easy DIY Air Dry Clay Jewelry Tray

This oval tray looks like fancy blue and white pottery, but it’s air dry clay and a paper napkin. Roll out the clay, dust a tray mold with baby powder so it releases, then press the clay in and smooth it with a damp sponge. Once it’s dry, pop it out, prime it and Mod Podge the napkin layer on. Edge it with metallic marker and brush on a thin coat of UV resin to cure under a lamp. Keep it thin or it bubbles.
Get the full tutorial at DIY JOY.
41. Easy Candle Jar Gift Wrapping Hack
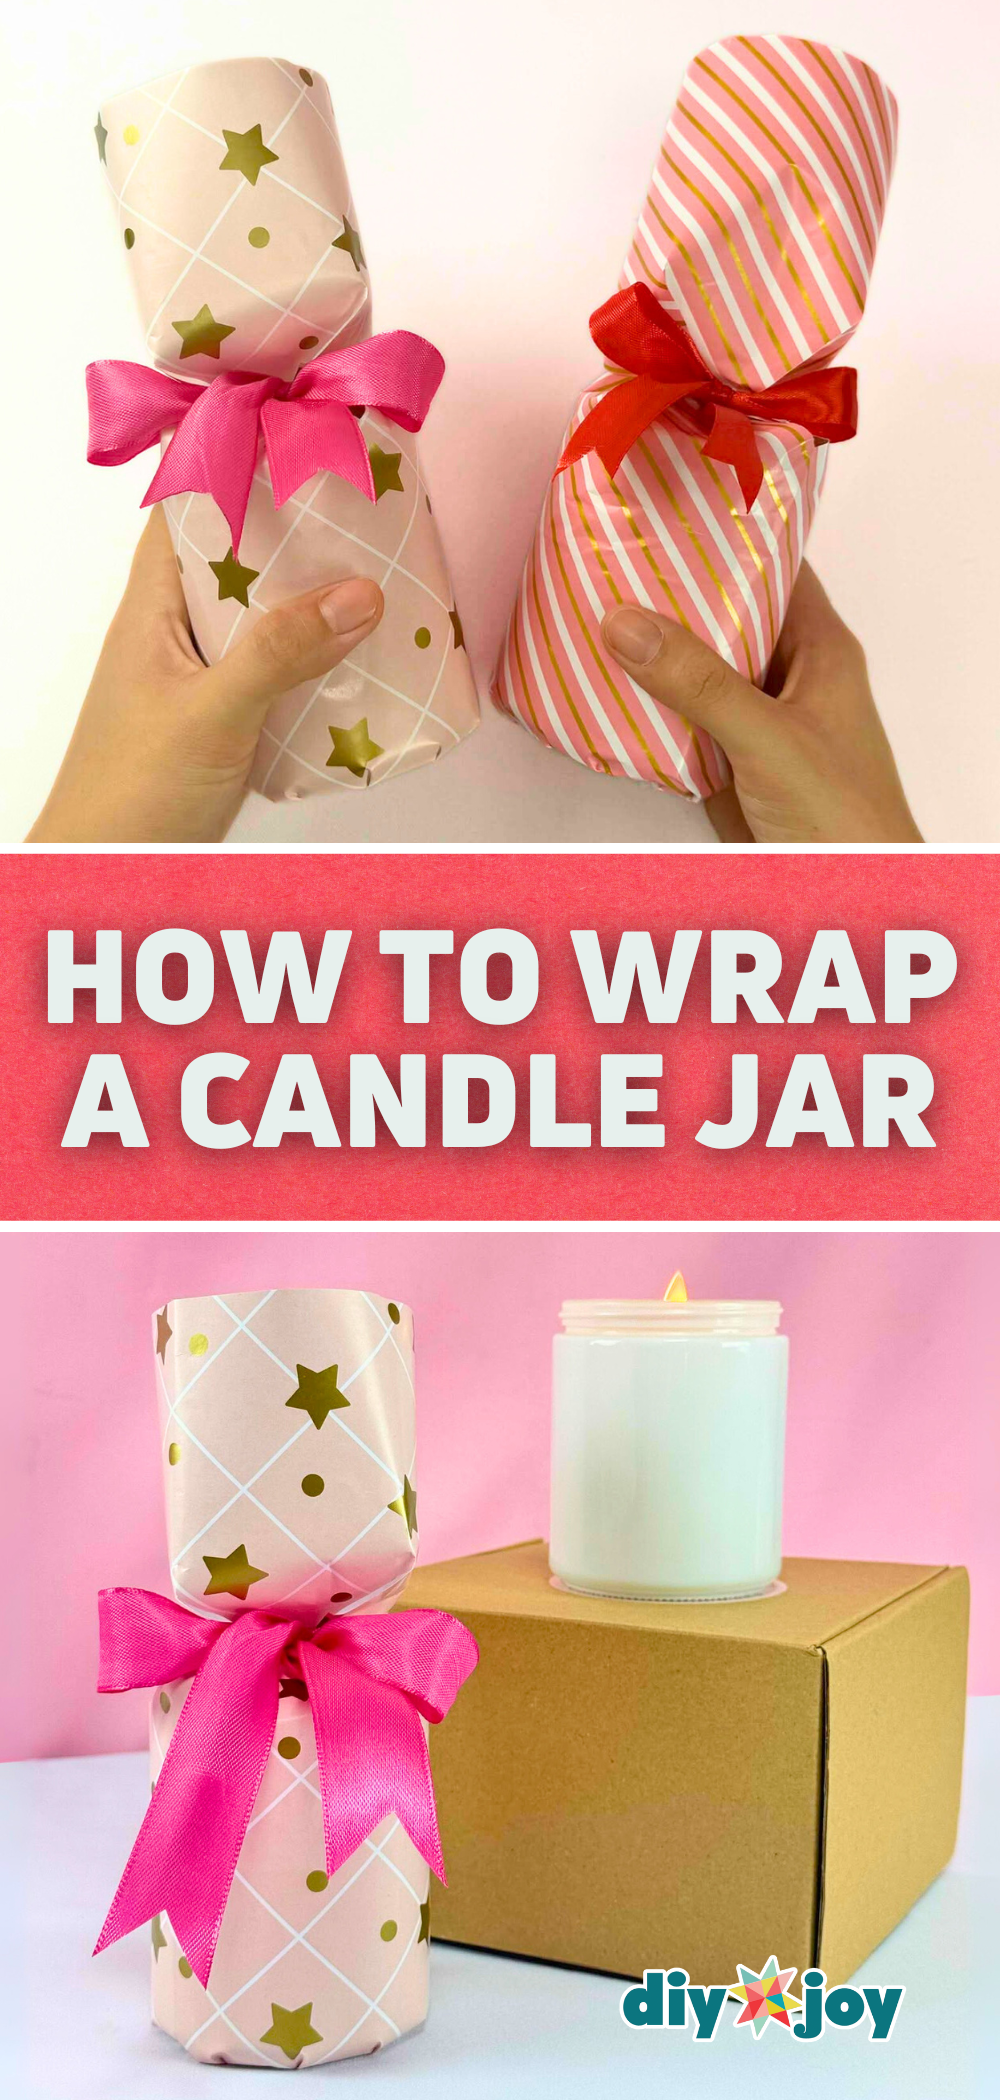
Candles are a go to neighbor gift, but a round glass jar is a pain to wrap. This hack fixes that. Cut paper as wide as the jar plus a little overlap and about twice its height, tape the seam with double sided tape and slide the jar out. Fold the ends using the jar as a guide, snip slits along the bottom and diamond cuts along the top. Tuck the bottom flat, gather the top and tie a satin bow. It ends up looking like fancy candy.
Get the full tutorial at DIY JOY.