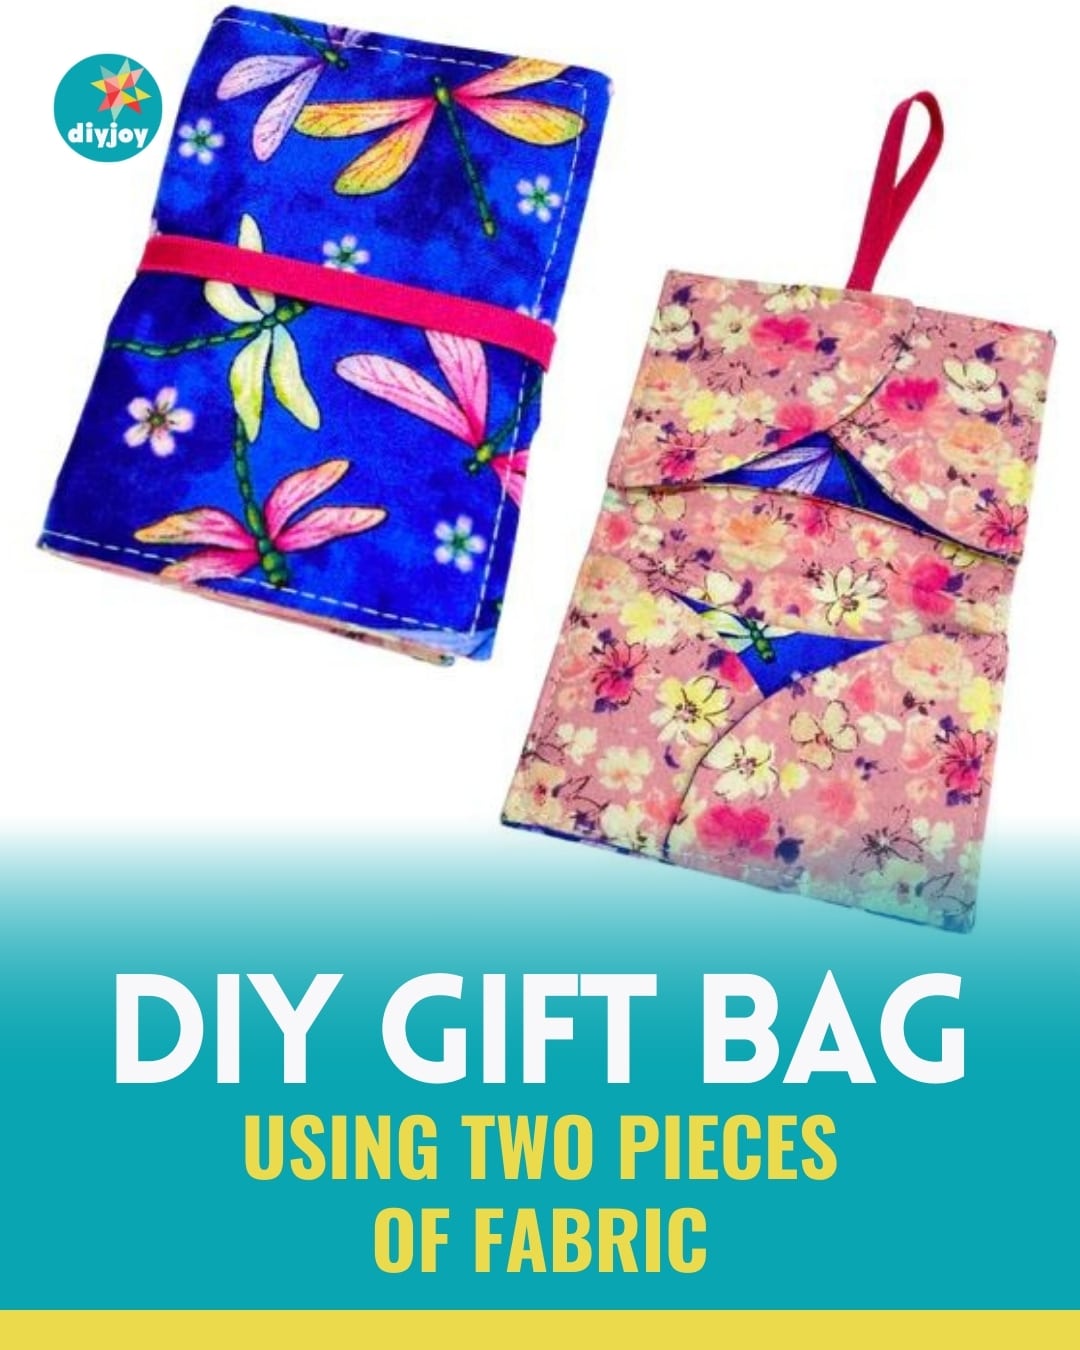
If you love personalizing your gifts, why not make the gift bag as well? This gift bag tutorial from Notches Sewing is perfect if you want to make a DIY gift bag. You will only need two scrap fabrics for this project – it’s easy, quick, and ideal if you don’t have any sewing experience or if you’re a beginner.
RELATED: 5-Minute Gift Bag – DIY Sewing Tutorial
What are you waiting for? Gather your materials now and start making this adorable gift bag perfect for the holiday season! Watch the video tutorial below to learn the step by step instructions.
Materials:
- (click here for the template)
- 2 – 9 1/2″ x 11″ of fabric
- light non-woven fusible interfacing (with the glue on one side)
- ruler
- rotary cutter
- elastic
Directions:
Step 1
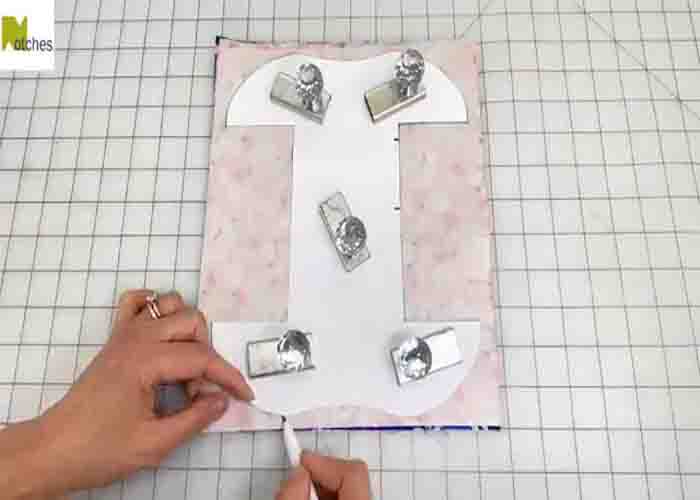
Lay the fusible interfacing with the glue side up, then place the fabric piece on top. Cut the interfacing to the same size, then iron the pieces together. Next, cut a 5 1/2″ x 1/4″ elastic. Set it aside. After this, line the two fabric pieces together on their right sides, then place the template on top. Trace it, then mark the two notches onto the fabric for the opening. Pin the fabrics to secure them, then sew starting from the bottom notch all the way to the top-notch, stitching right on top of the line.
[social_warfare]
Step 2
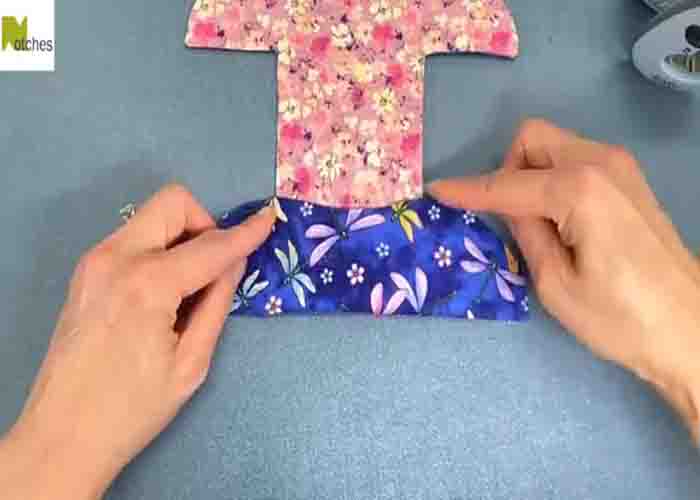
Once done, cut around the shape, leaving a 1/4″ seam allowance. Next, press open the opening seam. Then, turn over and fold down the other side of the seam, pressing it flat as well. Press open the rest of the straight seams. Now, turn the project right side out, then push out all the corners and curves. Press all around afterward.
Step 3
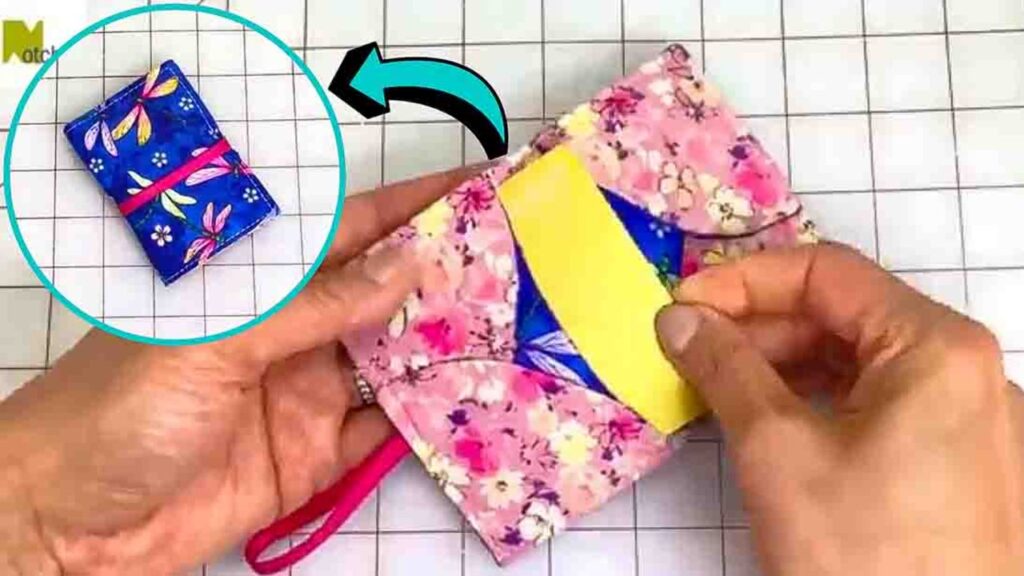
Next, with the lining side up, fold one end straight across, then press. Repeat on the other side. After this, fold the left side in line with both edges, press, then fold the other side and press as well. Clip them in place, then repeat these steps on the other side. Now, find the center and mark it. Grab the elastic and fold it in half lengthwise with the right sides together. Place the end at the center mark between the top two layers about 1/4″ in from the edge. Next, turn over and clip in place. Sew all around the project, securing the elastic in place as well. Now, you can add some gift cards inside and give them to your loved ones.
DIY Gift Bag with 2 Pieces of Fabric Only