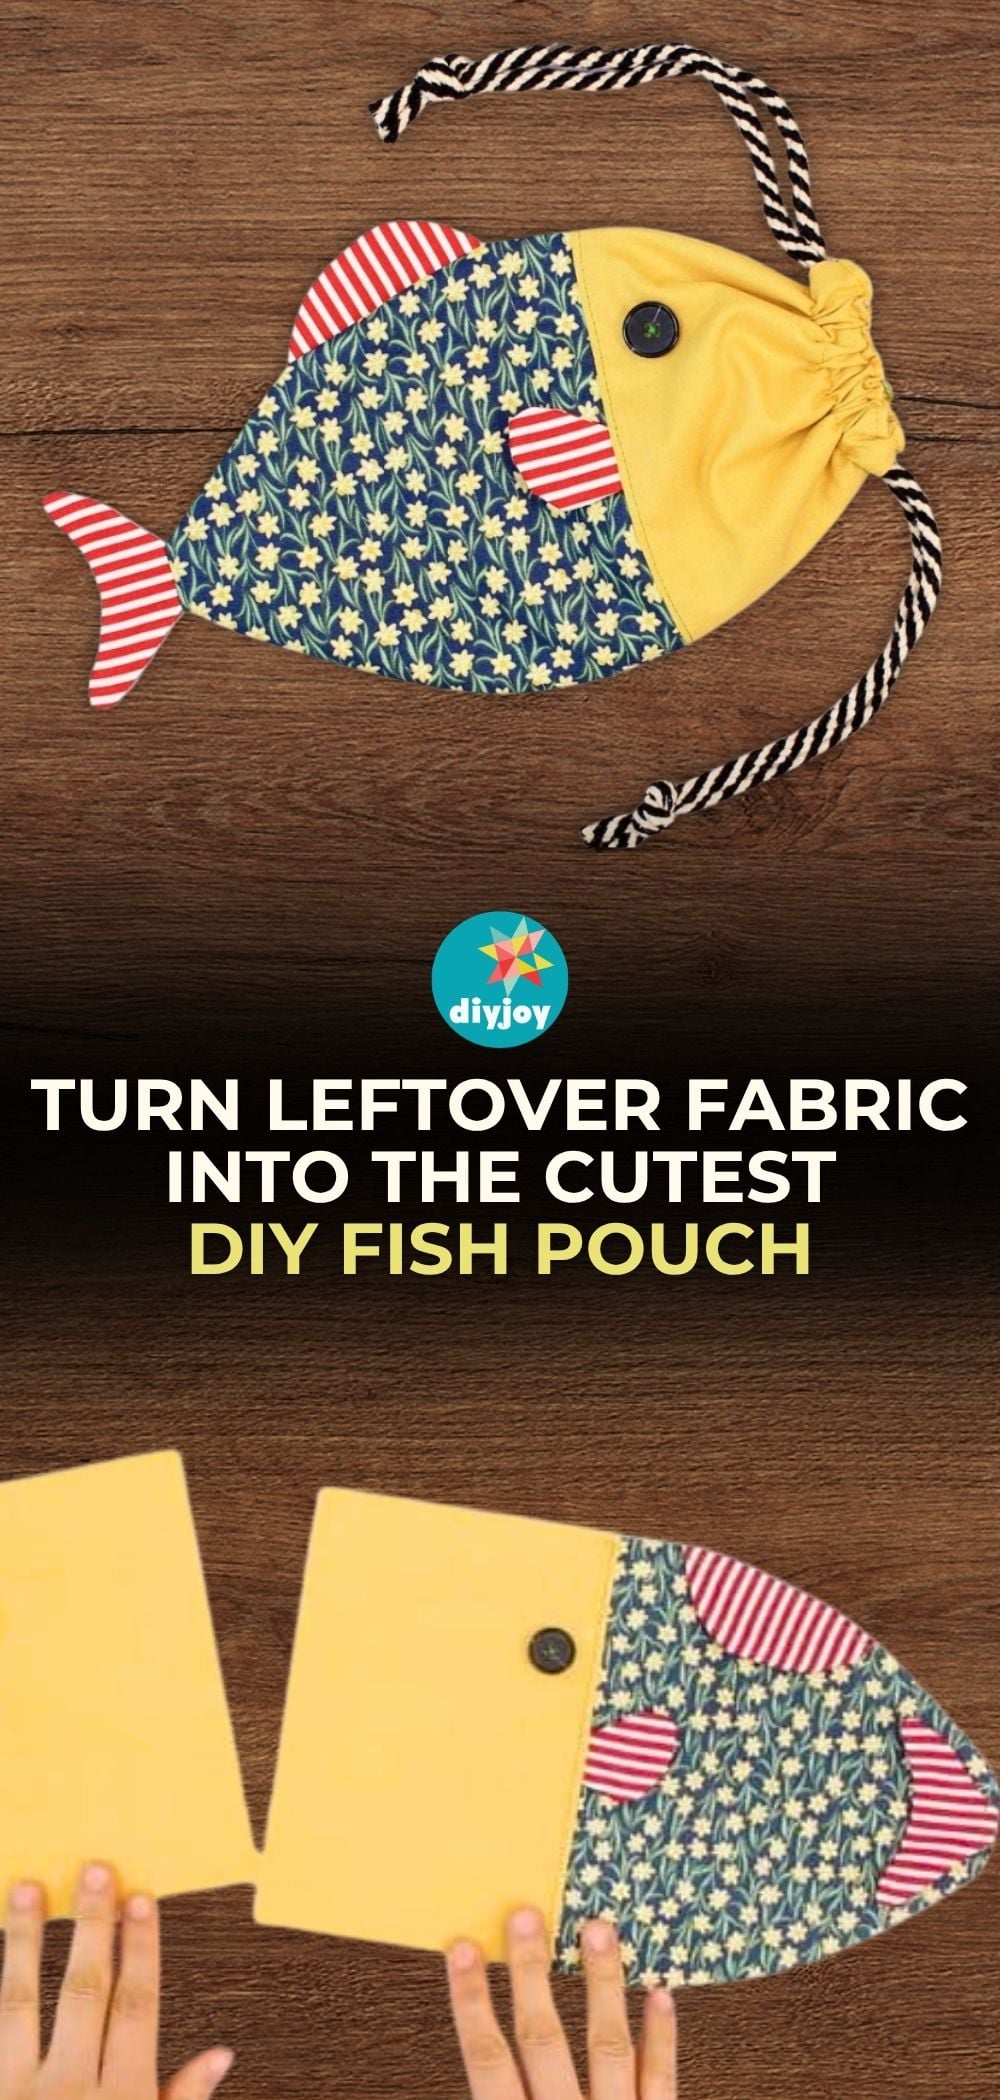
Repurpose excess fabrics from your past projects by making them into this DIY fish drawstring pouch. This is a wonderful and cute idea by sewingtimes on Youtube. It’s a fun and easy project that anyone can do and enjoy. You can gift them to your friends or even sell them online. Watch the video below for the full instructions.
Materials:
- 47-1/2 inch long cotton cord (o.2 inch)
- 2 buttons
For the outer layer:
- 2 pieces – 4-7/8″ x 6-3/4″ (A)
- 2 pieces – 6-3/4″ x 6-3/4″ (B)
- 2 pieces – 4-5/8″ x 1-3/4″ (C)
- 2 pieces of 3-3/4″ 2-1/4″ (D)
- 4 pieces of 2-1/4″ x 2″ (E)
For the lining:
- 2 pieces of 10-7/8″ x 6-3/4″ (F)
Instructions:
Step 1:
Get one piece of C and draw the dorsal fin (upper fin) of the fish. Next, get one piece of D, measure a 1-1/2″ line on the middle, and mark both ends. From those ends make the tail of the fish. Get two pieces of E and draw the pectoral fins (middle fins). Once done, place them on top of the remaining pieces, right sides together. Secure with pins and cut them using a pair of scissors. Sew them together with a 1/4″ seam allowance. Once done, flip them. Press using an iron.

[social_warfare buttons=”Facebook,Twitter,WhatsApp,Pinterest”]
Step 2:
Get one piece of B and measure 3-5/8″ from the top of the left side of the fabric then clip the pectoral fin (middle fin). For the remaining ‘B’ fabric, measure 3-5/8″ from the top of the right side then clip the pectoral fin. Make sure that the fins are mirroring each other with the curves facing away from the side.
Step 3:
Place the two pieces of A fabrics on top of ‘B’ fabrics with the fins right sides together. Secure with pins. Sew them together with a 3/8″ allowance. once done, press the seams using your fingers with the seam towards the yellow fabric. Sew the seam on top.
Step 4:
Fold one piece in half. Measure 5/8″ from the fold of the B fabric and mark using chalk. Make a curve from the top right edge of the seam to the mark. Cut the curve while it’s folded using a pair of scissors. Place the two pieces of F fabric or the lining on the bottom of the other side of the fish. Then place the other side of the fish that’s already cut on top of the stack with the right side down. Cut the excess on the other fabrics by following the first pattern.
Step 5:
Separate them and put the lining aside. Get one side of the fish. Sew the dorsal fin on the upper curve and the tail on the end. Cut the excess on the back of the fins. Sew the buttons for the eyes on the upper part of the A fabric just beside the seam.
Step 6:
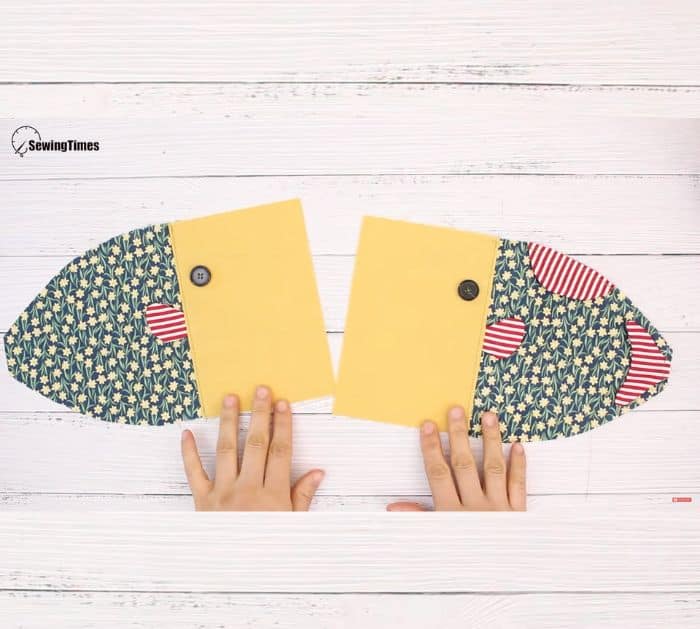
Place the lining on top of the two sides of the fish with the right sides facing. Sew the straight line edges together with a 3/8″ seam allowance. Press the seam allowance open using an iron. Place them on top of each other right sides together. Secure with pins. Make sure to fold the tail so you won’t sew it. Measure 3/4″ opening on the top and bottom of the fish and mark. Then mark an opening for the lining. Sew them together except for the openings with a 3/8″ allowance.
Step 7:
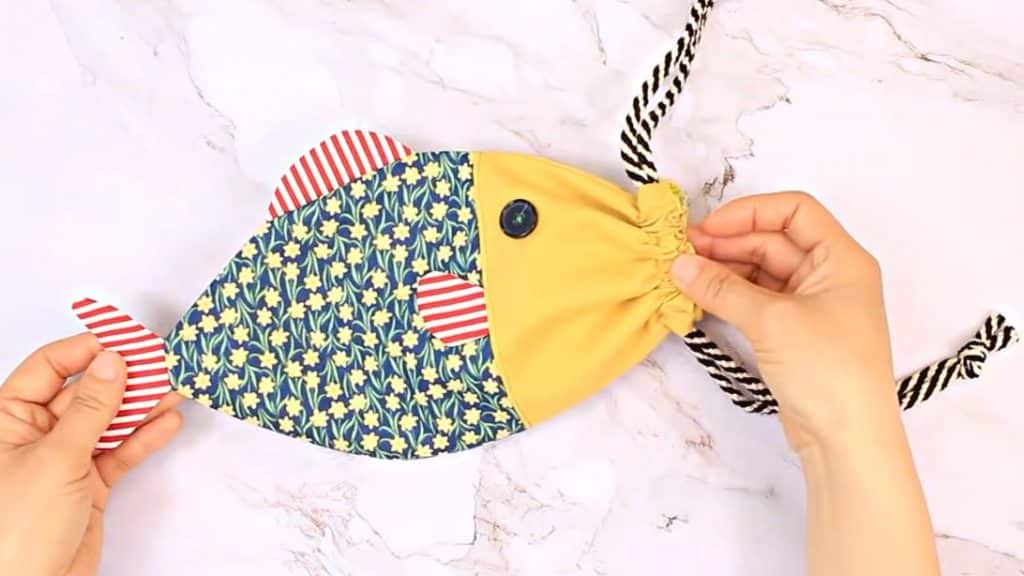
Pull the right side out from the opening on the lining. Once done, sew the opening on the lining and fold it inside the fish. Make a top stitch around the mouth of the fish and around again a 3/4 inch from the sides.
Step 8:
Cut the ropes into two pieces and insert both into the opening. Knot the sides and cut the excess. You are done!
DIY Fish Drawstring Pouch