I just had my old fence replaced and something in the back of my head was telling me not to have all of it hauled off. I’m so glad I listened to that small voice in my head because right after that I found this awesome tutorial!
I have this giant wall space in my living room I have been trying to think of a way to fill up for a while and I just couldn’t find any idea that I really loved. Until! I saw this huge clock tutorial on Pinterest!
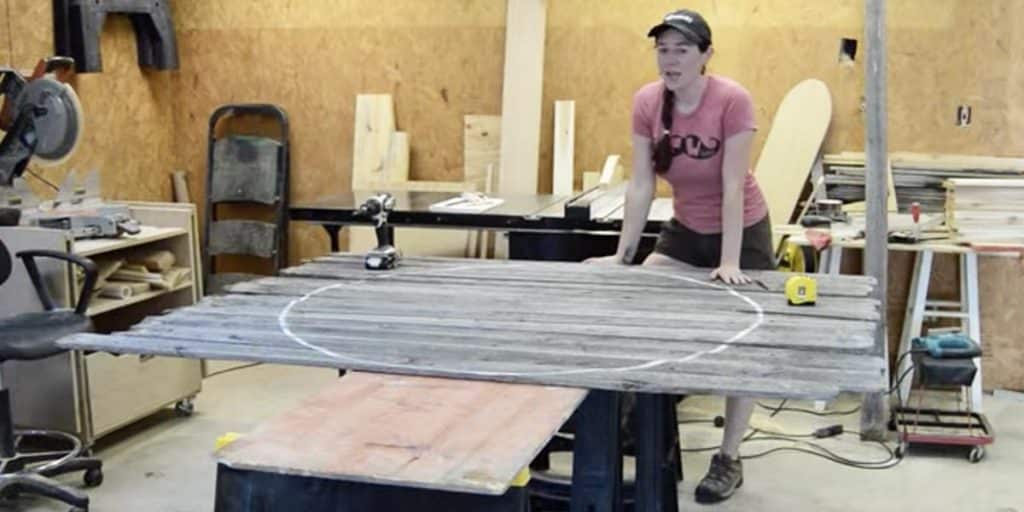
Here are the steps April Wilkerson says she took:
1) First thing I did was figure out how big I wanted it.
2) I figured if I wanted my clock to be 3′ in diameter that means the radius is 18″. I eyeballed where center was on the fence panel and drilled in a small screw with some of the head still sticking up, then tied a piece of string to it. Then I took my tape measure and measured out 18″ and tied a paint brush on that end.. essentially making a compass.
3) Next I got the white paint out and made me a circle. Just make sure you hold the string tight and go around until it’s complete.
4) I got my jigsaw and started cutting it out.
5) The jigsaw cut through the slats just fine, but not the horizontal railings that were nailed on the back of the panel. So after I finished the circle, I flipped the panel over and used my circular saw to make those cuts.


