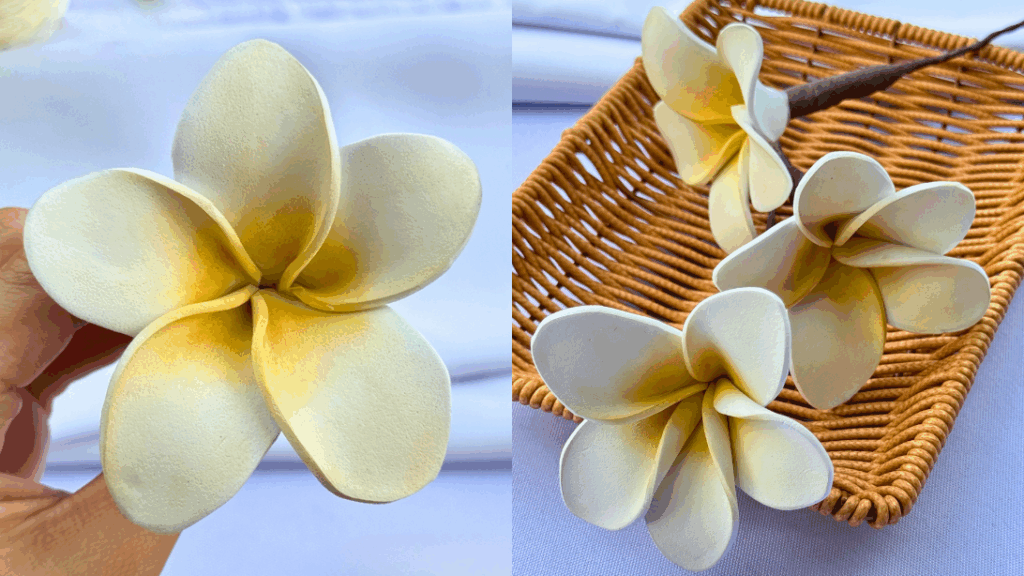
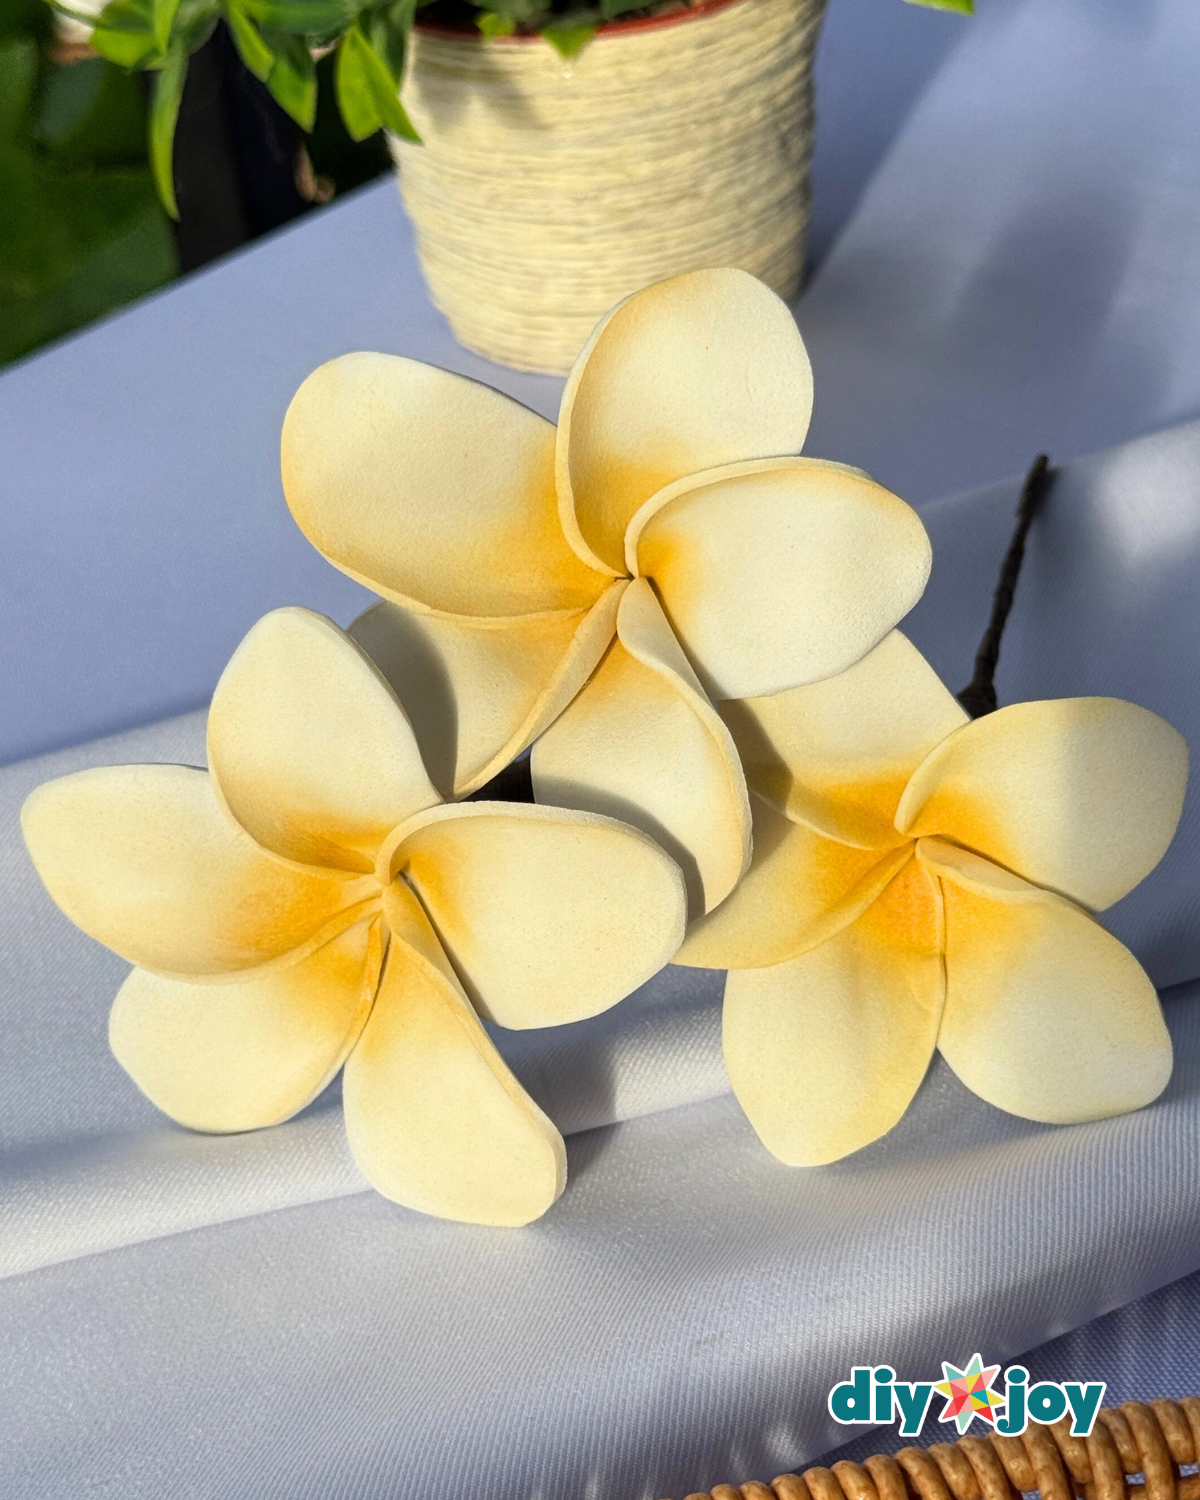
I have always loved the look of frangipani flowers. Their soft, curved petals and simple shape make them stand out without needing too many details. Instead of using real flowers that dry out quickly, I decided to recreate this design using craft foam. The result is a lightweight, long-lasting frangipani flower that you can use for so many different projects.
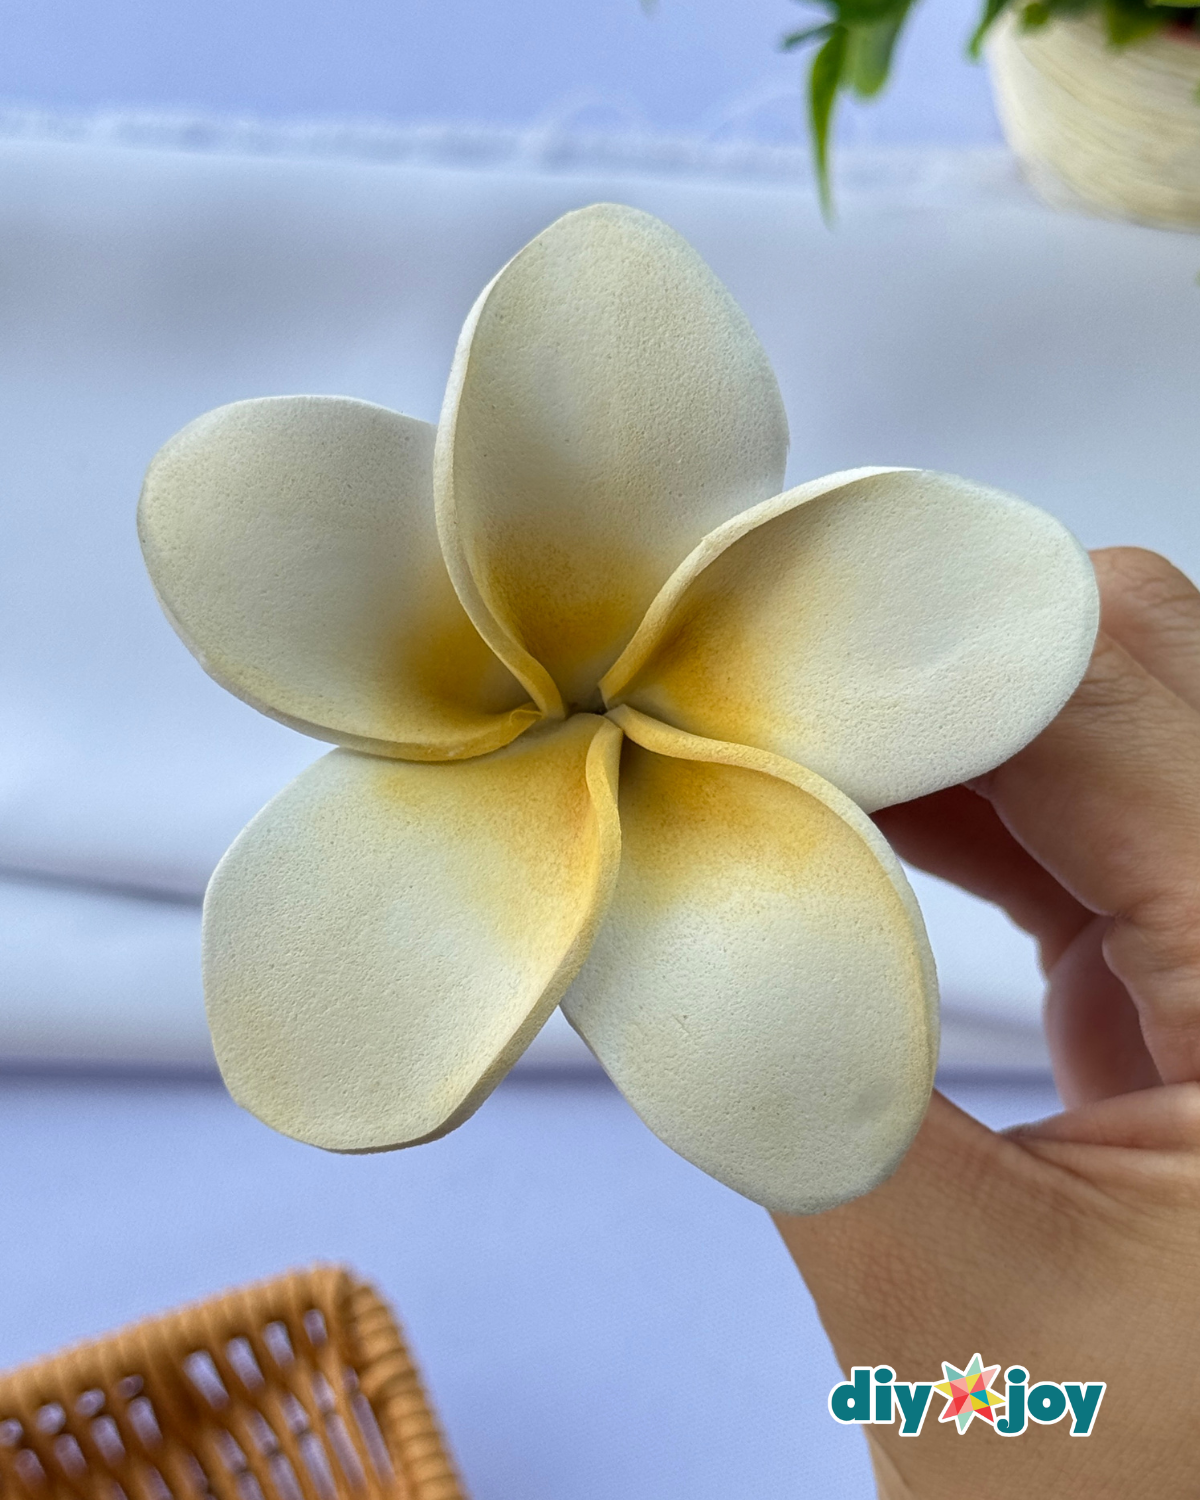
What makes this tutorial interesting is the shaping technique. Instead of leaving the foam flat, this method uses gentle heat from an iron to soften the foam sheet so you can bend and curve the petals naturally. This simple step makes a huge difference in the final result. The petals lift slightly and take on a more realistic form rather than looking stiff or cut straight from a template.
RELATED: Easy DIY Glitter Foam Flowers
This DIY frangipani flower made from a foam sheet is beginner-friendly and does not require expensive tools. Once you learn how to control the heat and shape the petals, you can easily create multiple flowers in different sizes and color combinations. They are perfect for hair accessories, party decorations, gift embellishments, or tropical-themed crafts.

If you want to try a flower craft that looks polished but is still easy to make, this technique is a great one to learn. Follow the step-by-step instructions below to see how a simple foam sheet and a bit of heat can transform into a beautifully shaped frangipani flower.
How to Make Magnolia Flower
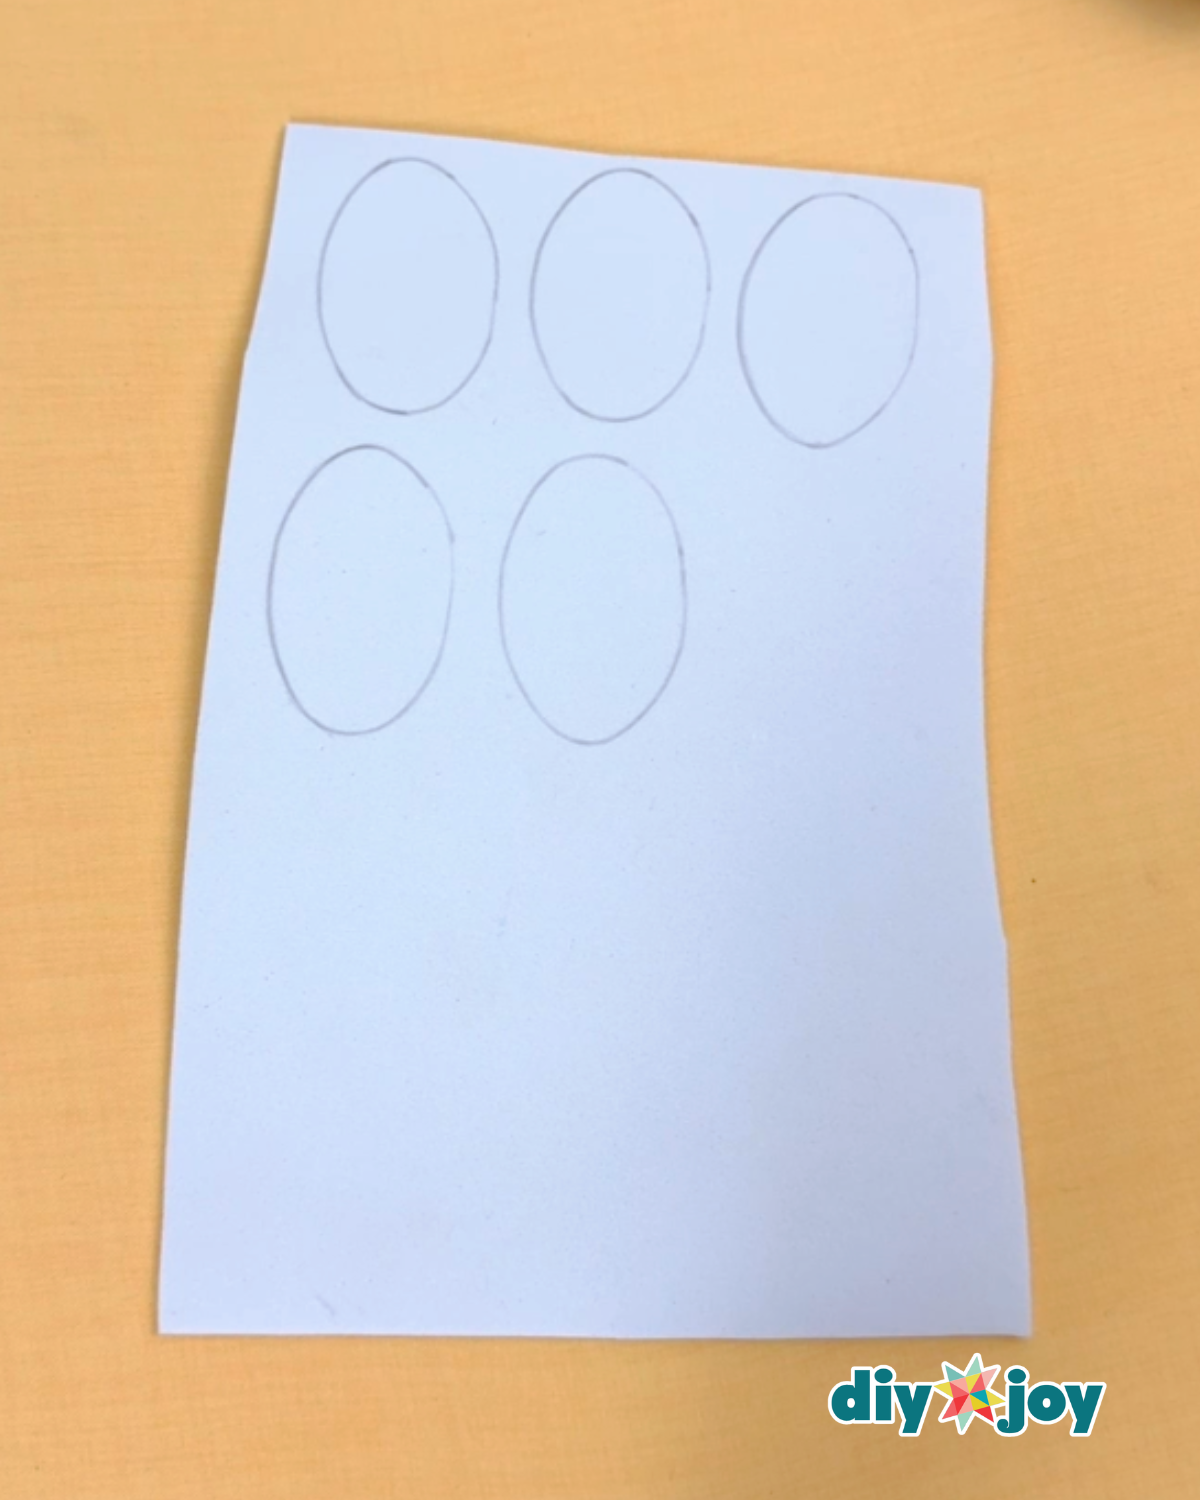
Step 1: Draw and Cut the Petals

Draw an egg-shaped template measuring approximately 5 x 3 cm on cardboard or paper. Cut out the template, then trace it onto a foam sheet five times. Carefully cut out all five foam egg shapes, making sure the edges are smooth and even.Step 2: Add Color to the Petals
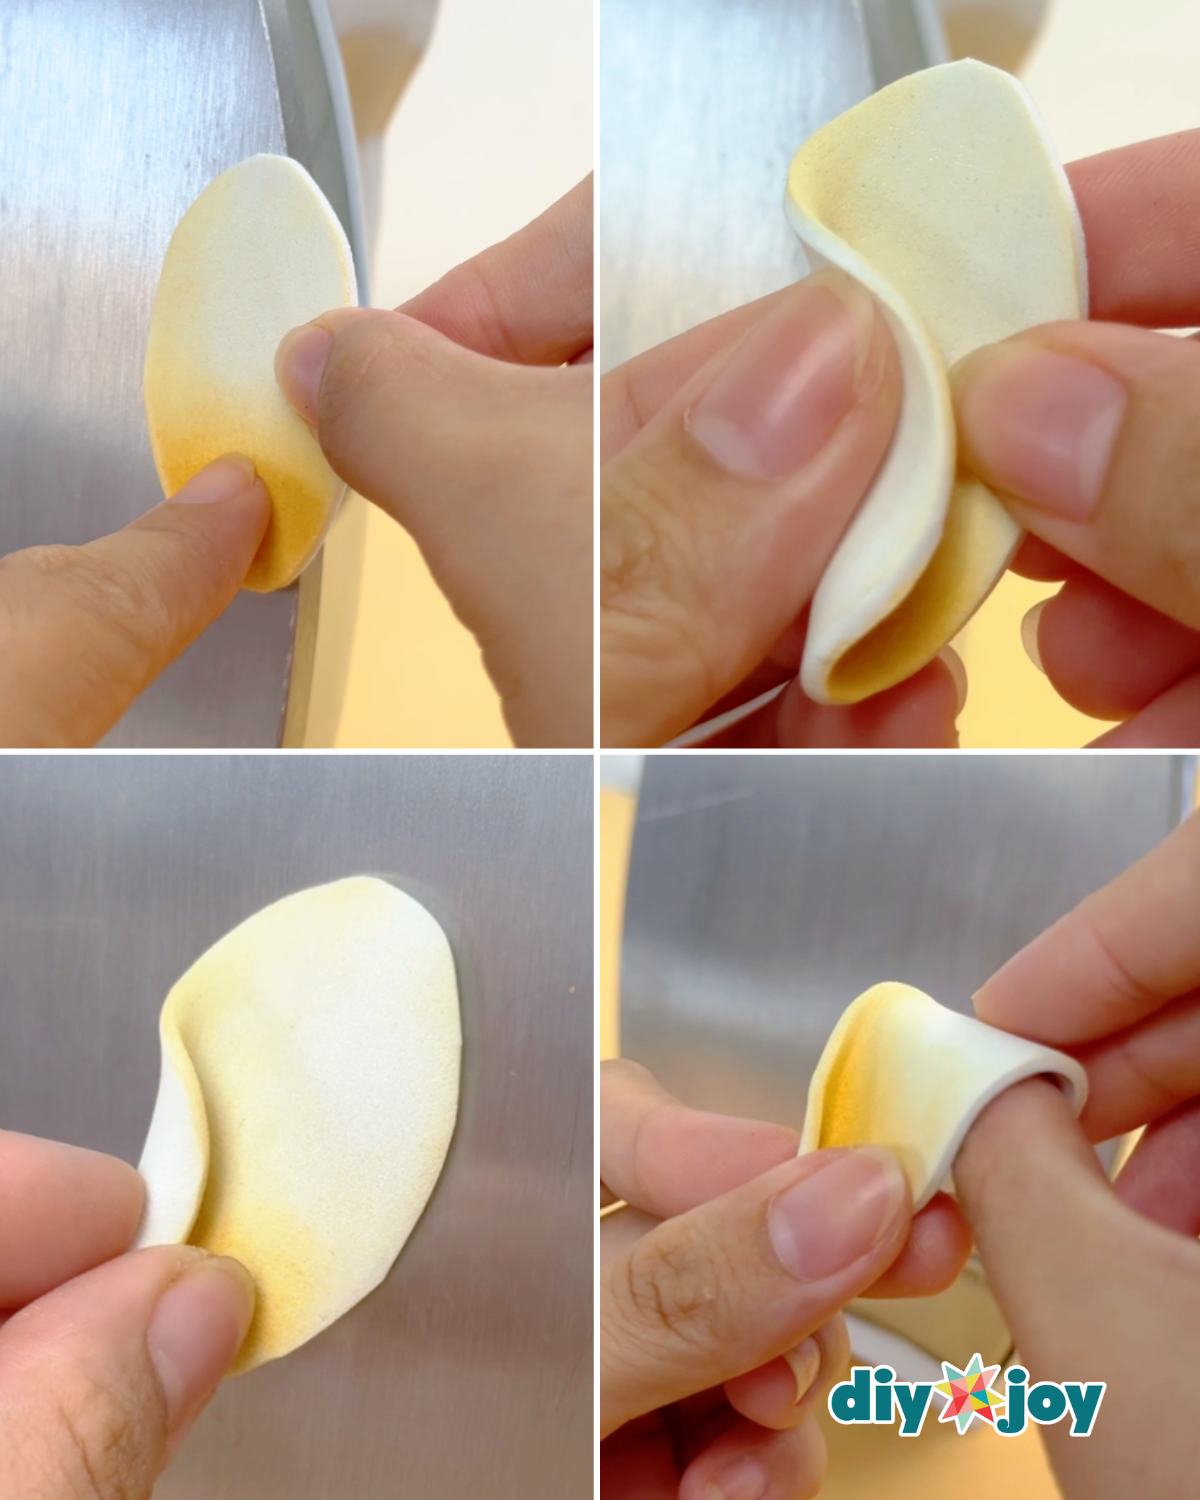
Scrub the pastel onto a plain sheet of paper, then use a brush to pick up the color and carefully apply it to the petals. Blend more color onto the bottom part and the left side of each petal for added depth.Step 3: Shape the Petals with Heat
Place the petal onto the iron, then as it begins to warm up, curve and fold the bottom left side inward as shown in the photo above. Once this is done, place the petal again on the iron and gently bend it backward to form the final shape.Step 4: Assemble the Flower
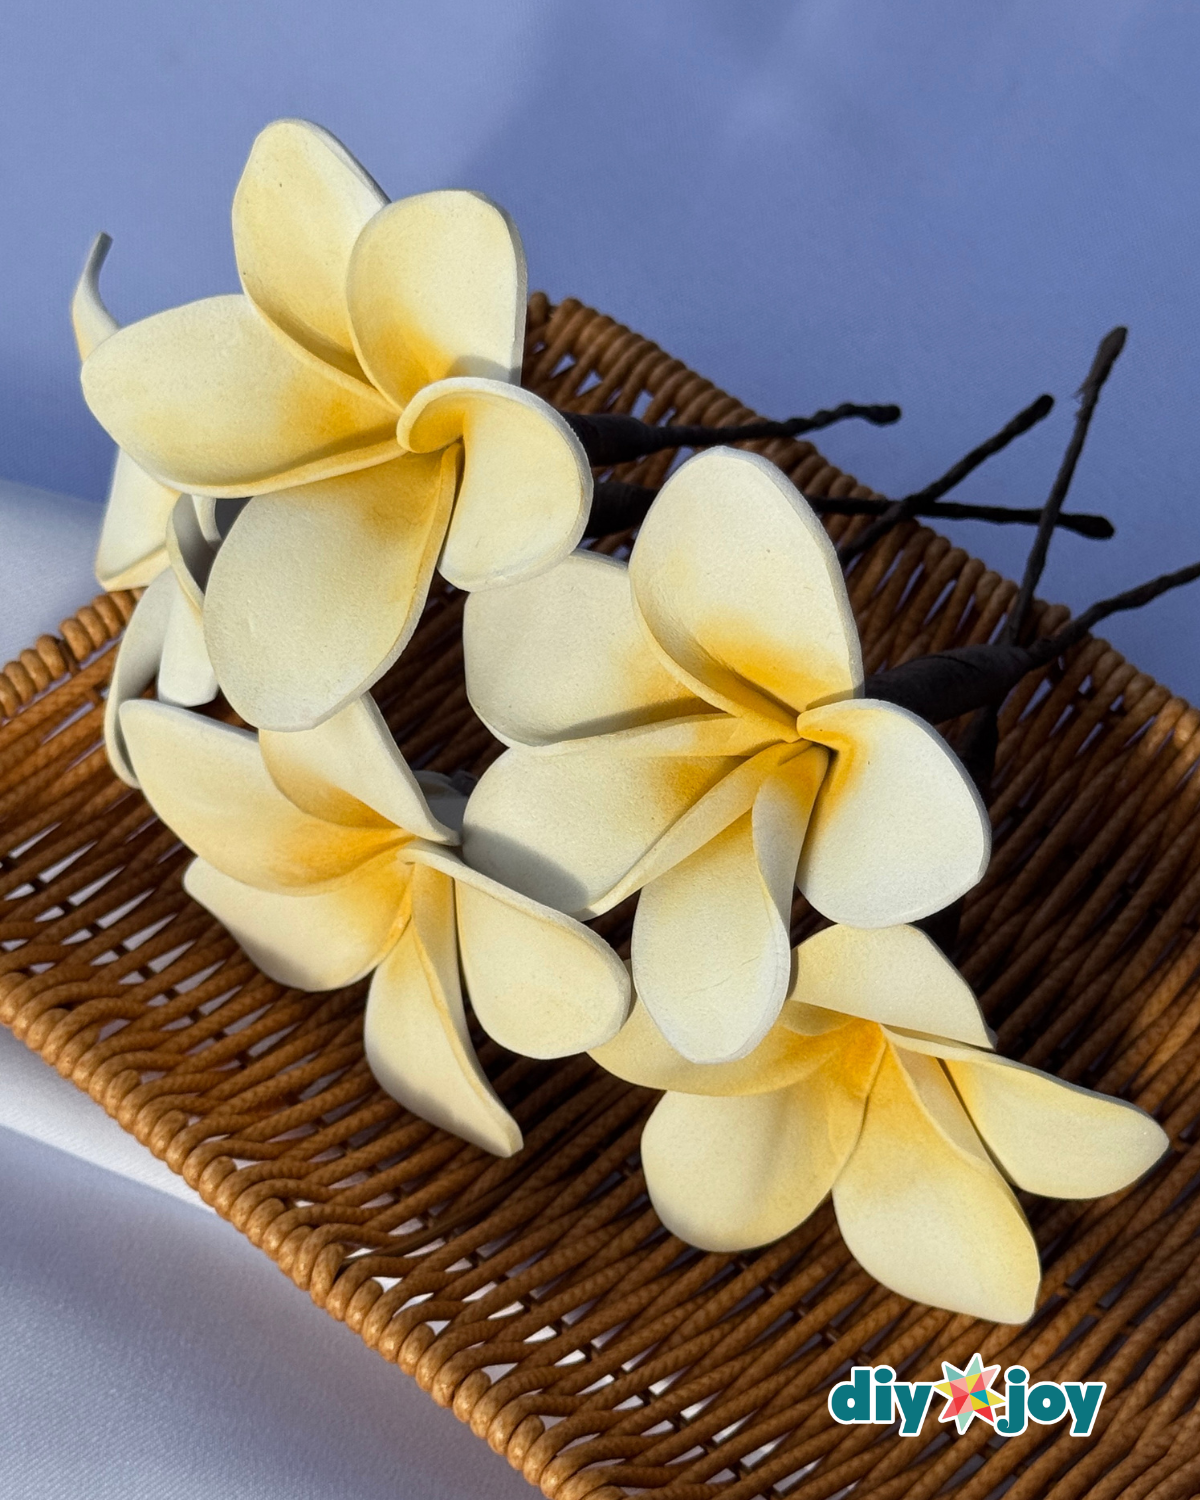
Apply hot glue to the bottom right side of a petal, then attach the next petal right above it, slightly overlapping the edges. Continue adding petals one by one until all are in place. Once complete, bring the edges of both petals together to lock the flower and form its final shape.Step 5: Create the Flower Stem
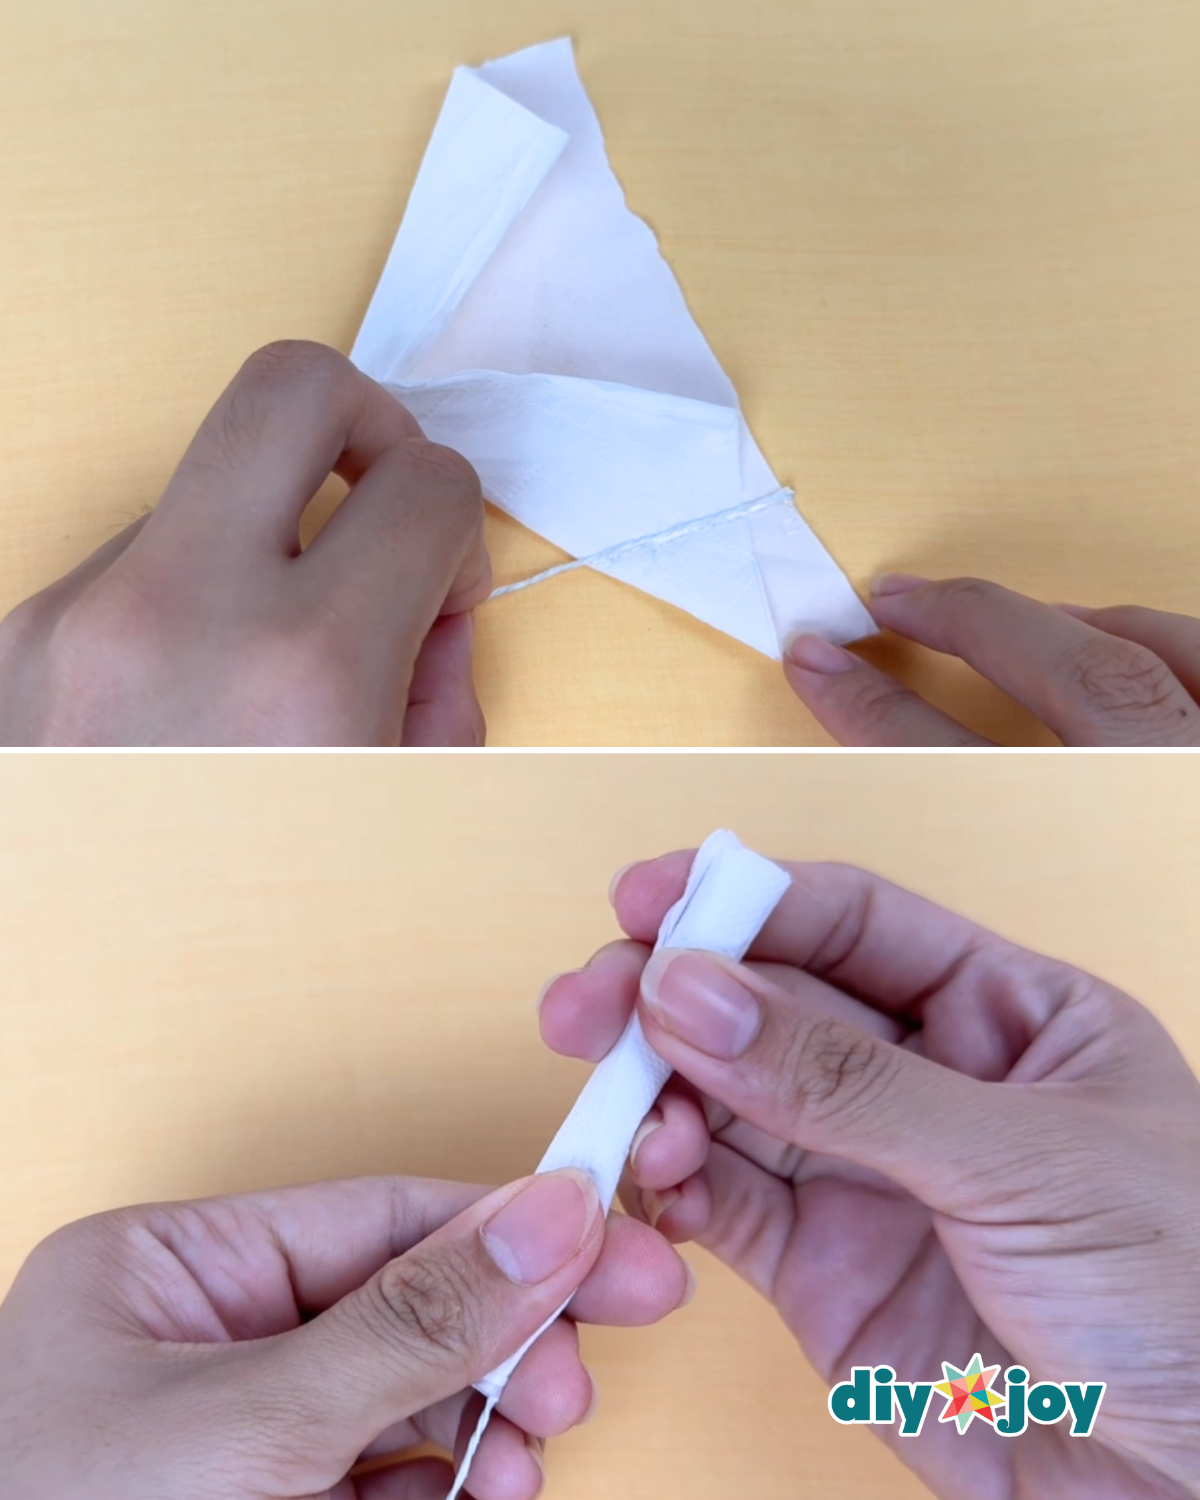
Take a piece of tissue paper and fold one side into a triangle (the shape doesn’t really matter, you can also just cut the tissue into a smaller piece, I just want to achieve a more triangular shape, or thick at the top and thinner at the bottom).
Apply a small amount of hot glue to the floral wire, then place the tissue on the wire and carefully roll it around the stick to form the upper part of the stem.Step 6: Attach the Flower to the Stem
Wrap the stem with floral tape to secure it firmly. Apply a small amount of hot glue to the top of the stem, then carefully attach the flower, pressing gently to hold it in place.


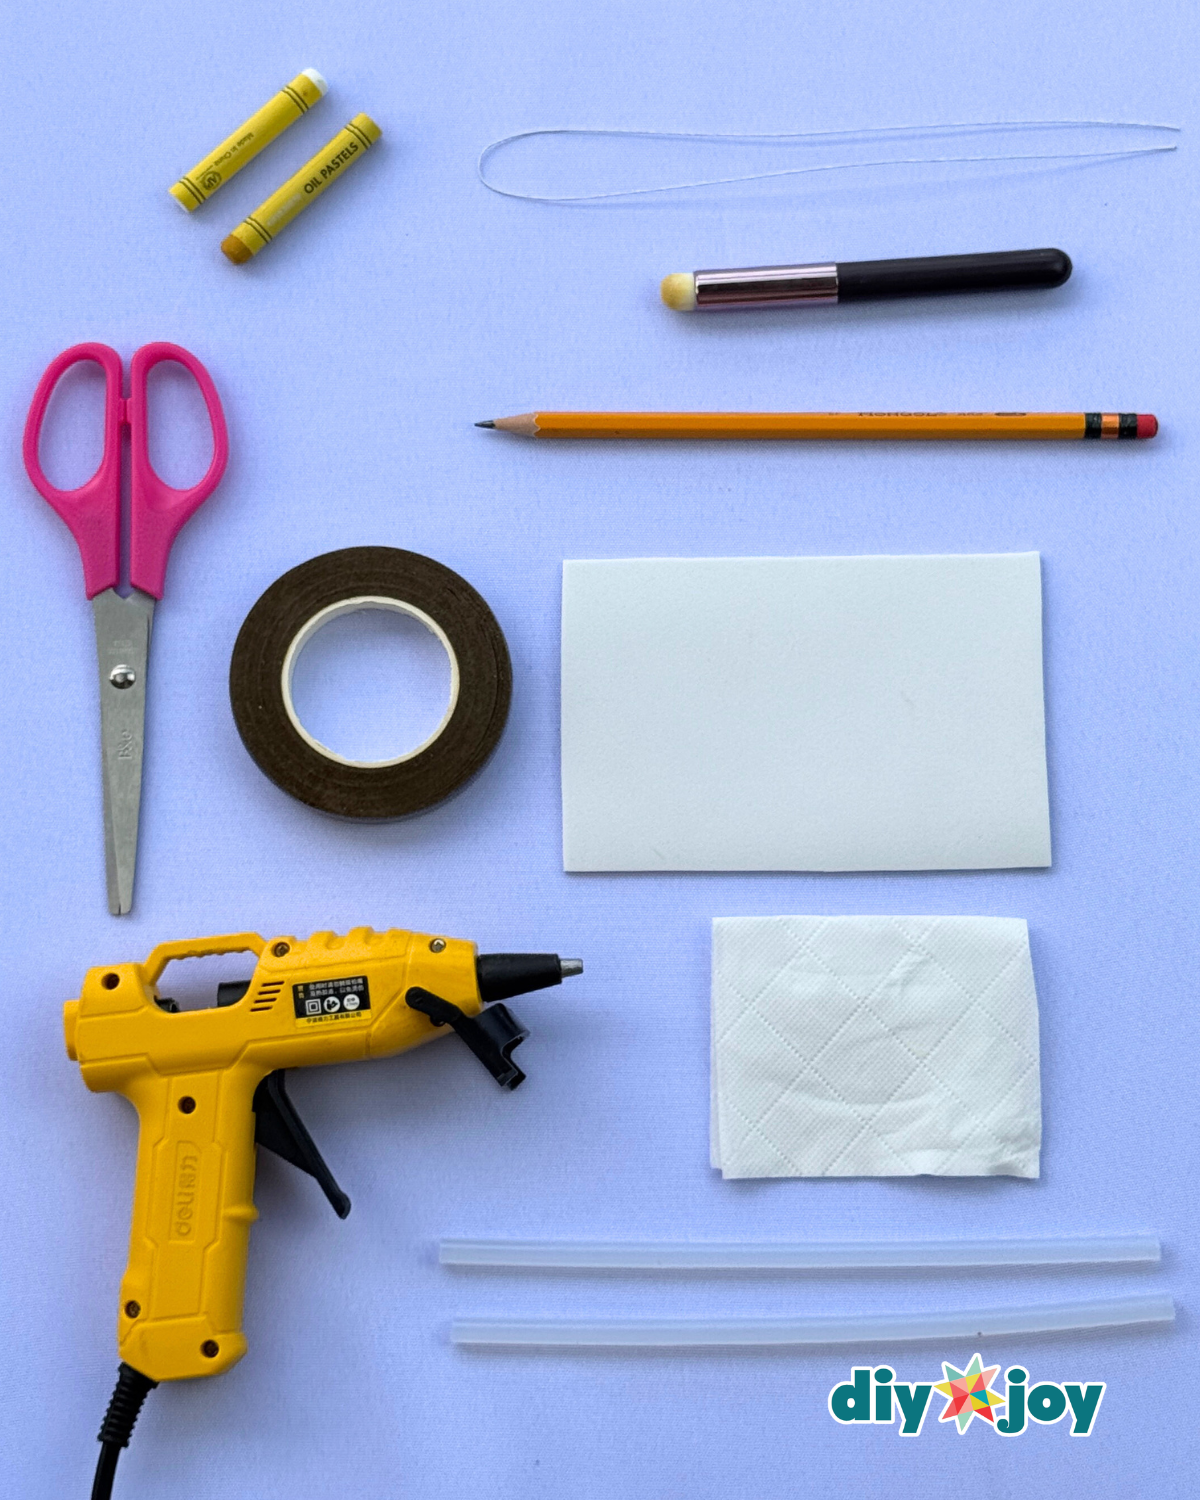
Materials
- White Craft Foam
- Floral Wire
- Oil Pastel
- Brush
- Scissors
- Floral Tape
- Tissue
- Hot Glue Gun and Glue Sticks
- Iron
![]()
Pro Tip
Use low to medium heat only. Foam softens quickly. Set your iron to low or medium heat with no steam. Too much heat can shrink or warp the foam.
What Craft to Try Next?

Paper Flowers

Crafts

Paper Flowers

Crafts
*If you love this craft, then visit our official website, follow our Facebook page, and subscribe to our YouTube channel for more!
Easy Craft Foam Frangipani Tutorial