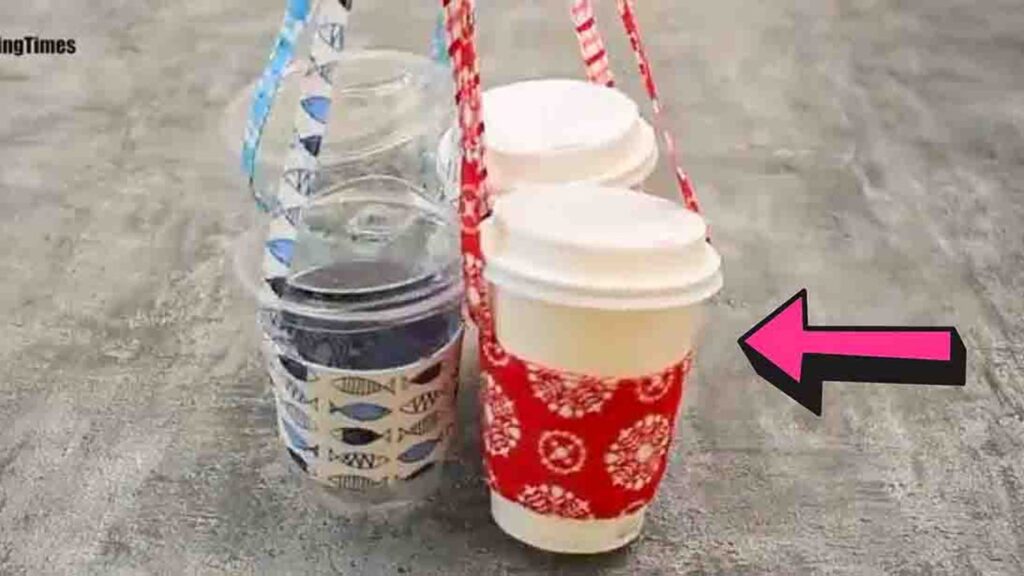
If you’re looking for DIY crafts you can sell on the local craft market, try making these cute DIY coffee sleeve holders from sewingtimes on Youtube. These sleeve holders are also the perfect personalized gift idea for your friends or family who loves coffee! Watch the video tutorial below to learn the step-by-step instructions.
Materials:
Outer layer fabric:
- one – 11 1/8″ x 3 3/4″
- one – 1 5/8″ x 20″
Lining fabric:
- one – 11 1/8″ x 3 3/4″
- one – 10″ x 3 1/4″ even fusible interfacing
- (click here for the free pattern)
Directions:
Step 1
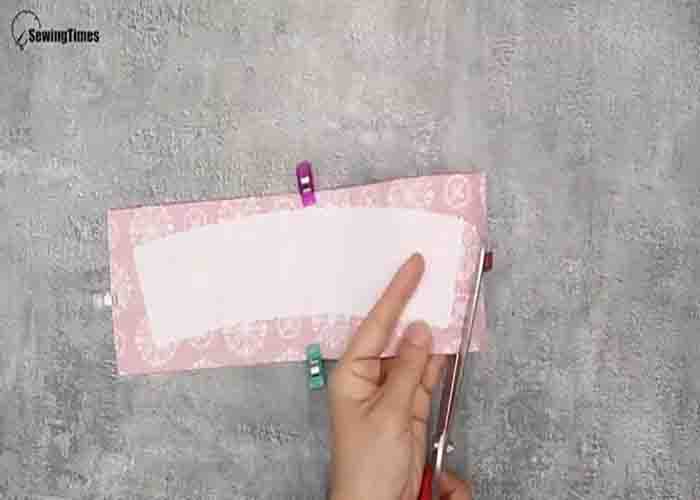
To start, cut all the required fabric sizes for the project. Once you have all the fabric pieces and the template cut, start assembling the coffee sleeve holder. Trace the template on the fusible interfacing first, then cut it. After this, put it over the wrong side of one of the 11 1/8″ x 3 3/4″ fabrics, then press it. Next, put both 11 1/8″ x 3 3/4″ together on the right sides, clip them to secure them in place, then cut along the fusible interfacing with a 3/8″ allowance. Set it aside. Moving on with the 1 5/8″ x 20″ strip, fold it twice, clip to secure, then sew. Back to the main piece, mark both sides on the right side, 3/4″ from the side edge, then attach both ends of the string on both marks you just made. Sew to secure.
[social_warfare]
Step 2
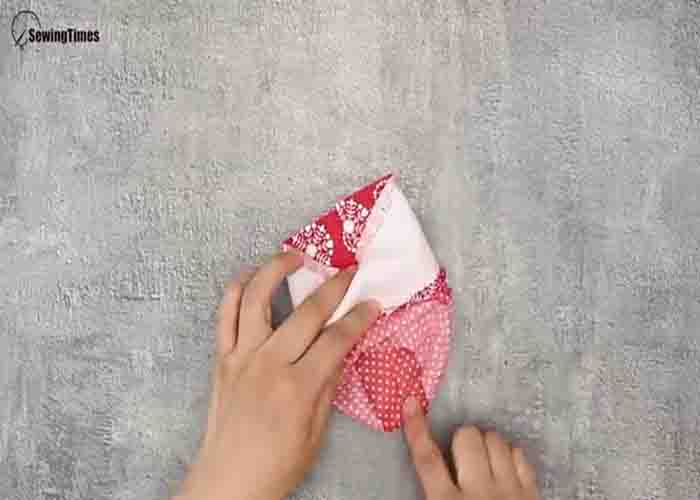
Next, place the remaining 11 1/8″ x 3 3/4″ fabric piece on the right side on top of the other piece, sandwiching the string in the middle. Sew the bottom with a 3/8″ seam allowance, then clip along the seam. Once done, open it up, then fold it, lining up the seams. Sew with a 3/8″ seam allowance. After this, press the seams open. Now, gather the string inside, crumple one side of the sleeve, then fold it in half. Pin in place, then sew with a 3/8″ seam allowance. While sewing, pull the crumpled part and continue to sew along the edges, leaving a gap. Once done, turn the sleeve right side out through the gap, then sew it close. Press it nicely, then stitch along the bottom and top edges. Your DIY coffee sleeve holder is now finished!
DIY Coffee Sleeve Holder Tutorial


