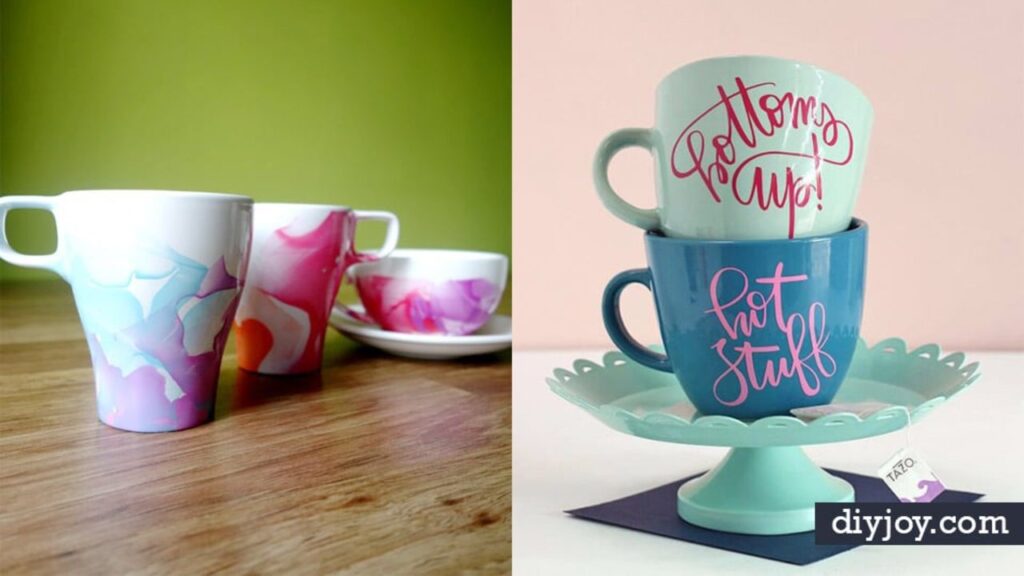
A plain white mug is basically a blank canvas that happens to hold coffee. These 18 DIY coffee mug ideas turn dollar store and thrift store mugs into gifts people actually keep: Sharpie and paint pen designs, painted polka dots, a speckled faux pottery dip, gold dipped and spray painted bottoms, vinyl lettering, glitter heat transfer vinyl and a vintage postcard decal. Two DIY JOY video tutorials join the list, a Sharpie letter mug and a Sharpie heart mug, both made by dotting color around a paper cutout. Most of these need a marker or a little paint and a slow bake in a cold oven to set the design, so pick a favorite and go raid the cupboard.
1. DIY Polka Dot Mug
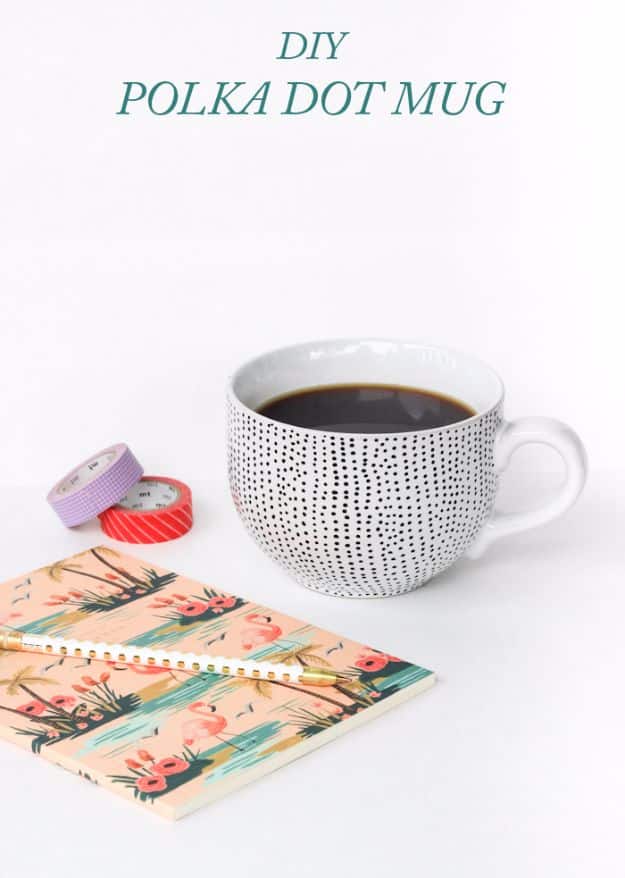
A porcelain paint pen turns a plain ceramic mug into a dotted, dishwasher safe mug in about 45 minutes, bake time included. The tutorial is refreshingly honest about what went wrong: hole reinforcement stickers used as a dot stencil pulled the paint right off when they were peeled. The fix is to skip the stickers and dot freehand with the marker tip. Mistakes scrub off before baking. Bake at 300°F for 35 minutes, putting the mug in while the oven preheats, then let it cool inside.
Get the full tutorial at The Crafted Life.
2. DIY Stenciled Coffee Mug

This stenciled coffee mug pairs a cut stencil saying with a confetti of painted dots. Cut a phrase from stencil tape with scissors, a craft knife or a cutting machine, smooth it onto the mug, then dab on a very thin coat of acrylic paint with a dauber and peel the tape right away for crisp edges. For the confetti, dip a pencil eraser in tiny dabs of paint and dot it around the cup. Gift it with a little baking soda for scrubbing out coffee rings.
Get the full tutorial at Damask Love.
3. Personalized Coffee Mug
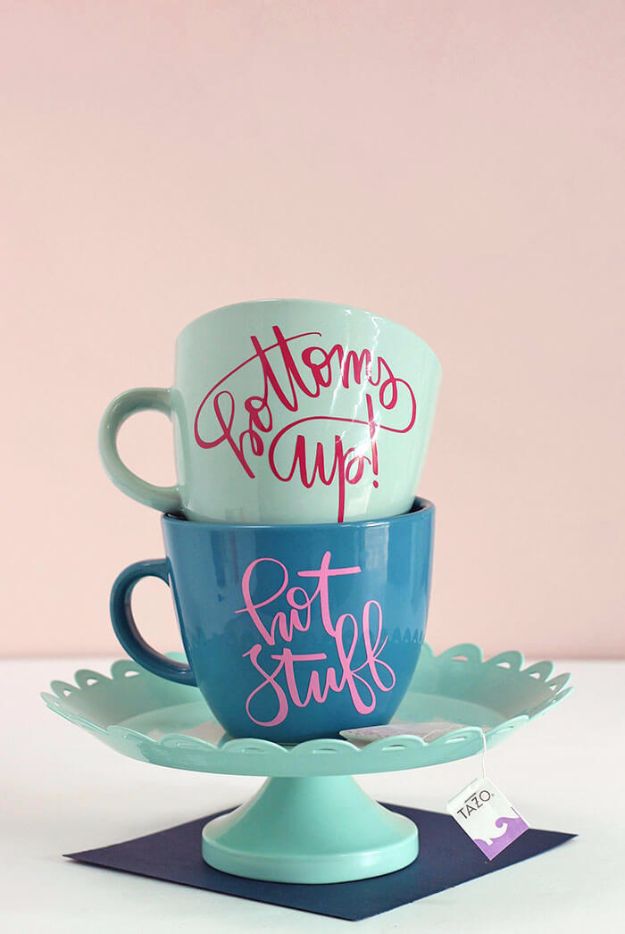
Personalized mugs and tea cups get a professional finish with permanent adhesive vinyl. Cut the design on a Silhouette or Cricut (free hot stuff and bottoms up files come with the tutorial), weed away the excess and lay transfer tape over the top. Delicate script works best with reverse weeding, which the post walks through step by step. Clean the cup, press the decal on and peel the tape slowly. No machine? Simpler shapes cut fine with scissors or a craft knife.
Get the full tutorial at Persia Lou.
4. DIY 5-Minute Decal Transfer On A Coffee Mug
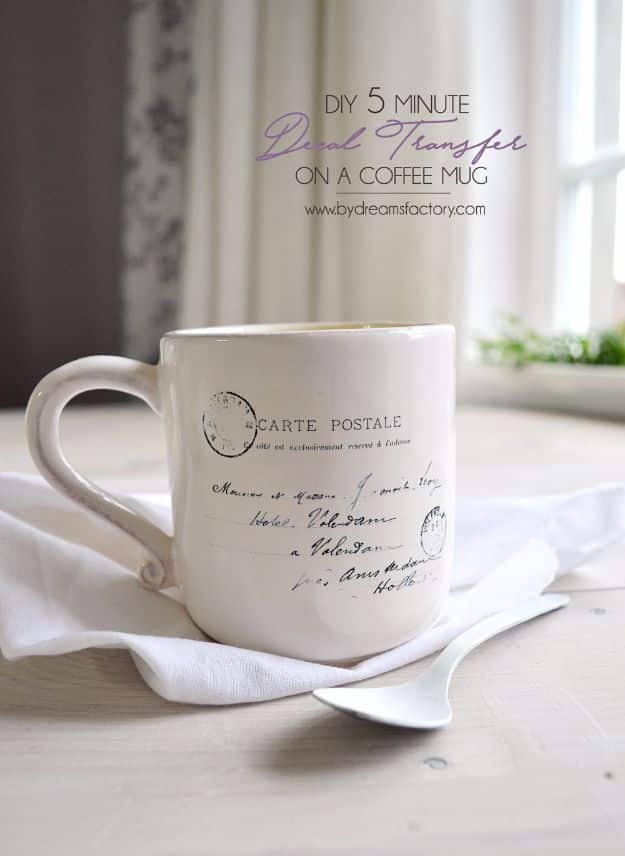
Waterslide decal paper puts any printed image on a coffee mug in about five minutes. Print a vintage French postcard (or any graphic you love) onto the decal paper, cut it out and soak it in plain water. Slide the decal off its white backing onto the mug, then press out air bubbles with a paper towel. The result looks like an old postcard stamped right onto the cup. Print several images on one sheet so none of the paper goes to waste.
Get the full tutorial at Dreams Factory.
5. DIY Speckled Dip Mug
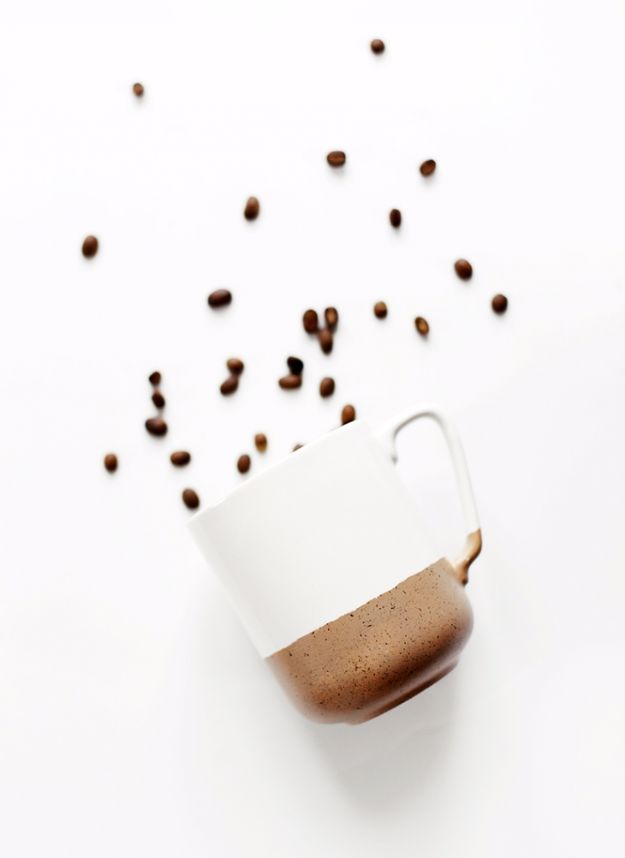
A speckled dip mug fakes the look of handmade pottery with a raw clay bottom. Tape off the lower part of a white mug, paint a couple of coats of a light tan, then flick a darker brown over it by running your thumb across a stiff brush. Remove the tape and let it dry. Cure it in the oven by putting the mug in upside down before the oven heats, bringing it to 350°F and baking 30 minutes, or let it cure for 21 days.
Get the full tutorial at The Merrythought.
6. DIY Sharpie Letter Mug
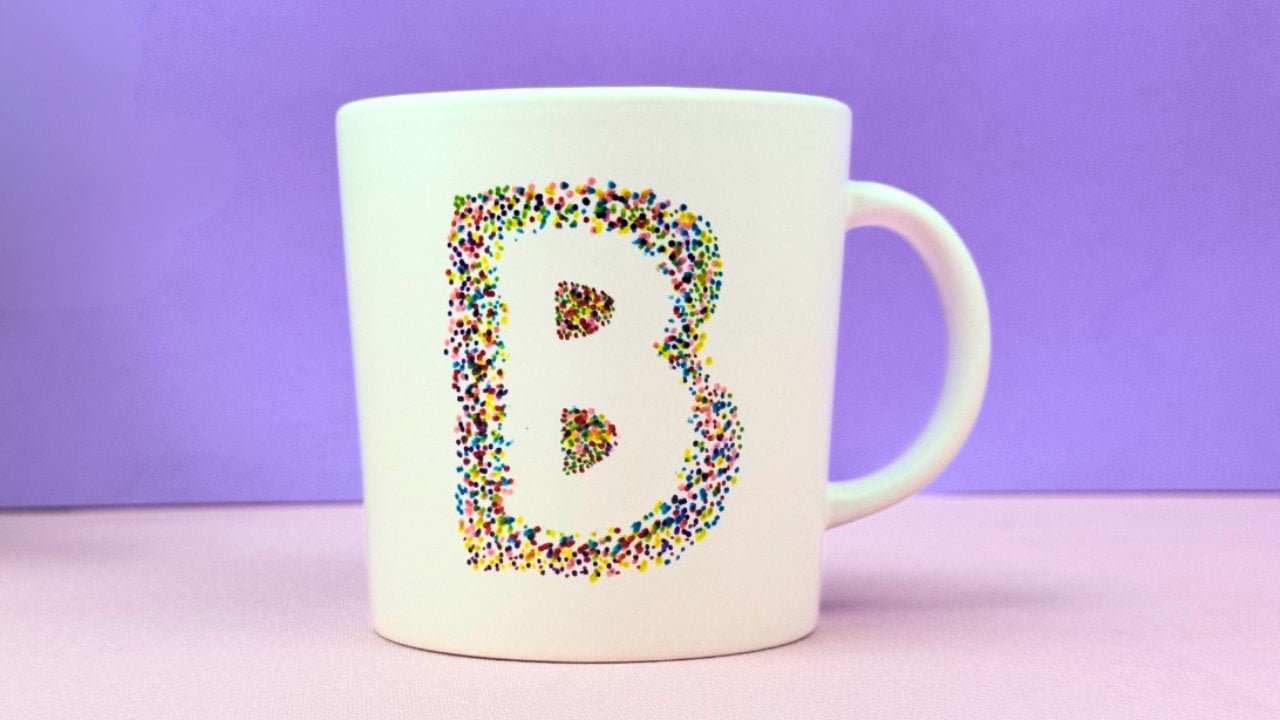
This Sharpie letter mug uses a paper cutout as a mask, so the initial shows up inside a halo of tiny colored dots. Write your letter on paper, cut it out and coat the back with a Zig glue pen, waiting until the glue dries from blue to white so it peels away cleanly later. Stick the letter in the center of the mug, dot all around it in several Sharpie colors, then lift the letter off. The video shows every step, and initials make it a quick personalized gift.
Get the full tutorial at DIY JOY.
7. DIY Merry and Bright Vinyl Mug

Red script vinyl turns a plain white mug into a Christmas gift for coffee or hot chocolate. The hand lettered merry and bright phrase was sized to about 3.1 by 2.9 inches and cut on a Silhouette, and Oracal 651 permanent vinyl was the only one that worked well on the mug. Weed the design, wash the mug and wipe it with rubbing alcohol on a cotton ball, then let it dry. Lay the transfer tape where you want the words, rub over it with a scraper and peel the tape away. Tuck Christmas candy inside and it is ready to give.
Get the full tutorial at Purely Katie.
8. Glitter Heat Transfer Vinyl Mug

Glitter heat transfer vinyl makes a sparkly coffee mug that held up to two weeks of dishwasher runs without peeling. Measure the printable area of the mug, size the design and mirror it before cutting glitter HTV (not smooth) on a Silhouette, then weed. The sticky carrier sheet holds it in place. Press with a household iron on the cotton setting, steam off, through a thin fabric barrier, moving along the curve. Layer a second color the same way.
Get the full tutorial at Silhouette School.
9. DIY Love Mug
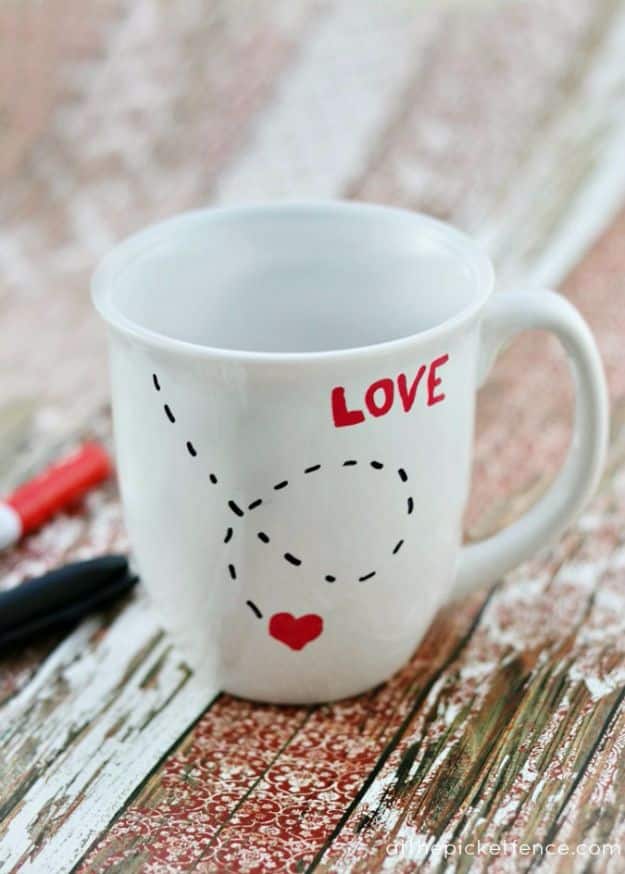
The love mug is a Valentine’s Day gift that costs a couple of dollars: a dollar store mug, a red paint pen and a black paint pen. Draw a dashed line that loops like the flight path of a little heart, finish it with a red heart and write love above it. Decorate both sides if you like. Set the mug on a cookie sheet in a cool oven, bring it to 350°F, bake 20 minutes and let it cool inside. Hand washing keeps the design looking fresh. Tuck chocolate dipped spoons inside for a teacher or coworker gift.
Get the full tutorial at At The Picket Fence.
10. DIY Sharpie Heart Mug
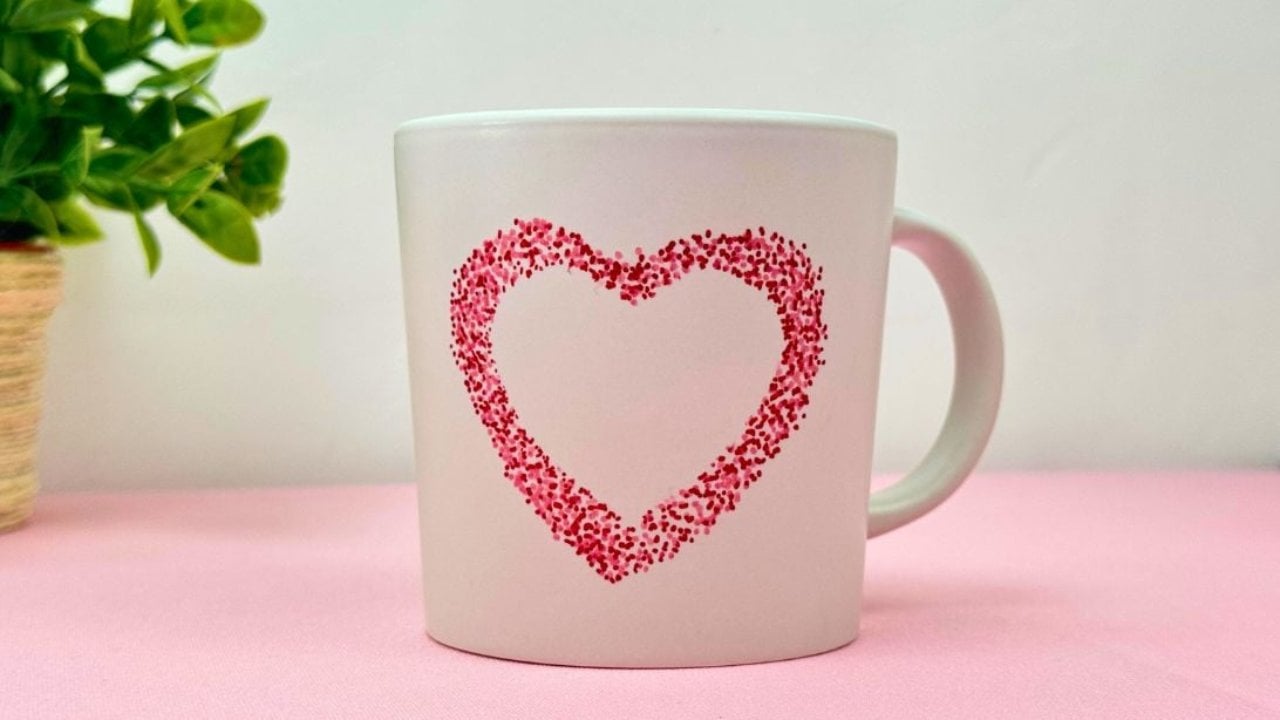
This Sharpie heart mug is a sweet Valentine’s Day gift you can finish in one sitting. Draw a heart on paper, cut it out and coat it with a Zig two way glue pen. Once the glue dries from blue to white it turns repositionable, like a sticky note. Press the heart onto the mug and ring it with red and pink dots, letting a few overlap the paper. Peel it away to reveal a crisp heart. Oil based paint markers and a cold oven bake make it last.
Get the full tutorial at DIY JOY.
11. Easy DIY Harry Potter Coffee Mugs

These Harry Potter coffee mugs use a pencil transfer trick, so no freehand drawing is needed. Print the design (platform 9 3/4, round glasses, mischief managed), shade the back of the paper with pencil, tape it to the mug and trace over the lines to leave a faint outline. Fill it in with oil based Sharpie paint markers. Let the mugs sit overnight, then put them in a cold oven, heat to 325°F and bake an hour, cooling inside. Dollar store mugs keep the cost low.
Get the full tutorial at Surviving A Teacher's Salary.
12. DIY Painted Coffee Mug Gift Idea

A snowman mug that says I’d melt for you is the kind of cheesy holiday gift everyone secretly loves. This one uses food safe ceramic markers sold with matching mugs: dots for the eyes and smile and a little orange carrot nose. Not happy with it? Wash it off with warm water before baking. Once the design is right, bake at 375°F for 40 minutes and let it cool in the oven. Add wooden spoons dipped in chocolate, sprinkles and mini marshmallows.
Get the full tutorial at The Inspiration Board.
13. DIY Gold Dipped Mug
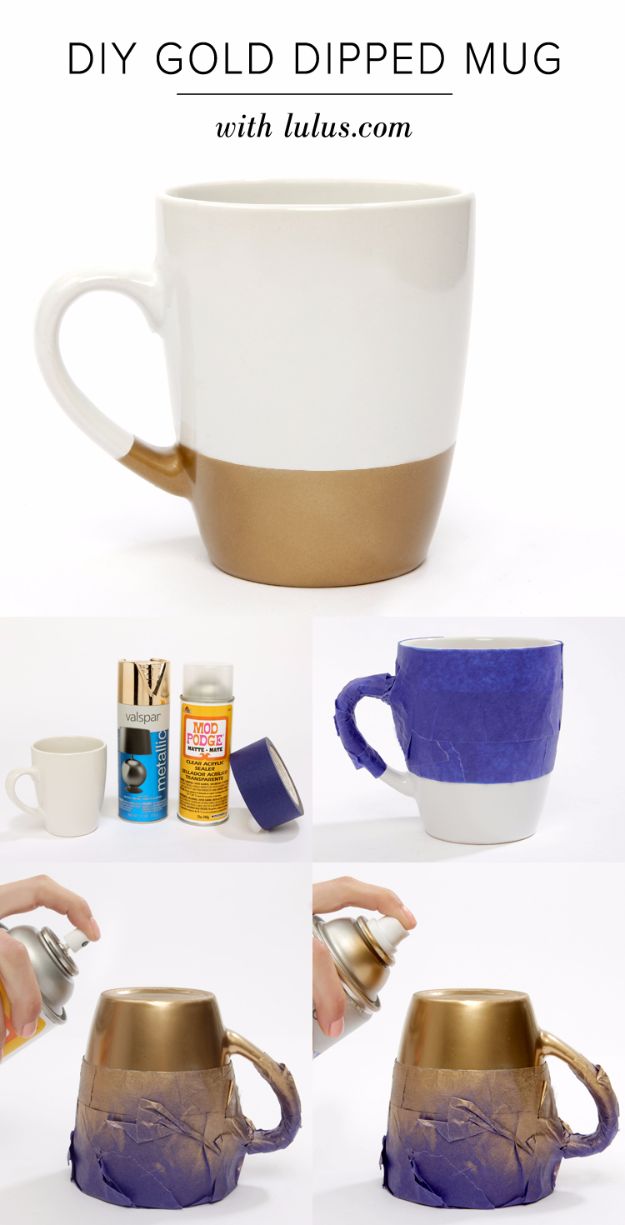
A gold dipped mug looks straight out of a boutique and needs only a plain white mug, painter’s tape, matte gold spray paint and Mod Podge or a clear ceramic sealer. Tape off everything you want to stay white, including the lip of the mug, and smooth the tape so the line stays crisp. Set the mug upside down on newspaper and spray the bottom from about 15 inches away in short bursts. After five minutes, apply the sealer, then peel the tape five to seven minutes later so it does not lift the paint. Hand wash only.
Get the full tutorial at Lulus.com Fashion Blog.
14. Spray Painted Coffee Mugs
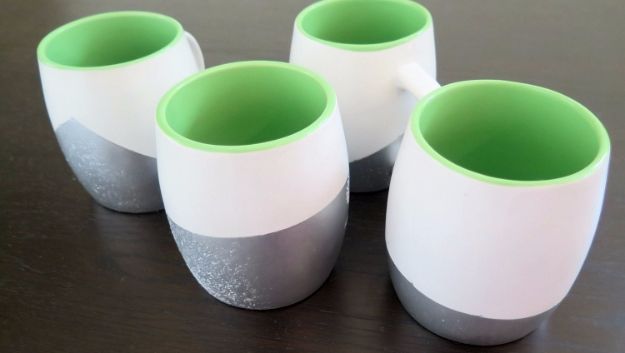
Thrift store mugs at 50 cents each get a modern refresh with painter’s tape and spray paint. Wash and dry the mugs, then tape a design that keeps paint on the lower half, covering the handle and rim. Spray outdoors with the mugs set inside a paper grocery bag to contain overspray, two coats an hour apart, and dry overnight. Peel the tape, set the mugs upside down on a baking sheet in a cool oven, heat to 300°F for 40 minutes and let them cool. Hand wash.
Get the full tutorial at Crazy Organized.
15. DIY Handprint Mug
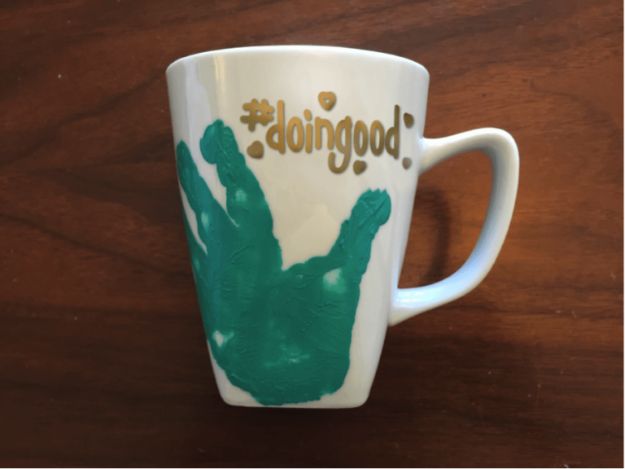
A handprint mug turns a child’s painted hand into a keepsake you’ll actually use every morning. Brush gloss enamel paint evenly over the little hand, press it onto a plain white mug for a few seconds and lift straight up. A second adult holding the mug steady helps a lot. Let it air dry at least an hour, then add a word or hashtag with an oil based Sharpie and finish with a gloss acrylic sealer. It makes a sweet Mother’s Day or grandparent gift.
Get the full tutorial at LifeAsMama.
16. DIY Initial Marker Mug
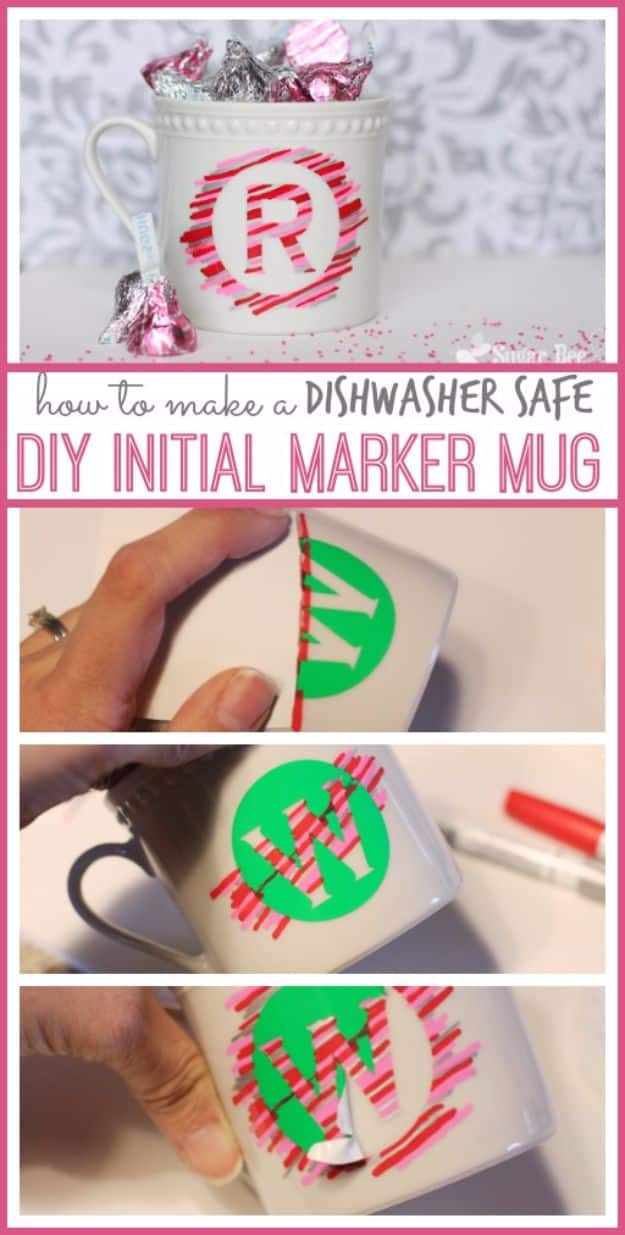
Initial marker mugs use a circle stencil with a letter cut out, then fill the circle with stripes or dots in oil based Sharpie. Clean the mug with rubbing alcohol, stick on the stencil and layer lines of varying length and thickness past the edge, or build up dots in several colors from the edges in. Peel the stencil to reveal the letter. Let the design set a couple of days, bake in a cold oven brought to 375°F for 30 minutes, then cool inside. It passed a top rack dishwasher test.
Get the full tutorial at Sugar Bee Crafts.
17. DIY Hand Lettered Coffee Mug
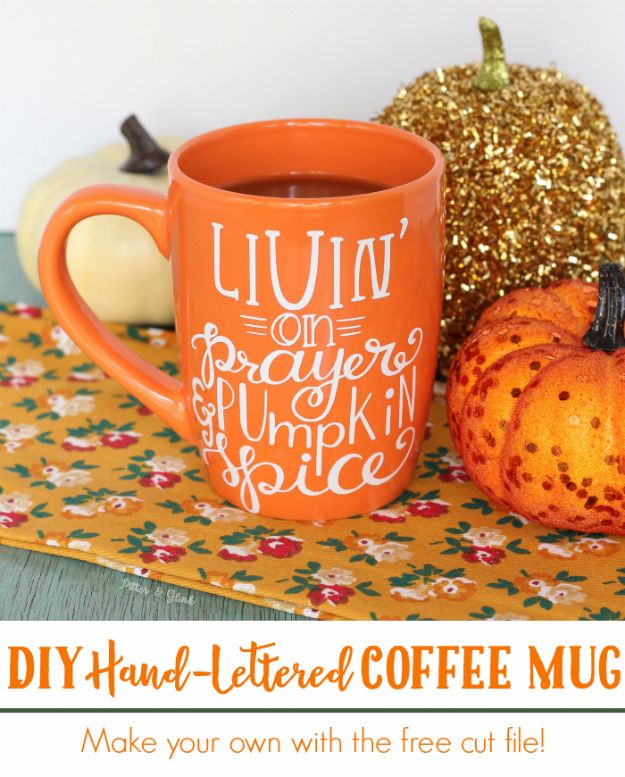
A $1 orange mug becomes a fall favorite with a free hand lettered livin’ on prayer and pumpkin spice cut file. Download the Silhouette Studio or SVG version, size it to the mug and cut it from vinyl, doing a test cut first. Weed the design, cover it with transfer tape and trim close with slits so it bends around the curve. Clean the mug with alcohol, then tear a strip from the middle of the backing to center the decal before smoothing it down.
Get the full tutorial at Pitter and Glink.
18. DIY Painted Ceramic Mugs with Martha Stewart Glass Paint and Stencils
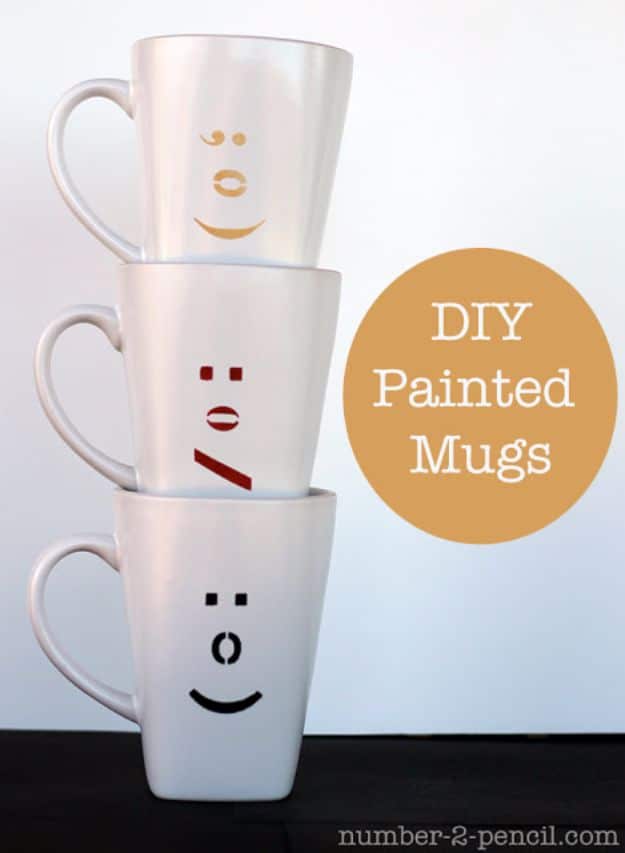
Punctuation stencils turn plain mugs into little emoticon faces, a sassy one in gold and a meh one in red for pre-coffee mornings. Wash the mugs, wipe them with alcohol, then stick on adhesive letter stencils. Tap a tiny amount of glass paint on with a small dauber, offloading the excess first, and lift the stencil while the paint is still wet. Air cure 21 days, or put the mugs in a cold oven set to 350°F, turn it off after 30 minutes and cool inside.
Get the full tutorial at No. 2 Pencil.