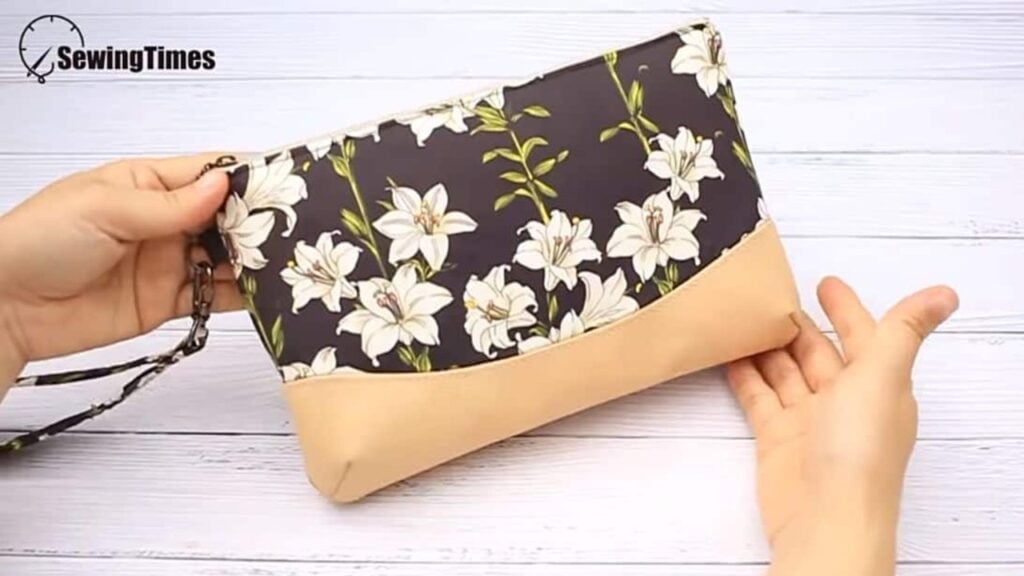
This DIY clutch purse bag and wrislet by sewing times is a lovely and easy project you can do at home. You can use this whenever you shop and do some errands. The pocket inside makes it easier to separate your money from your other things. Read on or watch the video tutorial below for the full instructions.
Materials:
- paper
- ruler
- pencil
- marker
- 2 pieces of 11-1/2″ x 7-1/2″ lining
- fusible fleece
- 2 pieces of 11-1/2″ x 5-1/2″ outer layer
- 2 pieces of contrast color fabric (11-1/2″ x 3-3/4″)
- 8-3/4″ x 9-1/2″ lining
- 2-3/8″ x 13-7/8″ fabric (same with the outer layer)
- 1-5/8″ x 1-1/8″ fabric (same with outer layer)
- metal hook and d-ring
- zipper
[social_warfare buttons=”Facebook,Pinterest,Twitter,WhatsApp”]
Instructions:
Step 1:
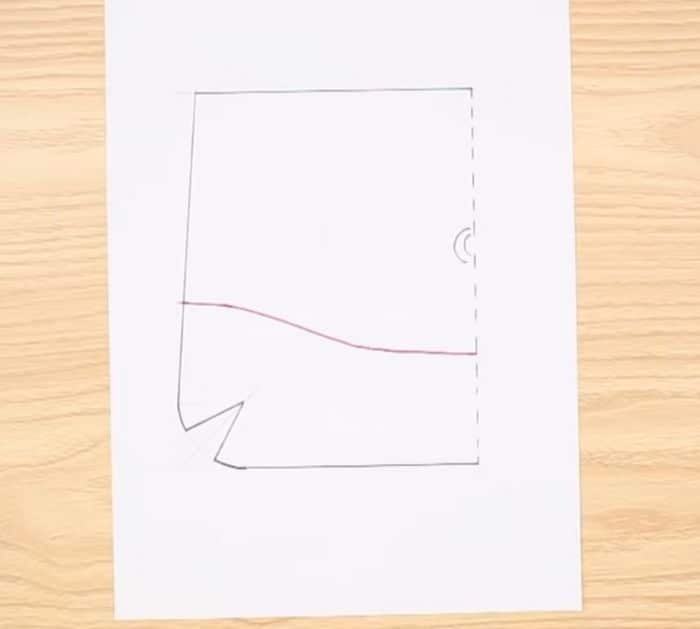
In a paper, draw a 5-3/8″ x 6-3/4″ rectangle in a dashed line using pencil. Then make a very small double half circle on the long side at the right. Next, on the left corner, draw a 1-1/8″ x 1-1/8″ square. Get a round object and place one quarter on the square to make a round curve. Then make an upward diagonal starting from the left corner to the right. From the top right corner make a triangle with the bottom line measuring 1″. Use the diagonal line as the guide. Once done, outline it with marker. From the top of the 1/8″ square measure 3″ upward. Then from the right bottom corner measure 2″ upward. Connect them in a slight curved line.
Step 2:
Fold the lining on half wrong side up. Place the pattern on top with the straight long side on the folded part. Trace the pattern then open. Trim off some of the outer fabric.
Step 3:
Fold the fleece and place on top of the pattern. Trace the upper shape and then cut. Make two of this. Trace the same pattern on the back of the outer layer. Place the fleece on top at the back and press with iron. Cut the excess fabric from the outer layer leaving an allowance.
Step 4:
Fold the contrast fabric in half and trace the bottom shape of the pattern. Do the same for the other one. Cut on the allowance on the top curved part. Get one outer layer and place right side up. Flip the contrast fabric with the wrong side facing up. Align the cuves of it to the outer layer using pins. Sew on the curved line with a 0.4″ seam allowance. Press the seams toward the contrast fabric then top stitch on curve of the right side. Do the same for the remaining outer and contrast fabric. Clip on the triangle corners then sew.
Step 5:
Fold the 8-3/4″ x 9-1/2″ lining wrong side up. Then make the corners round. Sew with a 0.4″ seam allowance but leave an opening. Once done, pull the right side out. Sew the straight edge twice. Place it on the middle of one lining(right side up) and sew on the sides and bottom.
Step 6:
Clip the triangle corners of the each lining then sew.
Step 7:
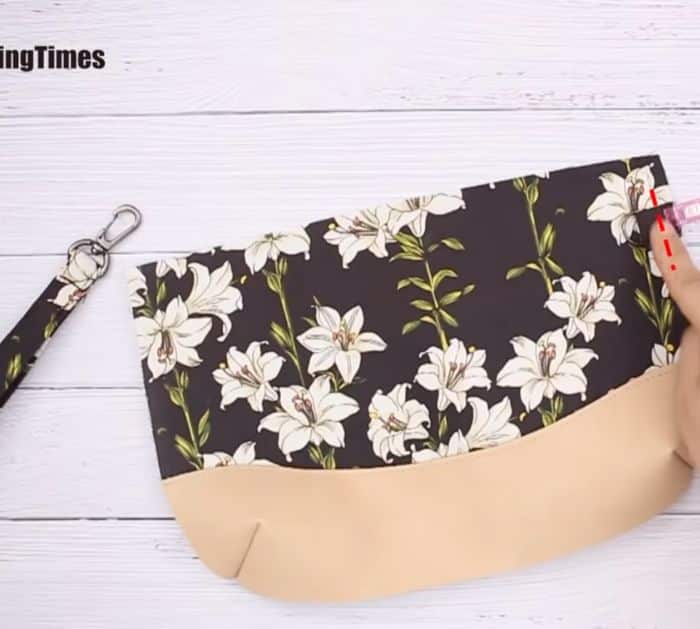
Fold the 1-5/8″ x 1-1/8″ on the top and bottom meeting in the middle. Place the D ring inside, fold then clip. Fold the 2-3/8″ x 13-7/8″ on the top and bottom meeting in the middle, then fold again in half. Sew on the middle on the top and bottom. Insert the hook. Open both ends then sew together. Open the seams then close to make the handle. Sew the D ring with cloth on one side of the outer layer.
Step 8:
Attach the zipper on one outer fabric then sew. Next, place the lining with pocket right side down on top then sew with 0.4″ seam allowance. Sew the outer fabric on the other side of the zipper. Once done, sew the lining on top right side down. Top stitch the zipper. Put the outer fabric together then also the lining. Sew the edges with a 0.4″ seam allowance. Pull the right side out. then blind stitch the opening.
DIY Clutch Purse Bag and Wrislet


