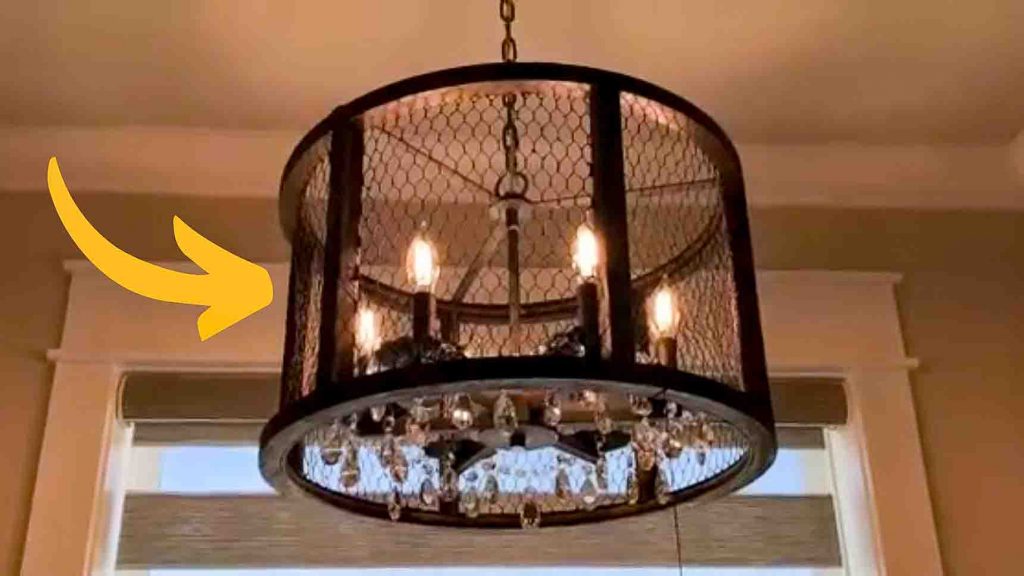
One day, I woke up and decided to give our chandelier a makeover that would fit the current theme of our home. While looking on Youtube, I came across this tutorial from Lily’sPad. This DIY chandelier cage is exactly the design I want! What’s more, you will only need a few materials for this, including chicken wire – can you believe that? It’s so pretty yet inexpensive. I immediately made one and carefully followed the instructions in the video, and boy, I’m so in love with the result. Our chandelier looks straight out of an old castle. Watch the video tutorial below now and learn the step by step instructions.
Materials:
- chicken wire
- trim, 6 ft to 8 ft long
- grow hoops
- stapler
- cutter
- measuring tape
- spray paint
- wire cutter
- heavy duty wire
- craft ring
Directions:
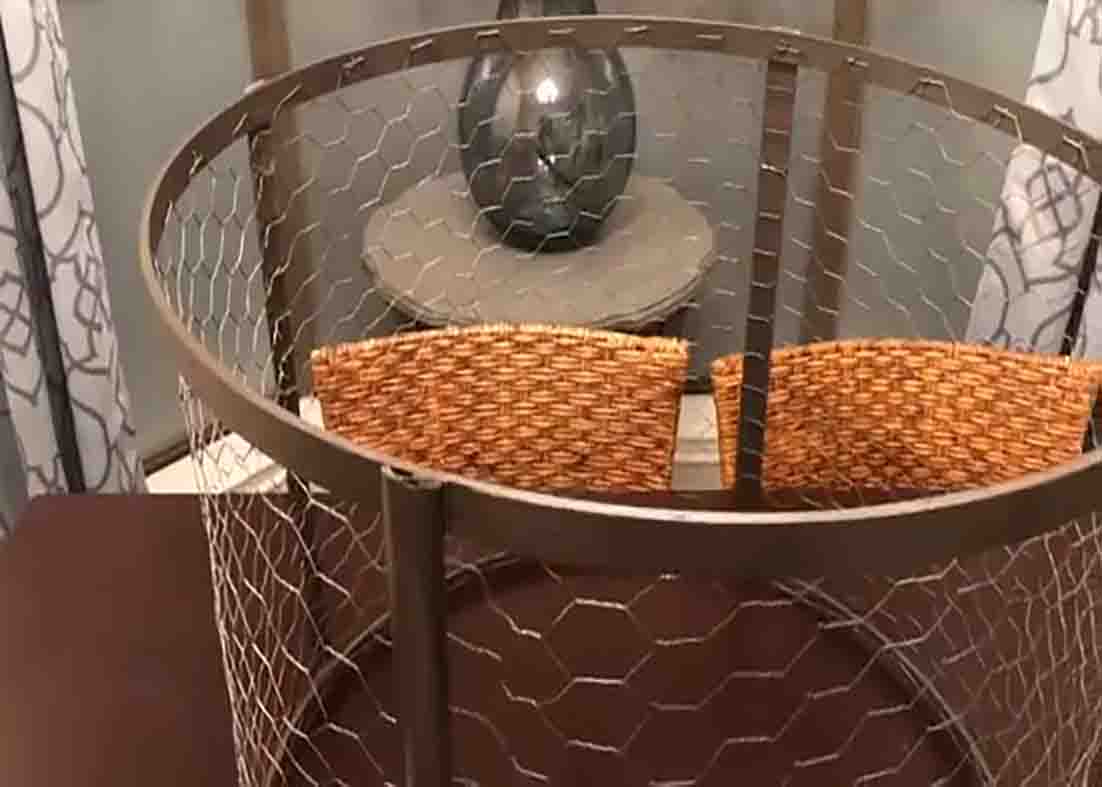
Step 1
To start, staple the chicken wire’s top and bottom edges to the grow hoops, shaping it into a cylinder. Next, cut the trim to the height of the cylinder, (you need four pieces), then attach them on the outside, along the edges, of the chandelier. After this, spray paint the whole thing with the color of your choice.
[social_warfare]
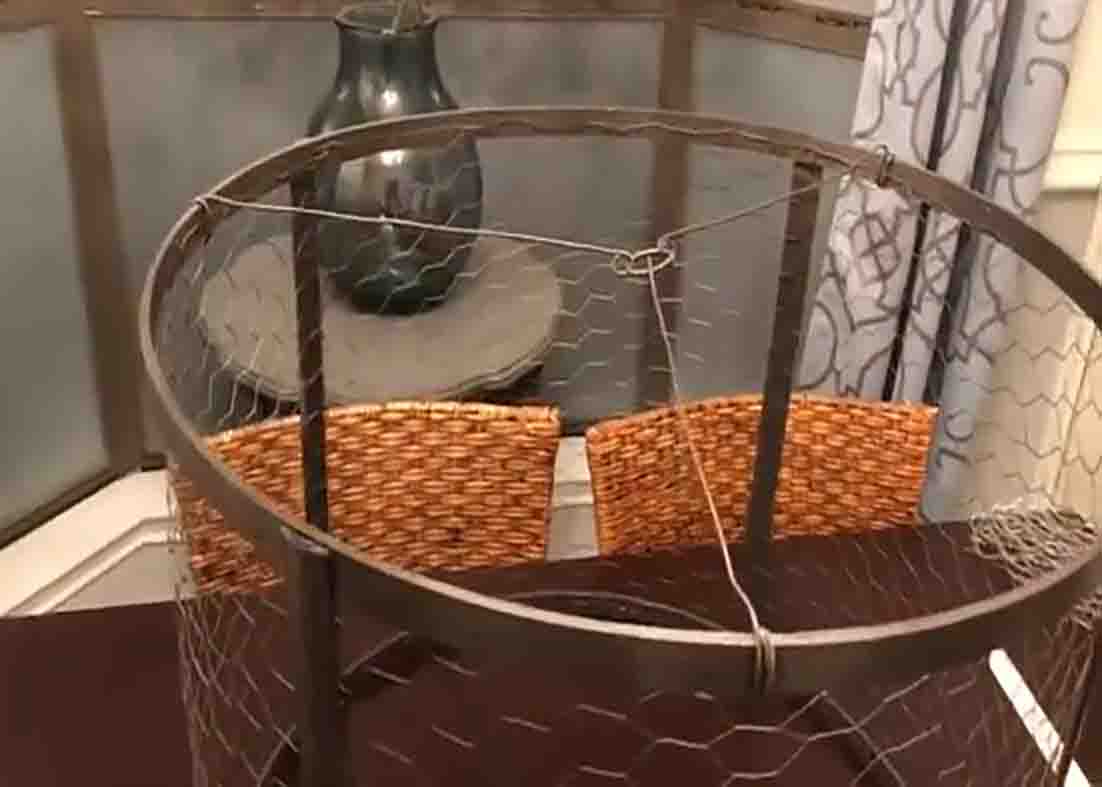
Step 2
Once the paint is completely dry, attach three pieces of wire on the top and connect them at the center with a craft ring to make the hang. After you secure it, mount it to your chandelier and you’re done.
DIY Chandelier Cage Using Chicken Wire Tutorial