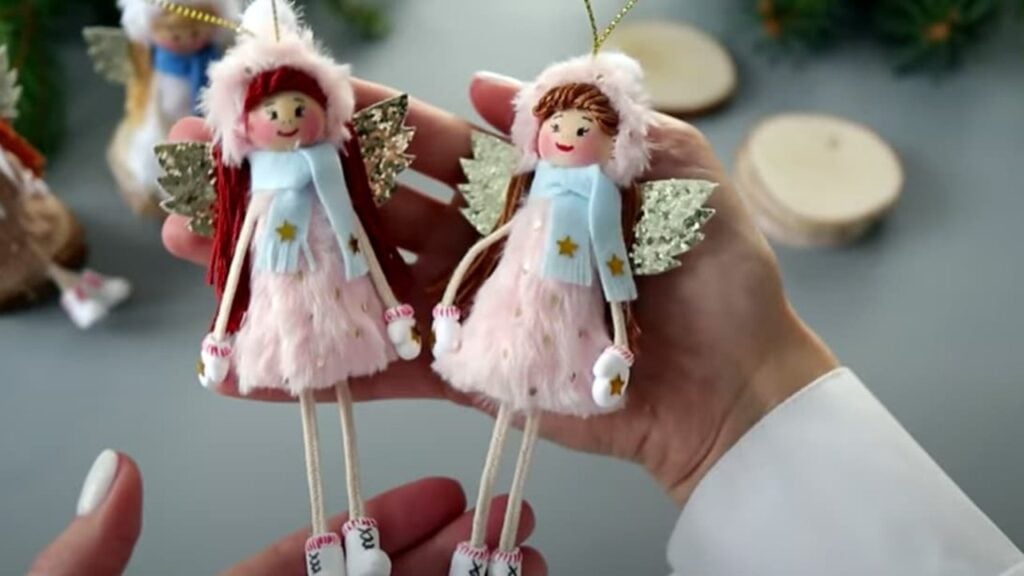
One of the things we remember during Christmas is how angels sang during the birth of Jesus. Their voices marked the start of the celebrations. So, in honor of this memory, you might want to make your own angel ornaments to hang on your Christmas tree. MiLena’s YouTube video teaches us how to do this with only a few cheap materials. The steps are simple, so you can even let your family members help out.
Materials:
- Foam cone (height 6-7 cm, diameter 3-4 cm)
- Cord (12 cm for legs, 15 cm for hands) -30 cm
- Faux fur, pile fabric
- Wooden bead (diameter: 2–2.5 cm)
- Thread floss–1 piece
- Felt
- Pompom
- Fabric-backed sequins or glitter foam
- Light polymer clay
- Markers, pencils
- Hot melt glue or universal glue
Directions:
Using a pencil, outline the base of the cone on the fabric. Cut a piece of the material about 5-7 mm from the outline.
Draw a line on the cone. The marked side serves as the backside of the doll. After that, make two holes at the bottom for the legs. Cut your cord into two pieces. Then, glue these onto the base of the cone.
Fold the fabric and make cuts to insert the legs. Following this, glue the fabric onto the base.
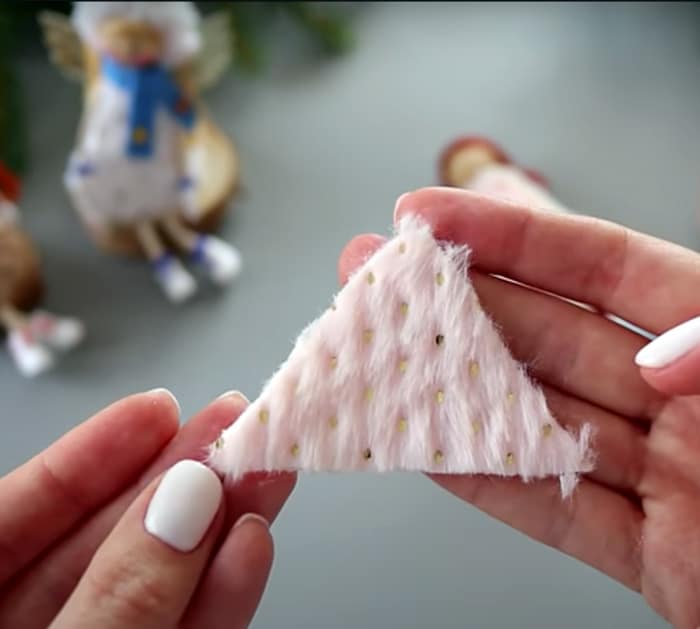
Get a larger piece of your fabric and place it with the wrong side facing up. Put the cone on the material.
Cut off your desired length of the fabric, but make sure that there is only a bit of space between the top and bottom of the cone.
Glue the fabric onto the front, wrapping it around the back. Cut off the excess and cleanly trim the bottom.
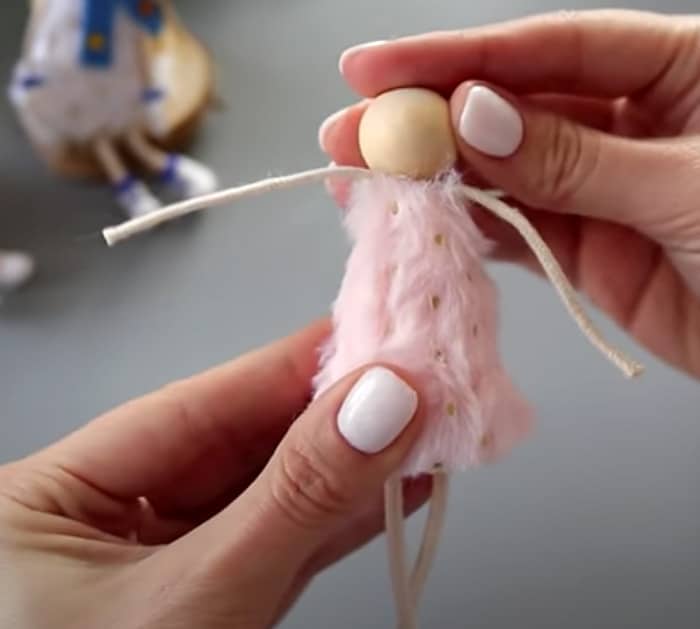
To make the head and arms, use your wooden beads and cord. Then, make a loop out of the cable and insert it into the bead. Make sure that the standing and working ends of the loop are sticking out. Then, cut off a bit of the cone and glue the head.
For the hair, straighten your floss threads and glue them onto the head.
Cut off 5 cm by 7 cm of your fabric to make the hat. Glue all the edges of the triangle. Then, glue the cap onto the doll.
Fix the hanging string onto the doll using a needle to thread through the hat. Then, straighten and glue another layer of hair. After that, glue the hat on top and tightly tie the tip. Cut off a piece of the cap and glue a pompom in its place.
Draw the doll’s face using markers. To create the doll’s blush, put colored pencil marks on the felt and apply it to the area you want.
To make the doll’s scarf, cut a long, thin piece of felt and wrap it around the doll’s neck.
For the wings, draw your preferred shape and size on paper. Then, glue it onto the back of your glittered foam. Trace the outline and cut it out. Do the same to cover the backside of the wings. After that, glue it onto the doll.
Use any airy light clay to make mittens and boots. Take a small piece, roll it into a ball, and attach it to a wooden stick. From here on, form the shapes of the mittens and boots. After that, remove the clay from the post. Wait for the clay to dry and then design it using markers. Then, glue these onto the cord.
For finishing touches, add some golden star sequins to your doll.