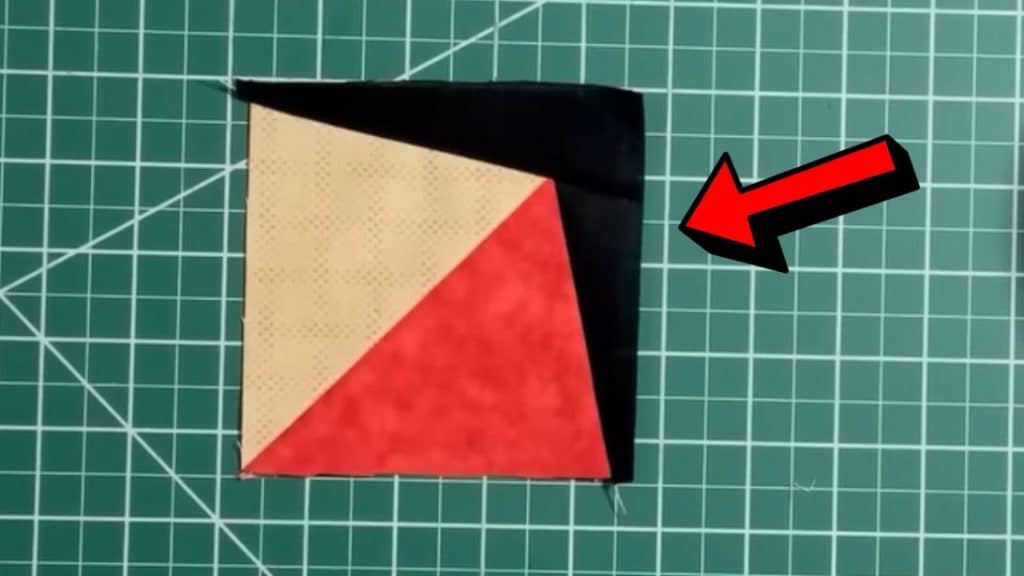
This may look hard to make, but Revelation Quilts definitely made it easier with her clear instructions. You’ll be amazed by the number of patterns you can create with these cutting corners quilt blocks. Watch the video below for examples.
Materials
For each block:
- 2 pieces of 5″ squares in different colors
- 2 1/2″ black strip
[social_warfare buttons=”facebook,pinterest,twitter,whatsapp”]
Instructions
Step 1:
Place the two 5″ squares on top of each other, right sides together.
Step 2:
Take a ruler and draw a diagonal line from corner to corner. Sew 1/4″ away from the line on either side. Next, cut directly on the line to get two half-square triangles. Open and press towards the dark side. Trim them into 4 1/2″ squares.
Step 3:
Get the 2 1/2″ black strip and cut it into 5″ x 2 1/2″ rectangles.
Step 4:
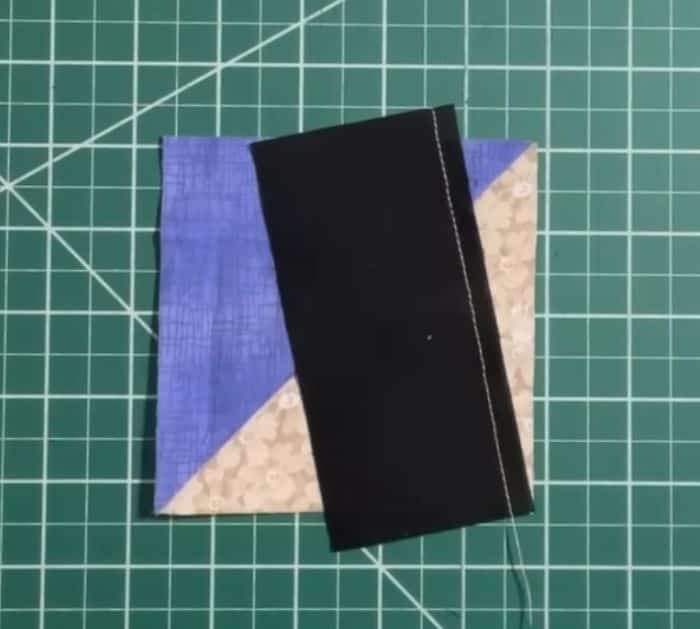
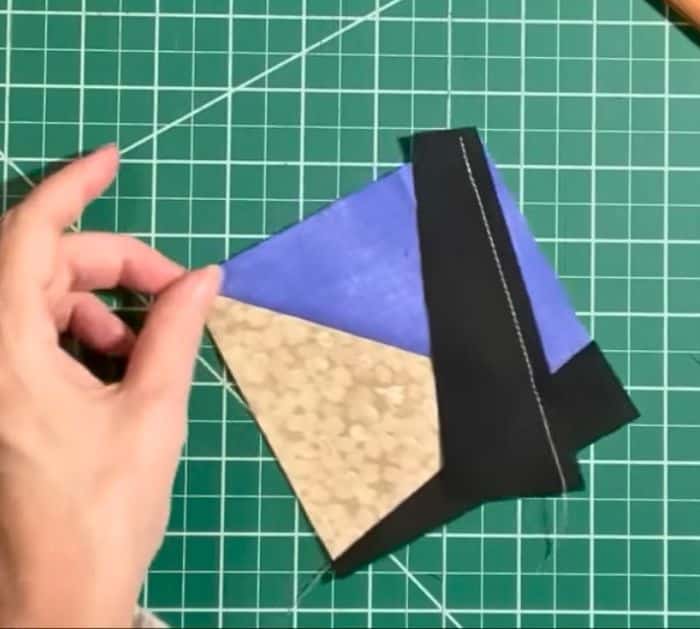
Get your ruler, measure 1 inch from the top right corner of your block, and mark it. Next, take your black rectangle and place one corner in the bottom left corner of your block. Make sure to line them up. Now, line up the top right corner of the rectangle onto the mark. Sew on the side of the black rectangle with a 1/4″ seam allowance. Place your ruler directly on top of the rectangle, make sure the edges are aligned, then cut the excess. Press it open.

Step 5:
Take your ruler and place it on top of your block. The 45-degree line should be along the seam line. Cut straight up to the side and top. Move your ruler a little bit to the left, and mark 1 inch down from the top.
Step 6:
Turn your block so the black is on the bottom. Take the same piece that you cut, and turn it over. align the top of the straight edge to the top right corner of the block, and the bottom corner to the mark. Sew 1/4″ away from the edge of the black piece. Cut excess and press it open. Place your ruler with the 45-angle directly on the seam line, and cut the excess of the sides.


