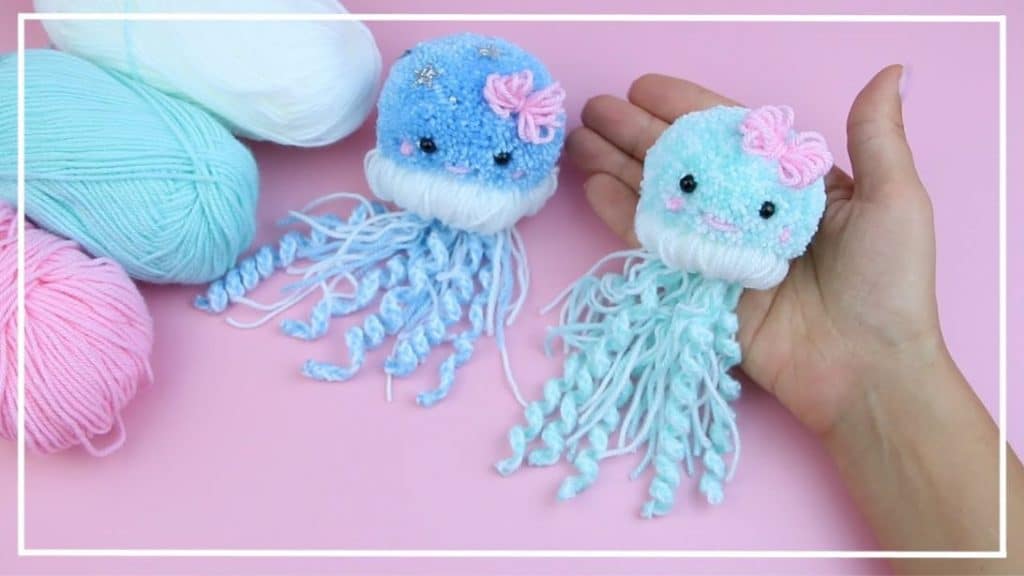
This cute jellyfish yard DIY is a great gift for the little ones. You can also use this to decorate bags and pillows – this will surely make them pop out! It doesn’t involve any knitting and it’s a very easy project. Learn how to make this adorable pompom toy with this fun tutorial by NataliDoma DIY on Youtube. Watch the video below for full instructions.
Materials:
- 3 colors of yarn (white, blue, pink)
- 2 black beads
- thread and needle
- chopsticks
[social_warfare buttons=”facebook,pinterest,twitter,whatsapp”]
Instructions:
Step 1:
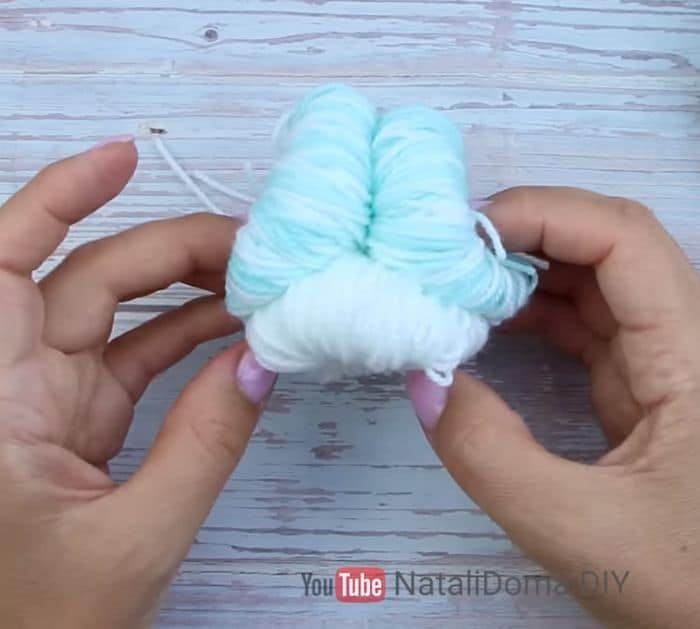
Take the ends of the first two yarns (blue and white) and loop them 80 times on your 3 fingers. Once done, cut it out and tie it in the middle with a small piece of yarn. Make sure to make a knot several times to secure it properly. Make another one and tie them together.
Step 2:
Take the end of the white yarn and loop it onto your 3 fingers 120 times, then cut and tie it in the middle. Tie it in the middle of the first two pieces.
Step 3:
Cut all the loops in the middle except for the white one. Trim to form it into a ball.
Step 4:
Sew the 2 black beads for the eyes of the jellyfish.
Step 5:
Insert the pink yarn into a needle and sew it to the jellyfish to make a smiley face.
Step 6:
Take the end of the pink yarn and loop it 10 times on your two fingers. Tie it in the middle to make a ribbon. Sew it to the top right of the jellyfish.
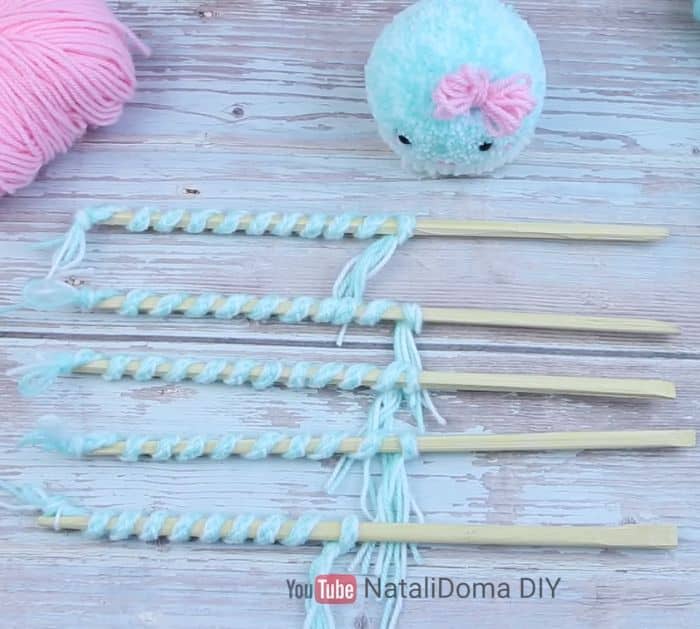
Step 7:
Cut 5 long strips using the blue and white yarns. Tie it on the end and braid them by 2s. Do not braid everything. Make 4 more of this braid.
Step 8:
Get a stick and one braid. Twirl the braid around the stick. Do the same for the remaining pieces. Place them in the oven for 10 to 15 minutes at 302F.
Step 9:
Remove them from the sticks and untie the ends. Fold the end and loop one of the strings around to make a knot. Sew each piece on the white part of the jellyfish.
Cute Jellyfish Yarn DIY