
This cathedral stars quilt by Jordan Fabrics on Youtube is so beautiful. I have no words to express how gorgeous this turned out! It really is a masterpiece. If you want to make something different and unique, definitely go for this pattern. Watch the video below for detailed instructions.
Materials:
- 3 3/4 yards of background
- 1 1/4 yards of medium-colored fabric for star points
- 3/8 yard of dark accent
- 1 yard of sashing
- 1/8 yard of cornerstones
- 1 yard of the outside border
- 3/4 yard for binding
- 4 1/4 yards for backing
[social_warfare buttons=”facebook,pinterest,twitter,whatsapp”]
Instructions:
Step 1:
Background:
- 2 pieces of 5″ width of fabric for the strip units
- 3 pieces of 7 1/4″ width of fabric for the strip units
- 8 pieces of 6″ width of fabric. Sub-cut to 48 pieces of 6″ squares
- 4 pieces of 11″ width of fabric. Sub-cut to 12 pieces of 11″ squares
Medium print:
- 7 pieces of 2 3/4″ width of fabric for strip units
- 3 pieces of 7 1/4″ width of fabric for strip units
Dark accent:
- 3 pieces of 2 3/4″ width of fabric for strip units
Sashing:
- 3 pieces of 9 1/2″ width of fabric. Sub-cut to 36 pieces of 2 by 9 1/2″ pieces
Cornerstones:
- 1 piece at 2″ width of fabric. Sub-cut to 13 pieces of 2″ squares.
Border:
- 7 pieces of 4 3/4″
Step 2:
Strip unit A. Sew a 2 3/4″ medium strip onto each side of a 5″ background print along the edges. Once done, press the allowances toward the darker print. Repeat to make another strip. Cut each strip into 5″ wide by 9 1/2″, making a total of 12 pieces.
Step 3:
Strip unit B. Sew a 2 3/4″ medium strip onto a 7 1/2″ background print, then press seam allowances toward the darker print. Repeat and make 2 more strips. Cut each strip into 7 1/4″ wide by 9 1/2″, making a total of 12 pieces.
Step 4:
Strip unit C. Sew a 2 3/4″ dark accent strip onto a 7 1/4″ medium print, once done press the seam allowances toward the darker print. Repeat and make 2 more strips. Cut each strip into 2 3/4″ wide by 9 1/2″ pieces, making a total of 36.
Step 5:
Get one unit A and sew a unit C onto each side to make a block. Repeat and make 11 more blocks.
Step 6:
Get one unit B and sew one unit C onto one side. Repeat and make 11 more blocks.
Step 7:
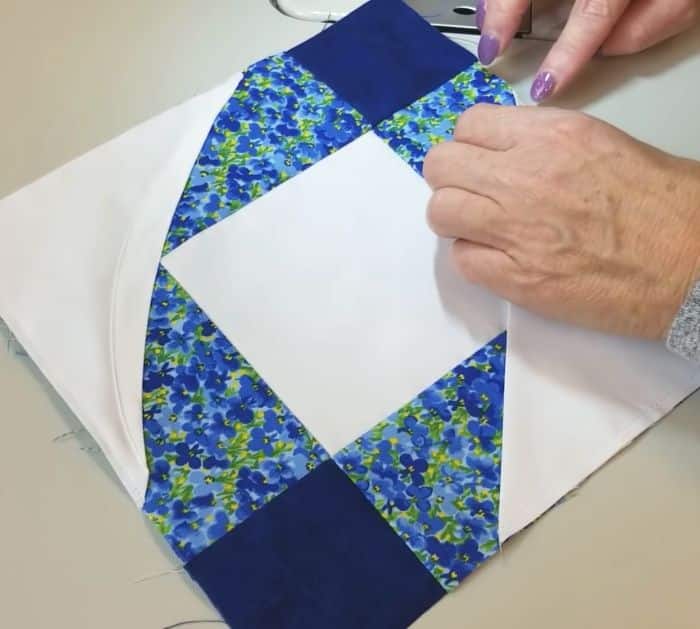
Fold each of the 6″ background blocks in half diagonally and iron to form a folded triangle. Place folded triangles onto two corners of your patchwork blocks. Match up the raw edges and stay stitch the triangle onto the block as close to the edge. Roll the folded edge back toward the corner to make a small curve. Start and stop folded curved section at least 1/4″ away from the raw edges. Top stitch the folded edges.
Step 8:
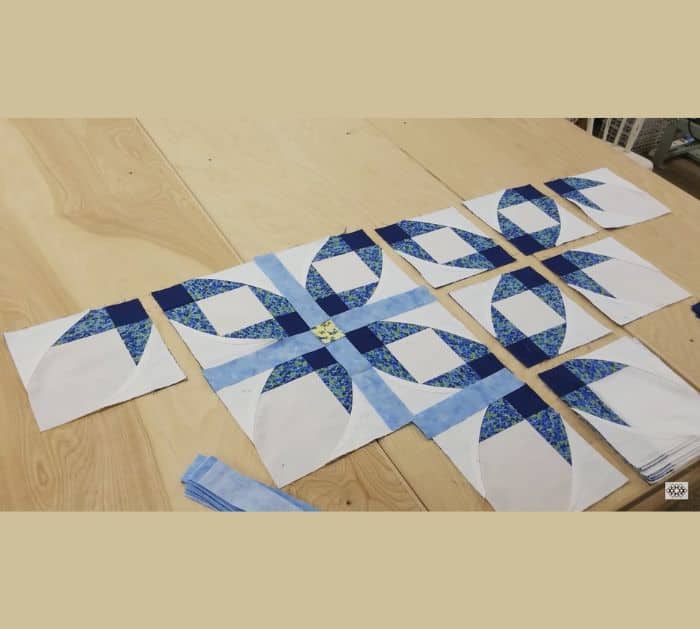
Arrange the blocks, sashing, cornerstones, and 11″ background blocks.
Step 9:
For the outer border, stitch 4 3/4″ pieces along their short edges to make one long piece. Sew onto all four sides of the quilt.
Woven Look Quilt


