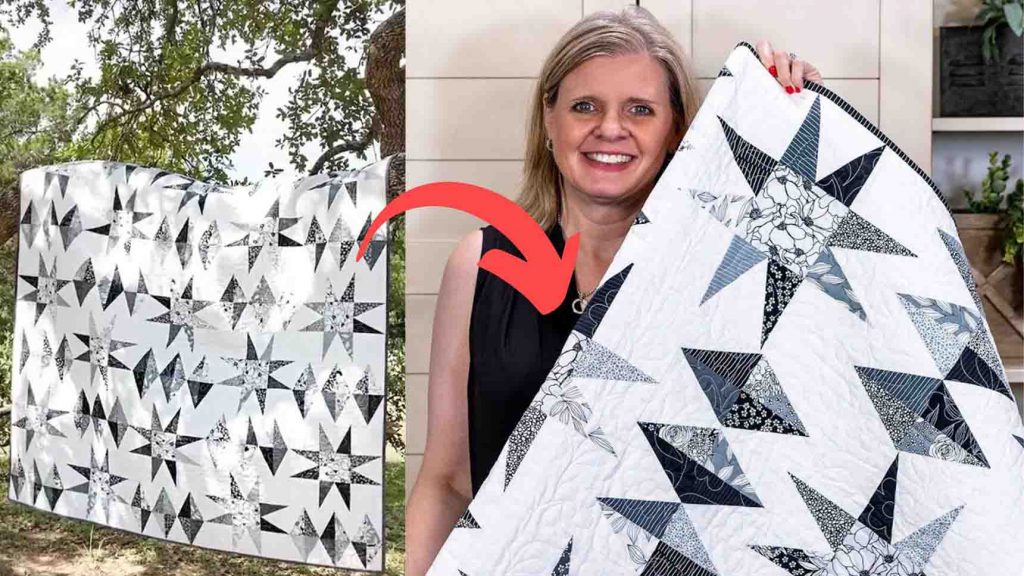
Are you looking for a quilt block pattern that looks pro but is totally beginner-friendly? This black diamond quilt from Fat Quarter Shop on Youtube might interest you. Diamonds may not be your best friend until you make this fun and gorgeous quilt, and trust me; this is easier to make than it looks. Watch the video tutorial below to learn the step-by-step instructions.
Materials:
- 4 yards of background fabric
- 17 fat quarters (block prints)
- 1/2 yard block accent
- 5/8 yard binding
- 4 yards of backing
Cutting:
- fabric A (using background fabric) – 60 – 4 1/2″ squares
- fabric B (using background fabric) 150 – 4″ x 6″ rectangles
- fabric C (using each fat quarter) – 9 – 4″ x 6″ rectangles (153 total)
- fabric D (using block accent) – 15 – 4 & 1/2″ squares
- fabric E (using binding) – 7 – 2 & 1/2″ x WOF
- click here for the free pattern
Directions:
Step 1
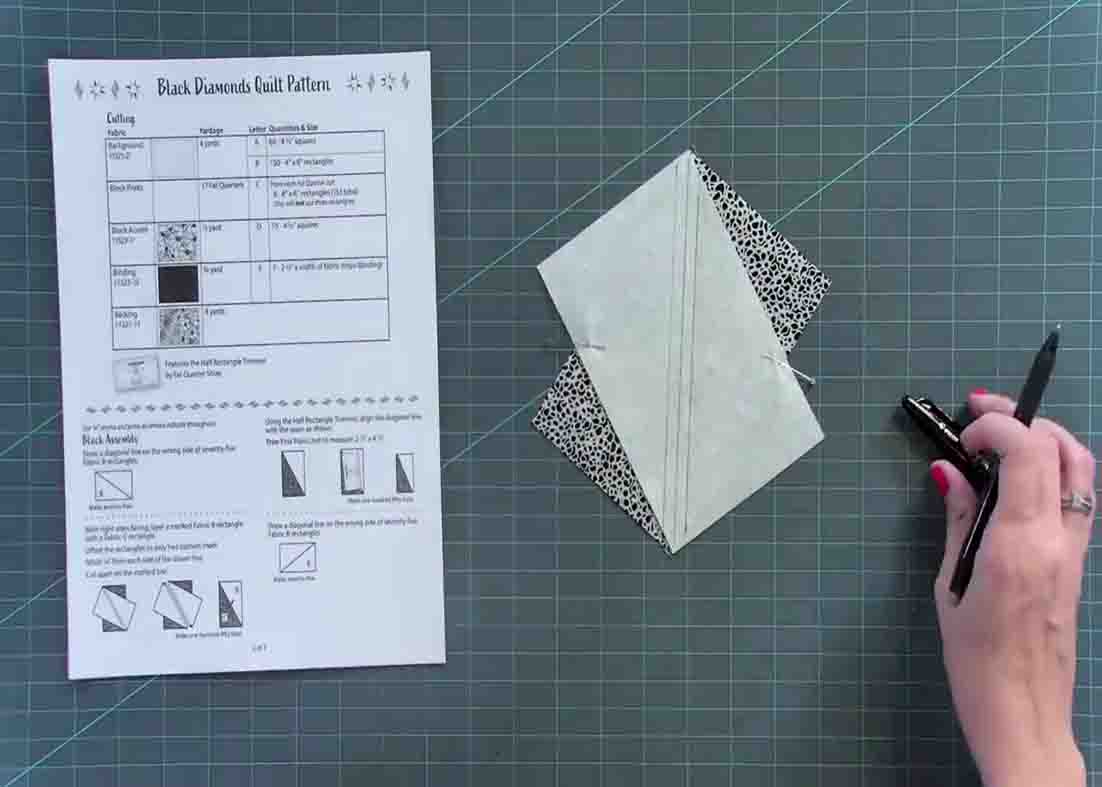
Before starting, make sure to cut all your fabrics accordingly. Now, take 75 fabric B’s and draw a line from the top left to the bottom right. Then, take a fabric C rectangle and line up the top point and the bottom right point. Pin it in place. Next, draw a line a 1/4″ away. Go down one stitch from whatever stitch length you normally use then stitch on the two outer lines. After this, take your ruler, put it right on the center line, and cut. Press the pieces and their seams open. Once your seam is nice and flat on the back, take your half-rectangle trimmer and rotary cutter, and trim. Make 150 of these.
[social_warfare]
Step 2
Now, take 75 fabric B’s, draw a line from the bottom left to the top right, and put that on a fabric C rectangle, going the opposite direction. Pin in place. Draw lines 1/4″ away, and stitch on those lines. Put your ruler on the center line, then cut. Press open and trim, repeating the steps earlier. Now, Take a right unit with a left unit, match the seams, and pin it at the top. Stitch 1/4″ seam and make 60 of these units.
Step 3
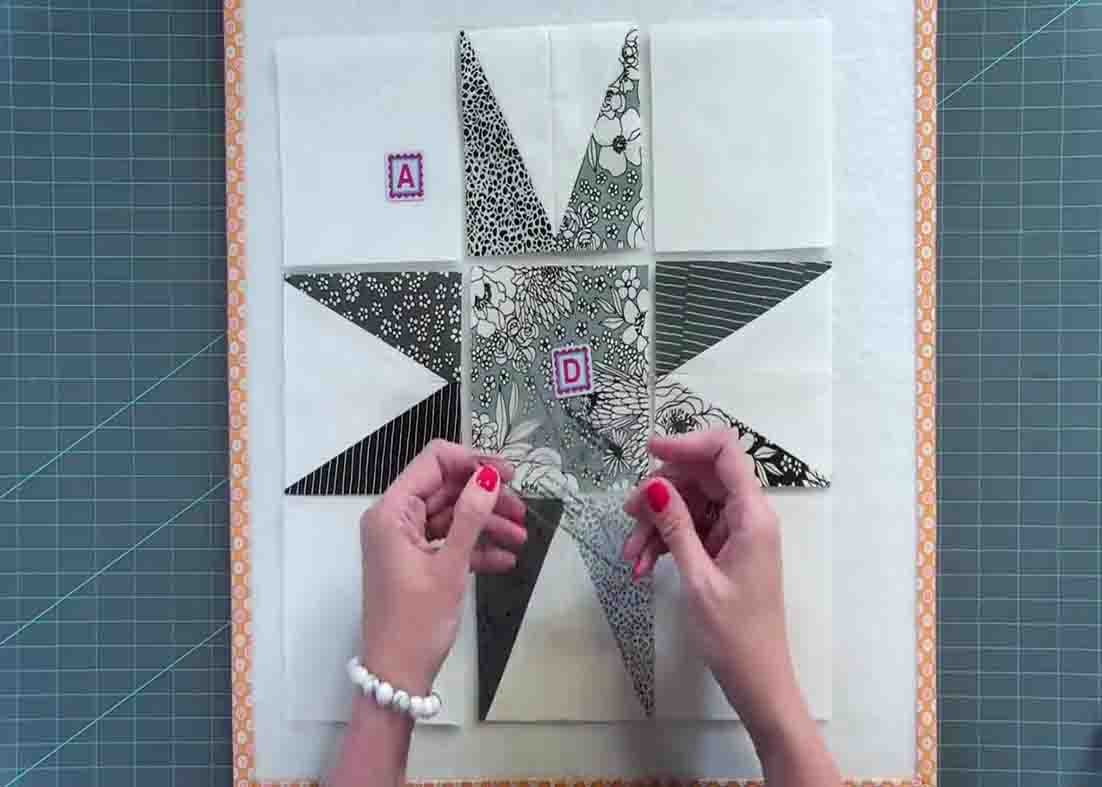
Now, it’s time to assemble the first block. Layout the pointy units around a fabric D square and place four fabric A’s on the outside. Stitch with a 1/4″ seam on each row, then press open. After this, sew your rows together.
Black Diamonds Quilt with Half Rectangle Triangles


